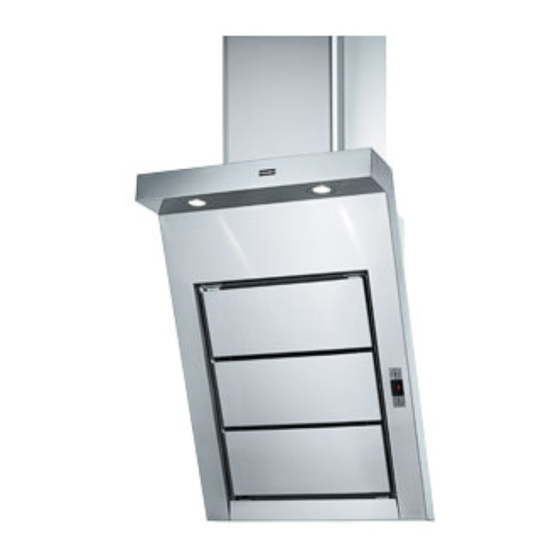
Publicité

Les langues disponibles
  • FR

Les langues disponibles

  • FRANÇAIS, page 22

Liens rapides

All manuals and user guides at all-guides.com
Instructions for use and installation
GB
Cooker Hood
Istruzioni per l'uso e l'installazione
IT
Cappa
Mode d'emploi et installation
FR
Hotte de Cuisine
Bedienungsanleitung und Einrichtung
DE
Dunstabzugshaube
Kullanım ve montaj talimatları
TR
Davlumbaz
Betjenings- og installationsvejledning
DK
Emhætte
Uživatelská Pøíruèka
CZ
Odsavač par
FAK 607
FAK 907

Publicité

Table des Matières
loading

Sommaire des Matières pour Franke FAK 607

  • Page 1 Instructions for use and installation Cooker Hood Istruzioni per l’uso e l’installazione Cappa Mode d’emploi et installation Hotte de Cuisine Bedienungsanleitung und Einrichtung Dunstabzugshaube Kullanım ve montaj talimatları Davlumbaz Betjenings- og installationsvejledning Emhætte Uživatelská Pøíruèka Odsavač par FAK 607 FAK 907...
  • Page 2: Table Des Matières

    All manuals and user guides at all-guides.com INDEX RECOMMENDATIONS AND SUGGESTIONS ........................4 CHARACTERISTICS ................................5 INSTALLATION..................................6 USE ......................................9 MAINTENANCE ................................... 10 INDICE CONSIGLI E SUGGERIMENTI............................13 CARATTERISTICHE................................14 INSTALLAZIONE ................................. 15 USO...................................... 18 MANUTENZIONE ................................19 SOMMAIRE CONSEILS ET SUGGESTIONS............................
  • Page 3 All manuals and user guides at all-guides.com OBSAH RADY A DOPORUČENÍ ..............................58 HLAVNÍ PARAMETRY................................. 59 INSTALACE ..................................60 POUŽITÍ ....................................63 ÚDRŽBA....................................64...
  • Page 4: Recommendations And Suggestions

    All manuals and user guides at all-guides.com RECOMMENDATIONS AND SUGGESTIONS The Instructions for Use apply to several versions of this appliance. Accord- ingly, you may find descriptions of individual features that do not apply to your specific appliance. INSTALLATION • The manufacturer will not be held liable for any damages resulting from in- correct or improper installation.
  • Page 5: Dimensions

    All manuals and user guides at all-guides.com CHARACTERISTICS Dimensions 598 / 898 7.2.1 Components Ref. Q.ty Product Components Hood Body, complete with: Controls, Light, Blower, Filters Upper Section Lower Section 14.1 Directional Air Outlet grille Flange 14.1 Air Outlet Connection Extension Air Outlet Connection Filter cover Ref.
  • Page 6 All manuals and user guides at all-guides.com INSTALLATION Wall drilling and bracket fixing 7.2.1 Drilling measures refer to a minimum safety distance at 190 190 250 mm On the wall, draw • a Vertical line up to the ceiling or upper limit, at the centre of the area in which the Hood is to be fitted;...
  • Page 7 All manuals and user guides at all-guides.com Mounting of the hood body • Remove the comfort panels pulling them slightly downwards. • Remove the grease filters. • Adjust slightly the Vr screws of the brackets 11a. • Hang the hood body on the brackets 11a. •...
  • Page 8: Chimney Assembly

    All manuals and user guides at all-guides.com 14.1 RECIRCULATION VERSION AIR OUTLET • Insert the connection extension pieces laterally 14.1 in connec- tion 15. • Insert the Connector 15 into the Support bracket 7.3 and fix it with a screw. •...
  • Page 9: Control Board

    All manuals and user guides at all-guides.com Control board Function Display Switches the extractor motor on and off at the latest Indicates the selected speed. selected speed Decreases the suction speed. Increases the suction speed. By pressing this key it is possible to activate the HI appears.
  • Page 10: Remote Control (Optional)

    All manuals and user guides at all-guides.com MAINTENANCE REMOTE CONTROL (OPTIONAL) The appliance can be controlled using a remote control powered by a 1.5 V carbon-zinc alkaline batteries of the standard LR03- AAA type (not included). • Do not place the remote control near to heat sources. •...
  • Page 11: Replacing The Charcoal Filter

    All manuals and user guides at all-guides.com Comfort panels • Remove the comfort panels pulling them slightly. • It is recommended to use a neutral detergent liquid and a damp cloth when washing the outer surface of the comfort panel. •...
  • Page 12: Lighting System

    All manuals and user guides at all-guides.com Lighting system REPLACING OF THE LAMPS 20 W halogen lamps • Loose the 2 fixing screws of the lighting support and remove the support from the hood. • Take off the lamp from the support. •...
  • Page 13: Consigli E Suggerimenti

    All manuals and user guides at all-guides.com CONSIGLI E SUGGERIMENTI Questo libretto di istruzioni per l'uso è previsto per più versioni dell' apparecchio. É possibile che siano descritti singoli particolari della dotazione, che non riguar- dano il Vostro apparecchio. INSTALLAZIONE •...
  • Page 14 All manuals and user guides at all-guides.com CARATTERISTICHE Ingombro 598 / 898 7.2.1 Componenti Rif. Q.tà Componenti di Prodotto Corpo Cappa completo di: Comandi, Luce, Gruppo Ventilatore, Filtri Camino Superiore 14.1 Camino Inferiore Griglia direzionata Uscita Aria Flangia riduzione 150-120 14.1 Prolunga Raccordo Uscita Aria Raccordo Uscita Aria...
  • Page 15 All manuals and user guides at all-guides.com INSTALLAZIONE Foratura Parete e Fissaggio Staffe 7.2.1 Le quote di foratura sono riferite alla di- 190 190 stanza minima di sicu- rezza di 250 mm Tracciare sulla Parete: • una linea Verticale fino al soffitto o al limite superiore, al centro della zona prevista per il montaggio della Cappa;...
  • Page 16 All manuals and user guides at all-guides.com Montaggio Corpo Cappa • Staccare i pannelli aspiranti tirandoli. • Togliere i Filtri Antigrasso agendo sulle apposite maniglie. • Regolare le due viti Vr, delle staffe 11a, ad inizio corsa. • Agganciare il corpo cappa alle 2 staffe 11a. •...
  • Page 17: Connessione Elettrica

    All manuals and user guides at all-guides.com 14.1 USCITA ARIA VERSIONE FILTRANTE • Inserire lateralmente le Prolunghe Raccordo 14.1 sul Raccordo • Inserire il Raccordo 15 nella Staffa di Sostegno 7.3 fissandolo con una Vite. • Assicurarsi che l’uscita delle Prolunghe Raccordo 14.1 risulti ø...
  • Page 18: Quadro Comandi

    All manuals and user guides at all-guides.com Quadro comandi Tasto Funzione Display Accende e spegne il motore di aspirazione all’ultima velo- Visualizza la velocità impostata cità utilizzata. Decrementa la velocità di esercizio. Incrementa la velocità di esercizio. Attiva la velocità intensiva da qualsiasi velocità anche da Visualizza HI e il punto in basso a destra lam- motore spento, tale velocità...
  • Page 19: Telecomando (Opzionale)

    All manuals and user guides at all-guides.com MANUTENZIONE TELECOMANDO (OPZIONALE) Questo apparecchio può essere comandato per mezzo di un tele- comando, alimentato con pile alcaline zinco-carbone da 1,5 V del tipo standard LR03-AAA (non incluse). • Non riporre il telecomando in prossimità di fonti di calore. •...
  • Page 20 All manuals and user guides at all-guides.com Pannelli Aspiranti • Togliere i pannelli aspiranti tirandoli. • Pulire esternamente con un panno umido e detersivo liquido neutro. • Pulirlo anche internamente utilizzando un panno umido e de- tergente neutro; non utilizzare panni o spugne bagnate, né getti d’acqua;...
  • Page 21: Sostituzione Lampade

    All manuals and user guides at all-guides.com Illuminazione SOSTITUZIONE LAMPADE Lampade alogene da 20 W. • Togliere le due viti che fissano il Supporto illuminazione e sfi- larlo dalla Cappa. • Estrarre la Lampada dal Supporto. • Sostituirla con una nuova di uguali caratteristiche, facendo at- tenzione di inserire correttamente i due spinotti nella sede del Supporto.
  • Page 22: Conseils Et Suggestions

    All manuals and user guides at all-guides.com CONSEILS ET SUGGESTIONS La présente notice d'emploi vaut pour plusieurs versions de l'appareil. Elle peut conte- nir des descriptions d'accessoires ne figurant pas dans votre appareil. INSTALLATION • Le fabricant décline toute responsabilité en cas de dommage dû à une installation non correcte ou non conforme aux règles de l’art.
  • Page 23: Caracteristiques

    All manuals and user guides at all-guides.com CARACTERISTIQUES Encombrement 598 / 898 7.2.1 Composants Réf. Q.té Composants de Produit Corps Hotte équipé de:Comandes, Lumière, Groupe Ventilateur, Filtres Cheminée Supérieure 14.1 Cheminée Inférieure Grille orientée Sortie de l’Air Flasque 14.1 Rallonge Raccord Sortie Air Raccord Sortie Air Couvercle filtrant Réf.
  • Page 24: Installation

    All manuals and user guides at all-guides.com INSTALLATION Perçage Paroi et Fixation Brides 7.2.1 Les indications de per- çage se réfèrent à la dis- 190 190 tance minimale de sécu- rité de 250 mm. Tracer sur la Paroi : • une ligne Verticale jusqu’au plafond ou à la limite supérieure, au centre de la zone prévue pour le montage de la Hotte ;...
  • Page 25 All manuals and user guides at all-guides.com Montage du corps de la hotte • Tirer sur les panneaux aspirants pour les ôter. • Retirer les filtres à graisse au moyen des poignées prévues à cet effet. • Placer les deux vis Vr, sur les équerres 11a sans les visser (B).
  • Page 26: Branchement Electrique

    All manuals and user guides at all-guides.com 14.1 SORTIE AIR VERSION FILTRANTE • Insérer latéralement les rallonges raccord 14.1 sur le raccord • Placer le raccord 15 dans l’étrier de soutien 7.3 en le fixant avec une vis. • S’assurer que la sortie des rallonges raccord 14.1 se trouve au ø...
  • Page 27: Utilisation

    All manuals and user guides at all-guides.com UTILISATION Tableau des commandes Touche Fonction Afficheur Allume et éteint le moteur d’aspiration à la dernière Affiche la vitesse choisie vitesse utilisée Diminue la vitesse de service Augmente la vitesse de service Active la vitesse intensive à partir de n’importe quelle Affiche HI et le point en bas à...
  • Page 28: Entretien

    All manuals and user guides at all-guides.com ENTRETIEN TELECOMMANDE (FOURNIE SUR DEMANDE) Il est possible de commander cet appareil au moyen d’une télé- commande, alimentée avec des piles alcalines zinc-charbon 1,5 V du type standard LR03-AAA (non compris). • Ne pas ranger la télécommande à proximité de sources de cha- leur.
  • Page 29: Remplacement Du Filtre Anti-Odeur Au Charbon Actif

    All manuals and user guides at all-guides.com Panneaux aspirants • Tirer sur les panneaux aspirants pour les ôter. • Nettoyer l’extérieur avec un chiffon humide imbibé de déter- gent liquide neutre. • Nettoyer également l’intérieur à l’aide d’un chiffon humide imbibé...
  • Page 30: Éclairage

    All manuals and user guides at all-guides.com Éclairage REMPLACEMENT DES LAMPES Lampes halogènes de 20 W. • Retirer les deux vis fixant le support de l’éclairage et le retirer de la hotte. • Extraire la lampe du support. • La remplacer par une nouvelle lampe ayant les mêmes caracté- ristiques.
  • Page 31: Empfehlungen Und Hinweise

    All manuals and user guides at all-guides.com EMPFEHLUNGEN UND HINWEISE Diese Gebrauchsanleitung gilt für mehrere Geräte-Ausführungen. Es ist möglich, dass einzelne Ausstattungsmerkmale beschrieben sind, die nicht auf Ihr Gerät zutreffen. MONTAGE • Der Hersteller haftet nicht für Schäden, die auf eine fehlerhafte und unsachgemäße Mon- tage zurückzuführen sind.
  • Page 32: Charakteristiken

    All manuals and user guides at all-guides.com CHARAKTERISTIKEN Platzbedarf 598 / 898 7.2.1 Komponenten Pos. Produktkomponenten Haubenkörper mit Schaltern, Beleuchtung, Gebläse- gruppe, Filter oberer Kaminteil 14.1 unterer Kaminteil Luftleitgitter Luftaustritt Flansch 14.1 Verlängerung Luftaustritt-Anschlussstück Luftaustritt-Anschlussstück Filterdeckel Pos. Montagekomponenten 7.2.1 Befestigungsbügel oberer Kaminteil Bügel für Anschlusshalter Dübel Dübel SB 12/10...
  • Page 33: Montage

    All manuals and user guides at all-guides.com MONTAGE Bohren der Befestigungslöcher und Fixieren der Befestigungsbügel 7.2.1 Die Bohrhöhen beziehen sich auf den Sicherheits- 190 190 Mindestabstand von 250 Achtung: Bitte beachten Sie bei der Montage das Gewicht der kompletten Haube. Die Tragfähigkeit der Decke oder alternativ der Trägerplatte für diese Zugbelastung muss vor der Montage geprüft und gegebenenfalls durch die Anbringung von geeigneten Befestigungs- oder Stabilisierungselementen hergestellt werden.
  • Page 34 All manuals and user guides at all-guides.com Montage des Haubenkörpers • Die Absaugpaneele herausziehen. • Die Fettfilter an den speziellen Griffen herausziehen. • Die beiden Schrauben Vr der Bügel 11a auf den Laufbeginn regulieren. • Den Haubenkörper an den 2 Bügeln 11a einhaken. •...
  • Page 35: Elektroanschluss

    All manuals and user guides at all-guides.com 14.1 Anschluss Umluftversion • Die Verlängerungen 14.1 beim Anschluss 15 seitlich einfügen. • Den Anschluss 15 am Haltebügel 7.3 einsetzen und mit einer Schraube fixieren. • Überprüfen, ob die Verlängerungen 14.1 mit den entsprechen- ø...
  • Page 36: Bedienung

    All manuals and user guides at all-guides.com BEDIENUNG Bedienblende Taste Funktion Display Schaltet den Motor der Absauganlage bei der zu- Zeigt die eingestellte Geschwindigkeit an letzt verwendeten Geschwindigkeit ein und aus. Vermindert die Betriebsgeschwindigkeit. Erhöht die Betriebsgeschwindigkeit. Aktiviert von jeder Geschwindigkeit aus, auch bei Zeigt HI an und der Punkt unten rechts blinkt ein- abgestelltem Motor, die Intensivgeschwindigkeit, die mal pro Sekunde.
  • Page 37: Wartung

    All manuals and user guides at all-guides.com WARTUNG FERNBEDIENUNG (OPTION) Dieses Gerät kann mit einer Fernbedienung gesteuert werden, welche mit alkalischen Zink-Kohle-Batterien 1,5 V des Standard- typs LR03-AAA versorgt wird (nicht enthalten). • Die Fernbedienung nicht in die Nähe von Hitzequellen legen. •...
  • Page 38 All manuals and user guides at all-guides.com Absaugpaneele • Die Absaugpaneele herausziehen. • Die Außenflächen mit einem feuchten Lappen und einem neut- ralem Flüssigreiniger säubern. • Auch Innen mit einem feuchten Lappen und einem neutralen Reinigungsmittel säubern; keine nassen Tücher oder Schwäm- me, oder gar Wasser verwenden, und keine schleifenden Mittel einsetzen.
  • Page 39: Auswechseln Der Lampe

    All manuals and user guides at all-guides.com Beleuchtung AUSWECHSELN DER LAMPE 20 W Halogenlampe • Die beiden Befestigungsschrauben der Lampenfassung aus- bauen und aus der Haube herausziehen. • Die Lampe aus der Fassung nehmen. • Durch eine neue Lampe mit gleichen Merkmalen ersetzen und beim Einschrauben darauf achten, dass die beiden Kontakte richtig in den Sitz der Fassung eingesetzt werden.
  • Page 40: Tavsiyeler Ve Öneriler

    All manuals and user guides at all-guides.com TAVSIYELER VE ÖNERILER Bu kullanma talimatι birden fazla cihaz modeli için geçerlidir. Cihazιnιza uymayan bazι donanιm özellikleri tarif edilmiş olabilir. MONTAJ • Yalnιş veya eksik montajdan doğan herhangi bir zararιn sorumluluğu üreticiye ait değildir. •...
  • Page 41: Özellikler

    All manuals and user guides at all-guides.com ÖZELLIKLER Boyutlar 598 / 898 7.2.1 Komponentler Ref. Miktar Ürün komponentleri Kumandaları, ışık, vantilatör grupları, filtreleri ile birlikte bir davlumbaz gövdesi Üst baca 14.1 Alt baca İstikamet ayarlı hava çıkış ızgarası Flanş 14.1 Hava Çıkışı...
  • Page 42: Montaj

    All manuals and user guides at all-guides.com MONTAJ Duvarın delinmesi ve kancaların vidalanması 7.2.1 Deliklerin ölcüleri minumum 250 mm 190 190 güvenlik mesafesinde ön görülmüstür Duvara şunları çizin: • Tavana veya üst sınıra kadar, Davlumbazın monte edilmesi öngörülen bölgenin merkezinde bir dikey çizgi çizin;...
  • Page 43 All manuals and user guides at all-guides.com Davlumbaz Gövdesinin Montajı • Emici panelleri çekerek çıkartınız. • Yağlanmaya karşı Filtreleri uygun tutamaklardan tu- tarak çıkartınız. • İşlem öncesi 11a askıların iki Vr vidasını ayarlayı- nız. • Davlumbaz gövdesini 2 11a askıya takınız. •...
  • Page 44: Elektri̇k Bağlantisi

    All manuals and user guides at all-guides.com 14.1 FİLTRE VERSİYONUNDA BAĞLANTILAR • Rakor Uzantılarını 14.1 diğer rakora takınız 15. • Soketi 15 destek mesnedine 7.3 yerleştirin ve bir vida ile sabitleyin. • Rakor uzantıları çıkışının 14.1 hem dikey hem yatay planda baca ağızlarına denk gelmesine dikkat ediniz.
  • Page 45: Kullanim

    All manuals and user guides at all-guides.com KULLANIM Kumanda Tablosu Tuş Fonksiyon Gösterge Aspiratör motorunu, kullanılan en son hızda açıp Ayarlanan hızı görüntüler. kapatır. O an devrede olan hızı düşürür. O an devrede olan hızı arttırır. Motor kapalıyken bile herhangi bir hızdan yoğun hızı HI işaretini görüntüler ve sağ...
  • Page 46: Bakim

    All manuals and user guides at all-guides.com BAKIM TELEKUMANDA (OPSİYONEL) Bu cihaza bir telekumanda ile de komut verilebilir; bu kumanda 1,5 Voltluk çinko-karbonlu LR03-AAA tipi standart alkalin pil- lerle çalışır (dahil değildir). • Telekumandayı ısı kaynakları yakınında bırakmaynız. • Pilleri çevreye atmayınız, bunlara ayrılmış çöp toplama kapla- rına atınız.
  • Page 47 All manuals and user guides at all-guides.com Emici Paneller • Emici panelleri çekerek çıkartınız. • Dış taraftan nemli bir bez ve sıvı nötr deterjan ile temizleyiniz. • İç taraftan nötr deterjan ve nemli bez kullanmak sureti ile te- mizleyiniz; Islak bez veya sünger kullanmayınız, su sıkmayı- nız, abrasif maddeler kullanmayınız.
  • Page 48 All manuals and user guides at all-guides.com Aydınlatma LAMBANIN DEĞİŞTİRİLMESİ 20 W halojen lambalar. • Aydınlatma Desteğinin iki adet tespit vidasını çıkartınız ve Desteği davlumbazdan çekerek çıkartınız. • Lambayı destekten çıkartınız. • Destek yuvasındaki iki ucun doğru bir şekilde yerleştirilmesine dikkat ederek Lambayı...
  • Page 49: Råd Og Anvisninger

    All manuals and user guides at all-guides.com RÅD OG ANVISNINGER Denne brugervejledning gælder for flere versioner af apparatet. Der fremstilles muligvis enkelte dele af tilbehøret, der ikke vedrører jeres apparat. INSTALLATION • Producenten kan ikke holdes ansvarlig for eventuelle skader, der skyldes ukorrekt eller forkert installation.
  • Page 50: Apparatbeskrivelse

    All manuals and user guides at all-guides.com APPARATBESKRIVELSE Dimensioner 598 / 898 7.2.1 Komponenter Ref. Antal Produktkomponenter Selve emhætten forsynet med betjeningspanel, bel- ysning, ventilationsgruppe, filtre Øvre skorsten 14.1 Nedre skorsten Rist med retningsindstilling for luftaftræk Reduktionsstuds 14.1 Forlængerstykker til luftdeflektor Luftdeflektor Filtrerende dæksel Ref.
  • Page 51: Installation

    All manuals and user guides at all-guides.com INSTALLATION Boring i væg og befæstigelse af beslag 7.2.1 Positionsværdierne for boring gælder ved en 190 190 sikkerhedsafstand på mindst 250 mm På væggen skal der afmærkes: • en lodret linje op til loftet eller den øverste grænse, i midten af emhættens monteringsområde; •...
  • Page 52 All manuals and user guides at all-guides.com Montering af emhætte • Åbn udsugningspanelerne. • Fjern fedtfiltrene ved hjælp af de specielle håndtag. • Reguler de to skruer Vr, på beslagene 11a, ved ge- vindstart. • Anbring emhættens struktur på de 2 beslag 11a. •...
  • Page 53 All manuals and user guides at all-guides.com 14.1 LUFTUDSTRØMNING PÅ FILTRERENDE VERSION • Før overgangsstykkets forlængere 14.1 ind på siden af over- gangsstykket 15. • Før overgangsstykket 15 ind i støttebeslaget 7.3, og spær det fast med en skrue. • Sørg for at udgangen på overgangsstykkets forlængere 14.1 ø...
  • Page 54: Brug

    All manuals and user guides at all-guides.com BRUG Betjeningspanel Tast Funktion Display Tænder og slukker udsugningsmotoren ved den sidste Viser den indstillede hastighed anvendte hastighed. Nedsætter driftshastigheden. Sætter driftshastigheden op. Aktiverer den intensive hastighed fra hviken som helst På skærmen vises HI, og prikken forneden til hastighed, også...
  • Page 55: Vedligeholdelse

    All manuals and user guides at all-guides.com VEDLIGEHOLDELSE FJERNBETJENING (EKSTRAUDSTYR) Denne emhætte kan styres ved hjælp af en fjernbetjener, der fun- gerer med 1,5V alkaliske carbon-zink batterier af standardtypen LR03-AAA (ikke medleveret). • Fjernbetjeningen må ikke anbringes i nærheden af varmekilder. •...
  • Page 56 All manuals and user guides at all-guides.com Udsugningspaneler • Fjern udsugningspanelerne ved at trække i dem. • Rens dem udvendigt med en fugtig klud og en mild rengø- ringsvæske. • Rens dem ligeledes indvendigt med en fugtig klud og et mildt rengøringsmiddel;...
  • Page 57: Udskiftning Af Pærer

    All manuals and user guides at all-guides.com Belysning UDSKIFTNING AF PÆRER Glødelamper på 20 W. • Fjern de to skruer, der holder belysningsholderen fast, og tag den ud af emhætten. • Tag pæren ud af holderen. • Erstat den med en ny pære med de samme egenskaber, idet man skal sørge for, at de to stifter sættes rigtigt ind i holderens sæde.
  • Page 58: Rady A Doporučení

    All manuals and user guides at all-guides.com RADY A DOPORUČENÍ Tento návod k použití je společný pro několik verzí přístroje. Je tedy možné, že bude obsahovat popis některých komponentů, které jsou součástí vybavení jiného přístroje než je Váš. INSTALACE • Výrobce odmítá jakoukoli odpovědnost za škody způsobené nesprávnou insta- lací, která...
  • Page 59: Hlavní Parametry

    All manuals and user guides at all-guides.com HLAVNÍ PARAMETRY Prostorový rozměr 598 / 898 7.2.1 Díly Č. Poč. Díly spotřebiče Těleso digestoře s: ovládáním, osvětlením, ventilační jednotkou, filtry Horní komín 14.1 Dolní komín Směrovatelná mřížka výstupu vzduchu Redukční příruba 150-120 14.1 Nástavec přípojky výstupu vzduchu Přípojka výstupu vzduchu...
  • Page 60: Instalace

    All manuals and user guides at all-guides.com INSTALACE Vyvrtání stěny a upevnění konzol 7.2.1 Kvóty vyvrtání se vzta- hují k minimální be- 190 190 zpečnostní vzdálenosti 250 mm Na stěně vyznačte: • svislou čáru až ke stropu nebo k horní ploše uprostřed prostoru plánovaného pro montáž digestoře; •...
  • Page 61 All manuals and user guides at all-guides.com Montáž tělesa digestoře • Zatažením odpojte nasávací panely. • Pomocí příslušných rukojetí vyjměte tukové filtry. • Seřiďte dva šrouby Vr konzol 11a na začátek zdvihu. • Zavěste těleso digestoře na dvě konzoly 11a. •...
  • Page 62: Elektrické Připojení

    All manuals and user guides at all-guides.com VÝSTUP VZDUCHU U FILTRAČNÍHO PROVEDENÍ 14.1 • Na přípojku 15 nasaďte bočně nástavce přípojky 14.1. • Přípojku 15 nasaďte do podpěrné konzoly 7.3. a upevněte ji šroubem. • Zkontrolujte, zda se výstupní otvor nástavců přípojky 14.1. kryje s otvory komínu, a to jak vodorovně...
  • Page 63: Použití

    All manuals and user guides at all-guides.com POUŽITÍ Ovládací panel Tlačítko Funkce Displej Vypíná a zapíná motor nasávání s poslední použitou Zobrazuje nastavenou rychlost. rychlostí. Snižuje provozní rychlost. Zvyšuje provozní rychlost. Spouští intenzivní rychlost z jakékoliv rychlosti, i u vy- Zobrazuje HI a tečka vpravo dole bliká...
  • Page 64: Údržba

    All manuals and user guides at all-guides.com ÚDRŽBA DÁLKOVÝ OVLADAČ (VOLITELNÉ) Tento spotřebič je možné ovládat dálkovým ovladačem napáje- ným dvěma alkalickými zinko-karbonovými bateriemi 1,5 v typu standard LR03-AAA (nezahrnutý). • Dálkový ovladač nepokládejte do blízkosti tepelných zdrojů. • Použité baterie nevyhazujte, ale zlikvidujte je ve speciálních kontejnerech.
  • Page 65 All manuals and user guides at all-guides.com Nasávací panely • Zatažením odpojte nasávací panely. • Vyčistěte jejich vnější plochy vlhkým hadříkem a neutrálním tekutým čisticím prostředkem. • Vyčistěte i vnitřek vlhkým hadříkem a neutrálním čisticím prostředkem. Nepoužívejte mokré hadříky nebo houbičky, vodní...
  • Page 66: Výměna Žárovek

    All manuals and user guides at all-guides.com Osvětlení VÝMĚNA ŽÁROVEK Halogenové žárovky 20 W. • Odšroubujte dva šrouby, které upevňují držák osvětlení, a poté jej vysuňte z digestoře. • Vyjměte žárovku z držáku. • Vyměňte žárovku za novou o stejných vlastnostech. Dbejte o to, abyste řádně...
  • Page 67 All manuals and user guides at all-guides.com...
  • Page 68 All manuals and user guides at all-guides.com Franke S.p.a. Via Pignolini,2 37019 Peschiera del Garda (VR) www.franke.it 436003664_ver5...

Ce manuel est également adapté pour:

Fak 907

Table des Matières