Table des Matières
Publicité
Les langues disponibles
Les langues disponibles
Liens rapides
Istruzioni per l'uso
IT
FR
Italiano, 1
Français, 13
ES
DE
Espanol, 49
Deutsch, 37
KIO 632 CC
Sommario
Installazione, 2-3
GB
English,25
Avvio e utilizzo, 5-9
FlexiZONE
PIANO
IT
Publicité
Chapitres
Table des Matières

Sommaire des Matières pour Whirlpool KIO 632 CC
-
Page 1: Table Des Matières
Spegnimento delle zone di cottura Programmazione della durata di una cottura Il contaminuti Blocco dei comandi Spegnimento del piano cottura Modalità “demo” KIO 632 CC FlexiZONE Consigli pratici per l’uso dell’apparecchio Dispositivi di sicurezza Consigli pratici per la cottura Precauzioni e consigli, 10... -
Page 2: Installazione
Installazione ! È importante conservare questo libretto per poterlo consultare in ogni momento. In caso di vendita, di cessione o di trasloco, assicurarsi che resti insieme all’apparecchio per informare il nuovo proprietario sul min. 20 mm funzionamento e sui relativi avvertimenti. ! Leggere attentamente le istruzioni: ci sono importanti informazioni sull’installazione, sull’uso e sulla CASSETTO... -
Page 3: Collegamento Elettrico
Fissaggio Tensione tipo e frequenza di rete • 400V - 2+N ~ 50 Hz L’installazione dell’apparecchio deve essere effettuata su un piano d’appoggio perfettamente piano. • 220-240V 3 ~ 50 Hz Le eventuali deformazioni provocate da un errato • 400V 3 - N ~ 50 Hz fissaggio potrebbero alterare le caratteristiche e •... -
Page 4: Descrizione Dell'apparecchio
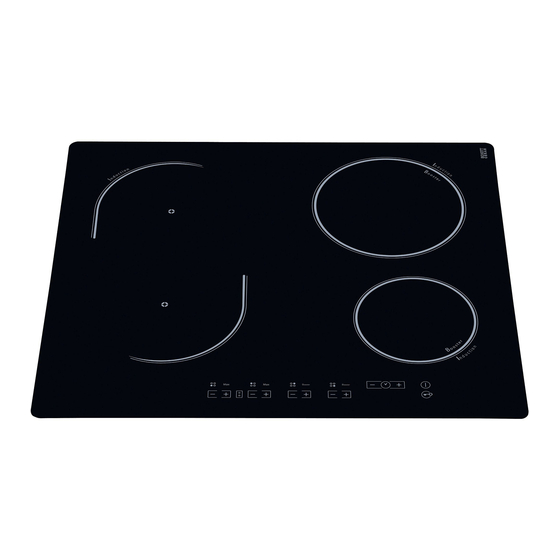
Descrizione dell’apparecchio Pannello di controllo Il pannello di controllo che qui viene descritto è rappresentato a fini esemplificativi: può non essere una esatta riproduzione del modello acquistato. Spia CONTAMINUTI Display TIMER DI PROGRAMMAZIONE Spia Tasto Indcatori FLEXI ZONE BOOSTER ZONA DI COTTURA PROGRAMMATA Spia Indicatori di POTENZA Tasto... -
Page 5: Avvio E Utilizzo
Avvio e utilizzo Accensione delle zone di cottura La colla applicata sulle guarnizioni lascia alcune tracce di grasso sul vetro. Prima di utilizzare l’apparecchio, si Ciascuna zona di cottura viene azionata tramite un tasto di raccomanda di eliminarle con un prodotto specifico per la manutenzione non abrasivo. -
Page 6: Il Contaminuti
3. Confermare premendo il tasto 5. Confermare premendo il tasto oppure si Il conto alla rovescia del timer ha inizio seleziona in automatico dopo 10 secondi. immediatamente. A tempo scaduto viene emesso un Il conto alla rovescia del timer ha inizio segnale acustico (per la durata di 1 minuto). - Page 7 Modalità FlexiZONE Se la pentola utilizzata non è centrata rispetto alla La zona FLEXI permette di regolare lo stesso livello di serigrafia si potrebbe udire un fischio o un leggero potenza su due piastre “collegate” tra loro. E’ ronzio, questo non segnala un malfunzionamento del attivabile se le due piastre si trovano in stato di OFF, piano.
-
Page 8: Consigli Pratici Per L'uso Dell'apparecchio
Consigli pratici per l’uso dell’apparecchio Surriscaldamento ! Adoperare recipienti di cottura il cui materiale di In caso di surriscaldamento dei componenti elettronici, il piano cottura si spegne fabbricazione sia compatibile con il principio automaticamente e sul display appare seguito da dell’induzione (materiale ferromagnetico). -
Page 9: Consigli Pratici Per La Cottura
Consigli pratici per la cottura ª Cottura a Pressione Frittura Pentola a Pressione • Grigliata Ebollizione • ¶ Crêpe Cottura a fuoco vivo e doratura (Arrosti, Bistecche, Scaloppine, Filetti di pesce, Uova al tegamino) ¶ § Addensamento rapido (Sughi liquidi) Acqua bollente (Pasta, Riso, Verdure) Latte §... -
Page 10: Precauzioni E Consigli
Precauzioni e consigli L’apparecchio è stato progettato e costruito • Non staccare la spina dalla presa della corrente in conformità alle norme internazionali di sicurezza. Queste tirando il cavo, bensì afferrando la spina. avvertenze sono fornite per ragioni di sicurezza e devono •... -
Page 11: Manutenzione E Cura
Manutenzione e cura Escludere la corrente elettrica Telaio in acciaio inox (solo nei modelli con cornice) Prima di ogni operazione isolare l’apparecchio dalla rete di alimentazione elettrica. L’acciaio inossidabile può macchiarsi per effetto di un’acqua molto calcarea lasciata per un periodo di tempo prolungato a contatto dello stesso oppure a Pulire l’apparecchio causa di prodotti per la pulizia contenenti fosforo. -
Page 12: Descrizione Tecnica Dei Modelli
B = booster: la zona di cottura può essere sovralimentata a 3000 W * = la potenza massima è limitata finché è attivo il booster nella zona di cottura posteriore relativa (vedi Avvio e utilizzo). Piani cottura KIO 632 CC Zone di cottura Potenza (in W) Posteriore sx... - Page 13 Extinction des foyers Programmation de la durée de cuisson Le minuteur Verrouillage des commandes Extinction de la table de cuisson Mode Démonstration (demo) KIO 632 CC FlexiZONE Conseils d’utilisation de l’appareil Les sécurités Conseils utiles pour la cuisson Précautions et conseils, 22 Sécurité...
-
Page 14: Installation
Installation Conserver ce mode d’emploi pour pouvoir le consulter à tout moment. En cas de vente, de cession ou de déménagement, veiller à ce qu’il suive l’appareil pour informer le nouveau propriétaire sur son fonctionnement min. 20 mm et lui fournir les conseils correspondants. Lire attentivement les instructions : elles contiennent TIROIR des conseils importants sur l’installation, l’utilisation et la... -
Page 15: Raccordement Électrique
Fixation • 400V - 2+N ~ 50 Hz Il est impératif d’assurer l’encastrement de l’appareil sur un plan • 220-240V 3 ~ 50 Hz d’appui parfaitement plat. Les déformations provoquées par une • 400V 3 - N ~ 50 Hz •... -
Page 16: Description De L'appareil
Description de l’appareil Tableau de bord Le tableau de bord qui est décrit n’a qu’une valeur d’exemple : il peut ne pas correspondre au modèle acheté. Voyant Touche MINUTEUR DIMINUTION DE TEMPS DE CUISSON Afficheur PROGRAMMATEUR Voyant Voyants Touche FLEXI ZONE BOOSTER FOYER PROGRAMMÉ... -
Page 17: Mise En Marche Et Utilisation
Mise en marche et utilisation La colle utilisée pour les joints laisse des traces de Une pression prolongée sur les touches graisse sur le verre. Nous conseillons de les éliminer accélère l’avancement rapide des niveaux de avant d’utiliser l’appareil à l’aide d’un produit puissance et des minutes du minuteur. -
Page 18: Le Minuteur
Le minuteur 1. Sélectionner le foyer à l’aide de la touche de sélection correspondante. La table de cuisson doit être allumée. 2. Régler le niveau de puissance du foyer. Le minuteur permet de sélectionner une durée de 99 minutes maximum. 3. -
Page 19: Conseils D'utilisation De L'appareil
Les sécurités VERROUILLAGE DES COMMANDES se mettent à clignoter pendant une seconde. Lâcher les touches – Détection de récipient et appuyer sur la touche Chaque foyer est équipé d’une détection de • il y a affichage de DE et de MO et la table s’éteint; casserole. - Page 20 Signal sonore cas d'utilisation uniquement de la partie supérieure ou inférieure, l'afficheur du foyer non utilisé se mettra Des anomalies, comme par exemple : à clignoter et au bout de 3 minutes la cuisson • un objet (casserole, couvert, ...) placé plus de 10 passera automatiquement en mode standard (non secondes sur la zone de commande, FLEXI).
-
Page 21: Conseils Utiles Pour La Cuisson
Conseils utiles pour la cuisson ª Mise en pression Friture Autocuisser • Grillade Ebullition • ¶ Crêpes Saise et coloration (Rotis, Steack, Escalope, Filets de poisson, Oeufs au plat) ¶ § Réduction rapide (Sauce liquides) Eau Frémissante (Pates, Riz, Légumes) Lait §... -
Page 22: Précautions Et Conseils
Précautions et conseils ! Cet appareil a été conçu et fabriqué conformément aux • N’effectuer aucune opération de nettoyage ou d’entretien normes internationales de sécurité. Ces consignes de sans avoir auparavant débranché la fiche de la prise de sécurité sont très importantes et doivent être lues courant. -
Page 23: Nettoyage Et Entretien
Nettoyage et entretien Mise hors tension Un contact prolongé avec une eau très calcaire ou Avant toute opération de nettoyage ou d’entretien l’utilisation de nettoyants contenant du phosphore couper l’alimentation électrique de l’appareil. peuvent tacher l’acier inox. Nous conseillons de rincer abondamment et de bien essuyer après entretien. -
Page 24: Description Technique Des Modèles
B = booster: le foyer peut être suralimenté à 3000 W * = la puissance maximale est limitée tant que le booster est activé sur le foyer arrière correspondant (voir Mise en marche et Utilisation). Tables de cuisson KIO 632 CC Foyers Puissance (en W) Arrière gauche I 1400 Arrière droit... - Page 25 Switching off the cooking zones Programming the cooking duration Timer Control panel lock Switching off the hob “Demo” mode KIO 632 CC FLEXI Z ONE Practical advice on using the appliance Safety devices Practical cooking advice Precautions and tips, 34...
-
Page 26: Installation
Installation Before operating your new appliance please read this instruction booklet carefully. It contains important information concerning the safe operation, installation and maintenance of the appliance. min. 20 mm Please keep these operating instructions for future reference. Pass them on to any new owners of the appliance. -
Page 27: Electrical Connection
Fixing • 220-240V 3 ~ 50 Hz on a perfectly level The appliance must be installed • 400V 3 - N ~ 50 Hz • 400V - 2+2N ~ 50 Hz supporting surface. Any deformities caused by improper fixing could affect the Separate the wires and connect them in accordance with features and operation of the hob. -
Page 28: Description Of The Appliance
Description of the appliance Control panel The control panel described in this manual is only a representative example: it may not exactly match the panel on your appliance. TIMER indicator light PROGRAMME TIMER REDUCE TIME display button COOKING ZONE PROGRAMMED FLEXI ZONE BOOSTER indicator light... -
Page 29: Start-Up And Use
Start-up and use Switching on the hob The glue applied on the gaskets leaves traces of grease on the glass. Before using the appliance, we recommend you remove these with a special non-abrasive cleaning product. To switch the hob on, press and hold the button for During the first few hours of use there may be a smell of approximately one second. -
Page 30: Timer
3. Confirm by pressing the button. 4. Set the cooking duration using the The timer begins counting down immediately. When buttons. the time has elapsed, a buzzer will sound (for one 5. Confirm by pressing the button or automatic minute). selection occurs after 10 seconds. - Page 31 The FlexiZONE mode The FLEXI Zone can be used to set the power of two "interconnected" hotplates to the same level. It can be activated if the two hotplates are OFF, by pressing the FLEXI ZONE button The FLEXI ZONE can be activated while the hob is on by pressing the FLEXI ZONE button once;...
-
Page 32: Practical Advice On Using The Appliance
Practical advice on using the appliance Overheating protection If the electronic elements overheat, the hob switches ! Use cookware made from materials which are compatible with the induction principle (ferromagnetic off automatically and appears on the display, material). We especially recommend pans made followed by a flashing number. -
Page 33: Practical Cooking Advice
Practical cooking advice ª Pressure cooking Frying Pressure cooker • Grilling Boiling • ¶ Crêpes Cooking on a high flame and browning (roasts, steaks, escalopes, fish fillets, fried eggs) ¶ § Fast thickening (liquid juices) Boiling water (pasta, rice, vegetables) Milk §... -
Page 34: Precautions And Tips
Precautions and tips This appliance has been designed and manufactured in from the mains socket; do not pull on the cable. compliance with international safety standards. The • Never perform any cleaning or maintenance work without following warnings are provided for safety reasons and must having disconnected the appliance from the electricity be read carefully. -
Page 35: Care And Maintenance
Care and maintenance Switching the appliance off Stainless steel frame (only in models with outer frame) Disconnect your appliance from the electricity supply before carrying out any work on it. Stainless steel can be marked by hard water which has been left on the surface for a long time, or by cleaning products containing phosphorus. -
Page 36: Technical Description Of The Models
B = booster: the power level of the cooking zone may be boosted to 3000 W * = the maximum power level is limited while the booster is activated for the relevant rear cooking zone (see Start-up and use). Hobs KIO 632 CC Cooking zone Power (W) I 1400 Back Left I 2200 –... - Page 37 Ausschalten der Kochzonen Programmierung der Garzeit Die Minutenuhr Sperre der Schaltelemente Ausschalten des Kochfeldes „Demo“-Mode (Vorführmodus) FlexiZONE KIO 632 CC Praktische Ratschläge zum Einsatz des Gerätes Sicherheitsvorrichtungen Praktische Back-/Brathinweise Vorsichtsmaßregeln und Hinweise, 46 Allgemeine Sicherheit Entsorgung Reinigung und Pflege, 47 Abschalten Ihres Gerätes vom Stromnetz...
-
Page 38: Installation
Installation ! Bewahren Sie diese Bedienungsanleitung bitte sorgfältig auf, damit Sie sie jederzeit zu Rate ziehen können. Sorgen Sie dafür, dass sie im Falle eines Verkaufs, eines Umzugs oder einer Übergabe an einen anderen Benutzer das Gerät stets min. 20 mm begleitet, damit auch der Nachbesitzer die Möglichkeit hat, darin nachschlagen zu können. -
Page 39: Elektroanschluss
Netzspannung und -frequenz Befestigung • 400V - 2+N ~ 50 Hz perfekt ebenen Stütz- bzw. Das Kochfeld muss auf einer • 220-240V 3 ~ 50 Hz Auflagefläche installiert werden. Durch unsachgemäße Befestigung hervorgerufene • 400V 3 - N ~ 50 Hz Verformungen könnten die Eigenschaften und Leistungen des •... -
Page 40: Beschreibung Des Gerätes
Beschreibung des Gerätes Bedienfeld Das hier beschriebene Bedienfeld dient nur als Beispiel, es handelt sich nicht unbedingt um eine genaue Widergabe des von Ihnen erworbenen Modells. Kontrollleuchte KURZZEITWECKER Display Taste PROGRAMMIERUNGSTIMER Kontrollleuchte Kontrollleuchte Taste FLEXI ZONE PROGRAMMIERTE KOCHZONE BOOSTER Kontrollleuchte LEISTUNGS- und Taste Taste... -
Page 41: Inbetriebsetzung Und Gebrauch
Inbetriebsetzung und Gebrauch - - - - - + + + + + Der auf die Dichtungen aufgetragene Leim könnte Durch längeres Drücken der Tasten können Fettspuren auf dem Glas hinterlassen. Wir empfehlen die Leistungswerte und die Minuten des Timers im Ihnen, diese vor Einsatz des Gerätes mit einem Schnelllauf verändert werden. -
Page 42: Die Minutenuhr
2. Stellen Sie über die Tasten “-” und “+” die gewünschte 3. Drücken Sie die Programmiertaste . Die Zeit ein. Kontrollleuchte der ausgewählten Zone blinkt. 3. Bestätigen Sie die Einstellung durch Druck auf die Taste 4. Stellen Sie über die Tasten “-” und “+” die gewünschte Garzeit ein. -
Page 43: Praktische Ratschläge Zum Einsatz Des Gerätes
• ein zu geringer Topfdurchmesser, Wird das Kochfeld daraufhin wieder eingeschaltet, • der Topf wurde abgenommen. funktioniert es wieder auf normale Weise. Praktische Ratschläge zum Einsatz des Gerätes Überhitzung Im Falle einer Überhitzung der elektronischen Gerätekomponenten schaltet sich das Kochfeld ! Verwenden Sie Kochgeschirr, dessen Herstellungsmaterial automatisch aus, auf dem Display erscheint die Anzeige (magnetisiertes Material) sich für das Induktionssystem... - Page 44 Damit die Kochzone FLEXI ZONE korrekt Mode FlexiZONE Mode FlexiZONE Mode FlexiZONE Mode FlexiZONE Mode FlexiZONE funktioniert, wird der Einsatz von Töpfen mit elliptischem oder länglichem Boden und mit einer Die FLEXI Zone ermöglicht bei beiden miteinander Abmessung von mindestens 250 Millimetern "verbundenen"...
-
Page 45: Praktische Back-/Brathinweise
Praktische Back-/Brathinweise ª Schnellgaren Fritieren Schnellkochtopf • Grillen Kochen • ¶ Crêpes Stark garen und bräunen (Braten, Koteletts, Schnitzel, Fischfilets, Spiegeleier) ¶ § Schnell eindicken (flüssige Soßen) Kochendes Wasser (Nudeln, Reis, Gemüse) Milch § Langsam eindicken (dickflüssige Soßen) ¢ Wasserbad Garen im Schnellkochtopf nach dem Dampfaustritt ¢... -
Page 46: Vorsichtsmaßregeln Und Hinweise
Vorsichtsmaßregeln und Hinweise Das Gerät wurde entsprechend den strengsten • Ziehen Sie den Netzstecker nicht am Netzkabel aus der internationalen Sicherheitsvorschriften entworfen und gebaut. Steckdose, sondern nur am Netzstecker selbst. Nachstehende Hinweise werden aus Sicherheitsgründen • Ziehen Sie vor der Reinigung oder vor geliefert und sollten aufmerksam gelesen werden. -
Page 47: Reinigung Und Pflege
Reinigung und Pflege Abschalten Ihres Gerätes vom • Achten Sie darauf, das Kochfeld nach der Stromnetz Reinigung stets mit klarem Wasser abzuspülen und anschließend abzutrocknen. Rückstände der Vor jeder Reinigung und Pflege ist das Gerät vom Reinigungsmittel könnten sich nämlich bei der Stromnetz zu trennen. -
Page 48: Technische Beschreibung Der Modelle
B = Booster: Die Leistung dieser Kochzone kann bis auf 3000 W erhöht werden. * = Die maximale Leistung wird begrenzt, solange die Boosterfunktion für die entsprechende hintere Kochzone eingeschaltet bleibt (siehe Inbetriebsetzung und Gebrauch). Kochfelder KIO 632 CC Kochzonen Leistung (W) Hinten links... - Page 49 Programación de la duración de una cocción El contador de minutos Bloqueo de los mandos Apagado de la encimera Modalidad “demo” KIO 632 CC FlexiZONE Consejos prácticos para el uso del aparato Dispositivos de seguridad Consejos prácticos para la cocción...
-
Page 50: Instalación
Instalación Es importante conservar este manual para poder consultarlo en todo momento. En el caso de venta, de cesión o de mudanza, verifique que permanezca junto al aparato para informar al nuevo propietario sobre su funcionamiento y sobre las min. 20 mm advertencias correspondientes. -
Page 51: Conexión Eléctrica
Las deformaciones que se podrían provocar por una mala • 400V 3 - N ~ 50 Hz fijación, pueden alterar las características y las prestaciones de • 400V - 2+2N ~ 50 Hz la encimera. Separe los cables y realice la conexión de acuerdo con la tabla La longitud del tornillo de regulación de los ganchos de fijación y los dibujos que se muestran a continuación:... -
Page 52: Descripción Del Aparato
Descripción del aparato Panel de control El panel de control se describe a continuación a modo de ejemplo: puede no ser una exacta reproducción del modelo adquirido. Piloto CONTADOR DE MINUTOS Pantalla TEMPORIZADOR Botón DISMINUCIÓN DE MINUTOS DE PROGRAMACIÓN Piloto ZONA DE Piloto Botón COCCIÓN PROGRAMADA... -
Page 53: Puesta En Funcionamiento Y Uso
Puesta en funcionamiento y uso Encendido de la encimera La cola aplicada sobre las juntas deja algunas trazas de grasa en el vidrio. Antes de utilizar el aparato, se recomienda eliminarlas con un producto específico para el mantenimiento, El encendido de la encimera se produce manteniendo no abrasivo. -
Page 54: El Contador De Minutos
Bloqueo de los mandos 5. Confirme la operación presionando el botón , si no lo Cuando la encimera está en funcionamiento, es posible hace, después de 10 segundos se selecciona automáticamente. bloquear el panel de control para evitar el peligro de La cuenta al revés del temporizador comienza inmediatamente. -
Page 55: Dispositivos De Seguridad
Interruptor de seguridad El aparato posee un interruptor de seguridad que apaga las zonas de cocción automáticamente cuando se alcanza un tiempo límite de uso a un determinado nivel de potencia. Durante la interrupción de seguridad, el display indica “0”. Ejemplo: la placa posterior derecha se ha fijado en 5, mientras que la placa delantera izquierda en 2. - Page 56 Modalidad FlexiZONE Si la olla utilizada no está centrada con respecto a la La zona FLEXI permite regular el mismo nivel de serigrafía podría oírse un silbido o un leve rumor, potencia en las dos placas "conectadas" entre sí. Se esto no significa el mal funcionamiento de la placa.
-
Page 57: Consejos Prácticos Para La Cocción
Consejos prácticos para la cocción ª Cocción a presión Freído Olla a presión • Asado Ebullición • ¶ Crêpe Cocción a fuego fuerte y dorado (Asados, Bistec, Escalopes, Filetes de pescado, Huevo frito) ¶ § Espesamiento rápido (Salsas líquidas) Agua hirviendo (Pasta, arroz, Verduras) Leche §... -
Page 58: Precauciones Y Consejos
Precauciones y consejos tirando del cable sino sujetando el enchufe. El aparato ha sido proyectado y fabricado en • No realice la limpieza o el mantenimiento sin haber conformidad con las normas internacionales sobre desconectado primero el aparato de la red eléctrica. seguridad. -
Page 59: Mantenimiento Y Cuidados
Mantenimiento y cuidados Interrumpir el suministro de corriente Estructura de acero inoxidable (sólo en los eléctrica modelos con marco) Antes de realizar cualquier operación, desconecte el El acero inoxidable puede mancharse por la acción aparato de la red de alimentación eléctrica. de agua muy calcárea dejada por un período de tiempo prolongado en contacto con el mismo o debido a productos para la limpieza con contenido de... -
Page 60: Descripción Técnica De Los Modelos
B = booster: la zona de cocción puede ser sobrealimentada a 3000 vatios * = la potencia máxima está limitada mientras esté en funcionamiento el booster de la zona de cocción posterior correspondiente (ver Puesta en funcionamiento y uso). KIO 632 CC Encimeras Zonas de cocción...