Oaxis Timepiece Manuel Utilisateur
Table des Matières

Sommaire des Matières pour Oaxis Timepiece
-
Page 2: Installing The App
Installing The App Installation de l'application | Instalando la App | アプリケーションをインストールします Download and install the app "Timepiece" on either iOS App Store or Google Play Store. The app is compatible with iOS 9+ and Android 5.0+ or newer. FR: Veuillez rechercher le nom de l'application «Timepiece» dans l'App Store iOS ou le Google Play Store pour télécharger et installer l'application sur votre... - Page 3 Get Watch Device ID Obtenir l'ID du périphérique de la mondre | Obtener tu ID del dispositivo reloj | デバイスのIDをゲッ トします 1. Navigate to the date screen by pressing the button on the right of the watch as illustrated. 2. Press and hold the button until the a device ID appear. It should look like this "#00208". FR: 1.
- Page 4 Apparier montre avec l'application | Emparejar el reloj con la App | デバイスとペアリングします 1. Swtch on your mobile device's Bluetooth via settings. 2. Open the “Timepiece” app on your mobile phone. Go to Device Management > Setup and select watch device ID 3.
- Page 5 à l'application. ES: 1. Enciende el Bluetooth para que el dispositivo pueda conectarse a la red. 2. Abre la App "Timepiece" en tu teléfono móvil. Ve a Manejo del Dispositivo > Con guración, selecciona ID del dispositivo reloj.
-
Page 6: Resetting The Watch
Resetting The Watch Réinitialiser la montre | Reiniciar el reloj | デバイスをリセッ トします 1. Navigate to the date screen by pressing the button on the right of the watch as illustrated. 2. Press and hold the button until the watch device ID appears. 3. - Page 7 FR: 1. Appuyez sur le bouton de la montre à droite pour changer d’écran et a cher la date. 2. Après le premier appui long, vous verrez l'ID du périphérique de la montre. 3. Le deuxième appui long a chera l'option “Réinitialiser”. Appuyez une fois rapidement pour annuler. Pour con rmer, appuyez longuement à...
- Page 8 ícono de "batería llena". Normalmente tomará al reloj entre una hora y una hora y media para cargar por completo. Cuando la batería se descargue nuevamente, mostrará el ícono de "sin batería". JA: 「Timepiece(タイムピース)」 の充電は、 以下の手順に従って行ってください : 1.充電ケーブルのUSB側を電源に接続します。 2.充電ケーブルのもう一方の端を 「Timepiece (タイムピース)」 の背面にあわせて...
-
Page 9: Auto Calibration
Auto Calibration Auto Calibration | Auto Calibración | 自動校正 Please adjust the watch hands on the app page to t the watch hands on your watch, clicking ‘Done’ when complete to calibrate the same time on your watch and mobile device, automatically. - Page 10 Puedes seguir el estatus de tu progreso en cualquier momento en la página de inicio de la App, permitiéndote veri car diariamente, semanalmente y mensualmente la información al hacer clic para ingresar en dicha función. JA: 「Timepiece」 では、 ステップ、 カロリー、 距離が特別な操作を 行わなく てもデバイスを装着するだけで、 自動的に追跡できます。 更にアプリ内では毎日、 毎週、 毎月の進捗状況を追跡することができます。...
-
Page 11: Heart Rate Monitoring
10 segundos al probar, y la página de prueba se mostrará a lo largo de la duración. Luego de 10 segundos, sentirás una vibración y los resultados estarán listos para ser observados. JA: 心拍数を効果的に記録できるように、 「 Timepiece」 の リストバンドは適切に手首にフィッ トするように長さを調節してください。 また、 手首の骨から約1cm離した位置に装着するようにしてください。... - Page 12 Notifications Noti cations | Noti caciones | APP通知 Open the app, click on the Gear icon and select “Noti cations”. Turn on any ‘noti cations’ to your preference. FR: Entrez dans l'application en cliquant sur l'icône d'engrenage, puis sur «Noti cation». Activez les ‘noti cations’ que vous souhaitez utiliser avec la montre.
- Page 13 Event Reminders Rappel d'événement | Recordatorio de eventos | アラーム ・ リマインダ Click on Gear icon and select “Reminders” on the app to customize daily reminders. You may set up to 8 di erent categorise of daily reminder. Once synced, the watch will vibrate and display the corresponding reminder icons.
- Page 14 Notes Remarques | Avisos | 備考 1. Please charge when the low-battery status is shown, using a standard battery charging device and follow the charging instructions. 2. Please charge in a cool, well-ventilated environment. High temperature charging conditions may cause devices to overheat, become deformed, create fumes, re or even explode. 3.
- Page 15 JA: 製品の使用は-10° Cから45° Cの範囲で行ってください。 1. 使用していないときは、 製品を-20° Cから85° Cの間で、 清潔で乾燥した場所に 保管してください。 2. 極端な温度変化にさらさないでください。 物理的衝撃、 熱的衝撃またはその他の衝撃を 避けてください。 ウォッチの内部および外部の部品が破損する恐れがあります。 3. 表面が傷つくのを防ぐために、 「 Timepiece」 のガラスケースを尖ったものや固いものに 近づけないようにしてください 4. 「Timepiece」 とその付属品には小さな部品を含まれており、 小さなお子様には窒息の おそれがあるため、 お子様の手が届かない場所に保管してください。 5. 「Timepiece」 の修理や改造をご自分で行わないでください。 このユーザーガイドに 掲載されいていないサービスやメンテナンスは、 専門家に依頼してください。 Support: Visit us at https://support.oaxis.com...
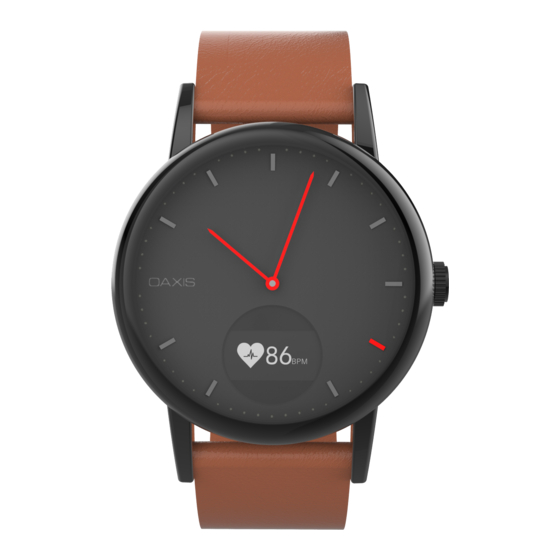
- Page 16 Wristband Heart Rate Sensor Display Bracelet Capteur de fréquence cardiaque A chage Pulsera Sensor de frecuencia cardiaca Pantalla リストバンド 心拍センサー ディスプレイ...