Table des Matières

Publicité

Les langues disponibles
  • FR

Les langues disponibles

  • FRANÇAIS, page 24

Liens rapides

Publicité

Table des Matières
loading

Sommaire des Matières pour YURAKU Yur.Vision YV17WB2

  • Page 2 Operation Instructions Thank you for purchasing this monitor, a high-resolution multi-scan color monitor. Please read this guide thoroughly before installation. FCC RADIO FREQUENCY INTERFERENCE STATEMENT WARNING: (FOR FCC CERTIFIED MODELS) This monitor has been tested and found compliant with the limits for a Class B digital device, pursuant to part 15 of the FCC Rules.
  • Page 3: Table Des Matières

    Content Safety Precautions ................1 First Setup ..................2 Quick Installation ................2 Front View of the Product ..............3 Rear View of the Product ..............3 Using On Screen Display (OSD) Functions........4 Supporting Timing Modes ..............7 Technical Information................8 Care and Maintenance ...............9 Troubleshooting ..................9...
  • Page 4: Safety Precautions

    Safety Precautions This monitor is manufactured and tested on a ground principle that a user’s safety comes first. However, improper use or installation may result danger to the monitor as well as to the user. Carefully go over the following WARNINGS before installation and keep this guide handy.
  • Page 5: First Setup

    First Setup Congratulation for purchasing this monitor of high performance! This monitor comes with the following accessories :  Power cable  D-Sub cable  Audio cable  User’s guide  Warranty Card Quick Installation Connecting the Monitor 1. Connect power cord Connect the power cord to a properly grounded AC outlet, then to the monitor. 2.
  • Page 6: Front View Of The Product

    Front View of the Product ➊ ➋ ➌ ➍ ➎ ➏ ➊ ➍ OSD TURN ON/OFF CONFIRM SELECTION ➋ ➎ SCROLL DOWN/DECREASE POWER ON/OFF ➌ ➏ SCROLL UP/INCREASE LED INDICATOR Rear View of the Product ➐ ➑ ➒ ➐ ➒ POWER INPUT VGA INPUT ➑...
  • Page 7: Using On Screen Display (Osd) Functions

    Using On Screen Display (OSD) Functions Display main menu. Exit from OSD menu. Auto adjust the image when not in OSD menu. Confirm the selection. Select the desired item when in OSD menu. When not in OSD menu, it is to immediately activate Contrast/ ▲or ▼...
  • Page 8 Short Cuts Function from the button(s) Auto Adjust : To auto adjust Horizontal Position, Vertical Position, Phase AUTO (Fine Tune) and Clock (H. Size) of the screen. Contrast : To adjust the foreground white level of screen image. ▲ ▼ : increase contrast, : decrease contrast.
  • Page 9 Sharpness : To adjust the clarity of a non-WXGA (1280x720) signal with ▼ ▲ button. Setup Menu : To set up Language Select, OSD Position, OSD Time Out. Language Select : To allow users to choose from available languages. OSD Position : Press 2 button to select between horizontal and vertical OSD Position adjustment.
  • Page 10: Supporting Timing Modes

    Supporting Timing Modes VESA 720 x 400 @ 70Hz VESA 640 x 480 @ 60Hz 640 x 480 @ 67Hz VESA 640 x 480 @ 75Hz VESA 800 x 600 @ 56Hz VESA 800 x 600 @ 60Hz VESA 800 x 600 @ 72Hz VESA 800 x 600 @ 75Hz 832 x 624 @ 75Hz...
  • Page 11: Technical Information

    Technical Information Technical Specification LCD Panel 17” TFT Energy Star compliant VESA Power Management DPMS compatible < 1 W WXGA 1280 x 720 max. Vertical Frequency 75Hz max. Displayable Resolution Pixel Dimension 0.291 x 0.291 mm LCD Display Color 262K (6 bits) Tilt 0°~20°...
  • Page 12: Care And Maintenance

    Care and Maintenance Care  Avoid exposing your monitor directly to sunlight or other heat source. Place your monitor away from the sun to reduce glare.  Put your monitor in a well ventilated area.  Do not place any heavy things on top of your monitor.  Make certain your monitor is installed in a clean and moisture-free area.
  • Page 13 Betriebshinweise Danke, dass Sie sich für diesen hochauflösenden Multiscan-Monitor entschieden haben. Bevor Sie mit der Installation beginnen, sollten Sie zuerst dieses Handbuch durchlesen. FCC-ERKLÄRUNG ZUR FUNKENTSTÖRUNG HINWEIS: (NUR FÜR FCC-GEPRÜFTE MODELLE) Dieses Gerät wurde getestet und entspricht den Anforderungen für elektronische Geräte Klasse B, gemäß...
  • Page 14 Inhaltsverzeichnis Sicherheitsbestimmungen ..............1 Erster Setup..................2 Kurzanleitung..................2 Vorderansicht des Produkts..............3 Rückansicht des Produkts ..............3 Verwenden der On Screen Display (OSD) Funktionen ...... 4 Unterstützte Zeitsteuerungen .............7 Technische Informationen..............8 Pflege und Aufbewahrung ..............9 Fehlerbehebung .................9...
  • Page 15: Sicherheitsbestimmungen

    Sicherheitsbestimmungen Bei der Herstellung und Prüfung dieses Monitors stand die Sicherheit des zukünftigen Nutzers immer im Vordergrund. Dennoch kann unsachgemäßer Betrieb und Installation zu Schaden am Gerät und zu Gefahren für den Nutzer führen. Lesen Sie sich deshalb zuerst sorgfältig die nachfolgenden Warnhinweise durch, bevor Sie mit der Installation beginnen.
  • Page 16: Erster Setup

    Erster Setup Gratulation, dass Sie sich für einen Monitor der Spitzenklasse entschieden haben! Dieser Monitor verfügt über folgende Teile:  Netzkabel.  VGA-Kabel (D-Sub, 15-polig).  Audiokabel.  Benutzerhandbuch.  Garantiekarte Kurzanleitung Connecting the Monitor 1. Verbindung des Netzkabels Verbinden Sie das Netzkabel mit einer geeigneten, geerdeten Wechselstromquelle und danach mit dem Monitor.
  • Page 17: Vorderansicht Des Produkts

    Vorderansicht des Produkts ➊ ➋ ➌ ➍ ➎ ➏ ➊ ➍ AKTIVIERT/BEENDET OSD EINSTELLUNG BESTÄTIGEN ➋ ➎ HERUNTER/VERRINGERN EIN/AUSSCHALTEN ➌ ➏ HERAUF/ERHÖHEN LED-ANZEIGE Rückansicht des Produkts ➐ ➑ ➒ ➐ ➒ NETZANSCHLUSS VGA-EINGANG (D-SUB 15-PIN) ➑ AUDIO-EINGANG...
  • Page 18: Verwenden Der On Screen Display (Osd) Funktionen

    Verwenden der On Screen Display (OSD) Funktionen Hauptmenü anzeigen. OSD-Menü verlassen. Automatisches Anpassen des Bildes, wenn Sie sich nicht im Hauptmenü befinden. Bestätigen der Auswahl. Wählen Sie den gewünschten Punkt im OSD-Menü aus. Zur sofortigen Aktivierung von Kontrast/Helligkeit, wenn Sie sich ▲oder ▼...
  • Page 19 Schnelltastenfunktion Autom. Anpassung (Auto Adjust) : Stellt Horizontal- und AUTO Vertikal-Position, Phase (Feineinstellung) und Takt (H-Größe) automatisch ein. Kontrast (Contrast) : Stellt den Weißwert des Bildschirmvordergrundes ▲ ▼ ein. : Erhöht Kontrast, : Verringert Kontrast. Helligkeit (Brightness) : Zum Anpassen der Helligkeit des Videos. ▲...
  • Page 20 Horizontale Größe (H. Size) : Stellt die Breite des Bildschirms ein. ▼ ▲ : erhöht die Breite des Bildschirms, : verringert die Breite des Bildschirms. Feineinstellung (Fine Tune) : Stellt die Verzögerungszeit ein. ▲ ▼ Drücken Sie order ,um den Benutzerwunsch einzustellen. Schärfe (Sharpness) : Zum Anpassen der Schärfe eines Nicht-WXGA ▼...
  • Page 21: Unterstützte Zeitsteuerungen

    Unterstützte Zeitsteuerungen VESA 720 x 400 @ 70Hz VESA 640 x 480 @ 60Hz 640 x 480 @ 67Hz VESA 640 x 480 @ 75Hz VESA 800 x 600 @ 56Hz VESA 800 x 600 @ 60Hz VESA 800 x 600 @ 72Hz VESA 800 x 600 @ 75Hz 832 x 624 @ 75Hz...
  • Page 22: Technische Informationen

    Technische Informationen Technische Daten LCD-Bildschirm 17” TFT Entspricht Energy Star, VESA Stromverwaltung DPMS-kompatibel < 1 W Anzeigbare Auflösung WXGA 1280 x 720 max. Vertikale Frequenz max.75Hz Pixelabmessungen 0.291 x 0.291 mm LCD-Anzeigefarben 262K (6 bits) Neigung 0°~20° Aktiver Anzeigebereich 372.5 mm x 209.5mm Betrieb: 0°C ~ +40°C Temperatur Lagerung: -20°C ~ + 60°C...
  • Page 23: Pflege Und Aufbewahrung

    Pflege und Aufbewahrung Pflege  Setzen Sie Ihren Monitor nicht der direkten Sonneneinstrahlung oder anderen Hitzequellen aus. Sonneneinstrahlung auf den Bildschirm sollte vermieden werden, um unangenehme Reflektion zu vermeiden.  Stellen Sie Ihren Monitor an einem gut durchlüfteten Ort auf.  Legen Sie keine schweren Gegenstände auf das Gerät.
  • Page 24 Instructions d’Utilisation Merci d’avoir acheté ce moniteur couleur multi-scan à haute résolution. Veuillez lire attentivement ce guide avant l’installation. COMMUNIQUE D’AVERTISSEMENT DE LA FCC CONCERNANT LES INTERFERENCE DE FREQUENCE RADIO: (SEULEMENT POUR MODELES CERTIFIE PAR LA FCC) Ce moniteur a été testé et à été trouvé conforme aux limites pour un appareil numérique de Classe B, suivant la partie 15 des règlements de la FCC.
  • Page 25 Contenu Précautions de Sécurité ..............1 Première Installation ................2 Installation Rapide ................2 Vue avant du produit ................3 Produit vu de dos................3 Utiliser les fonctions d’affichage d’écran (OSD) ......... 4 Support des modes minutage.............7 Informations Technique ..............8 Soins et Maintien ................9 En Cas de Problème ................9...
  • Page 26: Précautions De Sécurité

    Précautions de Sécurité Ce moniteur à été fabriqué et testé à partir du principe que la sécurité de l’utilisateur est primordiale. Néanmoins, l’utilisation ou l’installation incorrecte peut causer un danger à l’appareil aussi bien que à l’utilisateur. Lisez attentivement les AVERTISSEMENTS suivants avant de commencer l’installation et gardez ce guide à...
  • Page 27: Première Installation

    Première Installation Félicitations avec votre achat de ce moniteur de haute performance! Ce moniteur est fourni avec les accessoires suivants:  Cordon d’Alimentation  Câble D-Sub  Câble Audio  Guide de l’utilisateur  Documents de garantie Installation Rapide 1. Connectez le cordon d’alimentation Connectez le cordon d’alimentation au dos du moniteur. Branchez le cordon d’alimentation dans une prise de courant proche.
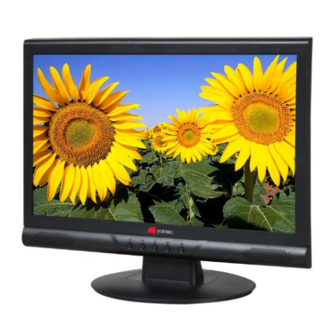
  • Page 28: Vue Avant Du Produit

    Vue avant du produit ➊ ➋ ➌ ➍ ➎ ➏ ➊ ➍ ACTIVER/QUITTER OSD CONFIRMER LA SÉLECTION ➋ DEFILER VERS LE BAS/ ➎ SOUS TENSION/ HORS TENSION DIMINUER ➌ DEFILER VERS LE HAUT/ ➏ INDICATEUR DEL AUGMENTER Produit vu de dos ➐...
  • Page 29: Utiliser Les Fonctions D'affichage D'écran (Osd)

    Utiliser les fonctions d’affichage d’écran (OSD) Afficher le menu principal. Quitter le menu OSD. Ajuster automatiquement l’image en dehors du menu OSD. Confirmer la sélection. Sélectionnez l’élément désiré quand vous êtes dans le menu OSD. Quand vous n’êtes pas dans le menu OSD, cela permet d’activer ▲ou ▼...
  • Page 30 Fonction de raccourci par bouton(s) Réglage automatique (Auto Adjust) : Ajuste automatiquement la AUTO position horizontale, la position verticale, la phase(accord fin) et l’horloge (taille H). Contraste (Contrast) : Pour ajuster le niveau blanc du premier plan de l’image de l’écran. ▲...
  • Page 31 Taille H. ( H. Size) : Ajuste la largeur de l’image de l’écran. ▼ ▲ : diminue la largeur de l’image de l’écran, : augmente la largeur de l’image de l’écran. Réglage image (Fine Tune) : Pour ajuster le temps de retard. ▲...
  • Page 32: Support Des Modes Minutage

    Support des modes minutage VESA 720 x 400 @ 70Hz VESA 640 x 480 @ 60Hz 640 x 480 @ 67Hz VESA 640 x 480 @ 75Hz VESA 800 x 600 @ 56Hz VESA 800 x 600 @ 60Hz VESA 800 x 600 @ 72Hz VESA 800 x 600 @ 75Hz...
  • Page 33: Informations Technique

    Informations Technique Spécifications Techniques Panneau LCD 17” TFT Energy Star conforme à VESA Gestion de Courant compatible avec DPMS < 1 W WXGA 1280 x 720 max. Fréquence Verticale Résolution Affichable maximale de 75Hz. Dimension des Pixels 0.291 x 0.291 mm Couleur de l’affichage 262 K (6 bits) Inclination...
  • Page 34: Soins Et Maintien

    Soins et Maintien Soins  Evitez d”exposer le moniteur directement à la lumière du soleil ou à une autre source de chaleur. Placez votre moniteur détourné du soleil pour éviter des reflets.  Placez votre moniteur dans un emplacement bien ventilé.  Ne mettez pas d’objet lourd sur le moniteur.
  • Page 35 Istruzioni d’Uso Grazie di aver acquistato questo monitor ad alta risoluzione, capace di supportare più modalità Video. Leggete attentamente questo manuale prima procedere l’installazione. (DICHIARAZIONE FCC) Questo monitor è stata testato e trovato in regola con i limiti della classe B Periferiche Digitali, riguardante la Sezione 15 del regolamento FCC.
  • Page 36 Indice Precauzioni di Sicurezza ..............1 Primo Montaggio ................2 Installazione Rapida ................2 Front View of the Product ..............3 Rear View of the Product ..............3 Utilizzo delle funzioni dell’OSD (On Screen Display) ......4 Modalità di frequenza supportate ............7 Caratteristiche Tecniche ..............8 Cura e Manutenzione .................9 Guida alla Risoluzione dei Problemi ...........
  • Page 37: Precauzioni Di Sicurezza

    Precauzioni di Sicurezza Questa periferica è stata costruita e testata in base al principio che la sicurezza dell’utente viene prima di tutto. Tuttavia un uso od una installazione impropria potrebbe provocare danni sia alla periferica che all’utente. Leggete attentamente i seguenti avvisi prima dell’installazione e tenete comunque questa guida sempre a portata di mano.
  • Page 38: Primo Montaggio

    Primo Montaggio Congratulazione per aver acquistato di questo monitor ad alte prestazioni! A questo monitor sono abbinati i seguenti accessori:  Cavo di Alimentazione  Cavo VGA (D-Sub a 15 pin)  Cavo audio  Cartolina di Garanzia  Guida utente Installazione Rapida 1. Collegate l’alimentazione Collegate prima il cavo di alimentazione ad una presa di corrente isolata adeguatamente e poi al monitor.
  • Page 39: Front View Of The Product

    Front View of the Product ➊ ➋ ➌ ➍ ➎ ➏ ➍ ➊ CONFERMARE LA SELEZIONE ATTIVA/DISATTIVA OSD ➎ ➋ INTERRUTTORE ON/OFF SCORRI IN BASSO / DIMINUISCI ➌ ➏ SCORRI IN ALTO/AUMENTA INDICATORE LED Rear View of the Product ➐ ➑...
  • Page 40: Utilizzo Delle Funzioni Dell'osd (On Screen Display)

    Utilizzo delle funzioni dell’OSD (On Screen Display) Visualizza menu principale. Esci dal menu OSD. Regola automaticamente l’immagine quando non è visualizzato il menu principale. Conferma la selezione. Seleziona la voce di interesse nel menu OSD. Quando non è visualizzato il menu OSD, consente di attivare ▲oder ▼...
  • Page 41 Funzioni rapide attivate dai tasti Regol auto (Auto Adjust) : Questa opzione consente di regolare la AUTO posizione orizzontale, la posizione verticale, la fase (Sintonia fine)��� e il clock (dimensione orizzontale). . Contrasto (Contrast) : Con il contrasto si regola il livello del bianco dello ▲...
  • Page 42 Dimen oriz (H. Size) : Questa opzione consente di regolare la larghezza dell’immagine. ▼ ▲ Premere per ridurre la larghezza e per aumentarla. Regolazione di precisione (Fine Tune) : L’opzione consente di regolare ▲ ▼ il ritardo. Premere per regolare la sintonia a propria scelta. Nitidezza (Sharpness) :Consente di regolare la chiarezza di un segnale ▼...
  • Page 43: Modalità Di Frequenza Supportate

    Modalità di frequenza supportate VESA 720 x 400 @ 70Hz VESA 640 x 480 @ 60Hz 640 x 480 @ 67Hz VESA 640 x 480 @ 75Hz VESA 800 x 600 @ 56Hz VESA 800 x 600 @ 60Hz VESA 800 x 600 @ 72Hz VESA 800 x 600 @ 75Hz...
  • Page 44: Caratteristiche Tecniche

    Caratteristiche Tecniche Specifiche Tecniche Diagonale Schermo LCD 17” TFT Energy Star compliant VESA Gestione consumi Compatibile DPMS < 1 W Risoluzione WXGA 1280 x 720 max. Frequenza Verticale max. 75Hz Dimensione Pixel 0.291 x 0.291 mm Numero di colori dello 262K (6 bits) schermo LCD Inclinazione...
  • Page 45: Cura E Manutenzione

    Cura e Manutenzione Cura  Non espone il monitor alla luce diretta del sole o ad altre fonti di calore. Posizione il monitor lontano dalla luce solare per evitare dei fastidiosi riflessi.  Posizionate il monitor in un punto ben ventilato.  Non appoggiate nessun oggetto pesante sopra il vostro monitor.
  • Page 46 Bedieningsinstructies Wij danken u voor de aankoop van deze monitor; een monitor met multiscan en een hoge resolutie. Lees dit handboek grondig door voordat u met de installatie begint. FCC-VERKLARING VAN RADIOFREQUENTE STORINGEN OPMERKING: (UITSLUITEND VOOR MODELLEN FCC- CERTIFICAAT) Dit apparaat is getest en voldoet aan de voorschriften voor een digitaal apparaat van klasse B, conform deel 15 van de FCC-regels.
  • Page 47 Inhoudsopgave Veiligheidsmaatregelen ..............1 Eerste werkzaamheden ..............2 Snelleinstallatie...................2 Vooraanzichtvanhetproduct ..............3 Achteraanzichtvanhetproduct .............3 FunctiesvanhetOnScreenDisplay(OSD) ..........4 Ondersteundetimings .................7 Technischeinformatie ................8 Verzorgingenonderhoud ..............9 Problemenoplossen ................9...
  • Page 48: Veiligheidsmaatregelen

    Veiligheidsmaatregelen Deze monitor is geproduceerd en getest met inachtneming van het principe dat de veiligheid van de toekomstige gebruiker op de eerste plaats staat. Onjuist gebruik en onjuiste installatie kan het apparaat echter beschadigen en gevaar opleveren voor de gebruiker. Lees derhalve eerst zorgvuldig onderstaande waarschuwingen voordat u begint met de installatie.
  • Page 49: Eerste Werkzaamheden

    Eerste werkzaamheden Gefeliciteerd met uw aankoop van deze monitor van topkwaliteit! Deze monitor wordt geleverd met de volgende toebehoren:  Voedingskabel  VGA-kabel (D-sub, 15-pins)  Audiokabel  Garantiekaart  Gebruikershandboek Snelle installatie 1. Netsnoer aansluiten Sluit het netsnoer aan op een stopcontact met eenaardingensluit het vervolgensaanopdemonitor.
  • Page 50: Achteraanzichtvanhetproduct

    Vorderansicht des Produkts ➊ ➋ ➌ ➍ ➎ ➏ ➊ ➍ OSD AAN/UIT SELECTIE BEVESTIGEN ➋ OMLAAG SCHUIVEN/ ➎ AAN/UIT VERMINDEREN ➌ OMHOOG SCHUIVEN/ ➏ VERMEERDEREN LED-INDICATOR Achteraanzicht van het product ➐ ➑ ➒ ➐ ➒ VOEDINGSAANSLUITING VGA-KABEL (D-SUB, 15-PINS) ➑...
  • Page 51: Functiesvanhetonscreendisplay(Osd)

    Functies van het On Screen Display (OSD) Hoofdmenu weergeven. OSD-menu verlaten. Automatisch instellen van het beeld, indien niet in het hoofdmenu. Selectie bevestigen. Kies het gewenste onderwerp in het OSD-menu. ▲oder ▼ Voor directe activering van contrast/helderheid, indien niet in het hoofdmenu.
  • Page 52 Sneltoetsfuncties Beeld automatisch aanpassen (Auto Adjust): Voor het automatisch AUTO instellen van Horizontale positie, Verticale positie, Fase (Fijnafstemming) en Klok (H. grootte) van het scherm. Contrast (Contrast): Voor het instellen van het witniveau van de ▲ ▼ voorgrond. : hoger contrast, : lager contrast.
  • Page 53 Scherpstellen (Fine Tune): Voor het instellen van de vertragingstijd. ▲ ▼ Druk op om de gewenste waarde in te stellen. Scherpte (Sharpness): Voor het instellen van de scherpte van een niet- ▼ ▲ WXGA-signaal (1280x720) met de toets Setup-menu (Setup Menu): Voor Taalselectie, Resolutieopmerking, OSD-positie en OSD-tijdsduur.
  • Page 54: Ondersteundetimings

    Ondersteunde timings VESA 720 x 400 @ 70Hz VESA 640 x 480 @ 60Hz 640 x 480 @ 67Hz VESA 640 x 480 @ 75Hz VESA 800 x 600 @ 56Hz VESA 800 x 600 @ 60Hz VESA 800 x 600 @ 72Hz VESA 800 x 600 @ 75Hz 832 x 624 @ 75Hz...
  • Page 55: Technischeinformatie

    Technische informatie Technische specificatie LCD-scherm 17” TFT Energy Star compliant, VESA Energiebeheer DPMS compatibel < 1 W Resolutie op het scherm WXGA 1280 x 720 max. Verticale frequentie max. 75Hz. Pixelgrootte 0.291 x 0.291 mm Aantal kleuren 262K (6 bits) Kantelen 0°~20°...
  • Page 56: Verzorgingenonderhoud

    Verzorging en onderhoud Verzorging  Stel de monitor niet bloot aan direct zonlicht of een andere warmtebron. Vermijd zonlicht op het beeldscherm om onaangename schittering op het scherm te voorkomen.  Zet de monitor op een goed geventileerde plaats.  Zet geen zware voorwerpen op de monitor.  Zet de monitor in een schone, droge omgeving.
  • Page 57 Instrucciones de operación Gracias por comprar este monitor, un monitor color multi-scan de alta resolución. Por favor lea esta guía minuciosamente antes de hacer la instalación. ACUERDO DE INTERFERENCIA DE RADIO FRECUENCIA PARA FCC ADVERTENCIA: (PARA MODELOS CERTIFICADOS COMO FCC) Este monitor ha sido probado y encontrado en regla con los límites para la clase B de mecanismos digitales, en conformidad con la parte 15 de las Reglas FCC.
  • Page 58 Contenido Precauciones de Seguridad ...............1 Primera Configuración ................2 Rápida Instalación ................2 Vista Frontal del Producto ..............3 Vista Trasera del Producto ..............3 Usar las Funciones de la Muestra En Pantalla (OSD) ....... 4 Tiempos soportados ................7 Información Técnica ................8 Mantenimiento y Cuidado ..............9 Solución de Problemas...............9...
  • Page 59: Precauciones De Seguridad

    Precauciones de Seguridad Este monitor ha sido manufacturado y probado bajo el principio de que la seguridad del usuario es lo primero. Sin embargo, el uso o la instalación impropia puede resultar de peligro para el monitor tanto como para el usuario. Lea cuidadosamente las siguientes ADVERTENCIAS antes de la instalación y conserve a mano esta guía.
  • Page 60: Primera Configuración

    Primera Configuración Gracias por comprar este monitor de alto rendimiento! Este monitor viene con los siguientes accesorios:  Cable toma de corriente  Cable VGA  Cable Audio  Guía de usuario  Tarjeta de Garantía Rápida Instalación 1. Conecte el cable de toma de corriente Enchufe el cable que toma la corriente a un toma corriente y después al monitor 2.
  • Page 61: Vista Frontal Del Producto

    Vista Frontal del Producto ➊ ➋ ➌ ➍ ➎ ➏ ➊ ➍ ACTIVAR/SALIR OSD CONFIRMAR/AUTOCONFIGURAR ➋ ➎ DESPLAZAR ABAJO/DISMINUIR ENCENDER/APAGAR ➌ ➏ DESPLAZAR ARRIBA/AUMENTAR INDICADOR LED Vista Trasera del Producto ➐ ➑ ➒ ➐ ➒ ENTRADA AC Cable VGA ➑ ENTRADA DE SONIDO...
  • Page 62: Usar Las Funciones De La Muestra En Pantalla (Osd)

    Usar las Funciones de la Muestra En Pantalla (OSD) Muestra el menú principal. Sale del menú OSD. Autoajusta la imagen cuando no está en el menú OSD. Confirma la selección. Selecciona el ítem deseado cuando se encuentra en el menú OSD. Cuando no está...
  • Page 63 La Función de Atajo del botón(es) Ajuste automático (Auto Adjust) : Ajuste automático de posición AUTO horizontal, posición vertical, fase (ajuste fino) y reloj (Tamaño-H). Contraste (Contrast) : Ra ajustar el nivel de blanco de la imagen en pantalla. ▲ ▼...
  • Page 64 Sintonizar (Fine Tune) : Para ajustar el retardo temporal. ▲ ▼ Pulse para ajustar a la preferencia del usuario. Nitidez (Sharpness) : Para ajustar la claridad de una señal no WXGA ▼ ▲ (1280x720) con el botón Menú de configuración (Setup Menu) : Para seleccionar el Idioma, la posición OSD, el Interruptor de OSD.
  • Page 65: Tiempos Soportados

    Tiempos soportados VESA 720 x 400 @ 70Hz VESA 640 x 480 @ 60Hz 640 x 480 @ 67Hz VESA 640 x 480 @ 75Hz VESA 800 x 600 @ 56Hz VESA 800 x 600 @ 60Hz VESA 800 x 600 @ 72Hz VESA 800 x 600 @ 75Hz 832 x 624 @ 75Hz...
  • Page 66: Información Técnica

    Información Técnica Especificaciones Técnicas Panel LCD 17” TFT En conformidad con Energy Star Compatible con Administración de VESA DPMS compatible energía < 1 W WXGA máximo 1280 x 720. Frecuencia Vertical Resolución Visualizable máxima 75Hz. Dimensión de Píxel 0.291 x 0.291 mm Visualización del Color 262K (6 bits) Inclinación...
  • Page 67: Mantenimiento Y Cuidado

    Mantenimiento y Cuidado Cuidado Evite exponer el monitor directamente a la luz del sol o otra fuente de calor.  Coloque su monitor lejos del sol para reducir el deslumbramiento.  Coloque su monitor en un área bien ventilada. No ponga nada pesado sobre el ...

Table des Matières