Publicité
Liens rapides
PROWLTOUCHWM Installation Guide
Wall Mount Installation
Kit includes: power supply and mounting screws.
1. Choose a desired mounting location for the wireless
Touchscreen. It is recommended to mount the touchscreen
out of direct sunlight and at a proper height for viewing.
2. Using 18 to 22-gauge wires, connect the wires from the 2
terminals on the back of the Wall Mount to the power supply
terminals and observe polarity. The wires can be routed
through one of the channels on the Wall Mount.
Wire Table
AWG
Wire Length
#22 wire
13 ft (4m)
#20 wire
21 ft (6.4m)
#18 wire
34 ft (10.3m)
3. Attach the Wall Mount plate to the wall using the 2 screws
provided. Alternately the Wall Mount Plate can be installed
directly on an electrical gang box.
4. Align the slots one back plate with the hooks on the mounting
bracket and slide it down until it is secure.
5. Align the slot on the back of the Touchscreen above the
mounting plate and slide down until fully seated. The LED's
illuminate. When Touchscreen is removed from mounting
plate the LED's are off.
1
POWER
SUPPLY /
LOCS
D'ALIMENTATION
18-22 GAUGE WIRES /
FILS CAL. 18-22
6. Plug the power supply into a non-switchable 110VAC, 60Hz
outlet for 24hrs to fully charge battery.
7. If desired, use the screw provided to permanently attach the
Touchscreen to mounting plate.
Kit de montage mural PROWLTOUCHWM
Kit de montage sur table PROWLTOUCHDM
2
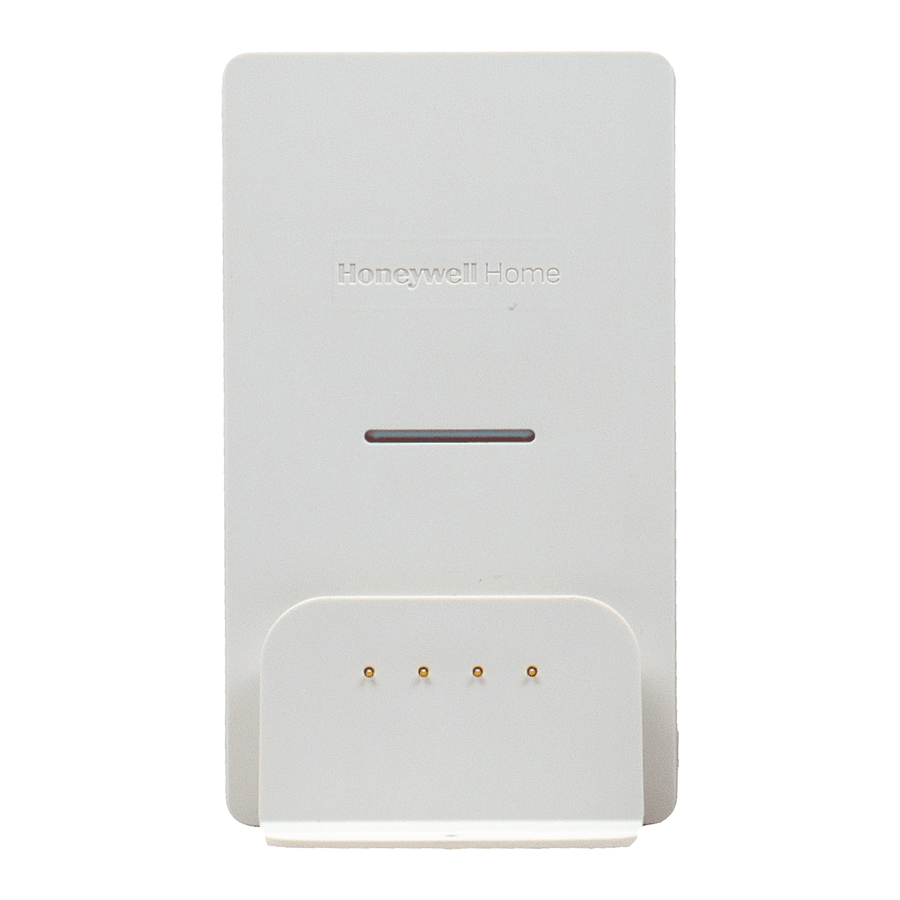
LED LIGHT
BAR / BARRE
LUMINEUSE
À DEL
SCREW / VIS
(TYP-2)
PROWLTOUCHWM Wall Mount Kit
PROWLTOUCHDM Desk Mount Kit
Guide d'installation – Montage mural
Installation du montage mural
Kit- WALLMT-WTS comprend: un bloc d'alimentation et des vis
de montage.
1.
Choisissez l'emplacement où monter l'écran tactile sans fil.
Il est recommandé de monter le pavé tactile à l'abri de la
lumière directe du soleil et à une hauteur lui permettant
d'être visible.
2.
À l'aide de fils de calibre 18-22, raccordez les 2 bornes à
l'arrière de la plaque de montage aux bornes du bloc
d'alimentation. Respectez la polarité. Les fils peuvent être
acheminés par le truchement d'un des canaux de support
mural.
Tableau de câblage
Caliber du fil
Longueur du fil
#22
13 pieds (4m)
#20
21 pieds (6.4m)
#18
34 pieds (10.3m)
3.
Fixez la plaque de montage au mur à l'aide des 2 vis
fournies. Il est également possible d'installer la plaque de
montage mural directement sur une boite à gangs
électrique.
4.
Alignez les encoches de la plaque arrière avec les pinces
de support de montage et faites-la glisser vers le bas
jusqu'à ce qu'elle soit bien fixée.
5.
Align the slot on the back of the Touchscreen above the
mounting plate and slide down until fully seated. The LED's
illuminate. When Touchscreen is removed from mounting
plate the LED's are off
3
WALL /
MUR
TOUCHSCREEN /
ÉCRAN TACTILE
WALL MOUNT
PLATE / PLAQUE
DE MONTAGE MURAL
6.
Branchez le bloc d'alimentation dans une prise sans
interrupteur de 110 VCA, 60 Hz, durant 24 heures pour
obtenir une charge complète de la batterie.
7.
Si souhaité, utilisez la vis fournie pour fixer de manière
permanente l'écran tactile à la plaque de montage.
SCREW FOR
SECURING
TOUCHSCREEN /
VIS POUR FIXER
L'ÉCRAN TACTILE
ProTouch-006-V0
Publicité

Manuels Connexes pour Honeywell Home PROWLTOUCHWM

Sommaire des Matières pour Honeywell Home PROWLTOUCHWM
- Page 1 PROWLTOUCHWM Wall Mount Kit PROWLTOUCHDM Desk Mount Kit Kit de montage mural PROWLTOUCHWM Kit de montage sur table PROWLTOUCHDM PROWLTOUCHWM Installation Guide Guide d’installation – Montage mural Wall Mount Installation Installation du montage mural Kit includes: power supply and mounting screws.
- Page 2 DÉCOUPER POUR PLUS DE CLARTÉ grip-048FC-V0 This product manufactured by Resideo and its affiliates. The Honeywell Home Trademark is used under license from Honeywell International Inc. 2 Corporate Center Drive, Suite 100 P.O. Box 9040, Melville, NY 11747 © 2019 Resideo Technologies, Inc www.resideo.com...