Publicité
Les langues disponibles
Les langues disponibles
Liens rapides
USER MANUAL
Xreg
Xreg
V5
Brushless Electronic Speed Controller
20A · 30A mi n i · 30A · 40A · 60A · 80A · 120A
130A HV OPTO · 160A HV OPTO
Imported and distributed by:
TOPMODEL S.A.S.
Le jardin d'entreprises de Sologne
41300 SELLES-SAINT-DENIS
FRANCE
www.topmodel.fr
V2.0 NOV 2020
• ESC which features a high performance 32-bit ARM M4 microprocessor (with a running frequency of up to 72MHz) is compatible with various brushless motors.
• Microprocessor powered by a separate DC regulator has better anti-interference performance greatly reduces the possibility of losing control.
• DEO (Driving E ciency Optimization) Technology greatly improves throttle response & driving e ciency and reduces ESC temperature.
• Built-in high-power BEC with output voltage adjustable among 5.2V, 6.0V and 7.4V. The BEC module is separate from other circuits on the ESC, so the normal BEC
output can be guaranteed (when issue like burnt power board happens) to allow users to get the aircraft back before crash.
(Note: the Xreg 130/160 HV OPTO V5 doesn't have this function. Xreg 20 V5 and Xreg 30 V5 mini cannot be adjusted).
• Normal/Soft/Very Soft start-up modes are compatible with regular propeller airplanes and EDF jet airplanes
(Please ensure to select the "Very Soft Start-up" mode when using EDF jet airplanes).
• Separate programming cable for connecting ESC to a LED program box and allows users to program the ESC anytime, anywhere.
(For detailed info, please refer to the user manual of LED program box).
• Normal/proportional/reverse brake modes (esp. reverse brake mode) can e ectively shorten the landing distance for the aircraft.
(Note: the Xreg 20 V5, Xreg 30 V5 mini, Xreg 130/160-HV-OPTO-V5 don't have this function.)
• Multiple protection features like start-up, ESC thermal, capacitor thermal, over-current, over-load, abnormal input voltage and throttle signal loss e ectively
prolong the service life of the ESC.
Xreg 20 V5
Xreg 30 V5
Xreg 40 V5
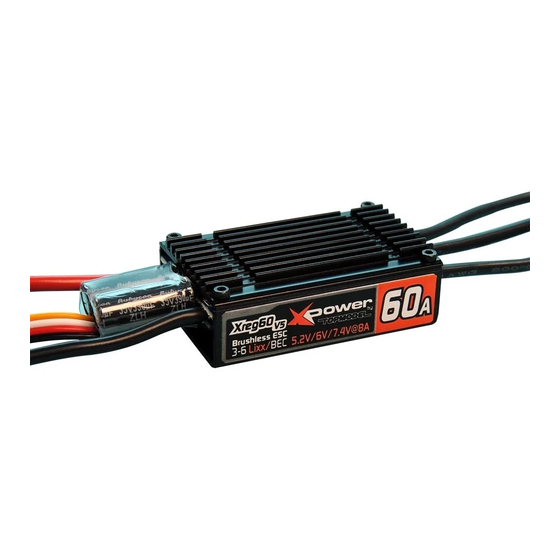
Xreg 60 V5
Xreg 80 V5
Xreg 120 V5
Xreg 130 HV OPTO V5
Xreg 160 HV OPTO V5
Note:
1. Xreg 130 and 160 HV OPTO V5 don't have the Reverse Brake Signal Wire.
2. Xreg 130 and 160 HV OPTO V5 don't have the BEC output wire (long red wire).
3. Xreg 30 V5 mini and Xreg 20 V5: Yellow Wire is the Programming Cable.
2
External Capacitor Module (also called Cappack) Wiring (Optional)
For the Xreg 80/120 V5, its BEC load capacity may be insu cient when using high power servos. In that case, we suggest connecting the stock external cappack to the BEC's output end (i.e. any idle channel on the
receiver *note 1) in parallel. Users can check if the BEC is working in overload condition by the following method: keep moving relevant throttle sticks (that control servos) to start/stop those servos and change
directions quickly to see if the receiver or ight control system (if exists) will be restarted during the process. If restart occurs, then it means that the sudden load of the electronic system exceeds the BEC's output
capability and an external cappack is needed.
Note 1: if there is no vacant channel on the receiver, then users can connect a short, thick Y cable (as thin, long cable may a ect the capacitor's performance, so we don't recommend it) to the BEC's output wires in
parallel.
Please carry out the mentioned test before trial ight, and keep the output signals from throttle channel at 0% throttle during the test.
ATTENTION
3
ESC/Radio Calibration
Connect a battery to
Then the motor will beep
Turn on the
the ESC; the motor will
two short beeps to
transmitter and move
sound "♪123" to
indicate the maximum
the throttle stick to
indicate the ESC is
throttle endpoint is
the top position.
normally powered on.
accepted.
4
Normal Start-up Process
Turn on the transmitter, and then move
After connected the ESC to a battery, the motor will emit
the throttle stick to the bottom position.
"♪ 123" to indicate the ESC is normally powered on.
Thank you for purchasing this XPower product! Brushless power systems can be very
dangerous. Any improper use may cause personal injury and damage to the product and
related devices. We strongly recommend reading through this user manual before use.
Because we have no control over the use, installation, or maintenance of this product, no
liability may be assumed for any damages or losses resulting from the use of the product.
We do not assume responsibility for any losses caused by unauthorized modi cations to
our product. Besides, we have the right to modify our product design, appearance,
features and usage requirements without noti cation. We, TOPMODEL, are only
responsible for our product cost and nothing else as result of using our product.
Xreg
Move the throttle stick to the
The motor will beep
The motor will beep a
bottom position within 5 seconds
"Number" beeps to
long beep to indicate
after the two short beeps, the
indicate the number
the calibration is
minimum throttle position will be
of LiPo cells you
complete.
accepted 1 second later.
have plugged in.
The motor will emit several beeps to
The motor emits a long beep to
indicate the number of LiPo cells.
indicate the ESC is ready to go.
• Plug the programming cable (on your ESC) into the programming port on the LED
program box.
Note: Xreg 30 V5 mini/ Xreg 20 V5 need plug the throttle signal cable into the power port on
the LED program box and the programming wire (yellow wire) into the programming
port on the LED program box.
• (With a battery connected to your ESC), after connected a LED program box to the ESC,
you need to disconnect the battery rst and then reconnect it to the ESC to enter the
programming mode to check and set parameters.
The portable program box is an optional accessory applicable for eld use. Its friendly
interface makes the ESC programming easy and quick. Connect a battery to your ESC after
connecting a LED program box to the ESC, all programmable items will show up a few seconds
later. You can select the item you want to program and the setting you want to choose via
"ITEM" & "VALUE" buttons on the program box, and then press the "OK" button to save all new
settings to your ESC.
Attention! You need to power your ESC o and then on after adjusting parameters.
Otherwise, new parameters won't take e ect.
06
Programmable Items
Values (Bs)
1
2
3
4
5
Items
1
Brake Type
Disabled
Normal
Proportional
Reverse
2
Brake Force
Disabled
Level 1
Level 2
Level 3
Level 4
3
Voltage Cuto Type
Soft
Hard
Regular
2S
3S
4S
5S
4
LiPo Cells
Auto Calc.
HV
6S
8S
10S
12S
5
Cuto Voltage
Disabled
2.8V
3.0V
3.2V
3.4V
6
BEC Voltage
5.2V
6.0V
7.4V
7
Start-up Mode
Normal
Soft
Very Soft
8
Timing
0°
5°
8°
12°
15°
9
Motor Direction
CW
CCW
10
Freewheeling
Enabled
Disabled
1. Brake Type
Normal Brake: After selected this option, the brake function will be activated when you move the throttle stick to the bottom position. In this mode, the brake amount equals to the brake force you've preset.
Proportional Brake: After selected this option, the throttle range of 20% to 100% (on the transmitter) will correspond to the ESC throttle output of 0% to 100% while the throttle range of 20% to 0% (on the
transmitter) will correspond to the brake force of 0 to 100%.
Note: the Xreg 20 V5 and Xreg 30 V5 mini don't have this function.
Reverse Brake: After selected this option, the Reverse Brake signal wire (its signal range must be the same as the throttle range) must to be plugged into any vacant channel on the receiver, and you can control the
motor direction via that channel. The channel range of 0-50% is the default motor direction, the channel range of 50% to 100% will cause the motor to spin counterclockwise. The channel stick should be within
the channel range of 0-50% (0 would be better) when the rst time you power on the ESC. After the Reverse function is activated, the motor will stop rst and then spin in the reversed direction and then increase to
the speed corresponding to the throttle input. Either signal loss, no matter reverse brake signal loss or throttle signal loss during the ight, can cause the throttle signal loss protection to be activated.
Note: the Xreg 20 V5, Xreg 30 V5 mini, Xreg130/160 HV OPTO don't have this function.
2. Brake Force
This item is adjustable from level 1 to level 7. The higher the level, the stronger the braking e ect. It's only e ect in the "Normal brake" mode.
3. Voltage Cuto Type
Soft Cuto : After selected this option, the ESC will gradually reduce the output to 50% of the full power in 3 seconds after the low-voltage cuto protection is activated.
Hard Cuto : After selected this option, the ESC will immediately cut o the output when the low-voltage cuto protection is activated.
4. LiPo Cells:
The ESC will automatically calculate the number of LiPo cells you have plugged in as per the "3.7V/Cell" rule if "Auto Calc." is selected, or you can set this item manually.
5. Cuto Voltage
This item is adjustable from 2.8V to 3.8V (they are the cuto voltages for one cell); or you can disable it if necessary.
6. BEC Voltage
This item adjusts the switch-mode BEC output voltage. It can be adjustable among 5.2V, 6.0V and 7.4V.
Note: the Xreg 20 V5, Xreg 30 V5 mini, Xreg130/160 HV OPTO don't have this function.
7. Start-up Mode
Normal Start-up: After selected this option, the motor will immediately start spinning and then quickly reach to the corresponding speed when you move the throttle stick from bottom position to top position.
Soft Start-up: After selected this option, the motor will slowly start spinning and then quickly reach to the corresponding speed when you move the throttle stick from bottom position to top position.
Very Soft Start-up: After selected this option, the motor will slowly (slower than in "Soft Start-up Mode") start spinning and then quickly reach to the corresponding speed when you move the throttle stick from
bottom position to top position. We recommend selecting the "Soft Start-up" or "Very Soft Start-up" mode when you are ying an airplane with a big-sized ducted fan. Please ensure to select the "Very Soft
Start-up" mode if the diameter of the ducted fan on your airplane is over 90mm.
8. Timing
This item is adjustable from 0 degree to 30 degrees.
9. Motor Rotation
This item allows you to adjust the rotation direction of your motor between CW and CCW.
10. Freewheeling
This item is adjustable between "Enabled" and "Disabled". With it enabled, you can have better throttle linearity or smoother throttle response.
07
Troubleshooting & Multiple Protections
Troubles
Warning Tones
The ESC didn't work after it was powered on while
"BB, BB, BB......"
the motor kept beeping.
The ESC didn't work after it was powered on while
"B-, B-, B-, B-......"
the motor kept beeping.
The ESC didn't work after it was powered on while
"B, B, B, B......"
the motor kept beeping.
The ESC didn't work after the throttle calibration
"B, B, B, B......"
while the motor kept beeping.
The motor "stuttered" during the ight. It would resume the
"BB, BB, BB......" or
normal operation if the throttle input was below 60%
but re-start to stutter if the throttle input was over 60%.
"BBBB, BBBB......"
The motor started to beep when it stopped spinning.
The ESC output suddenly reduced to 50% during the ight,
the motor kept beeping after the ight completed but the
"BBB, BBB, BBB......"
battery was still connected to the ESC.
Multiple Protections
1. Start-up Protection:
The ESC will monitor the motor speed during the start-up process. When the speed stops increasing or the speed increase is not stable, the ESC will take it as a start-up failure. At that time, if the throttle amount is
less than 15%, the ESC will try to restart automatically; if it is larger than 20%, you need to move the throttle stick back to the bottom position rst and then restart the ESC.
(Possible causes of this problem: poor connection/ disconnection between the ESC and motor wires, propellers are blocked, etc.)
2. ESC Thermal Protection:
The motor will "stutter" when the ESC temperature goes above 110℃ to indicate that the ESC thermal protection is activated. If lower down the throttle input to below 60% at this moment, the "stuttering" will
disappear and the ESC will output the corresponding power. The motor will re-start to "stutter" if the throttle input exceeds 60%. In this condition, disconnect the battery rst and then re-connect it to the ESC after
the ESC cools down (the ESC temperature cannot exceed 70℃, otherwise it cannot be started), it will resume the normal operation.
3. Throttle Signal Loss Protection:
When the ESC detects loss of signal for over 0.25 second, it will cut o the output immediately to avoid an even greater loss which may be caused by the continuous high-speed rotation of propellers or rotor blades.
The ESC will resume the corresponding output after normal signals are received.
4. Overload Protection:
The ESC will cut o the power/output or automatically restart itself when the load suddenly increases to a very high value.
(Possible cause to the sudden load increase is that propellers are blocked or the motor and the ESC are out of sync.)
5. Over-current Protection:
The ESC will cut o the output immediately when the peak current exceeds the regulated value, and then restart to resume the output. If the current continues to go above the regulated value, then the output will
be completely cut o . This protection may be activated by the burnt motor or some others.
6
7
8
Level 5
Level 6
Level 7
6S
14S
3.6V
3.8V
20°
25°
30 °
Note: Di erent ESCs have di erent default settings, please take the default
settings of each ESC as the standard.)
Causes
The input voltage was beyond the operating
Adjust the power-on voltage and ensure it's in the
voltage range of the ESC.
operating voltage range of the ESC.
The ESC didn't receive any throttle signal
Check if the transmitter and receiver are well bound,
from the receiver.
if any poor connection exists between the ESC and receiver.
The throttle stick has not been moved to
Move the throttle stick to the bottom position and calibrate
the bottom position.
the throttle range.
The throttle range you set was too narrow.
Re-calibrate the throttle range.
Improve the heat dissipating condition (i.e. add a cooling
The ESC thermal protection has been activated.
fan) or reduce the ESC load.
Change another pack; lower down the cuto voltage or
The low-voltage cuto protection has been activated.
disable the LVC protection (we do not recommend this).
Solutions
©2020 TOPMODEL S.A.S.
Publicité

Sommaire des Matières pour XPower Xreg V5
- Page 1 Thank you for purchasing this XPower product! Brushless power systems can be very dangerous. Any improper use may cause personal injury and damage to the product and related devices. We strongly recommend reading through this user manual before use. Because we have no control over the use, installation, or maintenance of this product, no liability may be assumed for any damages or losses resulting from the use of the product.
- Page 2 Merci d'avoir acheté ce produit! Les systèmes de propulsion Brushless peuvent être très dangereux. Toute utilisation incorrecte peut entraîner des blessures corporelles et des Programmation du contrôleur dommages au produit et aux dispositifs connexes. Nous vous recommandons fortement ATTENTION de lire ce mode d'emploi avant utilisation. Parce que nous n'avons aucun contrôle sur l'utilisation, l'installation ou la maintenance de ce produit, aucune responsabilité...