Little Tikes 656040M Instructions De Montage

Manuels Connexes pour Little Tikes 656040M

Sommaire des Matières pour Little Tikes 656040M
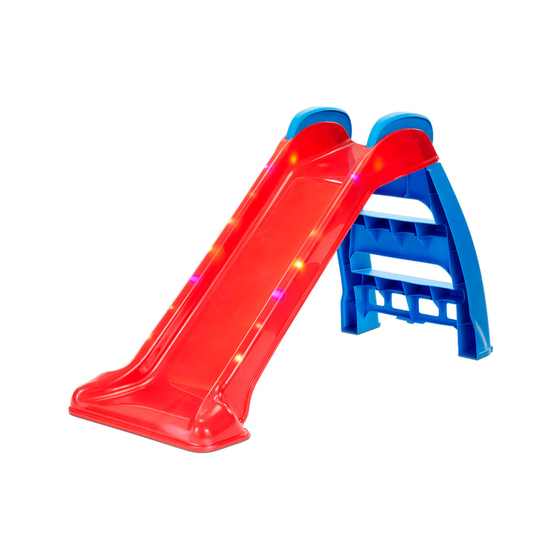
- Page 1 My First Light Up Slide ASSEMBLY INSTRUCTIONS #656040M #656040MX1 Adult assembly required. Approx. assembly time: 20min. Look for video of assembly at littletikes.com/videoinstructions XIM656040 - 11/20...
- Page 2 © Thank you for choosing the Little Tikes My First Light Up Slide. We strive to provide a durable, easy-to-assemble toy thats made to last, giving your child years of imaginative, engaging fun! Really important information you should know! • Read through all the instructions first.
-
Page 3: Maintenance Warnings
LIMITED WARRANTY The Little Tikes Company makes fun, high quality toys. We warrant to the original purchaser that this product is free of defects in materials or workmanship for one year * from the date of purchase (dated sales receipt is required for proof of purchase). -
Page 4: Fcc Compliance
Battery Safety Information. This is serious ! • Keep these instructions for future reference. • Requires 3 “AA” (LR06) alkaline batteries (not included). (Rechargeable batteries may be substituted.) • The voltage of a fully-charged, rechargeable battery is often lower than that of a fresh alkaline battery. Therefore, it is recommended that alkaline batteries be used instead of rechargeable batteries for best performance and longer play time. - Page 5 BEFORE you begin assembly, make sure you have all the parts listed below. Some packages of hardware may have extras pieces. Questions? We’re here to help. Little Tikes customer service team at 1-800-321-0183. Tool required (not included) Shown Actual SIze " (1.27 cm)
- Page 6 Ready...let’s start! Tool required (not included) Before playing, an adult must install fresh alkaline batteries in the Light-Up module (part D). Here’s how: Battery installation MUST be completed by an adult: 1. Using a Phillips screwdriver (not included) remove the screw and battery compartment cover from the Light-Up module (part D).
- Page 7 It’s time to add some lights Turn the slide (part A) over to access the underside. Place the Light-Up module (part D) onto the screw bosses. Secure the light-up module using (2) “ screws. " (1.27 cm)
- Page 8 Clip it! Place the LED strips into the crevice on each side of the slide. " (1.27 cm) LED strip Place a LED clip (part E) over the LED strip and onto the screw boss. Secure using using (1) ” (1,27 cm) screws in the (6) locations circled.
- Page 9 Step it up While the slide is still turned over, insert the steps (part B) into slide.
- Page 10 Handle it! Back of Front of handle handle Insert the FRONT of the handle into Fit the BACK of the handle into the the FRONT of the notched area at the back of the notched area. top of the slide.
- Page 11 2 CLICKS! Push down on the BACK of the handle. You MUST feel the handle CLICK 2 times! Pull UP on the BACK of the handle to be sure it will not pop off. If it does pull off, then you need to press down on the back again until you feel it click into place - 2 CLICKS! Now REPEAT for the other handle.
- Page 12 LIGHTS-LIGHTS-LIGHTS! Modes When the switch is in the “ON” position 1. Combination 2. In Wave (all the way to the right), the lights will run 3. Sequential 4. Slow Glow continuously. 5. Chasing/Flashing 6. Fade To Select a Mode: 7. Flash/Twinkle 8.
-
Page 13: Fr Ma Première Glissade Illuminée
INSTRUCTIONS DE MONTAGE Montage par un adulte requis. Durée de montage approximative : 20 min. Merci d’avoir choisi l’ensemble Ma première glissade illuminée de Little Tikes © . Nous nous engageons à offrir un jouet durable et facile à monter, procurant à votre enfant des années de plaisir créatif! Veuillez lire ces renseignements placez jamais ce produit sur du béton, de l’asphalte, du... -
Page 14: Entretien
ÉLIMINATION • Apprendre aux enfants à ne pas attacher d’objets sur le portique d’escalade, et qui ne sont pas • Le démontage et l’élimination de l’appareillage conçus spécialement pour être utilisés avec doivent s’effectuer de manière à ce que des pièces l’appareillage, tels que mais sans s’y limiter, les de petites dimensions ou tranchantes ou d’autres cordes à... -
Page 15: Conformité Avec La Fcc
Parties REMARQUE : Si le module cesse de fonctionner ou ne fonctionne pas normalement, retirez les piles pendant quelques minutes, puis remettez-les. Si le A. Glissade (1) Le matériel illustré est de taille B. Marches (1) réelle. problème persiste, installez de nouvelles piles. C. -
Page 16: Étape 8 : Parlons Rangement
à compter de sa date d’achat (le reçu d’achat daté est exigé comme preuve d’achat). Au titre de la présente garantie, la seule responsabilité de The Little Tikes Company et le seul recours se limitent au remplacement de la pièce défectueuse ou au remplacement du produit. La présente garantie est valable uniquement si le produit a été... - Page 17 INSTRUCCIONES DE MONTAJE El montaje debe realizarlo un adulto. Tiempo aproximado de montaje: 20 min. © Gracias por elegir Mi primer tobogán iluminado de Little Tikes . Nos esforzamos por crear juguetes perdurables, fáciles de ensamblar y creados para durar, que brindan a sus niños años de diversión fascinante y ocurrente.
-
Page 18: Cumplimiento De Fcc
Información sobre la • Indíqueles a los niños que se quiten el casco que utilizan para la bicicleta o para otros deportes antes seguridad de la batería. de jugar en este producto. • Enséñeles a los niños que no coloquen objetos ¡Esto es importante! que no están específicamente diseñados para usarse con este producto tales como cuerdas para... -
Page 19: Pasos De Montaje
¿Tiene preguntas? Estamos aquí para ayudarlo. PARTE POSTERIOR del área con muescas. Llame a nuestro equipo de servicio al cliente de Little Tikes al 1-800-321-0183. Paso 6: ¡2 CLICS! Empuje hacia abajo en la PARTE POSTERIOR del Herramientas necesarias: Destornillador Phillips. -
Page 20: Servicio Al Cliente
(se requiere el recibo de compra fechado como prueba). A exclusiva elección de la compañía Little Tikes, el único resarcimiento disponible en virtud de esta garantía será el reemplazo de la pieza (for consistency) defectuosa del producto o el reemplazo del producto. Esta garantía es válida solamente si el producto ha sido montado y mantenido según las instrucciones. - Page 21 6.5 ft. 6.5 ft. L+6.5 ft. 6.5 ft. 6.5 ft. 6.5 ft. 6.5 ft. Use Zone for Single-Axis Swings Use Zone for Multi-Axis Swings Use Zone with Protective Surfacing Use Zone with Protective Surfacing CONSUMER INFORMATION SHEET FOR • Use a minimum of 6 inches (15 cm) of protective surfacing for play equipment less than 4 feet (1.2 m) PLAYGROUND SURFACING MATERIALS in height.
-
Page 22: Sélection De La Surface De Protection
• Do not install loose fill surfacing over hard surfaces parmi différents types de surface ; suivez cependant such as concrete or asphalt. les directives suivantes, quel que soit le produit que vous sélectionnez : POURED-IN-PLACE SURFACES OR PRE- MANUFACTURED RUBBER TILE MATÉRIAUX EN VRAC: You may be interested in using surfacing other than •... - Page 23 SURFACES COULÉES EN PLACE OU PAVÉS los golpes en la superficie debajo y alrededor del PRÉFABRIQUÉS EN CAOUTCHOUC juego. El material protector para superficie debe Il peut être intéressant d’utiliser des surfaces autres aplicarse a una profundidad que sea apropiada a que les matériaux en vrac, comme les pavés en la altura del juego según la especificación F 1292 caoutchouc ou des surfaces coulées en place.
- Page 24 • No instale material de relleno suelto sobre superficies duras como hormigón o asfalto. SUPERFICIES MOLDEADAS IN SITU O BALDOSAS DE GOMA PREFABRICADAS Es posible que esté interesado en usar materiales de superficie que no sean de relleno suelto, tales como baldosas de goma o superficies moldeadas in situ.