Publicité
Les langues disponibles
Les langues disponibles
Liens rapides
Publicité

Manuels Connexes pour Oceanic OCEADH20L


Sommaire des Matières pour Oceanic OCEADH20L
- Page 1 Deshumidificateur d’air Guide d’utilisation DEHUMIDIFIER User manual REF : OCEADH20L Page 1 of...
- Page 2 CONSIGNES DE SÉCURITÉ IMPORTANT - À LIRE ET À RESPECTER • Avant d’utiliser l’appareil, lire attentivement les consignes de sécurité. Conservez-les à portée pour consultation ultérieure. • Le présent manuel et l'appareil en question contiennent des consignes de sécurité importantes qui doivent être lues et observées en tout temps. Le Fabricant décline toute responsabilité...
- Page 3 CONSIGNES DE SÉCURITÉ INSTALLATION L'appareil doit être manipulé et installé par au moins deux personnes - vous pourriez vous blesser. Utilisez des gants de protection pour le déballage et l'installation - vous pourriez vous couper. L'installation, y compris les branchements électriques, et les réparations doivent être dans le manuel de l'utilisateur.
- Page 4 CONSIGNES DE SÉCURITÉ NETTOYAGE ET ENTRETIEN : Il convient de s'assurer que l'appareil est coupé et débranché de l'alimentation électrique avant de réaliser une opération de maintenance ; n'utilisez jamais d'équipement de nettoyage à la vapeur - risque de choc électrique. ÉLIMINATION DES MATÉRIAUX D'EMBALLAGE •...
- Page 5 CONSIGNES DE SÉCURITÉ N'utilisez pas de systèmes pour accélérer le processus de décongélation ou pour le nettoyage, autres que ceux recommandés par le fabricant. L'appareil doit être stocké dans une zone bien aérée où la taille de la pièce correspond à fonctionnement).
- Page 6 CONSIGNES DE SÉCURITÉ 6-4 Vérification de la présence de réfrigérant La zone doit être vérifiée avec un détecteur de réfrigérant approprié avant et pendant le travail, afin de s'assurer que le technicien soit conscient des atmosphères potentiellement inflammables. Assurez-vous que l'équipement de détection de fuite utilisé est adapté à l'utilisation avec des réfrigérants inflammables, à...
- Page 7 CONSIGNES DE SÉCURITÉ En cas de panne susceptible de compromettre la sécurité, aucune alimentation électrique ne doit être connectée au circuit tant que la sécurité n'est pas satisfaisante. Si la panne ne peut pas être corrigée immédiatement mais qu'il est nécessaire de poursuivre l'opération, une solution temporaire adéquate doit être utilisée.
- Page 8 CONSIGNES DE SÉCURITÉ 10. Méthodes de détection de fuites Les méthodes de détection de fuites suivantes sont jugées acceptables pour les systèmes - Des détecteurs de fuites électroniques doivent être utilisés pour détecter des réfrigérants recalibrage (l'équipement de détection doit être calibré dans une zone sans réfrigérant). soit adapté...
- Page 9 CONSIGNES DE SÉCURITÉ - Les cylindres doivent être maintenus dans une position appropriée selon les instructions. - Assurez-vous que le système de réfrigération est mis à la terre avant de charger le système avec du réfrigérant. - Étiquetez le système lorsque la charge est complète (si ce n'est pas déjà le cas). - Il convient de faire très attention à...
- Page 10 CONSIGNES DE SÉCURITÉ Lors du transfert du réfrigérant dans des cylindres, assurez-vous que seul des cylindres de récupération appropriés soient utilisés. Assurez-vous que le nombre correct de cylindres pour le maintien de la charge totale du système soit disponible. Tous les cylindres à utiliser sont désignés pour le réfrigérant récupéré...
- Page 11 GUIDE D'INSTALLATION min50cm min20cm à partir de la face arrière min20cm depuis la face avant min20cm 50cm horizontalement de chaque coté entre des vêtements et les sorties d'air 1. Placez l'appareil en position verticale sur une surface stable déshumidi cateur sur un tapis ou sur des objets. Le cas échéant, de et plane pour éviter les fuites.
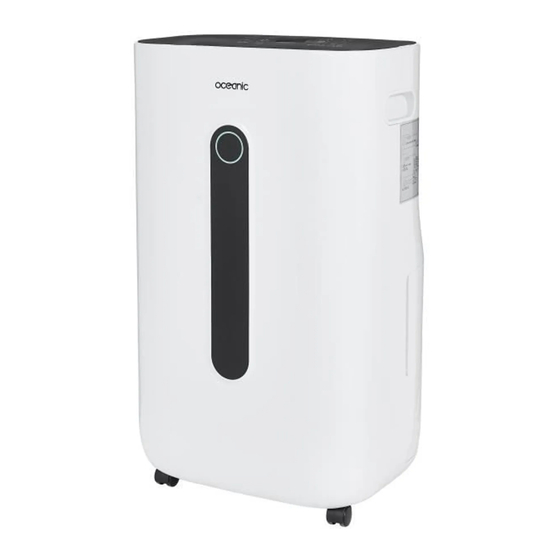
- Page 12 Description du produit 1. Panneau de commande numérique 2. Poignée 3. Entrée d'air 4. Sortie d'air 5. Bac de récupération d 'eau 7. Roulettes 8. Raccord de tuyau de vidange continue 9. Filtre 10. Voyant d'humidité...
- Page 13 Panneau de commande VITESSE VENTILATEUR SÉCURITÉ ENFANT MINUTERIE NUIT MARCHE / VENTILATEUR NIVEAUX MODE D'HUMIDITÉ DÉSHUMIDIFICATION MISE EN VEILLE 11. TOUCHE MARCHE / MISE EN VEILLE 20. Voyant bac de récupération plein Enfoncer pour allumer/éteindre l'unité 21. Voyant dégivrage 12. TOUCHE MODE DÉSHUMIDIFICATION 22.
- Page 14 COMMENT UTILISER L'APPAREIL PREMIÈRE UTILISATION récupérationest plein ou mal inséré, le voyant de plein d'eau Après avoir transporté ou manipulé l'appareil, attendez une heure avant de le brancher à l'alimentation (20), le voyant du bac de récupération plein s'allume et arrête électrique, assurez-vous que l'appareil soit en position l'appareil (lire le paragraphe «...
- Page 15 DESCRIPTIONS DES FONCTIONS FONCTION MINUTERIE FONCTION SÉCURITÉ ENFANT Appuyer sur la touche « MINUTERIE » (17) Enfoncez la touche « SÉCURITÉ ENFANT pour régler la marche/arrêt de la minuterie. Le » (18) pendant trois secondes pour voyant « H verrouiller toutes les commandes. Le voyant SÉCURITÉ...
- Page 16 VIDANGE D'EAU VIDANGE DE L'EAU AVEC LE BAC DE R CUP RATION D'EAU É É Le voyant plein d'eau (20) s'allume lorsque le bac de récupération d'eau est plein. La machine s'arrête automatiquement et le bac de récupération d'eau doit être vidé. 1.
- Page 17 VIDANGE CONTINUE 1. Retirez le bac de récupération 2. Branchez le tuyau de vidange (diamètre 10 mm) à l'ori ce de vidange et assurez-vous qu'il n'y ait pas de fuite d'eau. 3. Assurez-vous que la hauteur du tuyau de vidange ne dépasse la hauteur de l'ori ce de vidange.
- Page 18 NETTOYAGE ET ENTRETIEN NETTOYAGE DU DÉSHUMIDIFICATEUR 1. Éteignez et débranchez l'unité. 3. N'utilisez pas d'essence ou de solvants. 2. Nettoyez l'entrée (3) et la sortie (4) d'air à l'aide d'un 4. Nettoyez la surface avec un chi on doux et chi on doux.
- Page 19 DÉPANNAGE Que faire si... Causes possibles / Solutions Bruit soudain pendant le Bruit quand le compresseur vient d'être allumé. fonctionnement. • La z rop grande. La capacité de votr ateur peut êtr nte. L'humidité ne diminue pas. • Les portes sont ouvertes. •...
- Page 20 SERVICE APRÈS-VENTE Avant de contacter le Service Après-vente : Si des travaux de réparation doivent être réalisés, contactez le Service Après-vente (l'utilisation de pièces 1. Essayez de remédier par vous-même au problème en consultant les descriptions indiquées dans le de rechange d'origine et une réparation correcte sont chapitre «...
- Page 21 SAFETY INSTRUCTIONS IMPORTANT TO BE READ AND OBSERVED • Download the complete instruction manual on docs.whirlpool.eu or call the phone number shown on the warranty booklet. • Before using the appliance, read these safety instructions. Keep them nearby for future reference.
- Page 22 SAFETY INSTRUCTIONS INSTALLATION The appliance must be handled and installed by two or more persons - risk of injury. Use protective gloves to unpack and install - risk of cuts. Installation, including electrical connections, and repairs must be carried out by a qualified technician according to national wiring rules.
- Page 23 SAFETY INSTRUCTIONS CLEANING AND MAINTENANCE WARNING: Ensure that the appliance is switched off and disconnected from the power supply before performing any maintenance operation; never use steam cleaning equipment - risk of electric shock. DISPOSAL OF PACKAGING MATERIALS • The packaging material is 100% recyclable and is marked with the recycle symbol .
- Page 24 SAFETY INSTRUCTIONS Do not use means to accelerate the defrosting process or to clean, other than those recommended by the manufacturer. The appliance shall be stored in a well-ventilated area where the room size corresponds Do not pierce or burn. Be aware that the refrigerants may not contain an odor. A ny person who is involved with working on or breaking into a refrigerant circuit should authorizes their competence to handle refrigerants safely in accordance with an industry by the equipment manufacturer.
- Page 25 SAFETY INSTRUCTIONS 6-5 Presence of fire extinguisher If any hot work is to be conducted on the refrigerating equipment or any associated parts appropriate fire extinguishing equipment shall be available to hand. Have a dry powder or CO2 fire extinguisher adjacent to the charging area. 6-6 No ignition sources No person carrying out work in relation to a refrigerating system which involves exposing any pipe work that contains or has contained flammable refrigerant shall use any sources of...
- Page 26 SAFETY INSTRUCTIONS 7. Repairs to sealed components During repairs to sealed components, all electrical supplies shall be disconnected from the equipment being worked upon prior to any removal of sealed electrical supply to equipment during servicing, then a permanently operating form of leak detection shall be located at the most critical point to warn of a potentially hazardous situation.
- Page 27 SAFETY INSTRUCTIONS - If a leakage of refrigerant is found which requires brazing, all of the refrigerant shall be recovered from the system, or isolated (by means of shut off valves) in a part of the system remote from the leak. 11.
- Page 28 SAFETY INSTRUCTIONS c. Before attempting the procedure ensure that: - Mechanical handling equipment is available, if required, for handling refrigerant cylinders; - All personal protective equipment is available and being used correctly; - The recovery process is supervised at all times by a competent person; - Recovery equipment and cylinders conform to the appropriate standards.
- Page 29 SAFETY INSTRUCTIONS system, it shall be carried out safely. When moving or relocating the air conditioner, consult experienced service technicians for disconnection and reinstallation of the unit. Do not place any other electrical products or household belongings under indoor unit or outdoor unit.
- Page 30 I NSTALLATION GUIDE min50cm min20cm from the back min20cm from the front min20cm from Horizontal distance min 50 the left and right cm between the clothes and the air outlet 1. Place the appliance in the upright position on a stable 11.
- Page 31 Product Description 1. Control Panel and Digital 2. Handle 3. Air Inlet 4. Air Outlet 5. Water Bucket 6. Water Level Display 7. Castor Wheels 8. Continuous Draining Hose Connection 9. Filter 10. Humidity Indicator Light Page...
- Page 32 User Interface FAN SPEED CHILD LOCK SLEEP TIMER HUMIDITY DEHUMIDIFY POWER STAND-BY SETTING MOOE 11. STAND-BY BUTTON 20. Full bucket indicator Press to tur 21. Defrost Indicator 12. DEHUMIDIFY MODE BUTTON 22. Sleep Indicator Used to select the operating mode: Normal, Continuous, Strong, Laundry program.
- Page 33 HOW TO USE THE APPLIANCE FIRST-TIME USE the bucket is full or not inserted properly, the Water After transporting or handling the appliance, wait one Full indicator (20), full bucket indicator lights up and hour, before connecting it to the power supply, make sure that the appliance rests in the upright position, stops the appliance (read the “Water bucket full function”...
- Page 34 FUNTION DESCRIPTIONS TIMER FUNCTION CHILD LOCK FUNCTION Press the “TIMER” button (17) to set the Timer Press and hold the “CHILD LOCK”(18) button on/o . The “Hr”(30) indicator in the LED display for 3seconds to lock all controls. The (19) lights up.
- Page 35 WATER DRAINAGE DRAINING WATER THROUGH THE WATER BUCKET The Water Full indicator(20) lights up when the water bucket is full. The machine stops automatically and the water bucket will have to be emptied. 1. Remove the water bucket Gently pull water bucket out from the back of the dehumidifier.
- Page 36 CONTINUOUS DRAINAGE 1. Remove the buck et 2. Connect the drainage hose (diameter 10mm ) to the drain hole and ensure there is no water leaks out. 3. Ensure the horizontal height of drainage hose should not exceed the height of the drainage outlet.
- Page 37 After cleaning it, leave it to dry at room temperature until all its parts are thoroughly dry. 4. Replac Technical Data Model No: OCEADH20L Power Supply : 220V -240V 50Hz Dehumidity Capacity: 20L/Day(30 /80%)...
- Page 38 TROUBLE SHOOTING What to do if …. Possible reasons / Solutions Noise suddenly occurs during Noise occurs if the compressor has just activated. operation. • The area to be dehumidi ed is too large. Your dehumidi er’s capacity may be inadequate.
- Page 39 Your co-operation is vital to ensure the success of these schemes and for the protection of the environment. OCEANIC 120-126 Quai de Bacalan CS 11584 33000 Bordeaux IMPORTED BY : A.M.C.
- Page 40 Page...