Télécharger Imprimer la page

Publicité

Les langues disponibles

Les langues disponibles

Liens rapides

LUZERN - Radiowecker
10025037 10025038

Publicité

loading

Sommaire des Matières pour oneConcept LUZERN

  • Page 1 LUZERN - Radiowecker 10025037 10025038...
  • Page 2 Sehr geehrter Kunde, zunächst möchten wir Ihnen zum Erwerb Ihres Gerätes gratulieren. Bitte lesen Sie die folgenden Anschluss- und Anwendungshinweise sorgfältig durch und befol- gen Sie diese um möglichen technischen Schäden vorzubeugen. Sicherheitshinweise und Gewährleistung • Diese Bedienungsanleitung dient dazu, Sie mit der Funktionsweise dieses Produktes ver- traut zu machen.
  • Page 3 Technische Daten Artikelnummer 10030493 Anschlüsse SD, USB, AUX (3,5mm) Stromversorgung 220-240V, 50/60Hz Maße 21,5 x 11 x 13cm (BxHxT), ca 1,2kg Lieferumfang Gerät, Fernbedienung, Bedienungsanleitung Übersicht Snooze/Dimmer Play/Pause Lautstärkeregler Modus Standby PROG/STOP Display Sleep Timer Funktion Nächster Track Uhrzeit einstellen Voriger Track...
  • Page 4 Alarm 2 AUX-Anschluss Alarm 1 Netzkabel Batterie USB-Anschluss Antenne SD-Kartenslot Netzschalter IR-Sensor Fernbedienung: Standby Stop Titel zurück Alarm 1 Ordner zurück Modus Funktion Play/Pause Titel vor Alarm 2 Ordner vor PROG...
  • Page 5 Gerätenutzung Allgemein • Mit der Taste „Abspielen/Pausieren“ spielen Sie Musik ab bzw. unterbrechen den Abspiel- vorgang. • Durch Drücken der Tasten „Titelsprung vorwärts“ bzw. „Titelsprung rückwärts“ springen Sie zwischen Titeln hin und her. • Durch Gedrückthalten der Tasten „Titelsprung vorwärts“ bzw. „Titelsprung rückwärts“ spulen Sie innerhalb eines Titels vor und zurück.
  • Page 6 Senderspeicher • Halten Sie die „Programmieren / Stop“-Taste 2-3 Sekunden gedrückt. • Das Display wird nunmehr eine Speicherplatznummer anzeigen, auf die der Sender autot- matisch abgelegt wird. Sie können bis zu 30 Sender speichern. • Im Radiobetrieb können Sie durch drücken der „Programmieren / Stop“-Taste die gespei- cherten Sender auswählen.
  • Page 7 Alarm (Wecker) Einstellen • Versetzen Sie das Gerät in den Standyby-Modus, indem Sie den Standy-Knopf drücken. • Halten Sie den Knopf „Erster Weckalarm“ oder „Zweiter Weckalarm“ 1 Sekunde gedrückt. • Stellen Sie die Weckstunde durch Drücken der Tasten „Titelsprung vorwärts“ bzw. „Titel- sprung rückwärts“...
  • Page 8 Dear Customer, Congratulations on purchasing this product. Please read and follow these instructions, in order to avoid damaging the item. We do not cover any damages that may arise from improper use of the item or the disregard of the safety instructions. Important Safety Advice •...
  • Page 9 Technical Data Item # 10030493 Connections SD, USB, AUX (3.5mm) Power supply 220-240V, 50/60Hz Dimensions 21,5 x 11 x 13cm (BxHxT), approx. 1.2kg In the box Device, RC, user manual Overview Snooze/Dimmer Play/Pause Volume knob Mode Standby PROG/STOP Display Sleep timer Function Skip track Set clock...
  • Page 10 Alarm 2 AUX in (3.5mm) Alarm 1 Mains cable Battery USB slot Antenna SD card slot Power switch IR sensor Fernbedienung: Standby Stop Previous track Alarm 1 Previous folder Mode Function Play/Pause Skip track Alarm 2 Skip folder PROG...
  • Page 11 Operation Basics • Press PLAY/PAUSE to start playing tracks from the USB / SD card. Press again to stop playing USB / SD operation temporarily. Press again to resume playback. • Press SKIP/PREVIOUS to skip to the next track, respectively go back to previous track. Hold for fast forward/fast rewind.
  • Page 12 Manual search • Press SKIP+ or SKIP- button to adjust the FM frequency by steps of 0.05MHz. Automatic Preset Memory • Press and hold PROG./STOP for about 2 seconds to start the automatic preset process. • Display will show the memory sequence number and radio stations will be automatically preset into the sequence number (Note: Each sequence number means 1 preset station while during automatic preset process.) •...
  • Page 13 • Adjust minute by pressing the “SKIP +” or “SKIP -” button, press the “AL 1” or “AL 2” button to confirm. • Press the “SKIP +” or “SKIP -” button to select 1, 2, 3, or 4. • 1 - usb •...
  • Page 14 Cher client, Toutes nos félicitations pour l’acquisition de ce nouvel appareil. Veuillez lire attentivement les instructions suivantes de branchement et d’utilisation afin d’éviter d’éventuels dom- mages. Consignes de sécurité et garantie • Ce mode d’emploi a pour but de vous familiariser avec les fonctionnalités du produit. Conservez-le soigneusement afin de pouvoir vous y référer ultérieurement.
  • Page 15 
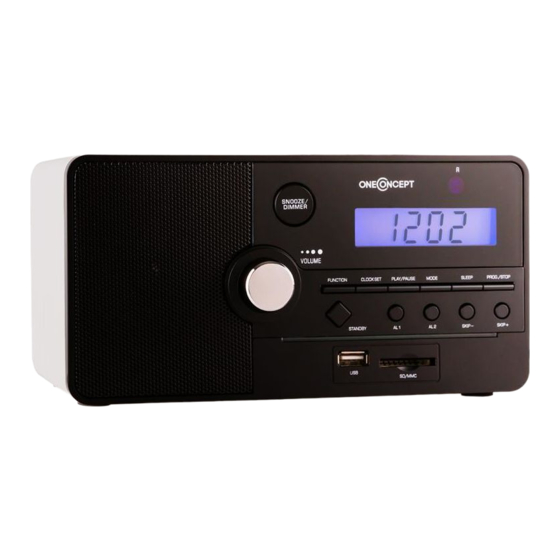
Fiche technique Numéro d’article 10030493 Connectivité SD, USB, AUX (3,5mm) Alimentation 220-240V, 50/60Hz Dimensions 21,5 x 11 x 13cm (LxHxP), ca 1,2kg Livraison Appareil, télécommande, mode d’emploi Übersicht Snooze/Dimmer Play/Pause Réglage du volume Mode Standby PROG/STOP Display Sleep Timer Fonction Piste suivante Réglage de l’heure Piste précédente...
  • Page 16 Alarme 2 Prise AUX Alarme 1 Câble secteur Batterie Port USB Antenne Lecteur de carte SD Interrupteur secteur Capteur IR Télécommande : Standby Stop Titre précédent Alarme 1 Dossier précédent Mode Fonction Play/Pause Titre suivant Alarme 2 Dossier suivant PROG...
  • Page 17 Utilisation de l’appareil Général • Avec la touche „lecture/pause“ vous démarrez la lecture de musique ou la mettez en pause. • En appuyant sur la touche „titre suivant“ ou „titre précédent“ vous passez d’un titre à l’autre en avant ou en arrière. •...
  • Page 18 Mémorisation de stations • Maintenez la touche „Programmer / Stop“ appuyée pendant 2-3 secondes. • L’écran affiche maintenant un numéro de présélection qui sera attribué automatique- ment à la station. Vous pouvez mémoriser jusqu’à 30 stations. • En mode radio et en appuyant sur la touche „Programmer / Stop“, vous pouvez choisir parmi les stations mémorisées.
  • Page 19 Réglage de l’alarme (réveil) • Mettez l’appareil en mode veille en appuyant sur le bouton Standby. • Maintenez appuyé le bouton „Première alarme de réveil“ ou „ deuxième alarme de ré- veil “ pendant une seconde. • Réglez l’heure de réveil en appuyant sur les touches „titre suivant“ ou „titre précédent“ et confirmez en appuyant sur la touche „...

Ce manuel est également adapté pour:

100250371002503810030493