Cristec Battery Monitor JBNUM-CPS3 Manuel D'utilisation
Table des Matières
Les langues disponibles
Les langues disponibles
Liens rapides
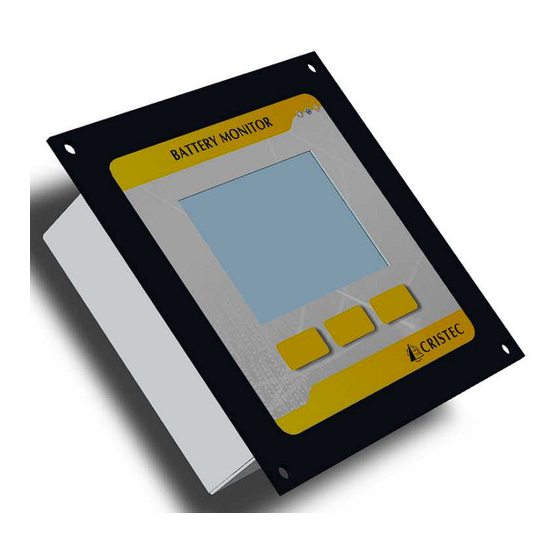
Battery Monitor CBM-01
Manuel d'utilisation
User manual
BATTERY MONITOR JBNUM-CPS3
S.A.S. CRISTEC
31 rue Marcel Paul – ZI Kerdroniou Est
29000 QUIMPER - FRANCE
Tél : 33 (0)2.98.53.80.82
Fax : 33 (0)2.98.55.64.94
e-mail:
info@cristec.fr
http://www.cristec.fr
www.busse-yachtshop.de | info@busse-yachtshop.de
Chapitres
Table des Matières
Dépannage

Sommaire des Matières pour Cristec Battery Monitor JBNUM-CPS3
- Page 1 Battery Monitor CBM-01 Manuel d’utilisation User manual BATTERY MONITOR JBNUM-CPS3 S.A.S. CRISTEC 31 rue Marcel Paul – ZI Kerdroniou Est 29000 QUIMPER - FRANCE Tél : 33 (0)2.98.53.80.82 Fax : 33 (0)2.98.55.64.94 e-mail: info@cristec.fr http://www.cristec.fr www.busse-yachtshop.de | info@busse-yachtshop.de...
- Page 2 Battery Monitor JBNUM-CPS3 www.busse-yachtshop.de | info@busse-yachtshop.de...
- Page 3 Battery Monitor JBNUM-CPS3 Langue / Language Français English www.busse-yachtshop.de | info@busse-yachtshop.de...
-
Page 4: Table Des Matières
Battery Monitor JBNUM-CPS3 Sommaire Précautions Garantie Préparation Vérification des accessoires fournis Installation du JBNUM-CPS3 Câblage du JBNUM- CPS3 DÉCOUVERTE DU FONCTIONNEMENT CONFIGURATION DU JBNUM-CPS3 Réglage général Configuration du type de batteries INITIALISATION HISTORIQUE GUIDE DE DÉPANNAGE SPÉCIFICATIONS Caractéristiques Techniques Déclaration de conformité... -
Page 5: Précautions
- Éviter les températures ambiantes trop élevées. Il est donc important de surveiller l’état de vos batteries par le biais d’un système complet, tel que le Battery Monitor JBNUM-CPS3, afin d’agir en temps utile et ainsi prolonger la durée de vie de vos batteries. - Page 6 Un montage incorrect peut entraîner un mauvais fonctionnement de l’appareil, ou même l’endommager. Il est donc important de suivre correctement l’installation du Battery Monitor JBNUM-CPS3. EN AUCUN CAS L’UTILISATEUR NE DOIT DÉMONTER L’APPAREIL. L’ouverture ou une utilisation non conforme du moniteur entraîne la perte immédiate de la garantie.
-
Page 7: Garantie
Exclusion de garantie La garantie CRISTEC ne couvre pas ses produits dans le cas de défauts survenus lors d’un usage non conforme à la description du manuel d’utilisation ou non décrit par celui- ci, ou de tout autre usage inapproprié. -
Page 8: Préparation
Battery Monitor JBNUM-CPS3 Préparation Vérifications des accessoires fournis Accessoires fournis à l’achat du Battery Monitor JBNUM-CPS3 : - Le moniteur de batteries - Un shunt de mesure 250A / 100mV - Un câble RJ11 de longueur 10 m - Manuel d’utilisation... -
Page 9: Installation Du Jbnum-Cps3
Battery Monitor JBNUM-CPS3 Installation du Battery Monitor JBNUM-CPS3 Faire une découpe dans le pupitre recevant l’afficheur suivant le plan ci-après. (Patron à découper en page 41) Ø 4 Positionner le Battery Monitor dans la découpe. Fixation de la platine sur le pupitre : par 4 vis M3 tête cylindrique + 4 écrous M3 + 4 rondelles plates M3. -
Page 10: Câblage Du Battery Monitor Jbnum-Cps3
Battery Monitor JBNUM-CPS3 Câblage du Battery Monitor JBNUM-CPS3 Déconnecter le chargeur de batterie du réseau d’entrée alternatif et des batteries (aucune tension en entrée et en sortie) Avant toute connexion, positionner le câble RJ11 de 10 m entre l’emplacement de la batterie et l’emplacement du moniteur. - Page 11 Battery Monitor JBNUM-CPS3 Schéma de câblage pour sonde de température STP-10M (en option) : Les sondes de température STP-10M permettant la visualisation de la température de l’environnement des batteries se connectent sur les connecteurs T1 et T2 prévus à cet effet. Le connecteur T1 correspond à la température de la batterie 1 et T2 correspond à...
-
Page 12: Découverte Du Fonctionnement
Découverte du fonctionnement Les informations fournies par l’afficheur ne doivent être utilisées qu’à titre indicatif. La société CRISTEC ne peut en aucun cas être tenue responsable des informations fournies par l’afficheur et se dégage de toute responsabilité concernant l’usage qu’il sera fait de l’afficheur ou des informations affichées. - Page 13 Battery Monitor JBNUM-CPS3 Principe de navigation à l’aide des 3 touches de navigation : Les touches de navigation prennent une fonction différente en fonction du menu dans lequel vous vous trouvez, il suffit de se reporter aux icônes situés en bas de l’écran pour pouvoir connaitre son rôle.
- Page 14 Battery Monitor JBNUM-CPS3 Mise en fonctionnement et utilisation Une fois le Battery Monitor câblé et sous tension, pour allumer le moniteur de batteries, appuyez sur la touche centrale VUE_SIMULT Après le lancement du Battery Monitor, visualisation des trois parcs batteries s’affiche en simultanée.
-
Page 15: Configuration Du Jbnum-Cps3
Battery Monitor JBNUM-CPS3 Configuration du JBNUM-CPS3 Réglage général Pour accéder à la configuration générale du Battery Monitor, lorsque vous êtes sur la vue VUE_SIMULT , appuyez sur la touche centrale pendant 2 secondes. Le menu de configuration apparait à l’écran : VUE_CONFIGBATMONITOR Vous avez donc accès à... - Page 16 Battery Monitor JBNUM-CPS3 Modifications des paramètres : Pour modifier l’un des paramètres, positionner le curseur à l’aide des touches sur le paramètre à modifier, et appuyez sur _OK_. Une fois dans la fenêtre de modification, modifiez la Exemple : Type d’alarme valeur du paramètre en utilisant les touches...
-
Page 17: Configuration Du Type De Batteries
Battery Monitor JBNUM-CPS3 Configuration du type de batteries Pour accéder à la configuration des batteries, lorsque vous êtes sur la vue VUE_SIMULT, accéder à la batterie que vous souhaitez paramétrer comme défini précédemment (par exemple : VUE_BAT1). Exemple : Configuration Batterie 1 Une fois que vous êtes sur la visualisation de... - Page 18 Battery Monitor JBNUM-CPS3 Modifications des paramètres : Pour modifier l’un des paramètres, positionner le curseur à l’aide des touches sur le paramètre à modifier, et appuyez sur _OK_. Une fois dans la fenêtre de modification, Exemple : Capacité batterie modifiez la valeur du paramètre en utilisant les touches Lorsque la valeur souhaitée est sélectionnée, la...
-
Page 19: Initialisation
Battery Monitor JBNUM-CPS3 Initialisation Pour une indication précise de l’état de charge de la batterie, il faut régulièrement réaliser une initialisation du Battery Monitor JBNUM-CPS3 Celle-ci se fait lorsque la batterie est complètement rechargée, et que lorsqu’elle est connectée au chargeur, celui-ci fonctionne en mode «... -
Page 20: Historique
Battery Monitor JBNUM-CPS3 Historique Le Battery Monitor permet aussi la mémorisation des alarmes détectées durant son fonctionnement. Exemple : BATTERY 1- Visualisation de l’historique : Tension Haute Pour y accéder, se positionner sur la visualisation de la batterie souhaitée, et appuyer sur la touche _HISTORY_. -
Page 21: Guide De Dépannage
Battery Monitor JBNUM-CPS3 Guide de dépannage SOLUTION OU SUGGESTION PROBLEME Le Battery Monitor ne - Vérifiez les branchements entre les batteries et le fonctionne pas (pas contrôleur. d’affichage / affichage - Vérifiez que les fusibles (interne au contrôleur et sur bloqué) -
Page 22: Spécifications
Battery Monitor JBNUM-CPS3 Spécifications Caractéristiques Techniques Caractéristiques du Battery Monitor JBNUM-CPS3 Tension d’alimentation : de 8 à 35 V Consommation : Sans éclairage : 23 mA Avec éclairage : 87 mA Mesure : Tension batterie : de 0 à 35 V Courant : de -300 A à... -
Page 23: Déclaration De Conformité
Constructeur : Adresse : 31 rue Marcel Paul – ZI Kerdroniou Est 29000 Quimper/France Déclare que le produit BATTERY MONITOR JBNUM-CPS3 est conforme aux dispositions de la directive 89/336/CEE et aux dispositions de la directive 73/23/CEE. Les normes harmonisées appliquées sont : NF-EN61000-6-1,... -
Page 44: Câblage Complet Du Jbnum-Cps3
Battery Monitor JBNUM-CPS3 CÂBLAGE DU JBNUM-CPS3 / JBNUM-CPS3 CONNECTION BAT3 BAT2 RJ11 BAT1 www.busse-yachtshop.de | info@busse-yachtshop.de... -
Page 45: Découpe Du Panneau Pour Jbnum-Cps3
Battery Monitor JBNUM-CPS3 DÉCOUPE DU PANNEAU / PANEL CUTOUT Trou / Hole : Ø 4 www.busse-yachtshop.de | info@busse-yachtshop.de...