BEA Multifix TC 300 E Mode D'emploi
Liens rapides
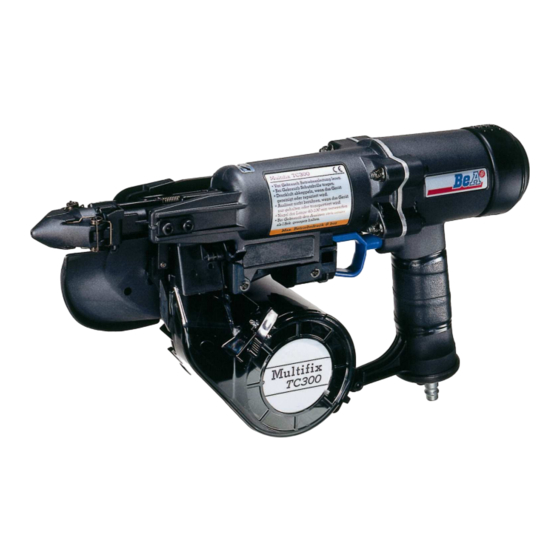
BeA-Multifix- Nagler TC 300 E
[1] Abmessungen: L = 195; H = 385 B = 128 mm;
[2] Gewicht: 2,3 kg.
[3] Zulässiger Luftdruck: 8 bar,
[4] empfohlener Betriebsdruck: 5 - 8 bar.
[5] Luftverbrauch pro Eintreibvorgang bei 6 bar:
4,25 l freie Luft.
[6] Eintreibgegenstand: TC-Nägel ∅ 2,9 bis Ø 4,4
in den Längen von 40 bis 100 mm.
[7] A-bewerteter Einzelereignis-
Schalleistungspegel
[8] A-bewerteterEinzelereignis-
Emission Schalldruckpegel
am Arbeitsplatz
[9] *Vibrationskennwert 2,55 m/s²
[10] Magazinart: Coil-Seitenlader
[11] Ladekapazität: 1 Coil
[12] Luftanschluß: 9 bis 10 mm Nennweite
Diese Ersatzteilliste/Servicehinweise bildet mit
dem
beiliegenden
Benutzer-Handbuch
Betriebsanleitung.
Bitte
vor
aufmerksam
lesen
und
Sicherheitshinweise
unbedingt beachten.
Nagelbeladung
Riegel drücken und die Magazinabdeckung aufklappen.
Bei Nagellängen von 40 - 60 mm muß die
Nagelauflage (A) eingelegt werden. Bei Nagellängen
von 65 - 100 wird die Nagelauflage entfernt. Durch
betätigen des Türriegels (B) öffnet sich die Tür (C). Den
Nagel-Kunststoffstreifen (D) in das Magazin legen und
den ersten Nagel bis in den Treiberkanal schieben. Die
Tür und das Magazin schließen.
Eintreibvorgang
Das Gerät auf das Werkstück fest aufsetzen. Den
Auslöser betätigen. Das Gerät treibt den Nagel in das
Werkstück und schaltet sich dann ab.
Achtung Verletzungsgefahr! Wenn ein Nagel nicht
vollständig eingetrieben ist niemals Gerät noch einmal
aufsetzen. Benutzen sie einen Hammer.
Bei senkrechter Nagelung
Stellhebel (E) an der
Nagelführung in Position (a) stellen. Sollen Nägel
schräg oder versenkt ins Werkstück eingetrieben
werden, Stellhebel in Position (b) stellen.
Tauschen der Kontaktspitze
Gerät von der Pneumatik-Druckquelle trennen. Den
Umschalthebel (F)
drehen und die Nagelführung
herunterziehen.
Nagelführung-Holzverbinder
aufstecken und durch dehen des Umschalthebels
sichern. Auf leichte Funktion prüfen. Achten sie beim
Nageln darauf, daß die Nagelführung in die Bohrung
der Holzverbinder eingeführt ist, bevor sie den
Auslöser betätigen.
Entfernen von verklemmten Nägeln
Gerät von der Pneumatik-Druckquelle trennen. Tür
öffnen und den Nagelstreifen zurückziehen. Mit einem
Dorn den Nagel von unten zurückschlagen oder mit
einem Schraubendreher herausdrücken.
BeA Multifix Nail Driver TC 300 E
This Spare parts list/service instructions and the
enclosed Operator's Manual constitute the
Operating Instructions. Before using read both
and strictly observe safety instructions.
In the German section of the spare parts list the
technical data are listed under codes [ ] (also see User
Manual).
Loading the nails
Press the bar and open the magazine cover. The nail
support (A) must be inserted for nail lengths from 40 to
60 mm. The nail support is removed for nail lengths
from 65 to 100 mm. The door (C) opens when the door
bolt (B) is operated. Place the plastic nail strip (D) into
the magazine and push the first nail into the driver
channel. Close the door and the magazine.
Nail driving operation
Firmly position the nail driver on the workpiece.
Operate the trigger. The machine drives the nail into the
workpiece and then switches off.
Risk of injury! The machine should never be reapplied
if a nail is not driven in fully. A hammer should be used
instead.
For vertical nail driving place the working lever (E) on
the nail guide in position (a). If the nail is to be driven
into the workpiece at an angle or embedded, the lever
should be placed in position (b).
Replacing the contact tip
Disconnect the machine from the pneumatic pressure
source. Turn the two– position lever (F) and pull down
the nail guide. Attach the wood connector bar which is
used in conjunction with the nail guide and secure in
position by turning the two–position lever. Check that it
operates smoothly. When driving in nails, ensure that
the nail guide is inserted in the bore of the wood
connector bars before operating the trigger.
Removing jammed nails
Disconnect the machine from the pneumatic pressure
source. Open the door and pull the nail strip back.
Knock the nail back from underneath using a spike or
push out with a screwdriver.
deutsch
L
= 107 dB
Wa, 1s
L
= 96 dB
pA, 1s
die
Inbetriebnahme
English
Cloueur BeA Multifix TC 300 E
Instructions de montage et entretien
Cette Nomenclature des pièces détachées et
instructions
de
montage
et le
l'utilisateur font partie du Mode d'Emploi. Avant
utilisation
veuillez les lire attentivement.
La
partie
en
langue
allemande
caractéristiques techniques avec des références [ ]
(voir manuel d'instruction).
Chargement du cloueur
Pousser le verrou et ouvrir le couvercle du magazin.
Pour les clous d'une longueur entre 40 et 60 mm,
utiliser le guide-clou (A). Pour les clous d'une longueur
entre 65 et 100 mm retirer le guide-clou. Ouvrir la
porte (C) en actionnant le verrou de la porte (B).
Introduire la bande à clous (D) dans le magazin et
pousser le premier clou dans le conduit d'enfonce.
Refermer la porte et le magazin.
Enfoncement
Appuyer fermement l'appareil sur la pièce à clouer.
Actionner le déclencheur. L'appareil enfonce le clou
dans la pièce et se met à l'arrêt.
Attention, risque de blessure! Au cas où un clou ne
serait pas enfoncé entièrement, ne jamais utiliser
l'appareil une deuxième fois. Utiliser un marteau.
Pour réaliser un enfoncement vertical, mettre le levier
(E) près du guide-clou en position (a). Pour réaliser un
enfoncement oblique, mettre le levier en position (b).
Remplacement de la pointe-contact
Débrancher l'appareil de l'alimentation pneumatique.
Tourner le levier de renversement (F) et baisser le
guide-clou. Appliquer la pièce de connexion bois - guide-
clou
et
verrouiller
en
tournant
renversement. Contrôler le fonctionnement libre.
Pendant l'enfoncement, veiller à ce que le guide-clou
soit bien introduit dans la pièce de connexion bois avant
d'actionner le déclencheur.
Enlèvement de clous coincés
Débrancher l'appareil de l'alimentation pneumatique.
Ouvrir la porte et retirer la bande à clous. Repousser le
clou par le bas à l'aide d'un poinçon ou d'un tournevis .
Clavador BEA-Multifix TC 300 E
Esta
Lista
de
piezas
e
mantenimiento son partes - junto con las
Instrucciones para el operario - de las normas de
trabajo.
Antes
del
utilizo
detenidamente dichas instrucciones y atender las
instrucciones de seguridad.
En la parte alemana de la lista de repuestos figuran
datos técnicos bajo cifras caracteristicas [ ]. (Véase
también el manual de usuario.)
Carga con clavos
Oprimir el cerrojo y destapar la cubierta del cargador.
Para clavos de 40 a 60 mm de largo es preciso colocar
el asiento para clavos (A). Para clavos de 65 a 100 mm
se prescinde de dicho asiento. Accionando el cerrojo de
la puertecilla (B) se abre la puertecilla (C). Colocar la tira
de plástico con clavos (D) en el cargador y empujar el
primer clavo hasta entrarlo en el canal del hincador.
Cerrar la puertecilla y el cargador.
Proceso de hincado
Aplicar el aparato firmemente sobre la pieza a trabajar.
Accionar el disparador. El aparato hinca el clavo en la
pieza, desconectándose a continuación.
Atención, peligro de lesiones: Si un clavo no
estuviera hincado completamente, no se deberá aplicar
jamás otra vez el aparato. Emplee un martillo.
Para hincado vertical, colocar la palanca reguladora (E)
en la conducción de clavos en posición (a). Si los clavos
han de ser hincados en forma oblicua o encastrados,
colocar la palanca reguladora en posición (b).
Cambio de la punta de contacto
Separar el aparato de la fuente de presión neumática.
Girar la palanca de inversión (F) y tirar de la conducción
de clavos hacia abajo. Calzar el ensamblador de
madera para la conducción de clavos y asegurarlo
mediante un giro de la palanca invesora. Verficar su
fácil funcionamiento. Al clavar, cuide que la conducción
de
clavos
está introducida
ensamblador
de
madera
antes
disparador.
Retirar clavos atascados
Separar el aparato de la fuente de presión neumática.
Abrir la puerta y tirar la tira de clavos hacia atrás.
Mediante un mandril, golpear el clavo hacia atrás
desde abajo o apretarlo hacia afuera con un
destornillador.
Sparachiodi BeA Multifix TC 300 E
La Lista ricambi/istruzioni di manutenzione e
l'allegato Manuale per l'utilizzatore costituiscono
le istruzioni per l'uso. Leggere attentamente prima
di
utilizzare
la
fissatrice
assolutamente le norme di sicurezza riportate.
français
Manuel
de
contient
les
le
levier
de
español
instrucciones
de
deben
leerse
en el
taladro
del
de
acionar
el
italiano
e
rispettare

Manuels Connexes pour BEA Multifix TC 300 E


Sommaire des Matières pour BEA Multifix TC 300 E
- Page 1 BeA-Multifix- Nagler TC 300 E Cloueur BeA Multifix TC 300 E [1] Abmessungen: L = 195; H = 385 B = 128 mm; [2] Gewicht: 2,3 kg. Instructions de montage et entretien [3] Zulässiger Luftdruck: 8 bar, Cette Nomenclature des pièces détachées et [4] empfohlener Betriebsdruck: 5 - 8 bar.
- Page 2 Svensk pneumatico. Girare la leva di commutazione (F) e Spikpistol BeA-Multifix TC 300 E abbassare la guida per i chiodi. Inserire il connettore in legno della guida e fissarlo ruotando la leva. Controllare Denna reservdelslista/serviceanvisningar utgör la facilità di funzionamento. Durante la chiodatura, en bruksanvisning i förening med bifogade...
- Page 3 Abdeckungshalter 14500186 32 Verschleißring 14500207 69 Ventilbock 14500232 104 Nagelführung 14503113 Exhaust cover retainer Wear ring Valve support,compl Nail guide Support de Cache Bague d'usure Support soupape,compl Guide du clou Soporte Tapa Desgaste anular Soporte valvula Guia de clavos Abdeckung 14500187 33 Rückschlagventil 14500208...
- Page 4 Nomenclature des piéces détachées et instructions de montage Español Lista de recambios e instrcciones de uso BeA Multifix-Nagler TC 300 E (Art.-Nr. 12100007 ) Type Tipo BeA Gruppe, Bogenstraße 43 - 45, 22926 Ahrensburg/Germany, Telefon +49 (0) 4102 78-0, Telefax +49 (0) 4102 78319 http://www.bea-group.com...