Publicité
Liens rapides
PWM / ATS – Adjusting and Testing Software
Anbauassistent für ECI/EQI 11xx/13xx
Mounting wizard for ECI/EQI 11xx/13xx
Assistant au montage pour l‘ECI/EQI 11xx/13xx
Montageanleitung
Mounting Instructions
Instructions de montage
ECI 1119 EnDat22
EQI 1131 EnDat22
ECI 1319 EnDat22
EQI 1331 EnDat22
1/2015
Publicité

Sommaire des Matières pour HEIDENHAIN ECI 11 Serie
- Page 1 Montageanleitung PWM / ATS – Adjusting and Testing Software Mounting Instructions Instructions de montage ECI 1119 EnDat22 EQI 1131 EnDat22 ECI 1319 EnDat22 Anbauassistent für ECI/EQI 11xx/13xx Mounting wizard for ECI/EQI 11xx/13xx EQI 1331 EnDat22 Assistant au montage pour l‘ECI/EQI 11xx/13xx 1/2015...
- Page 2 Weitere Informationen siehe Betriebsanleitung ATS-Software. For more information, refer to the ATS software operating instructions. ID 543734 Pour plus d’informations, se reporter au Guide d’utilisation du logiciel ATS. Weitere Informationen über die Montage des Messgerätes siehe ExI 11xx: Montageanleitung. ID 1082414 ID 1126437 For more information about mounting the encoder, refer to the mounting instructions.
- Page 3 Warnhinweise Warnings Recommandtions Achtung: Die Montage und Inbetriebnahme ist von einer qualifizierten Fachkraft unter Beachtung der örtlichen Sicherheitsvorschriften vorzunehmen. Die Steckverbindung darf nur spannungsfrei verbunden oder gelöst werden. Note: Mounting and commissioning is to be conducted by a qualified specialist under compliance with local safety regulations.
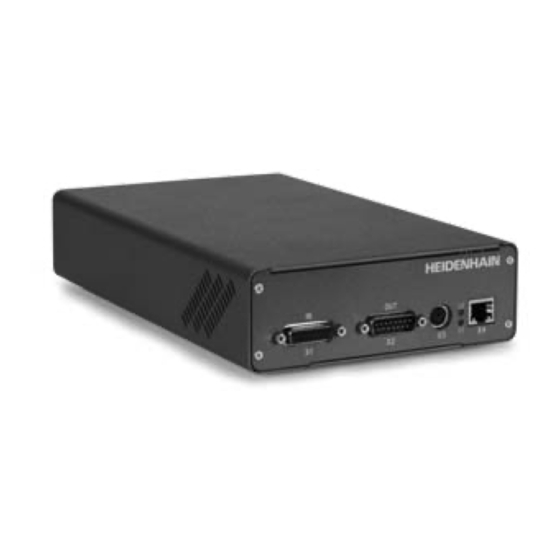
- Page 4 Also available for downloading free of charge from the software download area on the HEIDENHAIN homepage. HEIDENHAIN propose le PWM 20 pour le contrôle du montage. Il se compose des éléments suivants : € PWM 20 € Logiciel pour réglage et test (ATS) – version 2.6.04 et plus, avec banque de données pour la reconnaissance automatique du système de mesure.
- Page 5 Die Anbau-Überprüfung muss bei einer gleichmäßigen Durchwärmung aller Komponenten im Temperaturbereich von 23 °C ± 10 °C durchgeführt werden. The mounting is to be inspected with evenly distributed temperature of all components in the temperature range of 23 °C ± 10 °C. Le contrôle du montage doit être effectué...
- Page 6 Eingabe der Geräte-ID-Nummer. Bei Annahme der ID-Nummer weiter mit Punkt 7. Enter the encoder ID number. If the ID number is accepted, continue with Step 7. Introduction du numéro ID de l’appareil. Après la validation du numéro ID, suite avec le point 7. *) Spannungsversorgung nicht von Folge-Elektronik verwenden.
- Page 7 Manuelle Einstellung der Geräteparameter. Manual setting of the encoder parameters. Réglage manuel des paramètres du système de mesure. Warnhinweise beachten. Observe the warnings. Attention au message d’avertissement. Click...
- Page 8 Auf Einstellung 5 V und EnDat achten. Spannung über Sensorleitung nicht nachregeln. Check the 5 V and EnDat settings. Do not adjust the voltage over the sensor line. Attention au réglage 5 V et EnDat. Ne pas réguler la tension via la liaison sensor.
- Page 9 Click...
- Page 10 Vor Anschluss des Messgerätes, Messgerätedaten überprüfen. € Messgeräte-Schnittstelle: EnDat € Versorgungspannung [V]: € Spannung nachregeln: Nein Achtung: Das Einstellen falscher Daten kann das Messgerät, die Schnittstellenkarte oder den PC beschädigen. Before attaching the encoder, check the encoder data. € Encoder interface: EnDat €...
- Page 11 Click...
- Page 12 Click: Mounting check Rotes Symbol bedeutet: Versorgungsspannung liegt am Messgerät an. Red symbol indicates that the encoder is under power. Symbole rouge signifie: tension d’alimentation présente au système de mesure.
- Page 13 Warnhinweise beachten! Observe the warnings! Attention au message d’avertissement! Click...
- Page 14 Start der Anbau-Überprüfung. Start of the mounting inspection. Début du contrôle du montage.
- Page 15 Click...
- Page 16 scanning Rücksetzen der Min.-Max.- Werte (Optional) Anzeigen von Status Informationen (Optional) Reset the min.-max. values (optional) Display of status information (optional) Réinitialiser les valeurs Min et Max (en option) Afficher les informations d’état (en option)
- Page 17 Wenn der Wert von 100 unterschritten wird, Anbautoleranzen überprüfen If the value falls below 100, check the mounting tolerances scanning Vérifier les tolérances de montage si la valeur est inférieure à 100 ExI 11xx ExI 13xx *) 1 mm *) 2 mm Direkte Anzeige des Anbaumaßes, Sollwert *) Direct display of the mounting clearance.
- Page 18 Nicht relevant für Anbau-Überprüfung Not relevant for mounting inspection Non pertinent pour le contrôle du montage Speichern von Anbau-Messwerten in Setzen/Aufheben der Kundenspezifischen Nullpunktverschiebung (Optional) Setting/canceling the customer-specific datum shift (optional) eine Datei (Optional) Définir/supprimer le décalage de point zéro spécifique au client (en option) Mounting measured values are written to a file (optional) Sauvegarder les valeurs de mesure de...
- Page 19 Click Anbau-Überprüfung beenden und Rücksprung in das Hauptmenü, oder weitere Messgeräte prüfen End the mounting inspection and return to the main menu, or inspect further encoders Terminer le contrôle du montage et revenir dans le menu principal ou vérifier d’autres systèmes de mesure...
- Page 20 DR. JOHANNES HEIDENHAIN GmbH Dr.-Johannes-Heidenhain-Straße 5 83301 Traunreut, Germany { +49 8669 31-0 | +49 8669 5061 E-mail: info@heidenhain.de Technical support | +49 8669 32-1000 Measuring systems { +49 8669 31-3104 E-mail: service.ms-support@heidenhain.de TNC support { +49 8669 31-3101 E-mail: service.nc-support@heidenhain.de...
