Table des Matières
Publicité
Les langues disponibles
Les langues disponibles
Liens rapides
Children have died or been seriously injured when gates are not securely installed.
• ALWAYS install and use gate as directed, using all required parts.
• Install according to manufacturer' s instructions.
• STOP using when a child can climb over or dislodge the gate.
• Use only with the locking/latching mechanism securely engaged.
• NEVER use a gate to keep child away from pool.
• NEVER leave child unattended.
• ALWAYS close and lock the gate behind you.
• This product will not necessarily prevent all accidents. Proper adult supervision is
required at all times.
• Do not use if any components are missing or damaged.
• Adult assembly required.
• Exercise care when unpacking and assembling product.
• Intended for use with children from 6 months through 24 months.
• Do not mount to spindles less than 2 in. in diameter.
• Check daily that banister brackets are securely attached and gate is securely
anchored to banisters and/or wall.
WARNING
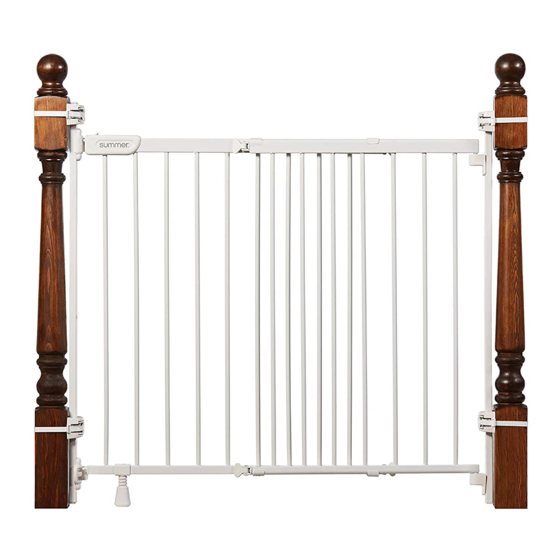
BANISTER & STAIR METAL GATE
WITH DUAL INSTALLATION KIT
INSTRUCTION MANUAL
Please read the following instructions
For technical support contact us at 1-401-671-6551 or
www.summerinfant.com/contact.
Tools required: Phillips head screwdriver
For use with children from 6 to 24 months.
Keep small parts away from children.
Summer Infant (USA), Inc.
1275 Park East Drive
Woonsocket, RI 02895 USA
1-401-671-6551
© 2019 Summer Infant (USA), Inc.
27903Z
and warnings carefully.
Keep this instruction manual
and save for future reference.
and drill (neither included).
Adult assembly required.
Colors and styles may vary.
MADE IN CHINA.
6/19
Publicité
Table des Matières

Sommaire des Matières pour Summer 27903Z
- Page 1 • Do not mount to spindles less than 2 in. in diameter. Woonsocket, RI 02895 USA Colors and styles may vary. • Check daily that banister brackets are securely attached and gate is securely 1-401-671-6551 MADE IN CHINA. anchored to banisters and/or wall. © 2019 Summer Infant (USA), Inc. 6/19...
- Page 2 components: Tools required (not included) Phillips head Screwdriver WALL MOUNT OPTION ONLY: Drill with 7/32” drill bit WOOD MOUNT OPTION ONLY: Pre-drill with 1/8” drill bit hardware: Top catch Bottom catch Support Foot screw components Left Gate Mount Support Foot Right Gate Mount Gate Extra foam pads (4)
- Page 3 Gate ts openings 31” to 46” (79cm to 117 cm) Hinge Assembly IMPORTANT: Place the gate on top landing at a distance of 2 in. from the edge of top stair or the furthest it can be placed based on the size and locations of your banisters.
- Page 4 1. Hinge Assembly CHOOSE WHICH OF THE TWO OPTIONS WITHIN THE HINGE ASSEMBLY SECTION BEST FITS YOUR NEEDS. Option A: Square Top Banister (No drilling necessary) Tab goes over the metal Straps go through slots on both sides of latch IMPORTANT NOTE: There are extra mounting pads provided to stick to...
-
Page 5: Wall Mount
1. Hinge Assembly Option B: Wall Mount wallboard wood wall Pre drill holes using 7/32” (5.5mm) drill bit. Use pre-existing holes in your banister bracket as your guide. Insert Wall Anchors into the hole with a hammer, tap gently Pre-drill a hole using a on end until the Wall 1/8”... -
Page 6: Important
2. Gate Assembly - Wall IMPORTANT: At the top of the landing, position the gate a minimum of 3-6 inches (8-15cm) away from the top step. IMPORTANT: The Gate should never open over the stairs. The protrusion on the latch will prevent the gate from swinging both ways. - Page 7 2. Gate Assembly - Banister IMPORTANT: At the top of the landing, position the gate a minimum of 3-6 inches (8-15cm) away from the top step. IMPORTANT: The Gate should never open over the stairs. The protrusion on the latch will prevent the gate from swinging both ways.
- Page 8 Latch Assembly is identical to Hinge 3. Latch Assembly (cont.) Assembly. Choose which of the two options best ts your needs. Banister Square Top Wall Mounted Banister SAFETY WARNING If installing gate at top of stairs, DO NOT mount into wallboard. IMPORTANT NOTE: When mounting into any wood (molding),...
-
Page 9: Barrière De Sécurité En Métal Pour Escaliers Et Balustrade Avec Double Trousse D'installation
Canada, L6W 4T5 • Véri er tous les jours que les supports de la balustrade sont bien xés et que la barrière est 1-905-456-8484 FABRIQUÉ EN CHINE. fermement ancrée aux balustrades ou au mur. © 2019 Summer Infant (USA), Inc. 6/19... - Page 10 composants : Outils nécessaires (non fournis) Tournevis cruciforme OPTION DE FIXATION MURALE UNIQUEMENT : Percer avec une mèche de 5,5 mm (7/32 po) OPTION DE FIXATION À DU BOIS UNIQUEMENT : Percer au préalable avec une mèche de 3,2 mm (1/8 po) matériel de xation : Loquet...
- Page 11 La barrière s’adapte aux ouvertures de 79 à 117 cm (31 à 46 po) Montage de la charnière IMPORTANT : Placer la barrière au sommet du palier à une distance de 5,08 cm (2 po) du bord de la marche supérieure ou le plus loin qu’elle puisse être fixée selon la taille et l’emplacement des balustrades.
-
Page 12: Montage De La Charnière
1. Montage de la charnière CHOISIR L’OPTION LA PLUS ADAPTÉE DANS LA RUBRIQUE DE MONTAGE DE LA CHARNIÈRE. Option A : Balustrade à poteau carré (perçage non requis) Onglet passe au-dessus du métal Les sangles passent dans les fentes des deux côtés du loquet Veiller à... -
Page 13: Montage Mural
1. Montage de la charnière Option B : Montage mural panneau mural mur en bois Percer un trou au préalable avec une mèche de 5,5 mm (7/32 po). Se servir des trous existants dans le montant de la balustrade comme Percer un trou guide. - Page 14 2. Montage de la barrière - Mur IMPORTANT: Au sommet du palier, installer la barrière à un minimum de 8 Ajouter les à 15 cm (3 à 6 po) de la rondelles en marche supérieure. plastique (pièce Q) aux boulons des charnières supérieures et Déverrouiller les 4...
- Page 15 2. Montage de la barrière - Balustrade IMPORTANT: Au sommet du palier, installer la barrière à un minimum de 8 à 15 cm (3 à 6 po) de la marche supérieure. haut IMPORTANT: La barrière ne doit jamais s’ouvrir dans la direction des escaliers.
- Page 16 2. Montage du loquet Le montage du loquet est identique Balustrade au montage de la charnière. Choisir l’option la plus adaptée selon le cas. haut MISES EN Fixation Balustrade à GARDE poteau carré murale Si la barrière est montée en haut d’un escalier, NE PAS la xer à...