Publicité

Les langues disponibles
  • FR

Les langues disponibles

Liens rapides

INSTRUCTIONS MANUAL
MANUAL DE INSTRUCCIONES
MANUEL D'INSTRUCTIONS
BEDIENUNGSANLEITUNG
MANUALE D'ISTRUZIONE

Publicité

Table des Matières
loading

Sommaire des Matières pour Taurus Mycook 1.8

  • Page 1 INSTRUCTIONS MANUAL MANUAL DE INSTRUCCIONES MANUEL D’INSTRUCTIONS BEDIENUNGSANLEITUNG MANUALE D’ISTRUZIONE...
  • Page 3: Safety Advice And Warnings

    ENGLISH Dear customer, Many thanks for choosing to purchase a TAURUS brand product. Thanks to its technology, design and operation and the fact that it exceeds the strictest quality standards, a fully satisfactory use and long product life can be assured.
  • Page 4 ENGLISH • After its use, disconnect the appliance; do not trust the container’s detector. • Disconnect the appliance and unplug the mains if you lea- ve it unattended and before changing the accessories or nearby moving parts, assembling, dismantling or cleaning. •...
  • Page 5 ENGLISH • Take the necessary measures to avoid starting the appliance involuntarily. • Do not touch any of the appliance’s moving parts while it is operating. • Do not use the appliance if you have medical implants (such as a cardiac pacemaker, etc.).
  • Page 6 ENGLISH Description and accessories Accessories Central unit Jug stand with attachment clamp Blade gasket Blades Lid gasket (black) Jar lid Measuring jug Mixing paddle Spatula...
  • Page 7 ENGLISH For space-saving purposes, the appliance comes packed with the jug positioned in a non-operational position. To remove the jug from the central unit: Take it by the handle, turn it clockwise until it stops, and lift upwards (Figure 2). Figure 2 Measuring jug (Figure 3)
  • Page 8 ENGLISH CAUTION. Never open the jug lid when the appliance is running to prevent the risk of overflowing and / or burns. Before opening the jug lid, stop the Mycook and wait a few seconds until the blades have come to a complete stop. This thick side of the gasket must be assembled Figure 7 in contact with the lid.
  • Page 9 ENGLISH CAUTION. For safety reasons, the lid of the jug cannot be re- moved or fitted when secured in the central unit. Do not use force as this could damage part of the safety element. The jug must be first removed from the central Figure 12 unit by turning it clockwise until it stops, with the jug base arrow lined up with the central unit...
  • Page 10 ENGLISH To insert the blades into the jug: 1. Place the blades into the jug fitting, being careful not to cut yourself (Figure 19). 2. Turn the jug, securing the blades in the fitting with your hand (Figure 20). 3. Fit the jug stand (with attachment clamp in the open position) onto the blade and the three pivots of the jug base (Figure 21).
  • Page 11 ENGLISH CAUTION. Never insert the spatula through the centre hole of the lid, if you are using the mixing paddle that comes with the blades. (Figure 24). Never use any utensil other than the spatula as this could be dangerous. (Figure 25). Figure 23 Mixing paddle (Figure 26)
  • Page 12 ENGLISH Instructions for use Control panel Digital screen Time selector control LED display to indicate kneading function activated Kneading key TURBO speed key LED temperature display Temperature selector control LED speed display Speed selector control Central Unit Ventilation grill Jug pad sensor Blade tow Power supply cable Stop/start switch...
  • Page 13 ENGLISH Place the appliance on a flat, stable surface that can withstand high temperatures, located at a safe dis- tance from other sources of heat or possible water splashes. ON / OFF Do not cover or obstruct the ventilation grills located SWITCH at the rear of the appliance.
  • Page 14 ENGLISH Activation scale: • From 0 to 1 minute: Counted in seconds. 00 30 • From 1 to 10 minutes: Counted in 30 second intervals. • From 10 to 90 minutes: Count in minutes. Turning the control quickly allows a faster selection. Figure 32 Kneading key (Figure 33)
  • Page 15 ENGLISH If working with hot mode: For safety reasons and in order to prevent splashes the “TURBO speed” pro- gressively speeds up and operates while the key is 00 28 held down. THE TURBO FUNCTION CANNOT BE ACTIVATED IN SPEEDS 1, 2 OR 3. The Turbo function is faster and more powerful and is ideal for shredding hard or large quantities of food.
  • Page 16 ENGLISH CAUTION. Always stop the machine using the speed selec- tor control. Wait a few seconds until the blades 88 28 have come to a complete stop before opening the jug lid. Never open the jug lid when the appliance is run- ning, due to the risk of overflowing and /or burns.
  • Page 17: Stand-By Function

    ENGLISH Stand-by function In versions with the standby or prepared mode for the BEEP! purpose of energy saving, the appliance will go into 00 00 power saving mode after a few minutes if left untou- ched in this time period. The Stby. symbol will be dis- played on the screen.
  • Page 18: Problems And Solutions

    ENGLISH • Do not place the jug in the dishwasher without first removing the blades. • Clean the jug with hot water containing a mild de- tergent. • You can clean the inside of the jug and blades by filling the jug halfway with water and selecting the hot or cold mode TURBO speed.
  • Page 19: Environment And Recycling

    ENGLISH PROBLEM REPAIR Do not start up Check that it is connected to the power supply. Check that the general switched is in the “ON” position. Check that the lid and the jug are properly fitted. Do not heat Check that the following steps have been followed: Time selection.
  • Page 20: Consejos Y Advertencias De Seguridad

    Distinguido cliente: Le agradecemos que se haya decidido por la compra de un electrodoméstico de la marca Taurus. Su tecnología, diseño y funcionalidad, junto con el hecho de superar las más estrictas normas de calidad le comportarán total satisfacción durante mucho tiempo.
  • Page 21 ESPAÑOL • Este aparato pueden utilizarlo personas con capacidades físicas, sensoriales o mentales reducidas o falta de expe- riencia y conocimiento, si se les ha dado la supervisión o formación apropiadas respecto al uso del aparato de una manera segura y comprenden los peligros que implica. •...
  • Page 22 ESPAÑOL • Antes de conectar el aparato a la red, verificar que el voltaje indicado en la placa de características coincide con el voltaje de red. • Conectar el aparato a una base provista de toma de tierra y que soporte 16 amperios. •...
  • Page 23 ESPAÑOL • Comprobar que la tapa esté perfectamente cerrada antes de poner en marcha el aparato. • No retirar la tapa mientras el líquido que contiene el recipiente esté hirviendo. • Usar siempre el aparato bajo vigilancia. • Toda utilización inadecuada, o en desacuerdo con las instrucciones de uso, puede com- portar peligro, anulando la garantía y la responsabilidad del fabricante.
  • Page 24 ESPAÑOL Descripción y accesorios Accesorios Unidad central Soporte jarra con brida de fijación cuchillas Jarra Junta cuchillas Cuchillas Junta tapa (negra) Tapa jarra Vaso dosificador Paleta mezcladora Espátula...
  • Page 25 ESPAÑOL Para ahorrar espacio, el aparato viene embalado con la jarra colocada en una posición que no es la de funcionamiento. Para sacar la jarra de la unidad central: Cogerla por el asa, girarla en sentido horario hasta el tope y levantarla (Dibujo 2).
  • Page 26 ESPAÑOL IMPORTANTE. No utilizar nunca la tapa sin la junta correcta- mente montada. (Dibujos 6 y 7). Tapa IMPORTANTE. Dibujo 7 No abrir nunca la tapa de la jarra, cuando el apa- Este lado grueso de la junta debe estar rato este funcionando, ya que existe peligro de montado en contacto con la tapa.
  • Page 27 ESPAÑOL Para desacoplar la jarra: Coger la jarra por el asa y girar en sentido horario hasta el tope (coinciden las dos flechas) y levantarla (Dibujo 13). IMPORTANTE. Dibujo 12 Por seguridad, la jarra no se puede tapar ni des- tapar cuando está...
  • Page 28 ESPAÑOL Para sacar las cuchillas de la jarra: 1. Desplazar la brida fijación cuchillas 180º a posi- ción abierto y tirar del soporte jarra, tal como indican las flechas. (Dibujos 17 y 18). 2. Sacar las cuchillas de la jarra con cuidado de no cortarse (Dibujo 19).
  • Page 29: Paleta Mezcladora

    ESPAÑOL IMPORTANTE. No introducir nunca la espátula por el orificio central de la tapa, si se está trabajando con la paleta mezcladora incorporada en las cuchillas. (Dibujo 24). No utilizar nunca otros utensilios en sustitución de la espátula. Puede ser peligroso. (Dibujo 25). Dibujo 23 Paleta mezcladora (Dibujo 26)
  • Page 30: Modo De Empleo

    ESPAÑOL Modo de empleo Panel de control Pantalla digital Mando selector de Tiempo Indicador luminoso de función Amasado activada Tecla de Amasado Tecla de Velocidad TURBO Indicadores LED de temperatura Mando selector temperatura Indicadores LED de velocidad Mando selector de Velocidad Unidad central Rejilla de ventilación Sensores presencia de jarra...
  • Page 31: Pantalla Digital

    ESPAÑOL Situar el aparato sobre una superficie plana, estable y apta para soportar altas temperaturas, alejada de otras fuentes de calor y de posibles salpicaduras de agua. INTERRUPTOR No cubrir ni obstruir las rejillas de ventilación situa- MARCHA / PARO das en la parte posterior del aparato.
  • Page 32 ESPAÑOL Escala de activación: • De 0 hasta 1 minuto: Cuenta segundo a segundo. 00 30 • De 1 minuto hasta 10 minutos: De 30 segundos en 30 segundos. • De 10 minutos hasta 90 minutos: De minuto en minuto. Girando el mando rápidamente la selección se hace más rápida.
  • Page 33 ESPAÑOL Si se trabaja en caliente: Por seguridad y a fin de evitar salpicaduras, la velocidad “TURBO” se incre- menta de una manera progresiva y funciona mientras 00 28 se mantenga la tecla presionada. NO ES POSIBLE ACTIVAR LA FUNCIÓN TURBO EN LAS VELOCIDADES 1, 2 Y 3.
  • Page 34 ESPAÑOL Para parar: Girar el mando selector de velocidad hacia la izquier- da hasta que se apaguen los indicadores luminosos 88 28 de la velocidad. IMPORTANTE. Parar siempre la máquina por el mando selector de velocidades. Antes de abrir la tapa de la jarra esperar unos segundos hasta que las cuchillas hayan quedado completamente en reposo.
  • Page 35: Función Stand-By

    ESPAÑOL Si no va a utilizar el aparato durante un tiempo: 1. Parar el aparato, accionando el interruptor mar- BEEP! cha/paro. 00 00 2. Desenchufar el aparato de la red eléctrica. Función Stand-by En versiones con stand-by o modo preparado, con finalidad del ahorro energético el aparato pasa a un estado de bajo consumo al cabo de unos pocos minu- tos, si durante este periodo el usuario no ha realizado...
  • Page 36: Anomalías Y Resolución

    ESPAÑOL • Limpiar las cuchillas con un cepillo y debajo del agua del grifo de modo que el contacto con el agua solo se realice por la parte superior de las cuchillas (Dibujo 45). IMPORTANTE. No sumergir nunca las cuchillas en agua, ni lavar Dibujo 45 en el lavavajillas, ya que si entra agua en su inte- rior se estropea su mecanismo interno.
  • Page 37: Características Técnicas

    ESPAÑOL ANOMALIA MENSAJE REPARACION La pantalla digital Posible sobrecorriente del motor. presenta: Quitar alimentos de la jarra. Err 4 La pantalla digital Posible sobrecalentamiento del motor. presenta: Dejar enfriar el aparato. Err 5 La pantalla digital Desconectar / conectar de la red eléctrica. Si continúa presenta: dando error, anotar el número y llevar el aparato a un Err 1, 2, 3, 6, 7, 10...
  • Page 38: Conseils Et Mesures De Sécurité

    FRANÇAIS Cher Client, Nous vous remercions d’avoir choisi d’acheter un appareil ménager de la marque TAU- RUS. Sa technologie, son design et sa fonctionnalité, s’ajoutant au fait qu’elle répond amplement aux normes de qualité les plus strictes, vous permettront d’en tirer une longue et durable satisfaction.
  • Page 39 FRANÇAIS • Cet appareil peut être utilisé par des personnes dont les capacités physiques, sensorielles ou mentales sont rédui- tes ou des personnes dénuées d’expérience concernant son utilisation, et ce, sous surveillance ou après avoir reçu les instructions pour un maniement sûr de l’appareil et de bien avoir compris les risques qu’il implique.
  • Page 40 FRANÇAIS • Avant de raccorder l’appareil au secteur, s’assurer que le voltage indiqué sur la plaque signalétique correspond à celui du secteur. • Raccorder l’appareil à une prise pourvue d’une fiche de terre et supportant au moins 16 ampères. • La prise de courant de l’appareil doit coïncider avec la base électrique de la prise de courant.
  • Page 41 FRANÇAIS • Pour un fonctionnement correct, maintenir la base de la carafe et le capteur de tempéra- ture de la carafe, propres (Figure 1). • Vérifier périodiquement le parfait état d’usage du joint du couvercle. • Vérifier que le couvercle est parfaitement fermé avant de mettre en marche l’appareil. •...
  • Page 42: Description Et Accessoires

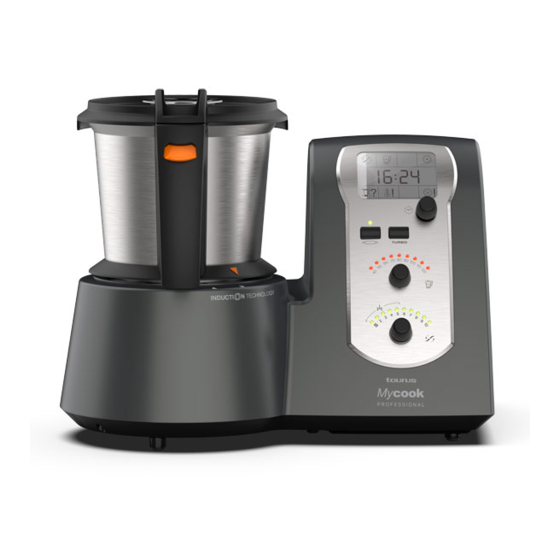
    FRANÇAIS Description et accessoires Accessoires Unité centrale Support carafe avec bride de fixation des lames Carafe Joint lames Lames Joint couvercle (noir) Couvercle carafe Verre doseur Palette de mélange Spatule...
  • Page 43: Verre Doseur

    FRANÇAIS Pour économiser de l’espace, l’appareil est emballé avec la carafe placée dans une position qui n’est pas celle de fonctionnement Pour retirer la carafe de l’unité centrale : La prendre par la poignée, la tourner dans le sens horaire jusqu’à la butée et la retirer (Image 2).
  • Page 44 FRANÇAIS IMPORTANT. Ne jamais utiliser le couvercle sans le joint co- rrectement installé. (Images 6 et 7). Couvercle IMPORTANT. Image 7 Ne jamais ouvrir le couvercle de la carafe lorsque (1) Ce côté épais du joint doit être en con- l’appareil sera en marche, car il existe un danger tact avec le couvercle.
  • Page 45: Support Carafe Avec Bride De Fixation Des Lames

    FRANÇAIS Pour désaccoupler la carafe : Prendre la carafe par la poignée et la tourner dans le sens des aiguilles d’une montre jusqu’à la butée (les deux flèches coïncident) et la retirer (Image 13). IMPORTANT. Image 12 Par mesure de sécurité, on ne peut ni ouvrir ni fermer la carafe lorsqu’elle est accouplée à...
  • Page 46 FRANÇAIS Pour retirer les lames de la carafe : 1. Déplacer 180º la bride de fixation des lames sur la position ouverte et tirer du support carafe, comme les flèches l’indiquent . (Images 17 et 18). 2. Retirer les lames de la carafe en prenant soin de ne pas se couper (Image 19).
  • Page 47: Ne Jamais Introduire La Spatule À Travers

    FRANÇAIS IMPORTANT. Ne jamais introduire la spatule à travers l’ouverture centrale du couvercle, si l’on travaille avec le fouet incorporé dans les lames (Image 24). Ne jamais utiliser d’autres ustensiles pour subs- tituer la spatule. Cela pourrait être dangereux. (Image 25). Image 23 Palette de mélange (Image 26)
  • Page 48 FRANÇAIS Mode d’emploi Tableau de commande Écran LCD Sélecteur de temps Indicateur lumineux fonction pétrissage activée Touche pétrissage Touche de vitesse TURBO Indicateurs lumineux de température Sélecteur de température Indicateurs lumineux de vitesse Sélecteur de vitesse Unité centrale Grille de ventilation Capteurs de présence de carafe Extracteur de lames Câble électrique de connexion...
  • Page 49: Écran Lcd

    FRANÇAIS Placer l’appareil sur une surface plane, stable et pou- vant supporter des températures élevées, éloignée d’autres sources de chaleur et des possibles écla- boussures d’eau. Ne pas couvrir, ni obstruer les grilles de ventilation INTERRUPTEUR situées à l’arrière de l’appareil. MARCHE / ARRÊT Image 29 Brancher l’appareil au secteur.
  • Page 50: Touche Pétrissage

    FRANÇAIS Échelle d’activation : • De 0 à 1 minute : Compte seconde à seconde. 00 30 • De 1 à 10 minutes : De 30 secondes en 30 secondes. • De 10 minutes à 90 minutes : De minute en minute. En tournant rapidement la commande, la sélection se réalise plus rapidement.
  • Page 51: Comment Travailler À Chaud

    FRANÇAIS Si l’on travaille à chaud : Par sécurité et afin d’éviter les éclaboussures, la vitesse « TURBO » augmente progressivement et fonctionne tant que l’on maintient 00 28 la touche appuyée. IL EST IMPOSSIBLE D’ACTIVER LA FONCTION TURBO POUR LES VITESSES 1, 2 ET 3. La fonction turbo est la plus rapide et puissante et est parfaite pour broyer des aliments durs ou en grande quantité.
  • Page 52 FRANÇAIS Pour arrêter : Tourner le sélecteur de vitesse vers la gauche jusqu’à ce que les indicateurs lumineux de vitesse s’éteignent. 88 28 IMPORTANT. Toujours utiliser la commande de vitesses pour arrêter la machine. Avant de soulever le couvercle de la carafe, attendre quelques secondes jusqu’à ce que les lames se trouvent sur la position repos.
  • Page 53: Fonction Stand-By

    FRANÇAIS Si vous n’utilisez pas l’appareil pendant un cer- tain temps : BEEP! 1. Arrêter l’appareil en appuyant sur l’interrupteur de 00 00 marche/arrêt. 2. Débrancher l’appareil du secteur. Fonction Stand-by Pour les modèles avec stand-by ou mode préparé : dans le but d’économiser de l’énergie, l’appareil pas- se à...
  • Page 54: Écologie Et Recyclage

    FRANÇAIS de telle sorte que le contact avec l’eau se réalise seu- lement sur le côté supérieur des lames (Image 45). IMPORTANT. Ne jamais submerger les lames dans l’eau, ni les passer au lave-vaisselle, car l’eau pourrait filtrer à l’intérieur et abîmer son mécanisme. Image 45 •...
  • Page 55: Caractéristiques Techniques

    FRANÇAIS ANOMALIE MESSAGE RÉPARATION L’écran LCD affiche : Possible surchauffe du moteur. Err 4 Retirer les aliments de la carafe L’écran LCD affiche : Possible surchauffe du moteur. Err 5 Laisser refroidir l’appareil. L’écran LCD affiche : Débrancher/ brancher du secteur. Si l’erreur conti- Err 1, 2, 3, 6, 7, 10 nue, noter le numéro et remettre l’appareil au service d’assistance technique.
  • Page 56 DEUTSCH Sehr geehrter Kunde: Wir danken Ihnen für Ihre Entscheidung, ein TAURUS Gerät zu kaufen. Technologie, Design und Funktionalität dieses Gerätes, in Kombination mit der Erfüllung der strengsten Qualitätsnormen, werden Ihnen lange Zeit viel Freude bereiten. Sicherheitsempfehlungen und -hinweise • Lesen Sie die Gebrauchsanweisung sorgfältig durch, be- vor Sie das Gerät einschalten, und bewahren Sie diese...
  • Page 57 DEUTSCH derten physischen oder geistigen Fähigkeiten oder einem Mangel an Erfahrung und Kenntnissen, sofern sie nicht durch eine für ihre Sicherheit verantwortliche Person beau- fsichtigt oder bei der Bedienung angeleitet werden und die möglichen Gefahren verstehen. • Dieses Gerät ist kein Spielzeug. Kinder sollten überwacht werden, um sicherzustellen, dass sie nicht mit dem Gerät spielen.
  • Page 58 DEUTSCH • Vergewissern Sie sich, dass die Spannung auf dem Typenschild mit der Netzspannung übereinstimmt, bevor Sie den Apparat an das Stromnetz anschließen. • Das Gerät an einen Stromanschluss anschlieβen, der mindestens 16 Ampere liefert. • Der Stecker des Geräts muss mit dem Steckdosentyp des Stromanschlusses übereins- timmen.
  • Page 59 DEUTSCH Regelmäßig den perfekten Zustand der Verbindungsstelle des Deckels überprüfen. Sich vergewissern, dass der Deckel fest verschlossen ist, bevor das Gerät in Betrieb ge- nommen wird. • Solange das Wasser im Topf kocht, nicht den Deckel öffnen. • Das Gerät darf nicht unbeaufsichtigt gelassen werden, während es am Netz angeschlos- sen ist.
  • Page 60 DEUTSCH Beschreibung und Zubehör Zubehör: Zentraleinheit Unterlage Kanne mit Befestigungsklammer für die Messer Gefäß Verbindungsstelle Messer Messer Deckeldichtung (schwarz) Krugdeckel Dosierglas Mischflügel Spatel...
  • Page 61 DEUTSCH Um Platz zu sparen ist das Gerät so verpackt, dass die Kanne sich in einer Position befindet, die von der Position bei Inbetriebnahme abweicht. Um die Kanne aus der Zentraleinheit zu entneh- men: Sie am Griff anfassen, im Uhrzeigersinn bis zum Ans- Abbildungen 2 chlag drehen und sie nach oben ziehen (Abbildung 2)
  • Page 62 DEUTSCH WICHTIG. Niemals den Deckel verwenden, ohne dass das Verbindungsstück richtig angebracht ist. (Abbil- dungen 6 und 7). Deckel Abbildungen 7 WICHTIG. (1) Diese dickere Seite des Verbin- Niemals den Deckel der Kanne öffnen, solan- dungsstücks muss an dem Deckel angebra- cht werden.
  • Page 63 DEUTSCH Um die Kanne zu entkoppeln: Die Kanne am Griff ergreifen und im Uhrzeigersinn bis zum Anschlag drehen (beide Pfeile stimmen übe- rein) und sie hierauf anheben (Abbildung 13). WICHTIG. Aus Sicherheitsgründen kann die Kanne nicht Abbildungen 12 abgedeckt oder geöffnet werden, solange sie an die zentrale Einheit angekoppelt ist.
  • Page 64 DEUTSCH 2. Die Messer mit Vorsicht aus der Kanne entfernen, ohne sich zu schneiden (Abbildung 19). Um die Messer in der Kanne zu montieren: 1. Die Messer in dem Hohlraum der Kanne mit Vor- sicht anbringen (Abbildung 19). 2. Die Kanne umdrehen und dabei die Messer mit der Hand festhalten (Abbildung 20).
  • Page 65 DEUTSCH WICHTIG. Stecken Sie niemals den Spatel in die mittige De- ckelöffnung, wenn das Gerät mit an den Messern angebrachtem Mischflügel läuft. (Abbildung 24) Verwenden Sie niemals andere Küchenutensilien als Ersatz für den Spatel. Dies kann gefährlich sein. (Abbildung 25) Abbildungen 23 Mischflügel (Abbildung 26)
  • Page 66 DEUTSCH Gebrauchsanweisung Bedienpanel Digitaler Bildschirm Steuerung Zeitwähler Leuchtanzeige der aktivierten Rührfunktion Rührtaste Taste Turbogeschwindigkeit Leuchtanzeigen der Temperatur Steuerung Temperaturwähler Leuchtanzeigen der Geschwindigkeit Steuerung Geschwindigkeit Zentrale Einheit Belüftungsgitter Sensoren der Anwesenheit der Kanne Mitnehmer Messer Elektrisches Anschlusskabel Ein/Aus-Schalter Temperatursensor der Kanne...
  • Page 67 DEUTSCH Das Gerät auf eine ebene, stabile Oberfläche stellen, die für hohe Temperaturen geeignet ist, fern von anderen Hitzequellen oder möglichen Wassers- pritzern. EIN / AUS Die Belüftungsgitter, die sich an der Hinterseite des SCHALTER Geräts befinden, nicht zudecken oder verstopfen. Abbildungen 29 1.
  • Page 68 DEUTSCH Maximum: 90 Minuten. Die Steuerung langsam nach links drehen, um die Zeit zu verringern. 00 30 Aktivierungsskala: • Zwischen 0 und 1 Minute. Lässt sich in Sekundenschritten einstellen. • Zwischen 1 Minute und 10 Minuten. Lässt sich in 30-Sekundenschritten einstellen. •...
  • Page 69 DEUTSCH Taste Turbogeschwindigkeit (Abbildung 35) Die Taste gedrückt halten, um die Turbo-Funktion zu 00 28 aktivieren. Die 10 Leuchtanzeigen der maximalen Geschwindigkeit leuchten auf (Abbildung 35). Wenn man kalt arbeitet: Wenn man die Taste nicht mehr gedrückt hält wird die Turbofunktion ausges- chaltet.
  • Page 70 DEUTSCH WICHTIG. Die Geschwindigkeit 1 (S) nur für Sofritos anwen- den. Nicht die Hitzefunktion aktivieren, wenn die 88 28 Kanne leer ist. Sobald der Vorgang abgeschlossen ist gibt das Gerät ein Tonsignal von sich, die Leuchtanzeigen der Temperatur blinken, die Messer drehen sich mit der Geschwindigkeit 2 (Leuchtanzeigen leuchten grün) um zu vermeiden, dass die Nahrungsmittel festkleben oder verbrennen...
  • Page 71: Stand-By-Funktion

    DEUTSCH Wenn das Gerät in Betrieb genommen wird und die BEEP! Kanne oder der Deckel nicht richtig angekoppelt 00 00 sind, gibt das Gerät ein Tonsignal von sich und ein Informationssymbol erscheint auf dem digitalen Bildschirm (Abbildung 42). Nach der Verarbeitung mit Hitze erscheint ein Infor- mationssymbol auf dem digitalen Bildschirm: Kanne und Temperatursensor heiß...
  • Page 72 DEUTSCH Produkte mit einem sauren oder basischen pH-Wert wie Lauge. • Lassen Sie kein Wasser oder andere Flüssigkeiten in die Belüftungsöffnungen eindringen, um Schä- den an den inneren Funktionsteilen des Gerätes zu vermeiden. • Das Gerät nicht in Wasser oder andere Flüssigkei- Abbildungen 45 ten tauchen und nicht unter den Wasserhahn halten.
  • Page 73 DEUTSCH Anomalien und Bewältigung Das Gerät verfügt über elektronische Sicherheitssys- teme, die sich selbst und den Anwender im Falle einer Überlastung oder falschen Anwendung schützen, wobei Warn- oder Fehlermeldungen auf dem digitalen Bildschirm angezeigt werden und das Gerät auch Ton- signale von sich gibt.
  • Page 74: Technische Daten

    DEUTSCH Umweltschutz und Recycelbar- keit des Produktes Die zur Herstellung des Verpackungsmaterials dieses Geräts verwendeten Materialien sind im Sammel-, Klassifizierungs- und Recyclingsystem integriert. Wenn Sie die Verpackung entsorgen mö- chten, können Sie die öffentlichen Müllcontainer für alle Abfallarten verwenden. Das Produkt gibt keine Substanzen in für die Umwelt schädlichen Konzentrationen ab.
  • Page 75 ITALIANO Egregio cliente, le siamo grati per aver acquistato un elettrodomestico della marca Taurus. La sua tecnologia, il suo design e la sua funzionalità, oltre al fatto di aver superato le più rigorose norme di qualità, le assicureranno una totale soddisfazione durante molto tempo.
  • Page 76 ITALIANO • È consentito l’utilizzo di questo apparecchio a persone con ridotte capacità fisiche, sensoriali o mentali o prive di esperienza e conoscenze, purché adeguatamente formate o supervisionate sull’uso sicuro dell’apparecchio, assicu- rando la comprensione dei rischi coinvolti. • Questo apparecchio non è un giocattolo. Assicurarsi che i bambini non giochino con l’apparecchio.
  • Page 77 ITALIANO • Prima di collegare l’apparecchio alla rete elettrica, verificare che il voltaggio indicato sulla targhetta caratteristiche e il selettore di voltaggio corrispondano al voltaggio della rete. • Collegare l’apparecchio a una base dotata di messa a terra e che possa sostenere alme- no 16 ampere.
  • Page 78 ITALIANO • Mantenere l’apparecchio in buono stato. Verificare che le parti mobili siano ben fissate e che non rimangono incastrate, che non ci siano pezzi rotti e che non si verifichino altre situazioni che possano nuocere al buon funzionamento dell’apparecchio. •...
  • Page 79 ITALIANO Descrizione e accessori Accessori: Unità centrale Supporto caraffa con morsetto di fissaggio lame Caraffa Giunto lame Lame Giunto coperchio (nero) Coperchio caraffa Bicchiere dosatore Paletta miscelatrice Spatola...
  • Page 80 ITALIANO Per risparmiare spazio, l’apparecchio è imballato con il recipiente collocato in una posizione che non è quella di funzionamento. Per rimuovere il coperchio dall’unità centrale: afferrarlo per il manico, ruotarlo in senso orario fino all’arresto e sollevarlo (schema 2). Schema 2 Bicchiere dosatore (schema 3)
  • Page 81 ITALIANO IMPORTANTE. Mai utilizzare il coperchio senza che il giunto sia correttamente installato (schemi 6 e 7). Coperchio IMPORTANTE. Mai aprire il coperchio della caraffa quando Schema 7 l’apparecchio è in funzione, in quanto sussiste (1) Questo lato spesso del giunto deve pericolo di traboccamento e/o ustioni.
  • Page 82 ITALIANO IMPORTANTE. Per motivi di sicurezza, non è possibile rimuove- re né installare il coperchio della caraffa se ques- ta è collegata all’unità centrale. Non forzare, in quanto si rischia la rottura di alcu- ni elementi di sicurezza. Per poter installare o rimuovere il coperchio della Schema 12 caraffa, è...
  • Page 83 ITALIANO 2. Girare il contenitore mantenendo con la mano le lame fissate nel loro alloggiamento (schema 20). 3. Incastrare il supporto caraffa (con il morsetto di fis- saggio lame in posizione aperta) nella lama e nei tre perni della base della caraffa (schema 21).
  • Page 84 ITALIANO IMPORTANTE. Non utilizzare mai altri utensili come sostituti della spatola. Ciò potrebbe generare dei pericoli (schema 25). Paletta miscelatrice Schema 23 (schema 26) La paletta miscelatrice consente di: 1. Montare panna, crema, albume... 2. Mescolare gli alimenti senza triturarli. 3.
  • Page 85 ITALIANO Modalità d’uso Pannello di controllo Schermo digitale Selettore di tempo Indicatore luminoso di funzione Impasto attiva Tasto di Impasto Tasto di velocità TURBO Indicatori luminosi di temperatura Selettore di temperatura Indicatori luminosi di velocità Selettore di velocità Unità centrale Griglia di ventilazione Sensori di rilevamento caraffa Motore lame...
  • Page 86: Schermo Digitale

    ITALIANO Appoggiare l’apparecchio su una superficie piana, stabile e adatta a sopportare temperature elevate, lontano da altre sorgenti di calore e da possibili schizzi d’acqua. INTERRUTTORE Non coprire né ostruire le griglie di ventilazione FUNZIONE / ARRESTO situate sulla parte posteriore dell’apparecchio. Schema 29 1.
  • Page 87 ITALIANO Scala di attivazione: • Da 0 a 1 minuto: Va di secondo in secondo. 00 30 • Da 1 minuto a 10 minuti: Va di 30 secondi in 30 secondi. • Da 10 minuti a 90 minuti: Va di minuto in minuto. Girando il comando rapidamente la selezione è...
  • Page 88 ITALIANO Se si lavora a caldo: per sicurezza e per evitare schizzi, la velocità “TURBO” aumenta in modo progressivo e funziona solo per alcuni secondi, 00 28 nonostante si mantenga il tasto premuto. NON È POSSIBILE ATTIVARE LA FUNZIONE TUR- BO NELLE VELOCITÀ...
  • Page 89 ITALIANO Per arrestare: Ruotare il comando selettore di velocità verso sinis- tra fino a quando non si siano spenti gli indicatori 88 28 luminosi della velocità. IMPORTANTE. Arrestare sempre la macchina con il comando selettore di velocità. Prima di aprire il coperchio del recipiente aspettare qualche secondo fino a quando le lame si siano completamente arrestate.
  • Page 90: Funzione Stand-By

    ITALIANO Per farlo, raffreddare il recipiente sotto il rubinetto, accoppiarlo al corpo centrale e aspettare che si BEEP! spenga l’icona di informazione. 00 00 Quando non si utilizza l’apparecchio per un certo tempo: 1. Spegnere l’apparecchio premendo l’interruttore accensione/spegnimento. 2. Scollegare l’apparecchio dalla rete. Funzione stand-by Nelle versioni dotate di funzione stand-by o di mo- dalità...
  • Page 91: Anomalie E Riparazioni

    ITALIANO • Quando si pulisce il coperchio o il vassoio metalli- co, si raccomanda di smontare il giunto per pulirlo separatamente. • Tutti gli accessori, ECCETTO LE LAME, possono essere lavati in lavastoviglie. Si possono lavare anche con acqua insaponata aiutandosi con una spugna o spazzolino non abrasivo.
  • Page 92 ITALIANO ANOMALIA MESSAGGIO ANOMALIA Lo schermo digitale Possibile sovracorrente del motore. mostra: Rimuovere gli alimenti dalla caraffa. Err 4 Lo schermo digitale Possibile surriscaldamento del motore. mostra: Lasciare raffreddare l’apparecchio. Err 5 Lo schermo digitale Scollegare / collegare dalla rete elettrica. Se l’errore mostra: persiste, annotare il numero e consegnare l’apparecchio Err 1, 2, 3, 6, 7, 10...
  • Page 93: Caratteristiche Tecniche

    ITALIANO Considerazioni su ambiente e riciclaggio I materiali che costituiscono l’imballaggio di questo apparecchio sono riciclabili. Per lo smaltimento, utilizzare gli appositi contenitori pubblici, adatti per ogni tipo di materiale. Il prodotto non contiene sostanze dannose per l’ambiente. Questo simbolo indica che, per smaltire il prodotto al termine della sua durata utile, occorre depositar- lo presso un ente di smaltimento autorizzato alla raccolta differenziata di rifiuti di apparecchiature...
  • Page 96 Avda. Barcelona s/n E 25790 Oliana Spain Product weight (approximate) G.W. 8,8 Kg · N.W. 7,8 Kg www.taurusprofessional.com...

Table des Matières