Table des Matières
Publicité
Les langues disponibles
Les langues disponibles
Liens rapides
USER MANUAL / MANUEL DE L'UTILISATEUR
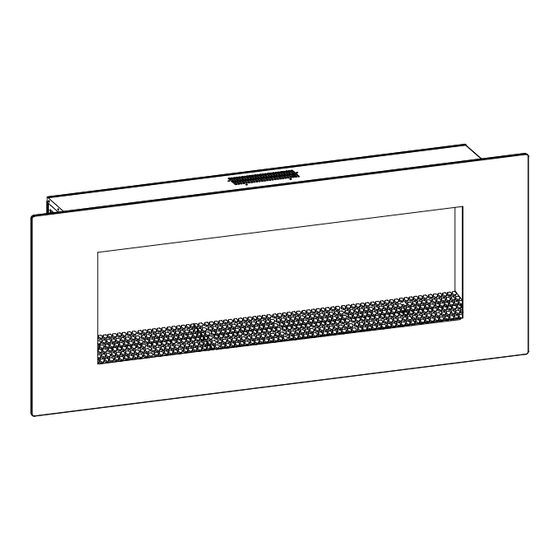
MACKENZIE
WALL-MOUNTED ELECTRIC FIREPLACE/FOYER ÉLECTRIQUE MURAL
IF THE INSTRUCTIONS IN THIS MANUAL IS NOT STRICTLY FOLLOWED,
AN ELECTRICAL SHOCK OR FIRE MAY RESULT CAUSING PROPERTY
DAMAGE, PERSONAL INJURIES, OR DEATH.
SI LES DIRECTIVES DANS CE MANUEL NE SONT PAS SUIVIES
RIGOUREUSEMENT, UNE DÉCHARGE ÉLECTRIQUE OU UN INCENDIE
PEUT SE PRODUIRE, CAUSANT DES DOMMAGES MATÉRIELS, DES
BLESSURES OU LA MORT.
DO NOT STORE OR USE GAS, OR OTHER FLAMMABLE VAPOURS OR LIQUIDS
IN THE VICINITY OF THIS OR ANY OTHER APPLIANCE.
NE RANGEZ OU N'UTILISEZ PAS D'ESSENCE OU D'AUTRES GAZ ET
LIQUIDES INFLAMMABLES À PROXIMITÉ DE CET APPAREIL OU DE TOUT
AUTRE APPAREIL ÉLECTROMÉNAGER.
IF YOU HAVE ANY PROBLEMS OR QUESTIONS, EMAIL OR CALL CUSTOMER SERVICE BEFORE
YOU RETURN THIS PRODUCT TO THE STORE WHERE IT WAS PURCHASED.
SI VOUS AVEZ DES PROBLÈMES OU QUESTIONS, CONTACTEZ LE SERVICE À LA CLIENTÈLE
PAR COURRIEL OU PAR TÉLÉPHONE AVANT DE RETOURNER CE PRODUIT LÀ OÙ VOUS L'AVEZ
ACHETÉ.
1807R1
Publicité
Table des Matières

Manuels Connexes pour Flamelux MACKENZIE

Sommaire des Matières pour Flamelux MACKENZIE
- Page 1 USER MANUAL / MANUEL DE L'UTILISATEUR MACKENZIE WALL-MOUNTED ELECTRIC FIREPLACE/FOYER ÉLECTRIQUE MURAL IF THE INSTRUCTIONS IN THIS MANUAL IS NOT STRICTLY FOLLOWED, AN ELECTRICAL SHOCK OR FIRE MAY RESULT CAUSING PROPERTY DO NOT STORE OR USE GAS, OR OTHER FLAMMABLE VAPOURS OR LIQUIDS DAMAGE, PERSONAL INJURIES, OR DEATH.
-
Page 16: Généralités
INSTRUCTIONS IMPORTANTES INSTRUCTIONS DE MONTAGE Généralités 14. Évitez d’introduire ou de faire tomber des corps étrangers 1. Lisez toutes les directives avant d'utiliser cet appareil. dans les fentes d'entrée et de sortie de l'air car cela pourrait 2. Le foyer devient très chaud lorsqu'il est en marche. provoquer des décharges électriques, causer un incendie ou Pour éviter toute brûlure, ne laissez pas la peau non couverte endommager le foyer. -
Page 17: Manipulation Et Déballage
INSTRUCTIONS IMPORTANTES INSTRUCTIONS DE MONTAGE Manipulation et déballage Avant de commencer l’installation du foyer électrique, veuillez lire les directives suivantes : 1 L’installation doit être effectuée par deux adultes afin d’éviter le risqu e de blessures ou de dommages. Si l’appareil est trop lourd pour quelque raison que ce soit, veuillez obtenir de l’aide supplémentaire. - Page 18 INSTRUCTIONS IMPORTANTES INSTRUCTIONS DE MONTAGE Quincaillerie A x 1 B x 2,6 kg C x 8 D x 8 E x 8 F x 2 Étape 1 Fixer les chevilles d’ancrage (C) dans le mur. 1. Percez 8 trous (8 mm de diamètre, 40 mm de profondeur) Note : avant de percer les murs, vérifiez toujours qu'il n'y ait pas dans le mur.
- Page 19 INSTRUCTIONS IMPORTANTES INSTRUCTIONS DE MONTAGE Étape 2 Fixation du support de suspension (A) au mur. 1. Tout en plaçant le support de suspension (A) vis-à-vis les trous percés, insérez les vis (D) sur le support de suspension. 2. Vissez le support de suspension (A) en place à l’aide d’un tournevis cruciforme.
- Page 23 ENTRETIEN RECOMMANDATIONS À L'UTILISATEUR DIRECTIVES DE MISE À LA TERRE 1. Toute réparation de cet appareil ne doit être effectuée que par une Cet appareil est conçu pour fonctionner sur un circuit de 120 personne qualifiée. volts. Le câble électrique est équipé d'une prise illustrée dans la 2.
-
Page 24: Arrêt De Chauffage
DIRECTIVES DE FONCTIONNEMENT L’illustration ci-dessous décrit le panneau de contrôle sur le côté droit de l'appareil et la télécommande. INTERRUPTEUR PRINCIPAL MARCHE/ARRÊT Pour mettre l'appareil en marche, appuyez sur l'interrupteur principal de « 0 » à « - ». L’interrupteur s’illuminera et émettra un bip sonore. L'appareil se met en mode veille. - Page 25 GUIDE DE DÉPANNAGE PROBLÈME 1. Pas de courant. 1a.Vérifiez si l’unité est branchée dans une prise standard de 120V. 2. Les bûches sont illuminées, mais l’effet de 2a.Vérifiez pour voir si le moteur du fileur fonctionne. Sinon, appelez le flamme ne fonctionne pas. service à...
- Page 26 a été immergée. s'il a subi jetez Ne mettez Ne mettez F-12...
-
Page 27: Pour Le Foyer Électrique Flamelux
1 AN DE GARANTIE Pour Le Foyer Électrique Flamelux GARANTIE DE BASE : Le fabricant garantit que ce produit est exempt de tout défaut de fabrication ou de matériaux pour une période d’un an après la date d’achat, selon les conditions et les restrictions suivantes. - Page 28 IF YOU HAVE ANY PROBLEMS OR QUESTIONS, EMAIL OR CALL CUSTOMER SERVICE BEFORE YOU RETURN THIS PRODUCT TO THE STORE WHERE IT WAS PURCHASED. SI VOUS AVEZ DES PROBLÈMES OU QUESTIONS, CONTACTEZ LE SERVICE À LA CLIENTÈLE PAR COURRIEL OU PAR TÉLÉPHONE AVANT DE RETOURNER CE PRODUIT LÀ OÙ VOUS L'AVEZ ACHETÉ.