Tricity 4-80321 Manuel D'instruction
Liens rapides
OPERATING INSTRUCTIONS
Ensure the fan is in the OFF position before plugging it into a
120V/60 Hz outlet.
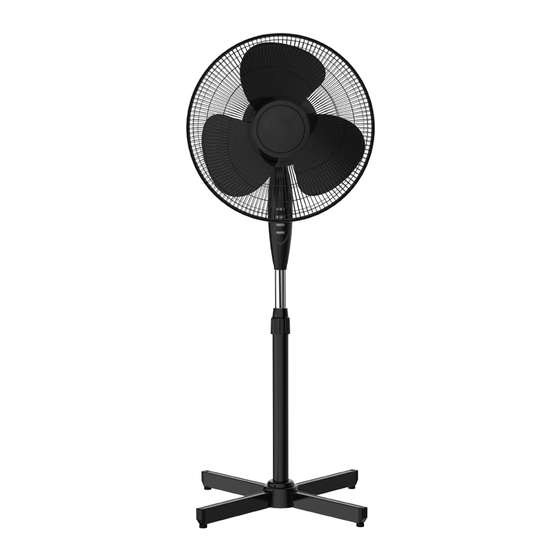
This fan has a 4-position push-button control located at the
front of the fan's control box (10):
Press [0] to turn the fan OFF. Press [1] for low fan speed, [2]
for medium speed, or [3] for high speed.
OSCILLATION: To automatically rotate the fan from left to
right, press the oscillation button (8) that is located on the
top of the motor housing. To stop oscillation at any point
during operation, pull up on the button to lock it in position.
TILT: To tilt the fan head so that the breeze is targeted at an
angle simply loosen tilt adjustable knob and move the fan
head up or down, carefully tilt the head of the fan until it
reaches the desired angle. Tighten knob to secure the fan
head at that angle. Be careful as to not tilt the head back
further than it is intended to go, doing so will damage the
unit.
HEIGHT ADJUSTMENT: To adjust the height of the fan, grip
the extension pole and loosen the height adjustment locking
nut (15). Without completely removing it, extend or lower
the pole to increase or decrease the height of the fan. Once
the fan is at a comfortable height, tighten the locking nut to
secure the pole.
CAUTION: TO PREVENT ELECTRICAL SHOCK, MATCH
THE TWO DIFFERENTLY SIZED PLUG BLADES TO THEIR
CORRESPONDING OUTLET SLOTS AND FULLY INSERT THE
PLUG.
CLEANING INSTRUCTIONS
1. Always disconnect the cord from the electrical outlet
when cleaning your fan.
2. Remove dust from the fan grilles using a soft cloth.
3. Wipe the exterior surfaces of the fan occasionally with a
damp cloth (not dripping wet) and dry thoroughly with a
soft dry cloth before operating it again.
4. Do not use harsh cleaners or materials to clean this unit.
Doing so will damage the finishes.
CAUTION: DO NOT ALLOW WATER TO RUN INTO THE
INTERIOR OF THE FAN, AS THIS COULD CREATE A FIRE OR
ELECTRIC SHOCK HAZARD. THE FAN MOTOR IS FACTORY-
LUBRICATED FOR LIFE AND WILL REQUIRE NO FURTHER
LUBRICATION. NO OTHER USER MAINTENANCE IS
REQUIRED OR RECOMMENDED. IF SERVICE IS REQUIRED,
SEND YOUR FAN TO THE NEAREST AUTHORIZED SERVICE
PROVIDER.
STORING YOUR FAN
1. Retain the original packaging to store your fan.
2. Disassemble and clean the fan before storing it.
Follow cleaning instructions 1–4 above.
3. Always store the fan in a dry place.
4. Never attempt to store the fan while it is still plugged in.
5. Never wrap the cord tightly around the fan or put any
stress on the cord where it enters the fan as it could cause
the cord to fray or break.
MODE D'EMPLOI
Assurez-vous que le ventilateur est en position d'arrêt avant
de le brancher sur une prise 120 V / 60 Hz.
Ce ventilateur est doté d'un bouton-poussoir à 4 positions
situé à l'avant du boîtier de commande du ventilateur (10):
Appuyez sur [0] pour éteindre le ventilateur.
Appuyez sur [1] pour une vitesse de ventilation faible, sur [2]
pour une vitesse moyenne ou sur [3] pour une vitesse élevée.
OSCILLATION: Pour faire tourner automatiquement le
ventilateur de gauche à droite, appuyez sur le bouton
d'oscillation (8) situé en haut du boîtier du moteur.
Pour arrêter l'oscillation à tout moment pendant le
fonctionnement, tirez sur le bouton pour le verrouiller en
position.
INCLINAISON: Pour incliner la tête du ventilateur de sorte
que la brise soit dirigée à un angle, desserrez simplement le
bouton de réglage de l'inclinaison réglable et déplacez la tête
du ventilateur vers le haut ou le bas, inclinez avec précaution
la tête du ventilateur jusqu'à ce qu'elle atteigne l'angle
souhaité. Serrez le bouton pour fixer la tête du ventilateur à
cet angle. Veillez à ne pas incliner la tête plus loin que prévu,
cela endommagerait l'unité.
RÉGLAGE DE LA HAUTEUR: Pour régler la hauteur du
ventilateur, saisissez la rallonge et desserrez le contre-écrou
de réglage en hauteur (15). Sans l'enlever complètement,
étendez ou abaissez le poteau pour augmenter ou diminuer
la hauteur du ventilateur. Une fois que le ventilateur est à
une hauteur confortable, serrez le contre-écrou pour fixer le
poteau.
ATTENTION: POUR ÉVITER LES DÉCHARGES ÉLECTRIQUES,
ALIGNEZ LES DEUX AUTRES LAMES DIFFÉRENTES DE LA
FICHE SUR LEUR PRISE CORRESPONDANTE ET INSÉRER
COMPLÈTEMENT LA FICHE.
NETTOYAGE
1. Débranchez toujours le cordon de la prise électrique lors
du nettoyage de votre ventilateur.
2. Éliminez la poussière des grilles de ventilateur à l'aide
d'un chiffon doux.
3. Essuyez les surfaces extérieures du ventilateur de temps
en temps avec un chiffon humide (sans gouttes) et
séchez-le soigneusement avec un chiffon doux et sec
avant de le remettre en marche.
4. N'utilisez pas des nettoyants ou des matériaux corrosifs
pour nettoyer cet appareil. Cela endommagerait les
finitions.
ATTENTION: NE JAMAIS METTRE DE L'EAU A L'INTÉRIEUR
DU VENTILATEUR, CAR CELA POURRAIT CRÉER UN RISQUE
D'INCENDIE OU D'ÉLECTROCUTION. LE MOTEUR DU
VENTILATEUR EST LUBRIFIÉ EN USINE À VIE ET N'AURA
PAS BESOIN DE LUBRIFICATION SUPPLÉMENTAIRE.
AUCUN AUTRE ENTRETIEN N'EST REQUIS OU
RECOMMANDÉ. SI UN SERVICE EST NECESSAIRE,
ENVOYEZ VOTRE VENTILATEUR AU FOURNISSEUR DE
SERVICE AUTORISE LE PLUS PROCHE.
RANGEMENT
1. Conservez l'emballage d'origine pour stocker votre
ventilateur.
2. Démontez et nettoyez le ventilateur avant de le ranger.
Suivez les instructions de nettoyage 1–4 ci-dessus.
3. Rangez toujours le ventilateur dans un endroit sec.
4. N'essayez jamais de stocker le ventilateur tant qu'il est
encore branché.
5. N'enroulez jamais le cordon fermement autour du
ventilateur et n'exercez aucune contrainte sur le cordon
là où il pénètre dans le ventilateur, car le cordon pourrait
s'effilocher ou se rompre.
Thank you for selecting Xtricity as your choice. With proper care, this product will provide years of pleasure
and enjoyment. Carefully follow the instructions in order to ensure that this product functions safely
and properly for years to come.
Nous vous remercions de choisir Xtricity. Moyennant un entretien adéquat, ce produit vous fournira un
éclairage plaisant et agréable. Suivez attentivement les instructions afin d'assurer le fonctionnement
convenable et sécuritaire de ce produit durant des années.
16" STAND FAN / VENTILATEUR SUR PIED
Item: 4-80321

Sommaire des Matières pour Tricity 4-80321
- Page 1 4. N’essayez jamais de stocker le ventilateur tant qu’il est encore branché. 5. N’enroulez jamais le cordon fermement autour du ventilateur et n’exercez aucune contrainte sur le cordon là où il pénètre dans le ventilateur, car le cordon pourrait Item: 4-80321 s’effilocher ou se rompre.
- Page 2 INSTRUCTIONS GUIDELINES FOR SAFE OPERATION RÈGLES POUR ASSURER UN FONCTIONNEMENT SÉCURITAIRE Please read all instructions before using this fan. When using any electrical appliance, basic precautions should always be Veuillez lire et prendre connaissance des consignes qui suivent avant d’utiliser le ventilateur. Lors de l’utilisation d’un appareil followed to reduce the risk of fire, electrical shock and injury: électrique, il est essentiel en tout temps de prendre les précautions nécessaires pour diminuer le risque d’incendie, de choc électrique, de blessures corporelles ou de dommages matériels, y compris les précautions qui suivent :...