Table des Matières
Publicité
Liens rapides
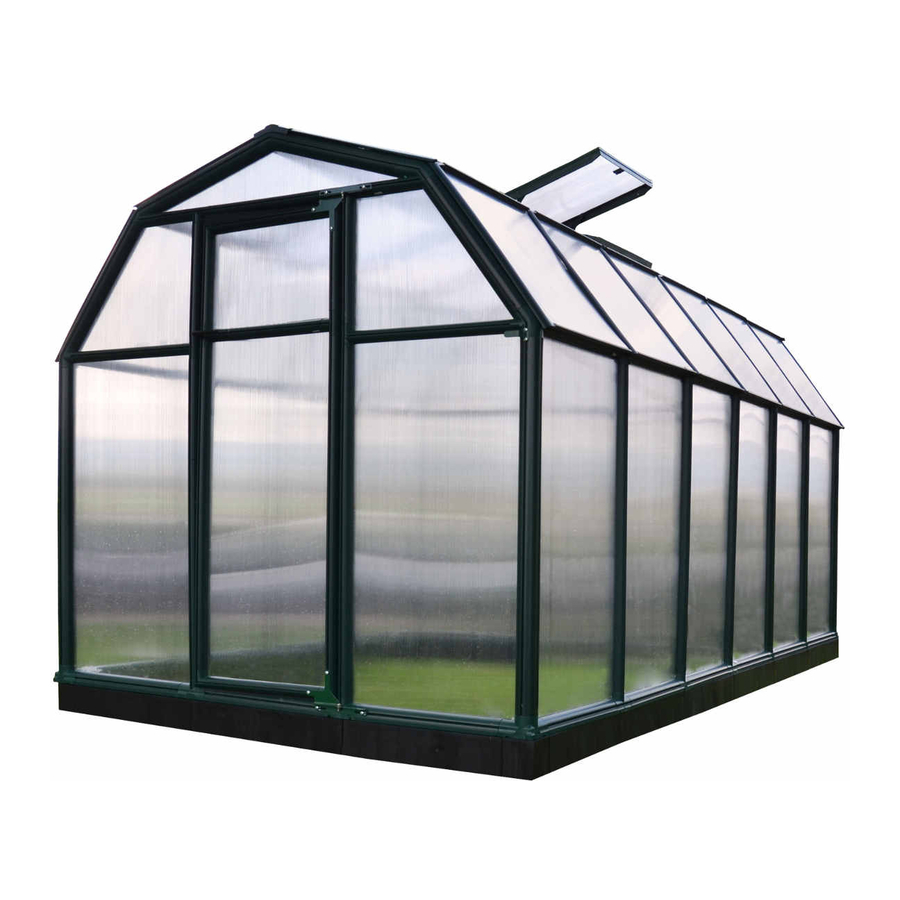
ECO Greenhouse
Modular greenhouses, garden sheds, outdoor garden elements and accessories
Designed and manufactured by Rion
A Member of the Plasson Group
Serres modulaires, abris de jardin, éléments et accessoires extérieurs de jardin
Conçu et fabriqué par Rion
Un membre du groupe Plasson
Modulare Treibhäuser, Gartenschuppen, Gartenmöbel und -zubehör
Design und Herstellung von Rion
Mitglied der Plasson-Gruppe
Invernaderos modulares, cobertizos de jardín, elementos y accesorios para jardines al aire libre
Diseñado y fabricado por Rion
Miembro del Grupo Plasson
Rion Ltd. • Cabri 25120 • Israel • Tel: +972-4-995-2666 • Fax: +972-4-995-2677
email: rion@rion.com • homepage: http:\\www.rion.com
English
Français
Deutsch
Español
Publicité
Table des Matières

Manuels Connexes pour Rion ECO 6x2.5

Sommaire des Matières pour Rion ECO 6x2.5
- Page 1 Invernaderos modulares, cobertizos de jardín, elementos y accesorios para jardines al aire libre Diseñado y fabricado por Rion Miembro del Grupo Plasson Rion Ltd. • Cabri 25120 • Israel • Tel: +972-4-995-2666 • Fax: +972-4-995-2677 email: rion@rion.com • homepage: http:\\www.rion.com English Français...
- Page 2 © 2009 by Rion Authorized Rion Distributors France Korea Backyard Living Source, Inc. - BLS Le petit jardinier Dowin Corporation 2334 W. Jayton Dr. Atwick France 3F Daeki BQD 1031-7 Meridian, ID 83642 10, Rue de Paris Bangbae-3 dong +208-287-6601...
- Page 3 ECO Greenhouse Assembly Instructions...
- Page 4 ECO Greenhouse Assembly Instructions...
-
Page 5: Safety First
Congratulations on purchasing a Rion ECO Greenhouse. We are certain that it will give you many happy years of pleasure in your garden. The Rion ECO Greenhouse has been designed to be as easy to put together as it is beautiful to look at. Most of the work can be done by a single person. Only attaching the roof requires the help of a family member or neighbor for a short while. -
Page 6: How To Use This Manual
ECO Greenhouse Assembly Instructions How To Use This Manual First take a look at page xli for the parts list. Here Parts • Pièces • Gewächshauselemente • Partes you will see: 1 The part ID 6 x 2.5 6 x 5 6 x 7 6 x 2.5 6 x 5 6 x 7... - Page 7 Every assembly step begins with an Overview Page. Frame • Châssis • Rahmen • Marco In this example you see: 1 The name of the assembly 2 The page number of each step to follow for the greenhouse model you have purchased 3 The portion of the greenhouse to be assembled, shown in green Step 1 (p.
- Page 8 ECO Greenhouse Assembly Instructions Follow the assembly instructions step-by-step. In ECO Greenhouse Assembly Instructions Frame • Châssis • Rahmen • Marco this example, you see: 1 The step number 2 A small drawing of the subassembly you will complete in this step 3 Parts needed for this step Pin1 Door22...
- Page 9 As you progress you will see: 1 Which greenhouse models this step is for. In this example, this step is done only for the two greenhouse models indicated 2 What page to go to for the next assembly step of ®...
-
Page 10: Assembly Techniques
ECO Greenhouse Assembly Instructions Assembly Techniques Using Pins When you see the Pin icon do the following: 1 Put a Pin1 pin on the GT1 Glazing Tool. 2 Align the pin with the indicated hole and push it in until it snaps secure. - Page 11 Inserting Roof Panels Once the glazing elements are in place, insert panels and windows in the following manner: 1 Make sure that the the plastic identification strip indicating the side with UV protection is facing outside. 2 Peel away a little portion of both edges of the ID strip. 3 Slip one corner into the RD glazing element.
- Page 12 viii ECO Greenhouse Assembly Instructions 7 In this example, first insert the panel into the lower RD glazing element, following the steps above. 8 Then bend the panel so it will enter the top glazing element. The callout (9) shows an enlarged cross-section of the lower profile and glazing element, and (0) of the upper profile and glazing element when they are seated correctly.
- Page 13 Prepare a Foundation Wood Deck Before assembling your new Greenhouse a proper foundation must be prepared. A number of anchoring options are possible, based on wind and ground conditions in Your Greenhouse can be secured to a wood deck with screws (not supplied) through your area.
- Page 14 It is important to clear your Greenhouse of snow in the winter. Rion offers a wide range of options for your new Greenhouse, including modular Glazing shelves, irrigation systems, additional windows, automatic window openers, and others.
-
Page 15: La Sécurité Avant Tout
Français Introduction Toutes nos félicitations pour avoir choisi d'acquérir une serre Demo (ECO Greenhouse) de Rion. Nous sommes certains qu'elle vous apportera de nombreuses années de bonheur dans votre jardin. La serre Demo (ECO Greenhouse) de Riona été conçue pour être aussi facile à monter qu'elle est belle à regarder. La plus grande part du travail de montage peut être réalisée par une seule personne. -
Page 16: Mode D'utilisation De Ce Manuel
ECO Greenhouse Assembly Instructions Mode d'utilisation de ce manuel Observez tout d'abord la page xli pour prendre Parts • Pièces • Gewächshauselemente • Partes connaissance de la liste des pièces. Vous y trouverez: 6 x 2.5 6 x 5 6 x 7 6 x 2.5 6 x 5 6 x 7 1 Le code correspondant à... - Page 17 Chaque étape du montage commence par une Frame • Châssis • Rahmen • Marco page qui en donne une vue d'ensemble. Dans cet exemple, vous pouvez voir: 1 La désignation de l'assemblage, 2 Le numéro de page correspondant à chaque étape à...
- Page 18 ECO Greenhouse Assembly Instructions Suivez les instructions d'assemblage étape par ECO Greenhouse Assembly Instructions Frame • Châssis • Rahmen • Marco étape. Dans cet exemple, vous pouvez voir: 1 Le numéro de l'étape, 2 Un schéma miniature du sous-assemblage à réaliser dans cette étape, 3 Les pièces nécessaires à...
- Page 19 Au fur et à mesure que vous avancerez dans le montage, vous trouverez: 1 L'indication des modèles de serre pour lesquels cette étape est pertinente. Dans l'exemple présent, cette étape n'est à réaliser que pour les deux modèles de serre mentionnés. ®...
-
Page 20: Techniques De Montage
ECO Greenhouse Assembly Instructions Techniques de montage Utilisation des chevilles Là où vous voyez le symbole désignant une cheville procédez comme suit: 1 Placez une cheville Pin1 sur l'outil de pose de vitrage GT1. 2 Alignez la cheville avec le trou indiqué et poussez-la jusqu'à entendre le “clic”... - Page 21 Insertion des panneaux Une fois les éléments de vitrage bien en place, insérez les panneaux et fenêtres selon la procédure suivante: 1 Faites glisser un coin dans l'élément de vitrage RD. 2 Continuez l'insertion jusqu'au bout. 3 Centrez le panneau, si nécessaire. Le repère de figure (4) montre une coupe transversale grossie du profilé...
- Page 22 xviii ECO Greenhouse Assembly Instructions 5 Dans cet exemple, insérez d'abord le panneau dans l'élément de vitrage inférieur RD, suivant les étapes ci-dessus. 6 Ensuite, incurvez le panneau de sorte qu'il puisse s'introduire dans l'élément de vitrage supérieur. Le repère de figure (7) montre une coupe transversale grossie du profilé...
-
Page 23: Préparation Des Fondations
Préparation des fondations Plancher en bois Avant de monter votre nouvelle serre, il est nécessaire de lui préparer des fondations adéquates. Il existe un certain nombre d'options quant à la fixation, selon les Votre serre peut se fixer à un plancher en bois à l'aide de vis (non fournies) traversant conditions de sol et de vent dans votre région. -
Page 24: Astuces De Montage Et Remarques
Il est essentiel de dégager la neige cumulée sur la serre en hiver. déplacer-le ensuite pour le positionnez au bon endroit une fois son assemblage Rion offre tout un éventail d'accessoires adaptés à votre nouvelle serre, et terminé. notamment : étagères modulaires, systèmes d'irrigation, fenêtres supplémentaires, dispositifs d'ouverture automatique des fenêtres et autres. - Page 25 Deutsch Einführung Wir möchten Ihnen zum Kauf des Rion Demo-Gewächshauses gratulieren (Rion ECO Greenhouse). Wir sind überzeugt, dass Sie mit dem Gewächshaus viel Freude in Ihrem Garten haben werden. Das Rion Demo-Gewächshaus (Rion ECO Greenhouse) ist so gestaltet, dass es einfach zusammenzubauen ist und ausserdem hervorragend aussieht. Der grösste Teil der Arbeit kann von einer einzelnen Person ausgeführt werden.
- Page 26 xxii ECO Greenhouse Assembly Instructions So benutzen Sie dieses Handbuch Zuerst sehen Sie sich die Teileliste auf Seite xli an. Parts • Pièces • Gewächshauselemente • Partes Hier sehen Sie: 1 Die Identifizierungsnummer des Teils 6 x 2.5 6 x 5 6 x 7 6 x 2.5 6 x 5 6 x 7...
- Page 27 Jeder Montageschritt beginnt mit einer Frame • Châssis • Rahmen • Marco Übersichtsseite. In diesem Beispiel sehen Sie: 1 Den Namen der Baugruppe 2 Die Seitennummer jedes auszuführenden Montageschritts gemäß des von Ihnen erworbenen Gewächshauses 3 Den Teil des Gewächshauses, der Step 1 (p.
- Page 28 xxiv ECO Greenhouse Assembly Instructions Folgen Sie den Montageanweisungen Schritt für ECO Greenhouse Assembly Instructions Frame • Châssis • Rahmen • Marco Schritt. In diesem Beispiel sehen Sie: 1 Die Nummer des Schritts 2 Eine kleine Zeichnung der Unterbaugruppe, die Sie in diesem Montageschritt zusammenbauen.
- Page 29 Mit Fortschreiten der Montage werden Sie sehen: 1 Auf welches Gewächshausmodell sich dieser Schritt bezieht. In diesem Beispiel wird dieser Schritt nur für die zwei aufgeführten Gewächshausmodelle ausgeführt. ® Step 14 (p. 13) 2 Auf welcher Seite der nächste Montageschritt für Ihr Gewächshausmodell aufgeführt ist.
- Page 30 xxvi ECO Greenhouse Assembly Instructions Montagetechniken Unter Einsatz von Stiften Wenn Sie das Symbol für einen Stift sehen, müssen Sie folgende Schritte ausführen: 1 Setzen Sie einen Stift in das GT1-Verglasungswerkzeug. 2 Richten Sie den Stift auf das angezeigte Loch aus und drücken ihn dann fest, bis er sicher einrastet.
- Page 31 Einsetzen der Platten Sobald die Verglasungselemente sich an Ort und Stelle befinden, können Sie die Platten und Fenster folgendermassen einsetzen: 1 Schieben Sie eine Ecke in das RD-Verglasungselement. 2 Fahren Sie damit fort, bis die Platte vollständig eingesetzt ist. 3 Zentrieren Sie die Platte, wenn nötig. Die technische Zeichnung (4) zeigt einen vergrösserten Querschnitt des Profils und korrekt eingesetzen Verglasungselements.
- Page 32 xxviii ECO Greenhouse Assembly Instructions 5 In diesem Beispiel setzen Sie zuerst die Platte in das untere RD- Verglasungselement, indem Sie den oben aufgeführten Schritten folgen. 6 Jetzt biegen Sie die Platte, so dass sie in das obere Verglasungselement eingesetzt werden kann. Die technische Zeichnung (7) zeigt einen vergrösserten Querschnitt des unteren Profils und korrekt eingesetzten Verglasungselements sowie (8) des oberen Profils und korrekt...
- Page 33 Vorbereitung eines Fundaments Holzboden Vor der Montage Ihres neuen Gewächshauses müssen Sie ein Fundament vorbereiten. Es stehen eine Reihe von Verankerungsmöglichkeiten zur Verfügung, je Ihr Gewächshaus kann mit Hilfe von Holzschrauben (nicht im Lieferumfang nach Wind- und Bodenbedingungen, die in Ihrer Gegend vorherrschen. inbegriffen) durch die Rahmen-Verbindungsteile auch auf einem Holzboden Vergewissern Sie sich, dass Sie sich über etwaige Baugenehmigungen, die befestigt werden.
- Page 34 Garage) zusammen und tragen ihn nach Fertigstellung an den Es ist wichtig, Ihr Gewächshaus während der Wintermonate schneefrei zu halten. endgültigen Standort. Rion bietet Ihnen eine Reihe von Zubehörteilen für Ihr neues Gewächshaus an, einschliesslich Regale in Modulbauweise, Bewässerungssysteme, zusätzliche Verglasung Fenster, automatische Fensteröffner und vieles mehr.
- Page 35 Felicitaciones por la compra de un Invernadero Rion Demo (Rion ECO Greenhouse). Estamos seguros que le proporcionará muchos años de placer en su jardín. El Invernadero Rion Demo (Rion ECO Greenhouse) ha sido proyectado para ser tan fácil de montar como hermoso para mirar. La mayor parte del trabajo puede ser realizada por una sola persona.
-
Page 36: Cómo Utilizar Este Manual
xxxii ECO Greenhouse Assembly Instructions Cómo utilizar este manual Primero, vea la lista de piezas en la página xli. En Parts • Pièces • Gewächshauselemente • Partes esta página podrá observar: 1 La identificación (ID) de la pieza 6 x 2.5 6 x 5 6 x 7 6 x 2.5 6 x 5 6 x 7... - Page 37 Cada paso de montaje comienza con una ficha Frame • Châssis • Rahmen • Marco técnica. En este ejemplo, se puede observar: 6 El nombre del montaje 7 El número de página de cada paso a seguir para el modelo de invernadero adquirido. 8 La sección del invernadero que se debe montar aparece de color verde.
- Page 38 xxxiv ECO Greenhouse Assembly Instructions Siga paso a paso las instrucciones de montaje. En ECO Greenhouse Assembly Instructions Frame • Châssis • Rahmen • Marco este ejemplo, se puede observar: 1 El número del paso 2 Un pequeño dibujo del subconjunto que debe completar en este paso 3 Las piezas necesarias para este paso Pin1...
- Page 39 A medida que avance en el montaje, podrá ver: 1 Para qué modelos de invernadero es este paso. En este ejemplo, este paso sólo se utiliza para los dos modelos de invernadero indicados. 2 Qué página consultar para el siguiente paso de ®...
- Page 40 xxxvi ECO Greenhouse Assembly Instructions Técnicas de Montaje Usando Pernos Cuando usted ve el icono del Perno haga el siguiente: 1 Coloque un perno Pin1 en la Herramienta para Vidrio GT1. 2 Alinee el perno con el agujero indicado y empújelo hacia adentro hasta que esté...
- Page 41 Inserción de Paneles Una vez que los elementos vidriados están en el lugar, inserte los paneles y las ventanas de la siguiente manera: 1 Deslice un rincón hacia el elemento vidriado RD. 2 Continúe insertando el panel hasta que esté completamente adentro.
- Page 42 xxxviii ECO Greenhouse Assembly Instructions 5 En este ejemplo, primero inserte el panel en el elemento vidriado RD inferior, siguiendo los pasos arriba.. 6 Después doble el panel de manera que entre el elemento vidriado superior. La llamada (7) presenta un corte transversal agrandado del perfil inferior y del elemento vidriado, y la (8) del perfil superior y del elemento vidriado cuando asentados correctamente.
- Page 43 Prepare una Base Cubierta de Madera Antes de montar su nuevo Invernadero una base apropiada debe ser preparada. Un número de opciones de anclaje son posibles, basadas en las condiciones del viento Su invernadero puede ser asegurado a una cubierta de madera con tornillos (no y del suelo en su área.
- Page 44 Monte el marco en una superficie plana (tal como una calzada o un garaje) y después trasládelo a la posición cuando completado. Es importante limpiar la nieve de su Invernadero en invierno. Rion ofrece una amplia gama de opciones para su nuevo Invernadero, Vidrio incluyendo estantes modulares, sistemas de irrigación, ventanas adicionales, abridores automáticos de ventana, y otros.
- Page 45 Parts • Pièces • Gewächshauselemente • Partes 6 x 2.5 6 x 5 6 x 7 6 x 2.5 6 x 5 6 x 7 50 cm Corner Frame Connector 1’7F” 61.8 cm 2’E” Frame Connector 113 cm 3’8A” 53.4 cm 1’9”...
- Page 46 xlii ECO Greenhouse Assembly Instructions 6 x 2.5 6 x 5 6 x 7 6 x 2.5 6 x 5 6 x 7 71.5 × 118.3 cm PN70 .5 m .5 m .5 m Soft Foam Insulation 2' 4D" × 3' 10L" 69.1 cm PN71 59.7 ×...
- Page 47 6 x 2.5 6 x 5 6 x 7 Hinged Door Kit Corner Oval Door Hinge Connector Hinge Upper Door Hinge Door22 Lower Door Hinge Dow2 Door Latch Door Holder xliii ECO Greenhouse Assembly Instructions...
- Page 48 xliv ECO Greenhouse Assembly Instructions Tools • Outils • Erforderliche • Cimientos Hammer Spirit Level Marteau Niveau à bulle Hammer Wasserwaage Martillo Cinta de medir Safety Gloves Gants de protection Scissors Schutzhandschuhe Ciseaux Guantes de Seguridad Schere Tijeras Razor Knive Cutter Teppichmesser Screwdriver...
- Page 49 Frame • Châssis • Rahmen • Marco Step 1 (p. 2) Step 1 (p. 2) Step 1 (p. 2) Step 2 (p. 2) Step 2 (p. 2) Step 2 (p. 2) Step 3 (p. 2) Step 3 (p. 2) Step 3 (p. 2) Step 4 (p.
- Page 50 ECO Greenhouse Assembly Instructions Frame • Châssis • Rahmen • Marco Pin1 Door22 Door22 (50 mm) • Some glazing elements (RA, RB, RC, and RD) are placed inside the long profiles in the interests of space. • Certains éléments de vitrage (RA, RB, RC et RD) ont été placés à l'intérieur des longs profilés pour gagner de la place.
- Page 51 Pin1 Pin1 Pin1 ECO Greenhouse Assembly Instructions Frame • Châssis • Rahmen • Marco...
- Page 52 ECO Greenhouse Assembly Instructions Frame • Châssis • Rahmen • Marco Pin1...
- Page 53 Pin1 x 12 ECO Greenhouse Assembly Instructions Frame • Châssis • Rahmen • Marco...
- Page 54 ECO Greenhouse Assembly Instructions Frame • Châssis • Rahmen • Marco Pin1 Step 10 (p. 7) Step 13 (p. 10) Step 13 (p. 10)
- Page 55 Pin1 ECO Greenhouse Assembly Instructions Frame • Châssis • Rahmen • Marco...
- Page 56 ECO Greenhouse Assembly Instructions Frame • Châssis • Rahmen • Marco...
- Page 57 • Prepare a Foundation (p. ix) • Préparation des fondations (p. xix) • Vorbereitung eines Fundaments (p. xxix) • Prepare una Base (p. xxxix) Roof • Toit • Dach • Techo (p. 23) ECO Greenhouse Assembly Instructions Frame • Châssis • Rahmen • Marco...
- Page 58 ECO Greenhouse Assembly Instructions Frame • Châssis • Rahmen • Marco Pin1...
- Page 59 Step 14 (p. 13) Step 17 (p. 16) ECO Greenhouse Assembly Instructions Frame • Châssis • Rahmen • Marco...
- Page 60 ECO Greenhouse Assembly Instructions Frame • Châssis • Rahmen • Marco Pin1...
- Page 61 ECO Greenhouse Assembly Instructions Frame • Châssis • Rahmen • Marco...
- Page 62 ECO Greenhouse Assembly Instructions Frame • Châssis • Rahmen • Marco...
- Page 63 • Prepare a Foundation (p. ix) • Préparation des fondations (p. xix) • Vorbereitung eines Fundaments (p. xxix) • Prepare una Base (p. xxxix) Roof • Toit • Dach • Techo (p. 23) ECO Greenhouse Assembly Instructions Frame • Châssis • Rahmen • Marco...
- Page 64 ECO Greenhouse Assembly Instructions Frame • Châssis • Rahmen • Marco Pin1...
- Page 65 ECO Greenhouse Assembly Instructions Frame • Châssis • Rahmen • Marco...
- Page 66 ECO Greenhouse Assembly Instructions Frame • Châssis • Rahmen • Marco Pin1...
- Page 67 ECO Greenhouse Assembly Instructions Frame • Châssis • Rahmen • Marco...
- Page 68 ECO Greenhouse Assembly Instructions Frame • Châssis • Rahmen • Marco...
- Page 69 • Prepare a Foundation (p. ix) • Préparation des fondations (p. xix) • Vorbereitung eines Fundaments (p. xxix) • Prepare una Base (p. xxxix) Roof • Toit • Dach • Techo (p. 23) ECO Greenhouse Assembly Instructions Frame • Châssis • Rahmen • Marco...
- Page 71 Roof • Toit • Dach • Techo Step 21 (p. 24) Step 33 (p. 36) Step 21 (p. 24) Step 49 (p. 53) Step 21 (p. 24) Step 65 (p. 72) Step 22 (p. 25) Step 34 (p. 37) Step 22 (p. 25) Step 50 (p.
- Page 72 ECO Greenhouse Assembly Instructions Roof • Toit • Dach • Techo PN72 PN72 Pin1 x 10 • The plastic indentification strip indicates the side of the panel which must face the outside in order to provide UV protection. Peel off the edges of the strip before inserting them in profiles.
- Page 73 Pin1 x 10 ECO Greenhouse Assembly Instructions Roof • Toit • Dach • Techo...
- Page 74 ECO Greenhouse Assembly Instructions Roof • Toit • Dach • Techo PN72 Pin1 PN72 • The plastic indentification strip indicates the side of the panel which must face the outside in order to provide UV protection. Peel off the edges of the strip before inserting them in profiles.
- Page 75 x 10 ECO Greenhouse Assembly Instructions Roof • Toit • Dach • Techo...
- Page 76 ECO Greenhouse Assembly Instructions Roof • Toit • Dach • Techo PN73L PN73L Pin1 x 10 • The plastic indentification strip indicates the side of the panel which must face the outside in order to provide UV protection. Peel off the edges of the strip before inserting them in profiles.
- Page 77 PN73R PN73R Pin1 • The plastic indentification strip indicates the side of the panel which must face the outside in order to provide UV protection. Peel off the edges of the strip before inserting them in profiles. • La bande d'identification en plastique indique le côté...
- Page 78 ECO Greenhouse Assembly Instructions Roof • Toit • Dach • Techo • La tira plástica de identificación indica el lado del panel que debe hacer frente al exterior para proporcionar protección ultravioleta. Despegue los bordes de la tira antes de insertarlos en los perfiles. Pin1 x 12...
- Page 79 PN72L PN73L PN73R PN73R PN61 Pin1 ECO Greenhouse Assembly Instructions Roof • Toit • Dach • Techo...
- Page 80 ECO Greenhouse Assembly Instructions Roof • Toit • Dach • Techo Pin1 Step 30 (p. 33) Step 45 (p. 48) Step 45 (p. 48)
- Page 81 Pin1 x 20 ECO Greenhouse Assembly Instructions Roof • Toit • Dach • Techo...
- Page 82 ECO Greenhouse Assembly Instructions Roof • Toit • Dach • Techo • See Using Glazing Elements (p. vi). • Cf. Utilisation des éléments de vitrage (p. xvi). • Siehe Einsatz der Verglasungselemente (p. xxvi). • Véase Usando Elementos Vidriados (p. xxxvi).
- Page 83 WIN35 WINH31 WINH31 WINH31 WIN35 ECO Greenhouse Assembly Instructions Roof • Toit • Dach • Techo...
- Page 84 ECO Greenhouse Assembly Instructions Roof • Toit • Dach • Techo • See Inserting Roof Panels (p. vii). • Cf. Insertion des panneaux (p. xvii). • Siehe Einsetzen der Platten (p. xxvii). • Véase Inserción de Paneles (p. xxxvii). WIN35...
- Page 85 • See Using Glazing Elements (p. vi). • Cf. Utilisation des éléments de vitrage (p. xvi). • Siehe Einsatz der Verglasungselemente (p. xxvi). • Véase Usando Elementos Vidriados (p. xxxvi). ECO Greenhouse Assembly Instructions Roof • Toit • Dach • Techo...
- Page 86 ECO Greenhouse Assembly Instructions Roof • Toit • Dach • Techo • See Using Glazing Elements (p. vi). • Cf. Utilisation des éléments de vitrage (p. xvi). • Siehe Einsatz der Verglasungselemente (p. xxvi). • Véase Usando Elementos Vidriados (p. xxxvi).
- Page 87 PN77 • The plastic indentification strip indicates the side of the panel which must face the outside in order to provide UV protection. Peel off the edges of the strip before inserting them in profiles. • See Inserting Roof Panels (p. vii). •...
- Page 88 ECO Greenhouse Assembly Instructions Roof • Toit • Dach • Techo • See Using Glazing Elements (p. vi). • Cf. Utilisation des éléments de vitrage (p. xvi). • Siehe Einsatz der Verglasungselemente (p. xxvi). • Véase Usando Elementos Vidriados (p. xxxvi).
- Page 89 • See Using Glazing Elements (p. vi). • Cf. Utilisation des éléments de vitrage (p. xvi). • Siehe Einsatz der Verglasungselemente (p. xxvi). • Véase Usando Elementos Vidriados (p. xxxvi). ECO Greenhouse Assembly Instructions Roof • Toit • Dach • Techo...
- Page 90 ECO Greenhouse Assembly Instructions Roof • Toit • Dach • Techo PN78 PN78 • The plastic indentification strip indicates the side of the panel which must face the outside in order to provide UV protection. Peel off the edges of the strip before inserting them in profiles.
- Page 91 RC12 • See Using Glazing Elements (p. vi). • Cf. Utilisation des éléments de vitrage (p. xvi). • Siehe Einsatz der Verglasungselemente (p. xxvi). • Véase Usando Elementos Vidriados (p. xxxvi). ECO Greenhouse Assembly Instructions Roof • Toit • Dach • Techo...
- Page 92 ECO Greenhouse Assembly Instructions Roof • Toit • Dach • Techo • See Using Glazing Elements (p. vi). • Cf. Utilisation des éléments de vitrage (p. xvi). • Siehe Einsatz der Verglasungselemente (p. xxvi). • Véase Usando Elementos Vidriados (p. xxxvi).
- Page 93 PN77 • The plastic indentification strip indicates the side of the panel which must face the outside in order to provide UV protection. Peel off the edges of the strip before inserting them in profiles. • See Inserting Roof Panels (p. vii). •...
- Page 94 ECO Greenhouse Assembly Instructions Roof • Toit • Dach • Techo • See Using Glazing Elements (p. vi). • Cf. Utilisation des éléments de vitrage (p. xvi). • Siehe Einsatz der Verglasungselemente (p. xxvi). • Véase Usando Elementos Vidriados (p. xxxvi).
- Page 95 • If you need to remove the roof caps push them on one side and lift. • Si vous devez enlever les protections du toit, il suffit de les pousser sur le côté et de les soulever. • Wenn Sie die Dachkappen entfernen müssen, drücken Sie sie auf einer Seite nach unten und heben sie dann an der anderen Seite hoch.
- Page 96 ECO Greenhouse Assembly Instructions Roof • Toit • Dach • Techo Pin1 x 16...
- Page 97 Pin1 x 20 Step 47 (p. 50) Step 62 (p. 66) ECO Greenhouse Assembly Instructions Roof • Toit • Dach • Techo...
- Page 98 ECO Greenhouse Assembly Instructions Roof • Toit • Dach • Techo Pin1 x 20...
- Page 99 ECO Greenhouse Assembly Instructions Roof • Toit • Dach • Techo...
- Page 100 ECO Greenhouse Assembly Instructions Roof • Toit • Dach • Techo • See Using Glazing Elements (p. vi). • Cf. Utilisation des éléments de vitrage (p. xvi). • Siehe Einsatz der Verglasungselemente (p. xxvi). • Véase Usando Elementos Vidriados (p. xxxvi).
- Page 101 WIN35 WINH31 WINH31 WINH31 WIN35 ECO Greenhouse Assembly Instructions Roof • Toit • Dach • Techo...
- Page 102 ECO Greenhouse Assembly Instructions Roof • Toit • Dach • Techo PN78 WIN34 • The plastic indentification strip indicates the side of the panel which must face the outside in order to PN78 provide UV protection. Peel off the edges of the strip before inserting them in profiles.
- Page 103 • See Using Glazing Elements (p. vi). • Cf. Utilisation des éléments de vitrage (p. xvi). • Siehe Einsatz der Verglasungselemente (p. xxvi). • Véase Usando Elementos Vidriados (p. xxxvi). ECO Greenhouse Assembly Instructions Roof • Toit • Dach • Techo...
- Page 104 ECO Greenhouse Assembly Instructions Roof • Toit • Dach • Techo • See Using Glazing Elements (p. vi). • Cf. Utilisation des éléments de vitrage (p. xvi). • Siehe Einsatz der Verglasungselemente (p. xxvi). • Véase Usando Elementos Vidriados (p. xxxvi).
- Page 105 PN77 • The plastic indentification strip indicates the side of the panel which must face the outside in order to provide UV protection. Peel off the edges of the strip before inserting them in profiles. • See Inserting Roof Panels (p. vii). •...
- Page 106 ECO Greenhouse Assembly Instructions Roof • Toit • Dach • Techo • See Using Glazing Elements (p. vi). • Cf. Utilisation des éléments de vitrage (p. xvi). • Siehe Einsatz der Verglasungselemente (p. xxvi). • Véase Usando Elementos Vidriados (p. xxxvi).
- Page 107 • See Using Glazing Elements (p. vi). • Cf. Utilisation des éléments de vitrage (p. xvi). • Siehe Einsatz der Verglasungselemente (p. xxvi). • Véase Usando Elementos Vidriados (p. xxxvi). ECO Greenhouse Assembly Instructions Roof • Toit • Dach • Techo...
- Page 108 ECO Greenhouse Assembly Instructions Roof • Toit • Dach • Techo PN78 • The plastic indentification strip indicates the side of the panel which PN78 must face the outside in order to provide UV protection. Peel off the edges of the strip before inserting them in profiles.
- Page 109 RC12 • See Using Glazing Elements (p. vi). • Cf. Utilisation des éléments de vitrage (p. xvi). • Siehe Einsatz der Verglasungselemente (p. xxvi). • Véase Usando Elementos Vidriados (p. xxxvi). ECO Greenhouse Assembly Instructions Roof • Toit • Dach • Techo...
- Page 110 ECO Greenhouse Assembly Instructions Roof • Toit • Dach • Techo • See Using Glazing Elements (p. vi). • Cf. Utilisation des éléments de vitrage (p. xvi). • Siehe Einsatz der Verglasungselemente (p. xxvi). • Véase Usando Elementos Vidriados (p. xxxvi).
- Page 111 PN77 • The plastic indentification strip indicates the side of the panel which must face the outside in order to provide UV protection. Peel off the edges of the strip before inserting them in profiles. • See Inserting Roof Panels (p. vii). PN77 •...
- Page 112 ECO Greenhouse Assembly Instructions Roof • Toit • Dach • Techo • See Using Glazing Elements (p. vi). • Cf. Utilisation des éléments de vitrage (p. xvi). • Siehe Einsatz der Verglasungselemente (p. xxvi). • Véase Usando Elementos Vidriados (p. xxxvi).
- Page 113 • If you need to remove the roof caps push them on one side and lift. • Si vous devez enlever les protections du toit, il suffit de les pousser sur le côté et de les soulever. • Wenn Sie die Dachkappen entfernen müssen, drücken Sie sie auf einer Seite nach unten und heben sie dann an der anderen Seite hoch.
- Page 114 ECO Greenhouse Assembly Instructions Roof • Toit • Dach • Techo Pin1 x 16...
- Page 115 ECO Greenhouse Assembly Instructions Roof • Toit • Dach • Techo...
- Page 116 ECO Greenhouse Assembly Instructions Roof • Toit • Dach • Techo Pin1 x 20...
- Page 117 ECO Greenhouse Assembly Instructions Roof • Toit • Dach • Techo...
- Page 118 ECO Greenhouse Assembly Instructions Roof • Toit • Dach • Techo Pin1 x 20...
- Page 119 ECO Greenhouse Assembly Instructions Roof • Toit • Dach • Techo...
- Page 120 ECO Greenhouse Assembly Instructions Roof • Toit • Dach • Techo • See Using Glazing Elements (p. vi). • Cf. Utilisation des éléments de vitrage (p. xvi). • Siehe Einsatz der Verglasungselemente (p. xxvi). • Véase Usando Elementos Vidriados (p. xxxvi).
- Page 121 ECO Greenhouse Assembly Instructions Roof • Toit • Dach • Techo...
- Page 122 ECO Greenhouse Assembly Instructions Roof • Toit • Dach • Techo WIN34 WINH31 WINH31 WINH31 WIN34 PN78 • The plastic indentification strip indicates the side of the panel which must face the outside in order to provide UV protection. Peel off the edges of the strip before inserting them in profiles.
- Page 123 PN78 PN78 PN78 ECO Greenhouse Assembly Instructions Roof • Toit • Dach • Techo...
- Page 124 ECO Greenhouse Assembly Instructions Roof • Toit • Dach • Techo • See Using Glazing Elements (p. vi). • Cf. Utilisation des éléments de vitrage (p. xvi). • Siehe Einsatz der Verglasungselemente (p. xxvi). • Véase Usando Elementos Vidriados (p. xxxvi).
- Page 125 ECO Greenhouse Assembly Instructions Roof • Toit • Dach • Techo...
- Page 126 ECO Greenhouse Assembly Instructions Roof • Toit • Dach • Techo • See Using Glazing Elements (p. vi). • Cf. Utilisation des éléments de vitrage (p. xvi). • Siehe Einsatz der Verglasungselemente (p. xxvi). • Véase Usando Elementos Vidriados (p. xxxvi).
- Page 127 ECO Greenhouse Assembly Instructions Roof • Toit • Dach • Techo...
- Page 128 ECO Greenhouse Assembly Instructions Roof • Toit • Dach • Techo PN77 • The plastic indentification strip indicates the side of the panel which must face the outside in order to provide UV protection. Peel off the edges of the strip before inserting them in profiles.
- Page 129 PN77 PN77 PN77 PN77 PN77 ECO Greenhouse Assembly Instructions Roof • Toit • Dach • Techo...
- Page 130 ECO Greenhouse Assembly Instructions Roof • Toit • Dach • Techo • See Using Glazing Elements (p. vi). • Cf. Utilisation des éléments de vitrage (p. xvi). • Siehe Einsatz der Verglasungselemente (p. xxvi). • Véase Usando Elementos Vidriados (p. xxxvi).
- Page 131 ECO Greenhouse Assembly Instructions Roof • Toit • Dach • Techo...
- Page 132 ECO Greenhouse Assembly Instructions Roof • Toit • Dach • Techo • See Using Glazing Elements (p. vi). • Cf. Utilisation des éléments de vitrage (p. xvi). • Siehe Einsatz der Verglasungselemente (p. xxvi). • Véase Usando Elementos Vidriados (p. xxxvi).
- Page 133 ECO Greenhouse Assembly Instructions Roof • Toit • Dach • Techo...
- Page 134 ECO Greenhouse Assembly Instructions Roof • Toit • Dach • Techo PN78 • The plastic indentification strip indicates the side of the panel which must face the outside in order to provide UV protection. Peel off the edges of the strip before inserting them in profiles.
- Page 135 PN78 PN78 PN78 PN78 ECO Greenhouse Assembly Instructions Roof • Toit • Dach • Techo...
- Page 136 ECO Greenhouse Assembly Instructions Roof • Toit • Dach • Techo RC12 • See Using Glazing Elements (p. vi). • Cf. Utilisation des éléments de vitrage (p. xvi). • Siehe Einsatz der Verglasungselemente (p. xxvi). • Véase Usando Elementos Vidriados (p. xxxvi).
- Page 137 ECO Greenhouse Assembly Instructions Roof • Toit • Dach • Techo...
- Page 138 ECO Greenhouse Assembly Instructions Roof • Toit • Dach • Techo • See Using Glazing Elements (p. vi). • Cf. Utilisation des éléments de vitrage (p. xvi). • Siehe Einsatz der Verglasungselemente (p. xxvi). • Véase Usando Elementos Vidriados (p. xxxvi).
- Page 139 ECO Greenhouse Assembly Instructions Roof • Toit • Dach • Techo...
- Page 140 ECO Greenhouse Assembly Instructions Roof • Toit • Dach • Techo PN77 • The plastic indentification strip indicates the side of the panel which must face the outside in order to provide UV protection. Peel off the edges of the strip before inserting them in profiles.
- Page 141 PN77 PN77 PN77 PN77 PN77 ECO Greenhouse Assembly Instructions Roof • Toit • Dach • Techo...
- Page 142 ECO Greenhouse Assembly Instructions Roof • Toit • Dach • Techo • See Using Glazing Elements (p. vi). • Cf. Utilisation des éléments de vitrage (p. xvi). • Siehe Einsatz der Verglasungselemente (p. xxvi). • Véase Usando Elementos Vidriados (p. xxxvi).
- Page 143 ECO Greenhouse Assembly Instructions Roof • Toit • Dach • Techo...
- Page 144 ECO Greenhouse Assembly Instructions Roof • Toit • Dach • Techo • If you need to remove the roof caps push them on one side and lift. • Si vous devez enlever les protections du toit, il suffit de les pousser sur le côté et de les soulever. •...
- Page 145 Step 79 (p. 100) ECO Greenhouse Assembly Instructions Roof • Toit • Dach • Techo...
- Page 147 Walls • Paroise • Wände • Paredes Step 79 (p. 100) Step 91 (p. 112) Step 101 (p. 132) Step 80 (p. 101) Step 92 (p. 114) Step 102 (p. 134) Step 81 (p. 102) Step 93 (p. 116) Step 103 (p. 136) Step 82 (p.
- Page 148 ECO Greenhouse Assembly Instructions Walls • Paroise • Wände • Paredes Pin1...
- Page 149 ECO Greenhouse Assembly Instructions Walls • Paroise • Wände • Paredes...
- Page 150 ECO Greenhouse Assembly Instructions Walls • Paroise • Wände • Paredes Pin1...
- Page 151 PN71 PN71 ECO Greenhouse Assembly Instructions Walls • Paroise • Wände • Paredes...
- Page 152 ECO Greenhouse Assembly Instructions Walls • Paroise • Wände • Paredes PN71 PN71...
- Page 153 PN70 PN70 ECO Greenhouse Assembly Instructions Walls • Paroise • Wände • Paredes...
- Page 154 ECO Greenhouse Assembly Instructions Walls • Paroise • Wände • Paredes PN71 PN71...
- Page 155 PN71 PN71 ECO Greenhouse Assembly Instructions Walls • Paroise • Wände • Paredes...
- Page 156 ECO Greenhouse Assembly Instructions Walls • Paroise • Wände • Paredes PN71 PN71...
- Page 157 PN70 PN70 ECO Greenhouse Assembly Instructions Walls • Paroise • Wände • Paredes...
- Page 158 ECO Greenhouse Assembly Instructions Walls • Paroise • Wände • Paredes • Place the roof on the columns and circle around the greenhouse and insert the first 1 cm (½") of the roof connectors into the columns. Panel by panel, circle around the greenhouse and lower the roof into place.
- Page 159 Pin1 x 18 Step 111 (p. 154) ECO Greenhouse Assembly Instructions Walls • Paroise • Wände • Paredes...
- Page 160 ECO Greenhouse Assembly Instructions Walls • Paroise • Wände • Paredes Pin1...
- Page 161 ECO Greenhouse Assembly Instructions Walls • Paroise • Wände • Paredes...
- Page 162 ECO Greenhouse Assembly Instructions Walls • Paroise • Wände • Paredes...
- Page 163 ECO Greenhouse Assembly Instructions Walls • Paroise • Wände • Paredes...
- Page 164 ECO Greenhouse Assembly Instructions Walls • Paroise • Wände • Paredes Pin1 x 12...
- Page 165 ECO Greenhouse Assembly Instructions Walls • Paroise • Wände • Paredes...
- Page 166 ECO Greenhouse Assembly Instructions Walls • Paroise • Wände • Paredes PN71...
- Page 167 PN71 ECO Greenhouse Assembly Instructions Walls • Paroise • Wände • Paredes...
- Page 168 ECO Greenhouse Assembly Instructions Walls • Paroise • Wände • Paredes PN71...
- Page 169 PN71 ECO Greenhouse Assembly Instructions Walls • Paroise • Wände • Paredes...
- Page 170 ECO Greenhouse Assembly Instructions Walls • Paroise • Wände • Paredes PN70...
- Page 171 PN70 PN70 ECO Greenhouse Assembly Instructions Walls • Paroise • Wände • Paredes...
- Page 172 ECO Greenhouse Assembly Instructions Walls • Paroise • Wände • Paredes PN71...
- Page 173 PN71 PN71 PN71 ECO Greenhouse Assembly Instructions Walls • Paroise • Wände • Paredes...
- Page 174 ECO Greenhouse Assembly Instructions Walls • Paroise • Wände • Paredes PN70...
- Page 175 PN70 PN70 ECO Greenhouse Assembly Instructions Walls • Paroise • Wände • Paredes...
- Page 176 ECO Greenhouse Assembly Instructions Walls • Paroise • Wände • Paredes • Place the roof on the columns and circle around the greenhouse and insert the first 1 cm (½") of the roof connectors into the columns. Panel by panel, circle around the greenhouse and lower the roof into place.
- Page 177 ECO Greenhouse Assembly Instructions Walls • Paroise • Wände • Paredes...
- Page 178 ECO Greenhouse Assembly Instructions Walls • Paroise • Wände • Paredes Pin1 x 18...
- Page 179 Step 111 (p. 154) ECO Greenhouse Assembly Instructions Walls • Paroise • Wände • Paredes...
- Page 180 ECO Greenhouse Assembly Instructions Walls • Paroise • Wände • Paredes Pin1...
- Page 181 ECO Greenhouse Assembly Instructions Walls • Paroise • Wände • Paredes...
- Page 182 ECO Greenhouse Assembly Instructions Walls • Paroise • Wände • Paredes...
- Page 183 ECO Greenhouse Assembly Instructions Walls • Paroise • Wände • Paredes...
- Page 184 ECO Greenhouse Assembly Instructions Walls • Paroise • Wände • Paredes Pin1 x 16...
- Page 185 ECO Greenhouse Assembly Instructions Walls • Paroise • Wände • Paredes...
- Page 186 ECO Greenhouse Assembly Instructions Walls • Paroise • Wände • Paredes PN71...
- Page 187 PN71 ECO Greenhouse Assembly Instructions Walls • Paroise • Wände • Paredes...
- Page 188 ECO Greenhouse Assembly Instructions Walls • Paroise • Wände • Paredes PN71...
- Page 189 PN71 ECO Greenhouse Assembly Instructions Walls • Paroise • Wände • Paredes...
- Page 190 ECO Greenhouse Assembly Instructions Walls • Paroise • Wände • Paredes PN70...
- Page 191 PN70 PN70 PN70 ECO Greenhouse Assembly Instructions Walls • Paroise • Wände • Paredes...
- Page 192 ECO Greenhouse Assembly Instructions Walls • Paroise • Wände • Paredes PN71...
- Page 193 PN71 PN71 PN71 ECO Greenhouse Assembly Instructions Walls • Paroise • Wände • Paredes...
- Page 194 ECO Greenhouse Assembly Instructions Walls • Paroise • Wände • Paredes PN70...
- Page 195 PN70 PN70 PN70 ECO Greenhouse Assembly Instructions Walls • Paroise • Wände • Paredes...
- Page 196 ECO Greenhouse Assembly Instructions Walls • Paroise • Wände • Paredes • Place the roof on the columns and circle around the greenhouse and insert the first 1 cm (½") of the roof connectors into the columns. Panel by panel, circle around the greenhouse and lower the roof into place.
- Page 197 ECO Greenhouse Assembly Instructions Walls • Paroise • Wände • Paredes...
- Page 198 ECO Greenhouse Assembly Instructions Walls • Paroise • Wände • Paredes Pin1 x 18...
- Page 199 Step 111 (p. 154) ECO Greenhouse Assembly Instructions Walls • Paroise • Wände • Paredes...
- Page 201 Door • Porte • Tür • Puerta Step 111 (p. 154) Step 111 (p. 154) Step 111 (p. 154) Step 112 (p. 154) Step 112 (p. 154) Step 112 (p. 154) Step 113 (p. 155) Step 113 (p. 155) Step 113 (p. 155) Step 114 (p.
- Page 202 ECO Greenhouse Assembly Instructions Door • Porte • Tür • Puerta DoorwW1 Doorw DOW1 DOW1 Pin1 Pin1 • The larger handle always faces the outside. • La poignée la plus grande est toujours à l'extérieur. • Der grössere Griff zeigt immer nach aussen. •...
- Page 203 PN61 PN61 Pin1 • The plastic indentification strip indicates the side of the panel which must face the outside in order to provide UV protection. Peel off the edges of the strip before inserting them in profiles. • La bande d'identification en plastique indique le côté...
- Page 204 ECO Greenhouse Assembly Instructions Door • Porte • Tür • Puerta PN71 Pin1 • The plastic indentification strip PN71 indicates the side of the panel which must face the outside in order to provide UV protection. Peel off the edges of the strip before inserting them in profiles.
- Page 205 Pin1 • Use the Door Latch to keep the door closed against the wind. We do not recommend closing the door when you are inside. • Verrouillez la porte pour la maintenir fermée en cas de vent. Il est fortement déconseillé de fermer la porte lorsque vous vous trouvez à...
- Page 206 ECO Greenhouse Assembly Instructions Door • Porte • Tür • Puerta Upper Door Hinge AS80 ASL80 Upper Door ASM80 Hinge (80 mm) DOW2 ASL80 ASM80 Upper Door Hinge AS80 DOW2...
- Page 207 AS80 ASL80 ASM80 (80 mm) AS80 ASL80 ASM80 ECO Greenhouse Assembly Instructions Door • Porte • Tür • Puerta...
- Page 208 ECO Greenhouse Assembly Instructions Door • Porte • Tür • Puerta • Remove the identification strip on the panels at the end of assembly. • Examine your Greenhouse for sharp edges and trim with a razor knife if necessary. • Retirez la bande d'identification des panneaux à la fin du montage. •...
- Page 209 • Seal any gaps between the upper panels and profiles using SF soft foam insulation. Cut pieces of SF soft foam insulation 2.5 cm (1") long, remove the adhesive backing, and place where shown, making sure that the area is clean and dry. •...
- Page 212 ECO Greenhouse Rion Ltd. • Cabri 25120 • Israel • Tel: +972-4-995-2666 • Fax: +972-4-995-2677 email: rion@rion.com • homepage: http:\\www.rion.com Version 23032009...