Table des Matières

Publicité

Les langues disponibles

Les langues disponibles

Liens rapides

HeatsBox
Die weltweit erste intelligente
heizbare Lunchbox
HeatsBox
La première Lunchbox chauffante
intelligente au monde
Reheat
Bottom &
top heat
HeatsBox
Il primo Lunchbox riscaldabile
intelligente al mondo

Publicité

Table des Matières
loading

Sommaire des Matières pour Koenig HeatsBox

  • Page 1 Reheat Bottom & top heat HeatsBox HeatsBox HeatsBox Die weltweit erste intelligente La première Lunchbox chauffante Il primo Lunchbox riscaldabile heizbare Lunchbox intelligente au monde intelligente al mondo...
  • Page 2 Utilisez toutes les possibilités de la HeatsBox® avec l’application HeatsBox! Sfrutta tutte le possibilità di HeatsBox® con l’app HeatsBox! Get the most out of the HeatsBox® by downloading the HeatsBox App! Weitere Informationen zu unseren Produkten und dem Sortiment finden Sie unter:...
  • Page 3: Table Des Matières

    Deutsch ..................3 – 11 Français .................. 12 – 20 Italiano ................... 21 – 29 English ..................30 – 38 Inhaltsverzeichnis Gebrauch («Zweck») des Produkts ............ 4 Sicherheitsvorkehrungen ..............5 Wichtige allgemeine Sicherheitshinweise ........... 5 Wichtige Hinweise ................6 Allgemeine Empfehlungen ..............6 Teilebeschreibung ................
  • Page 4: Gebrauch («Zweck») Des Produkts

    Nährwerte Ihrer Lebensmittel beibehält. Geniessen Sie Ihre Mahlzeit warm und gewinnen Sie mit der HeatsBox mehr Flexibilität im Alltag. Die HeatsBox ist auf den Betrieb via Netzstecker (220–240V AC) ausgelegt, sodass Sie bequem im Büro, in der Schule oder zuhause Ihre Mahlzeiten aufwärmen können.
  • Page 5: Sicherheitsvorkehrungen

    Sie das Gerät weder in die Nähe noch direkt in einen Ofen, Kühl- oder Gefrierschrank. Stellen Sie das Gerät nicht in die Nähe oder in eine Mikrowelle oder Geschirrspüler. Der Ab- stand zur HeatsBox sollte mindestens 25 Zentimeter betragen. • Ein Gerät mit warmem Inhalt nur mit äusserster Vorsicht bewegen. Ansonsten kann es zu Verbrennungen und Verletzungen von Personen kommen.
  • Page 6: Wichtige Hinweise

    Wichtige Hinweise • Verwenden Sie für die Reinigung keine Scheuermittel oder -schwämme. • Das Gerät, Stromkabel oder Steckverbindung niemals in Wasser oder andere Flüssigkeiten ein- tauchen. • Während der erstmaligen Benutzung kann das Gerät einen leichten Geruch abgeben. Dies ist normal und wird innerhalb weniger Minuten verschwinden.
  • Page 7: Teilebeschreibung

    Teilebeschreibung 1. HeatsBox Gerät 7. Heizfläche des Deckels 2. Deckel der HeatsBox 8. Dichtung des Deckels 3. Ein/Aus-Taste mit LED-Kontrollleuchte 9. Heizfläche des Innengehäuses 4. Verschluss 10. Stromkabel mit Netzstecker 5. Innenschale 11. Deckel für die Innenschale 6. Steckverbindung 12. Teiler...
  • Page 8: Vor Dem Erstgebrauch

    • Lassen Sie das Gerät ca. 1 Minute abkühlen, nehmen Sie dann den Deckel ab und geniessen Sie Ihre Mahlzeit. Ansonsten hält Ihnen die HeatsBox das Essen automatisch für 30 Minuten warm. • Ziehen Sie den Netzstecker und entfernen Sie den Deckel.
  • Page 9: Anmerkungen Zum Gebrauch

    • Wenn Sie mit dem Gerät verbunden sind, so wechselt die LED-Kontrollleuchte die Farbe von weiss zu blau. Hinweis: Es ist auch möglich, direkt aus dem standby-Modus sich mit der HeatsBox via App zu verbinden, ohne dass zuerst den Einschaltknopf gedrückt werden muss.
  • Page 10: Grafik Zur Übersicht Der Led Farben Der Ein/Aus-Taste

    Deckel schliessen, um fortzufahren. Warmhalteprozess läuft, aber ist temporär Gelb Warmhalteprozess läuft unterbrochen, da der Deckel offen ist. Deckel schliessen, um fortzufahren. HeatsBox ist verbunden mit Deckel ist offen und muss zum Starten eines Blau der App Heizprozesses zuerst geschlossen werden. Keine Farbe, Die HeatsBox ist im aber Gerät ist...
  • Page 11: Entsorgung

    190 g Stromkabel & Steckverbindung • Länge Stromkabel: 1.5 m • Steckverbindung: Phase und Neutralleiter Lieferumfang • 1 HeatsBox (inkl. 1 Edelstahl Innenschale) • 1 Stromkabel mit Netzstecker • 1 Bedienungsanleitung Zertifizierungen • CE EN 60335-1:2012 und EN 60335-2-9:2016 • CE-RED EN 60950-1, EN 301489, EN 300328 und EN 62479 •...
  • Page 12 Table de matières Utilisation du produit ...............13 Précautions de sécurité ..............14 Instructions générales de sécurité importantes ........14 Remarques importantes ..............15 Recommandations générales ............15 Description des pièces ..............16 Avant la première utilisation.............17 Manuel d’instructions ..............17 Notes sur l’utilisation ...............18 Graphique pour l’aperçu des couleurs de la LED du bouton marche/arrêt ...........19 Nettoyer l’intérieur ................19 Nettoyage de l’extérieur ..............19...
  • Page 13: Utilisation Du Produit

    Profitez de votre repas chaud et gagnez en flexibilité dans la vie de tous les jours grâce à la HeatsBox. La HeatsBox est conçue pour fonctionner sur une prise de courant (220– 240V AC), ce qui vous permet de réchauffer vos repas dans le confort de votre bureau, de votre école ou de votre maison.
  • Page 14: Précautions De Sécurité

    Ne placez pas l’appareil à proximité ou dans un four à micro-ondes ou un lave-vaisselle. La distance par rapport à la HeatsBox doit être d’au moins 25 centimètres. • Ne déplacez un appareil dont le contenu est chaud qu’avec une extrême prudence. Dans le cas contraire, cela peut entraîner des brûlures et des blessures aux personnes.
  • Page 15: Remarques Importantes

    Remarques importantes • N’utilisez pas de produits à récurer ni d’éponges abrasives pour le nettoyage. • N’immergez jamais l’appareil, le câble d’alimentation ou la fiche de connexion dans l’eau ou d’autres liquides. • Lors de la première utilisation, l’appareil peut émettre une légère odeur. C’est normal et cela disparaîtra en quelques minutes.
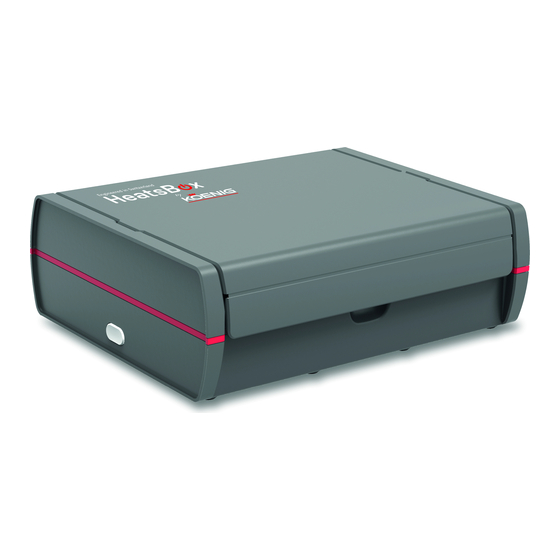
  • Page 16: Description Des Pièces

    Description des pièces 1. Dispositif HeatsBox 7. Surface de chauffe du couvercle 2. Couvercle de la HeatsBox 8. Joint du couvercle 3. Bouton marche/arrêt avec témoin 9. Surface de chauffage du logement intérieur lumineux LED 10. Câble d’alimentation avec prise de courant 4.
  • Page 17: Avant La Première Utilisation

    à une certaine température pendant une période supplémentaire. • Laissez l’appareil refroidir pendant environ 1 minute, puis retirez le couvercle et savourez votre repas. Sinon, la HeatsBox maintient automatiquement les aliments au chaud pendant 30 minutes. • Débranchez le cordon d’alimentation et retirez le couvercle.
  • Page 18: Notes Sur L'utilisation

    • Lorsque vous êtes connecté à l’appareil, le témoin lumineux LED change de couleur, passant du blanc au bleu. Indice: Il est également possible de se connecter à la HeatsBox via l’application directement depuis le mode veille sans avoir à appuyer sur le bouton d’alimentation au préalable.
  • Page 19: Graphique Pour L'aperçu Des Couleurs De La Led Du Bouton Marche/Arrêt

    Jaune en cours couvercle est ouvert. Fermez le couvercle pour continuer. Le couvercle est ouvert et doit être fermé au HeatsBox est connectée Bleu préalable pour lancer un processus de chauf- à l’application fage. Pas de couleur, La HeatsBox est mais l’appareil...
  • Page 20: Élimination

    • Longueur du câble électrique: 1.5 m • Connexion à la prise: Conducteur de phase et de neutre Champ d’application • 1 HeatsBox (y compris 1 récipient intérieur en acier inoxydable) • 1 câble d’alimentation avec prise de courant • 1 manuel d’instructions Certifications •...
  • Page 21 Indice Uso («scopo») del prodotto ............22 Precauzioni di sicurezza ..............23 Importanti avvertenze generali di sicurezza ........23 Avvertenze importanti ..............24 Raccomandazioni generali .............. 24 Descrizione dei componenti ............25 Prima del primo utilizzo ..............26 Istruzioni per l’uso ................26 Note sull’uso ..................
  • Page 22: Uso («Scopo») Del Prodotto

    HeatsBox permette di godersi il proprio pasto caldo e ottenere più flessibilità nella vita di tutti i giorni. L’HeatsBox è progettato per funzionare tramite la spina di rete (220– 240 V AC), in modo da poter riscaldare i pasti nel comfort dell’ufficio, a scuola o a casa. Il processo di riscalda- mento può...
  • Page 23: Precauzioni Di Sicurezza

    Non collocare l’apparecchio vicino a o in un forno a microonde o una lavastoviglie. La distanza dall’HeatsBox deve essere di almeno 25 centimetri. • Spostare un apparecchio con contenuto caldo solo con estrema cautela. In caso con- trario, ciò...
  • Page 24: Avvertenze Importanti

    Avvertenze importanti • Non utilizzare detergenti o spugne abrasive per la pulizia. • Non immergere mai l’apparecchio, il cavo di alimentazione o la spina di collegamento in acqua o altri liquidi. • Durante il primo utilizzo, l’apparecchio può emettere un leggero odore. Ciò è normale e scom- parirà...
  • Page 25: Descrizione Dei Componenti

    Descrizione dei componenti 1. Apparecchio HeatsBox 8. Guarnizione del coperchio 2. Coperchio dell’HeatsBox 9. Superficie riscaldante dell’alloggiamento 3. Tasto On/Off con indicatore luminoso a LED interno 4. Chiusura 10. Cavo di alimentazione con spina di rete 5. Vassoio interno 11. Coperchio per il vassoio interno 6.
  • Page 26: Prima Del Primo Utilizzo

    • Rimuovere il vassoio interno dall’apparecchio e pulirlo con acqua tiepida e sapone. Sciacquare e asciugare bene il vassoio interno prima di rimetterlo nell’apparecchio. • Pulire la superficie esterna dell’unità con un panno umido (acqua). • Scaricare l’app HeatsBox per lo smartphone: • Google Play Store: • Cercare «HeatsBox» nel Play Store •...
  • Page 27: Note Sull'uso

    Il processo di riscaldamento inizia immediatamente e la spia LED diventa rossa. • Una volta impostato il timer per l’ora che si vuole mangiare l’Heatsbox calcola automaticamente quando deve iniziare il processo di riscaldamento. È possibile chiudere l’app o interrompere laconnessione bluetooth *.
  • Page 28: Grafico Per Una Panoramica Dei Colori Dei Led Del Tasto On/Off

    è aperto. Chiudere il coperchio per continuare. L’HeatsBox è collegato Il coperchio è aperto e deve essere chiuso all’app prima di iniziare un processo di riscaldamento. Nessun colore, L’HeatsBox è in modalità ma il dispositivo standby. L’HeatsBox può è collegato essere attivato tramite all’alimentazione app.
  • Page 29: Smaltimento

    • Lunghezza del cavo di alimentazione: 1.5 m • Spina di collegamento: Conduttore di fase e neutro Entità della fornitura • 1 HeatsBox (incl. 1 vassoio interno in acciaio inox) • 1 cavo di alimentazione con spina di rete • 1 istruzioni per l’uso Certificazioni •...
  • Page 30 Table of Contents Intended use .................. 31 Safety Precautions ................32 Important safety information ............32 Important Notes ................33 General Recommendations ............. 33 Parts Description ................34 Before First Use ................35 User Instructions ................35 User Hints ..................36 Overview about LED Colors ON/OFF button ........
  • Page 31: Intended Use

    The efficient and even heating process provides a fresh taste and retains full nutritional value of your food. Enjoy your favorite meal and a more convenient lifestyle. HeatsBox is powered by 220–240 V AC and the heating process can be started by either pressing the ON/OFF button or by using our Android or iOS App.
  • Page 32: Safety Precautions

    Use the appliance in accordance with its designated use and for its in-tended purpose only. Warning: No modification and/or manipulation are allowed at any cir-cumstances. KOENIG rejects any liability whatsoever. In case of a transfer of the product (such as, but not limited to, reselling or gifting), the printed...
  • Page 33: Important Notes

    Important Notes • Warning: Never submerge appliance into water or other liquids. It may be damaged beyond repair and cause a risk of electric shock. • Do not use abrasive cleaners or scouring pads. • Do not immerse the appliance, cord or plug into water at any time. •...
  • Page 34: Parts Description

    Parts Description 1. HeatsBox appliance 7. Inner case heating surface 2. Lid of HeatsBox (Heating Lid) 8. Rubber sealing of lid 3. On/Off button with LED indicator light 9. Lid heating surface 4. Fastener 10. Power cord 5. Inner dish 11.
  • Page 35: Before First Use

    • Search for «HeatsBox» in Play Store, or enter the following link in your browser: www.faitron.com/android • Apple App Store: www.faitron.com/ios • Search for «HeatsBox» in the App Store, or enter the following link in your browser: www.faitron.com/ios • You can find the up-to-date manual of the App by visiting: www.faitron.com/App User Instructions 1.
  • Page 36: User Hints

    LED control lamp turns red. • If you have set a timer, the HeatsBox will automatically start the heat-ing process after a set time, but not immediately. You can close the app or disconnect the bluetooth * connection.
  • Page 37: Overview About Led Colors On/Off Button

    HeatsBox is connected Lid is open and must be closed first to start Blue to the App. heating process. No color, The HeatsBox is in but device is standby mode. The connected to the HeatsBox can be power socket activated via App.
  • Page 38: Disposal

    Disposal Disable appliances prior to disposal, cut off mains cable and bring to an official refuse site. The HeatsBox and its part should not be disposed of with other household waste. Specifications • Model: B00145 • Material: PP, Silicone, Aluminium •...
  • Page 39: Garantie

    Garantie Garantie Garanzia Guarantee Die Produktgarantie entspricht jeweils den lokalen, gesetzlichen Bestimmungen, mindestens aber 2 Jahre ab Kaufdatum. Sie umfasst Konstruktions-, Produktions- sowie Materialfehler. Ausgenommen sind sämtliche Verschleissteile und unsachgemässe Benutzung oder Pflege so- wie Eingriffe von Drittpersonen. Bitte bewahren Sie Ihre Kaufquittung sorgfältig auf, sie gilt als Garantienachweis.
  • Page 40 Adressen Adresses Indirizzi Address TAVORA Brands AG Sihlbruggstrasse 107 6340 Baar Switzerland www.koenigworld.com Best brands for your home www.tavora.ch...

Table des Matières