
Manuels Connexes pour Klarstein 10035709


Sommaire des Matières pour Klarstein 10035709
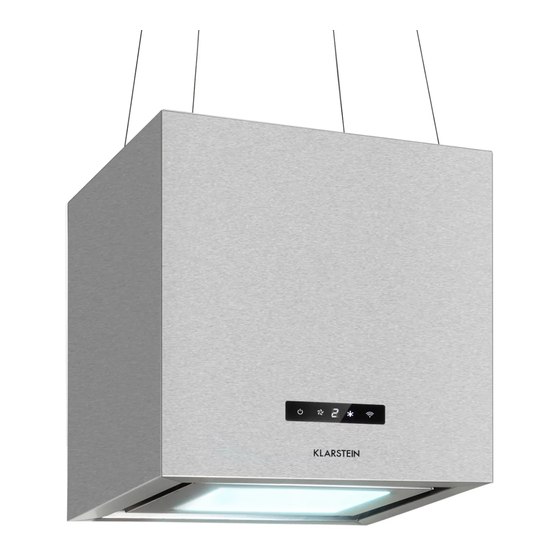
- Page 1 KRONLEUCHTER SMART VARIOLIGHT Dunstabzugshaube Range Hood Campana extractora Hotte aspirante Cappa aspirante 10035709 10035710 10035711 www.klarstein.com...
-
Page 3: Table Des Matières
Gerätesteuerung per Smartphone 13 Reinigung und Wartung 15 Fehlerbehebung 16 Hinweise zum Umweltschutz 17 Produktdatenblatt 18 Hinweise zur Entsorgung 20 Konformitätserklärung 20 TECHNISCHE DATEN 10035709 10035709, 10035710, 1003571 1 Stromversorgung 220-240 V ~ 50/60 Hz LED-Lampe 250 W WiFi-Standard 802.1 1 b/g/n WiFi-Frequenz 2,4 GHz WiFi-Sendeleistung (max.) -
Page 4: Sicherheitshinweise
SICHERHEITSHINWEISE • Lesen Sie sich alle Hinweise vor der Benutzung sorgfältig durch und bewahren Sie die Bedienungsanleitung zum späteren Nachschlagen gut auf. • Die Montagearbeiten dürfen nur von einer Elektrofachkraft oder einer qualifizierten Person durchgeführt werden. Bevor Sie die Dunstabzugshaube verwenden, stellen Sie sicher, dass die Spannung (V) und die auf der Dunstabzugshaube angegebene Frequenz (Hz) der Spannung und Frequenz der Stromversorgung in Ihrem Haushalt entsprechen. - Page 5 Wichtige Hinweise zum Abluftbetrieb WARNUNG Vergiftungsgefahr durch zurückgesaugte Abgase! Betreiben Sie das Gerät nicht im Abluftbetrieb, wenn es zusammen mit einer raumluftabhängigen Feuerstätte betrieben wird und keine ausreichende Luftzirkulation garantiert wird. Raumluftabhängige Feuerstätten wie Gas-, Öl-, Holz- oder Kohleheizungen, Boiler oder Durchlauferhitzer beziehen die Luft aus dem Raum und führen sie durch ein Abluftrohr oder einen Kamin ins Freie.
-
Page 6: Installation
INSTALLATION Installation mit Abluft Hinweis: Beachten Sie die Sicherheitshinweise zur Bedienung des Gerätes, wenn die Luft nach außen abgeführt wird. Wenn die Dunstabzugshaube gleichzeitig mit einem Gerät in Betrieb ist, das seine Energie aus einer anderen Quelle als Strom bezieht, darf der Unterdruck im Raum 4 Pa nicht übersteigen (4 x 10⁻⁵ Bar). - Page 7 Abmessungen...
- Page 8 Vorbereitung Falls sie über einen Abzug nach außen verfügen, können Sie die Abzugshaube wie auf dem Bild rechts installieren. Der Abzugskanal sollte einen Durchmesser von mindestens 150 mm haben und aus Emaille, Aluminium oder einem flexiblen, hitzebeständigen Rohr bestehen. • Schalten Sie das Gerät vor der Installation aus und ziehen Sie den Stecker.
- Page 9 Befestigen Sie die Dekorplatte mit 2 Schrauben ST4*8 mm an der Montageplatte. Heben Sie die Dunstabzugshaube mit einer weiteren Person nach oben. Befestigen Sie die Halteseile an den entsprechenden Halterungen an der Oberseite der Dunstabzugshaube. Stellen Sie die Länge der Halteseile ein, bevor Sie den Körper der Dunstabzugshaube an den Halteseilen...
-
Page 10: Aktivkohlefilter Einbauen (Optional)
AKTIVKOHLEFILTER EINBAUEN (OPTIONAL) Mit einem Aktivkohlefilter lassen sich Um den Filter installieren zu können, bei innenentlüfteten Abzugshauben müssen sie zuerst den Fettfilter entfernen. unangenehme Essensgerüche aus der Drücken Sie auf den Verschluss und Luft filtern. ziehen Sie ihn herunter. Stecken Sie den Aktivkohlefilter auf den Lüfter und drehen Sie ihn im Uhrzeigersinn fest. -
Page 11: Bedienfeld
BEDIENFELD EIN/AUS GESCHWINDIGKEIT LICHT WIFI TASTENFUNKTIONEN Ein/aus Drücken Sie kurz auf die Taste EIN/AUS, um die Dunstabzugshaube einzuschalten. Wenn Sie das Gerät zum ersten Mal einschalten, läuft der Lüfter auf Stufe 1. Wenn Sie das Gerät ausschalten merkt es sich die zuletzt eingestellte Geschwindigkeit. Geschwindigkeit einstellen •... - Page 12 Licht ein/aus Drücken Sie kurz auf die Taste LICHT, um das Licht einzuschalten. Drücken Sie die Taste erneut, um das Licht wieder auszuschalten. Lichtfarbe einstellen Drücken Sie lang auf die Taste licht, um die Lichtfarbe einzustellen. Das Display zeigt [0] an. Drücken Sie nun mehrmals kurz auf die Taste GESCHWINDIGKEIT, UM DIE LICHTFARBE VON [L1] bis [L9] anzupassen: L1 = weiß...
-
Page 13: Gerätesteuerung Per Smartphone
GERÄTESTEUERUNG PER SMARTPHONE Wenn Sie Ihr Klarstein-Gerät in Ihr heimisches WLAN einbinden, können Sie es ganz bequem über die dazugehörige Klarstein-App bedienen. Die App ermöglicht es Ihnen, nicht nur das Gerät über Ihr Smartphone fernzusteuern, sondern bietet Ihnen zudem Zugang zu Rezepten und weiterführenden Informationen. - Page 14 Fehlerbehebung bei Verbindungsproblemen Wenn Ihr Klarstein-Gerät im WLAN nicht gefunden werden kann, überprüfen Sie Folgendes: • Ist das Gerät eingesteckt? • Ist die WLAN-Funktion des Smartphones aktiviert? • Ist die WLAN-Funktion des Klarstein-Gerätes aktiviert? (Befolgen Sie die Anweisungen in der App.) •...
-
Page 15: Reinigung Und Wartung
REINIGUNG UND WARTUNG Schalten Sie die Dunstabzugshaube vor der Reinigung und Wartung aus und ziehen Sie den Stecker aus der Steckdose. Die Außenflächen sind anfällig für Kratzer und Flecken. Benutzen Sie daher zur Reinigung keine Scheuermittel und wischen Sie Rückstände von alkalischen oder saure Substanzen (Zitronensaft, Essig) nach der Reinigung umgehend weg. -
Page 16: Fehlerbehebung
FEHLERBEHEBUNG Fehler Mögliche Ursache Lösung Das Licht ist an, aber der Die Lüftung ist blockiert. Entfernen Sie die Motor läuft nicht. Blockade. Der Kondensator ist Lassen Sie den kaputt. Kondensator ersetzen. Der Motor ist kaputt. Lassen Sie den Motor ersetzen. Der Motor riecht Lassen Sie den Motor merkwürdig. -
Page 17: Hinweise Zum Umweltschutz
HINWEISE ZUM UMWELTSCHUTZ • Achten Sie während des Kochens auf eine ausreichende Luftzufuhr, damit die Dunstabzugshaube effizient und mit einem geringen Betriebsgeräusch arbeiten kann. • Passen Sie die Gebläsedrehzahl an die beim Kochen entstehende Dampfmenge an. Verwenden Sie den Intensivmodus nur bei Bedarf. Je niedriger die Gebläsedrehzahl ist, desto weniger Energie wird verbraucht. -
Page 18: Produktdatenblatt
PRODUKTDATENBLATT Angaben nach Verordnung (EU) Nr. 65/2014 Mess- und Berechnungsmethoden nach EN 61591:1997+A1:2006+A2:201 1+A1 1:201 4+A12:2015 Artikelnummer 10035709, 10035710, 1003571 1 Bezeichnung Symbol Wert Einheit Jährlicher Energieverbrauch 44,3 kWh/Jahr hood Energieeffizienzklasse fluiddynamische Effizienz 29,7 hood Klasse für die fluiddynamische Effizienz... - Page 19 Angaben nach Verordnung (EU) Nr. 66/2014 Mess- und Berechnungsmethoden nach EN 61591:1997+A1:2006+A2:201 1+A1 1:201 4+A12:2015 Artikelnummer 10035709, 10035710, 1003571 1 Bezeichnung Symbol Wert Einheit Jährlicher Energieverbrauch 44,3 kWh/Jahr hood Zeitverlängerungsfaktor Fluiddynamische Effizienz 29,7 hood Energieeffizienzindex 54,8 hood Gemessener Luftvolumenstrom im m³/h...
-
Page 20: Hinweise Zur Entsorgung
Mitmenschen vor negativen Konsequenzen. KONFORMITÄTSERKLÄRUNG Hersteller: Chal-Tec GmbH, Wallstraße 16, 10179 Berlin, Deutschland. Importeur für Großbritannien: Chal-Tec UK limited Unit 6 Riverside Business Centre Brighton Road Shoreham-by-Sea BN43 6RE United Kingdom Die vollständige Konformitätserklärung des Herstellers fi nden Sie unter folgendem Link: https://use.berlin/10035709... - Page 21 Cleaning and Maintenance 33 Troubleshooting 34 Notes on Environmental Protection 35 Product Data Sheet 36 Disposal Considerations 38 Declaration of Conformity 38 TECHNICAL DATA Item number 10035709, 10035710, 1003571 1 Power supply 220-240 V ~ 50/60 Hz LED lamp 250 W WiFi standard 802.1 1 b/g/n WiFi frequency 2,4 GHz WiFi radio-frequency power (max.)
-
Page 22: Safety Instructions
SAFETY INSTRUCTIONS • Thank you for purchasing this cooker hood. Please read the instruction manual carefully before you use the cooker hood, and keep it in a safe place. • The installation work must be carried out by a qualified electrician or competent person. - Page 23 Important notes about the extraction mode WARNING Risk of poisoning from exhaust gases sucked back. Never operate the device in extraction mode simultaneously with an open flue appliance when there is not adequate airflow guaranteed. Open fl ue combustion equipment (for example, gas, oil, wood or coal-fi red heaters, tankless water heaters, water heaters) pulls combustion air from the room and runs it through an exhaust pipe or chimney to the outside.
-
Page 24: Installation
INSTALLATION Installation (Vent outside) Note: When the range hood and appliance supplied with energy other than electricity are simultaneously in operation, the negative pressure in the room must be not exceed 4 Pa (4 x 10 Bar). Installation (Vent inside) If you do not have an outlet to the outside, exhaust pipe is not required and the installation is similar to the one show in section “Installation (Vent outside)”. - Page 25 Dimensions...
-
Page 26: Preparation
Preparation If you have an outlet to the outside, your cooker hood can be connected as below picture by means of an extraction duct (enamel, aluminium, flexible pipe or inflammable material with an interior diameter of 150 mm). • Before installation, turn the unit off and unplug it from the outlet. - Page 27 Fasten the decor plate to the mounting plate using 2 ST4*8 mm screws. Lift the cooker hood upwards with another person. Attach the retaining ropes to the corresponding brackets on the top of the cooker hood. Adjust the length of the holding ropes before attaching the body of the cooker hood to the...
-
Page 28: Installing A Carbon Filter (Optional)
INSTALLING A CARBON FILTER (OPTIONAL) Activated carbon filter can be used to In order to install the activated carbon trap odours. filter, the grease filter should be detached first. Press the lock and pull it downward. Plug the activated carbon filter into the unit and turn it in clockwise direction. -
Page 29: Control Panel
CONTROL PANEL ON/OFF SPEED LIGHT WIFI KEY FUNCTIONS On/Off Press the ON/OFF button briefly to switch on the cooker hood. When you switch on the unit for the first time, the fan runs at speed 1. When you switch off the unit, it remembers the last speed set. -
Page 30: Light On/Off
Light on/off Briefly press the LIGHT key to switch the light on. Press the key again to switch the light off. Setting the light color Press and hold the light key to set the light color. The display shows [0]. Now briefly press the speed key several times to adjust the light color from [L1] to [L9]: L1 = white L2 = red... -
Page 31: Device Control By Smartphone
Make sure your smartphone is connected to the same WiFi network that your Klarstein device is to be connected to. Open the Klarstein app. Sign in to your account. If you do not have an account, sign up in the Klarstein app. Follow the instructions from the app. App Download Use the scan function of your smartphone to scan the QR code and save the app on your smartphone. - Page 32 If your Klarstein device cannot be found in the WLAN, check the following: • Is the device plugged in? • Is the WiFi feature of my phone enabled? • Is the WiFi function of the Klarstein device activated? (Follow the instructions in the app) • Has the WLAN password been entered correctly? •...
-
Page 33: Cleaning And Maintenance
CLEANING AND MAINTENANCE Turn off the cooker hood before cleaning and maintenance and unplug the appliance from the wall outlet. The exterior surfaces are susceptible to scratches and stains. Therefore, do not use abrasive cleaners and wipe away any alkaline or acidic residue (lemon juice, vinegar) immediately after cleaning. -
Page 34: Troubleshooting
TROUBLESHOOTING Fault Possible Cause Solution Light on, but motor does The leaf blocked. Get rid of the blocking. not work. The capacitor damaged. Replace capacitor. The motor jammed Replace motor. bearing damaged. The internal with of motor Replace motor. off or a bad smell from the motor. -
Page 35: Notes On Environmental Protection
NOTES ON ENVIRONMENTAL PROTECTION • During cooking, make sure that there is sufficient air supply so that the cooker hood can operate efficiently and with low operating noise. • Adjust the fan speed to the amount of steam produced during cooking. Use the intensive mode only when necessary. -
Page 36: Product Data Sheet
PRODUCT DATA SHEET Information according to Regulation (EU) No. 65/2014 Measurement and calculation methods according to EN 61591:1997+A1:2006+A2:20 1 1+A1 1:2014+A12:2015 Item number 10035709, 10035710, 1003571 1 Description Symbol Value Unit Annual Energy Consumption 44,3 kWh/Year hood Energy Efficiency class... - Page 37 Information according to Regulation (EU) No. 66/2014 Measurement and calculation methods according to EN 61591:1997+A1:2006+A2:20 1 1+A1 1:2014+A12:2015 Item number 10035709, 10035710, 1003571 1 Description Symbol Value Unit Annual Energy Consumption 44,3 kWh/Year hood Time increase factor Fluid Dynamic Efficiency...
-
Page 38: Disposal Considerations
Chal-Tec GmbH, Wallstrasse 16, 10179 Berlin, Germany. Importer for Great Britain: Chal-Tec UK limited Unit 6 Riverside Business Centre Brighton Road Shoreham-by-Sea BN43 6RE United Kingdom The complete declaration of conformity of the manufacturer can be found at the following link: https://use.berlin/10035709... - Page 39 Notas para cuidar del medio ambiente 53 Ficha técnica del producto 54 Indicaciones sobre la retirada del aparato 56 Declaración de conformidad 56 DATOS TÉCNICOS Número de artículo 10035709, 10035710, 1003571 1 Fuente de alimentación 220-240 V ~ 50/60 Hz Luz LED 250 W WiFi estándar 802.1 1 b/g/n...
-
Page 40: Indicaciones De Seguridad
INDICACIONES DE SEGURIDAD • Lea atentamente todas las indicaciones y conserve este manual para consultas posteriores. • Los trabajos de montaje deben ser realizados solamente por un electricista u otro profesional. Antes de utilizar la campana extractora, asegúrese de que la tensión (V) y la frecuencia indicada en la campana extractora (Hz) coinciden con la tensión (V) y frecuencia (Hz) de su suministro eléctrico. - Page 41 Notas importantes acerca del modo de extracción ADVERTENCIA Peligro de muerte, riesgo de intoxicación provocado por gases en combustión aspirados. Nunca ponga en funcionamiento la función de extracción simultáneamente con un dispositivo que genere calor en una estancia estanca si no se ha garantizado una ventilación sufi ciente.
-
Page 42: Instalación
INSTALACIÓN Instalación con ventilación exterior Nota: consulte las indicaciones de seguridad para utilizar el aparato si el aire se conduce hacia el exterior. Si la campana extractora se pone en funcionamiento al mismo tiempo que otro dispositivo desde la misma fuente de energía, la presión de la estancia no debe superar los 4 Pa (4 x 10 Bar). - Page 43 Dimensiones...
- Page 44 Preparación Si cuenta con una salida de aire al exterior, puede instalar la campana tal y como indica la ilustración de la derecha. El tiro de aire debe contar con un diámetro mínimo de 150 mm y el conducto deberá estar fabricado en esmalte, aluminio o un material flexible y resistente al calor.
- Page 45 Fije la placa decorativa con 2 tornillos ST4x8 mm a la placa de montaje. Levante la campana extractora ayudándose de otra persona. Fije los cables de sujeción a los soportes correspondientes en la parte superior de la campana extractora. Ajuste la longitud del cable de sujeción antes de fijar la estructura de la campana extractora...
-
Page 46: Instalar Un Filtro De Carbón Activado (Opcional)
INSTALAR UN FILTRO DE CARBÓN ACTIVADO (OPCIONAL) Con un filtro de carbón activado Para poder instalar el filtro, primero instalado en las campanas con debe quitar el filtro de grasa. Presione ventilación interna, es posible filtrar los el cierre y tírelo hacia abajo. olores desagradables de los alimentos. -
Page 47: Panel De Control
PANEL DE CONTROL ON/OFF VELOCIDAD WIFI FUNCIONES DE LAS TECLAS ON/OFF Pulse la tecla ON/OFF para encender la campana extractora. Si enciende el aparato por primera vez, el ventilador funciona al nivel 1. Si apaga el aparato, memorizará la última velocidad seleccionada. Ajustar la velocidad •... - Page 48 Luz on/off Puse la tecla LUZ para encender la luz. Pulse de nuevo la tecla para volver a apagar la luz. Seleccionar el color de la luz Mantenga pulsada la tecla LUZ para seleccionar el color de la luz. El display muestra [0].
-
Page 49: Control Del Dispositivo Por Smartphone
Si conecta el aparato a su red WLAN doméstica, podrá controlarlo cómodamente mediante la App correspondiente de Klarstein. La App le permite no solo controlar el aparato mediante su smartphone, sino que también le ofrece acceso a recetas y otra información adicional. - Page 50 Solución de problemas de conexión Si su dispositivo Klarstein no se encuentra en la WLAN, compruebe lo siguiente: • ¿Está enchufado el dispositivo? • ¿Está activada la función WiFi de mi teléfono? • ¿Está activada la función WiFi del dispositivo Klarstein? (Sigue las instrucciones de la aplicación)
-
Page 51: Limpieza Y Mantenimiento
LIMPIEZA Y MANTENIMIENTO Antes de limpiar y mantener la campana extractora, apáguela y desenchufe el aparato de la toma de corriente. Las superficies exteriores son susceptibles a arañazos y manchas. Por lo tanto, no utilice limpiadores abrasivos y limpie cualquier residuo alcalino o ácido (jugo de limón, vinagre) inmediatamente después de la limpieza. -
Page 52: Solución De Problemas
SOLUCIÓN DE PROBLEMAS Problema Posible causa Solución La luz está encendida La ventilación está Retire aquello que pero el motor no funciona. bloqueada. obstruye la ventilación. El condensador está Sustituya el condensador. averiado. El motor está averiado. Sustituya el motor. El motor genera un olor Sustituya el motor. -
Page 53: Notas Para Cuidar Del Medio Ambiente
NOTAS PARA CUIDAR DEL MEDIO AMBIENTE • Durante la cocción, asegúrese de que haya un flujo de aire suficiente para que la campana extractora funcione eficazmente y con poco ruido de funcionamiento. • Ajuste la velocidad del ventilador a la cantidad de vapor producida durante la cocción. -
Page 54: Ficha Técnica Del Producto
FICHA TÉCNICA DEL PRODUCTO Información según el Reglamento (UE) nº 65/2014 Métodos de medición y cálculo según EN 61591:1997+A1:2006+A2:201 1+A1 1:2014 +A12:2015 Número de artículo 10035709, 10035710, 1003571 1 Descripción Símbolo Valor Unidad Consumo anual de energía 44,3 kWh/Año hood Clase de eficiencia energética... - Page 55 Datos según el Reglamento (UE) nº 66/2014 Métodos de medición y cálculo según EN 61591:1997+A1:2006+A2:201 1+A1 1:2014 +A12:2015 Número de artículo 10035709, 10035710, 1003571 1 Descripción Símbolo Valor Unidad Consumo anual de energía 44,3 kWh/Año hood Factor de extensión temporal eficiencia fluidodinámica...
-
Page 56: Indicaciones Sobre La Retirada Del Aparato
Chal-Tec GmbH, Wallstraße 16, 10179 Berlín, Alemania. Importador para Gran Bretaña: Chal-Tec UK limited Unit 6 Riverside Business Centre Brighton Road Shoreham-by-Sea BN43 6RE United Kingdom Puede descargar la declaración de conformidad completa del fabricante en el siguiente enlace: https://use. berlin/10035709... -
Page 57: Fiche Technique
Informations sur la protection de l‘environnement 71 Fiche de données produit 72 Informations sur le recyclage 74 Déclaration de conformité 74 FICHE TECHNIQUE Numéro d'article 10035709, 10035710, 1003571 1 Source d'alimentation 220-240 V ~ 50/60 Hz Lampe LED 250 W WiFi standard 802.1 1 b/g/n WiFi fréquence... -
Page 58: Consignes De Sécurité
CONSIGNES DE SÉCURITÉ • Lisez attentivement toutes les consignes avant d’utiliser l’appareil et conservez ce mode d’emploi pour vous y référer ultérieurement. • Les travaux de montage doivent être effectués uniquement par électricien professionnel ou un spécialiste. Avant d‘utiliser la hotte aspirante, assurez-vous que la tension (V) et la fréquence indiquée sur la hotte aspirante (Hz) correspondent à... - Page 59 Remarques importantes concernant le mode d‘extraction MISE EN GARDE Danger de mort, risques d‘intoxication ! Par la ré-aspiration de gaz de combustion. Ne jamais utiliser la fonction d’aspiration de l’appareil en même temps qu’un foyer dépendant de l’air ambiant si l’air frais est insuffi sant.
-
Page 60: Installation
INSTALLATION Installation avec évacuation extérieure de l’air Attention: respecter les consignes de sécurité pour l’utilisation de l’appareil avec évacuation extérieure de l’air. Si la hotte aspirante est utilisée simultanément avec un autre appareil qui tire son énergie d’une source autre qu’électrique, la dépression de la pièce ne doit pas excéder 4 Pa (4 x 10 Bar). - Page 61 Dimensions...
- Page 62 Préparation Si l’espace dispose d’une bouche d’aération dirigée vers l’extérieur, il est possible d’installer la hotte comme sur l’image de droite. Le conduit d’aspiration doit avoir un diamètre d’au moins 150 mm et doit être composé d’émail, d’aluminium ou d’un tuyau flexible et thermorésistant. •...
- Page 63 Fixez le panneau décoratif à la plaque de montage avec 2 vis ST4 * 8 mm. Soulevez la hotte aspirante en vous faisant aider d‘une autre personne. Fixez les attaches aux supports correspondants sur le dessus de la hotte. Ajustez la longueur des attaches avant de fixer le corps de la hotte aux attaches.
-
Page 64: Installation Du Filtre À Charbon Actif (Facultatif)
INSTALLATION DU FILTRE À CHARBON ACTIF (FACULTATIF) Le filtre à charbon actif permet à la Pour installer le filtre, vous devez hotte de filtrer et d'éliminer les odeurs d'abord démonter le filtre à graisse. désagréables de cuisine. Appuyez sur la fermeture et abaissez-la. Placez le filtre à... -
Page 65: Panneau De Commande
PANNEAU DE COMMANDE MARCHE/ARRÊT VITESSE ÉCLAIRAGE WIFI FONCTIONS DES TOUCHES Marche /arrêt Appuyez brièvement sur MARCHE / ARRÊT pour allumer la hotte aspirante. Lorsque vous allumez l‘appareil pour la première fois, le ventilateur fonctionne au niveau 1. Lorsque vous éteignez l‘appareil, il se souvient de la dernière vitesse réglée. Réglage de la vitesse •... - Page 66 Éclairage marche / arrêt Appuyez brièvement sur Éclairage pour allumer la lumière. Appuyez à nouveau pour éteindre la lumière. Réglage de la couleur de l‘éclairage Appuyez longuement sur le bouton d‘éclairage pour définir la couleur de la lumière. L‘écran affiche [0]. Maintenant, appuyez brièvement sur VITESSE plusieurs fois pour régler LA COULEUR DE LA LUMIÈRE DE [L1] à...
-
Page 67: Contrôle De L'appareil Par Smartphone
à distance l‘appareil via votre smartphone, mais vous donne également accès à des recettes et à des informations supplémentaires. Procédez comme suit pour connecter votre smartphone avec votre appareil Klarstein : Téléchargez d‘abord l‘application Klarstein en scannant le code QR avec votre smartphone (voir ci-dessous) ou téléchargez-le directement depuis l‘App Store ou... - Page 68 Dépannage des problèmes de connexion Si votre appareil Klarstein ne se trouve pas dans le WLAN, vérifiez les points suivants : • L‘appareil est-il branché ? • La fonction WiFi de mon téléphone est-elle activée ? • La fonction WiFi de l‘appareil Klarstein est-elle activée ? (Suivez les instructions dans l‘application)
-
Page 69: Nettoyage Et Maintenance
NETTOYAGE ET MAINTENANCE Éteignez la hotte avant le nettoyage et l’entretien, puis débranchez la fiche de la prise. Les surfaces extérieures sont sujettes aux rayures et aux taches. Par conséquent, n‘utilisez pas d‘abrasifs pour le nettoyage et essuyez immédiatement les restes de substances alcalines ou acides (jus de citron, vinaigre) après le nettoyage. -
Page 70: Résolution Des Problèmes
RÉSOLUTION DES PROBLÈMES Problème Cause possible Solution La lumière est allumée La bouche d’aération est Éliminer la source du mais le moteur ne bloquée. blocage. fonctionne pas. Le condensateur est cassé. Faire remplacer le condensateur. Le moteur est cassé. Faire remplacer le moteur. Le moteur dégage une Faire remplacer le moteur. -
Page 71: Informations Sur La Protection De L'environnement
INFORMATIONS SUR LA PROTECTION DE L‘ENVIRONNEMENT • Assurez-vous qu‘il y a une ventilation suffisante pendant la cuisson pour que la hotte aspirante puisse fonctionner efficacement et avec un faible niveau sonore. • Ajustez la vitesse du ventilateur à la quantité de vapeur produite pendant la cuisson. -
Page 72: Fiche De Données Produit
FICHE DE DONNÉES PRODUIT Informations selon le règlement (UE) n ° 65/2014 Méthodes de mesure et de calcul selon EN 61591:1997+A1:2006+A2:201 1+A1 1:201 4+A12:2015 Numéro d‘article 10035709, 10035710, 1003571 1 Description Symbole Valeur Unité Consommation annuelle d'énergie 44,3 kWh/Année hood Classe d'efficacité... - Page 73 Informations selon le règlement (UE) n ° 66/2014 Méthodes de mesure et de calcul selon EN 61591:1997+A1:2006+A2:201 1+A1 1:201 4+A12:2015 Numéro d‘article 10035709, 10035710, 1003571 1 Description Symbole Valeur Unité Consommation annuelle d'énergie 44,3 kWh/Année hood Facteur d'extension de temps Efficacité...
-
Page 74: Informations Sur Le Recyclage
Chal-Tec GmbH, Wallstraße 16, 10179 Berlin, Allemagne. Importateur pour la Grande Bretagne : Chal-Tec UK limited Unit 6 Riverside Business Centre Brighton Road Shoreham-by-Sea BN43 6RE United Kingdom La déclaration complète de conformité du fabricant est accessible par le lien suivant : https://use.berlin/10035709... - Page 75 Indicazioni per la tutela dell’ambiente 89 Scheda dati del prodotto 90 Avviso di smaltimento 92 Dichiarazione di conformità 92 DATI TECNICI Numero di articolo 10035709, 10035710, 1003571 1 Rete elettrica 220-240 V ~ 50/60 Hz Luce LED 250 W WiFi standard 802.1 1 b/g/n...
-
Page 76: Avvertenze Di Sicurezza
AVVERTENZE DI SICUREZZA • Leggere attentamente tutte le istruzioni prima dell´uso e conservare il manuale per consultazioni future. • Il montaggio può essere eseguito solo da un tecnico qualificato. Prima di utilizzare la cappa aspirante, accertarsi che la tensione (V) e la frequenza (Hz) indicate corrispondano alla tensione (V) e alla frequenza (Hz) domestiche. - Page 77 Note importanti circa la modalità di estrazione AVVERTENZA Pericolo di morte, pericolo di intossicazione da gas di scarico! Non azionare l´apparecchio con funzione di scarico mentre è attivo un impianto di riscaldamento che utilizza l´aria ambiente, se l´areazione non è suffi ciente. Gli impianti di riscaldamento che sfruttano l´aria ambiente (ad es.
-
Page 78: Installazione
INSTALLAZIONE Installazione con scarico all’esterno Nota: prestare attenzione alle avvertenze di sicurezza se si utilizza lo scarico all’esterno. Se la cappa aspirante è in funzione contemporaneamente con un altro dispositivi che trae energia da un’altra fonte di corrente, la depressione nella stanza non deve superare i 4 Pa (4 x 10 bar). - Page 79 Dimensioni...
- Page 80 Preparazione Se si possiede uno scarico verso l‘esterno, è possibile installare la cappa come mostrato nell‘immagine a destra. Il condotto di scarico deve avere un diametro minimo di 150 mm ed essere composto da smalto, alluminio, da un tubo flessibile, resistente al calore. •...
- Page 81 Fissare il pannello decorativo al pannello di montaggio con 2 viti ST4*8 mm. Sollevare la cappa aspirante con l’aiuto di un’altra persona. Fissare il cavo di sostegno agli appositi supporti sul lato superiore della cappa. Regolare la lunghezza del cavo di sostegno prima di agganciarci il corpo della cappa aspirante.
-
Page 82: Come Installare Un Filtro Ai Carboni Attivi (Opzionale)
COME INSTALLARE UN FILTRO AI CARBONI ATTIVI (OPZIONALE) Con un filtro ai carboni attivi è possibile Per installare il filtro, è necessario prima eliminare odori spiacevoli in cappe di tutto rimuovere il filtro antigrasso. aspiranti con scarico interno. Premere sulla chiusura e rimuoverlo. Posizionare il filtro ai carboni attivi sulla ventola e ruotare in senso orario. -
Page 83: Pannello Di Controllo
PANNELLO DI CONTROLLO ON/OFF VELOCITÀ LUCE WI-FI TASTI FUNZIONE On/off Premere brevemente ON/OFF per accendere la cappa aspirante. Quando si accende il dispositivo per la prima volta, la ventola funziona al livello di velocità 1. Se si spegne il dispositivo, viene salvata l’ultimo livello di velocità utilizzato. Impostare la velocità... - Page 84 Accendere/spegnere la luce Premere brevemente LUCE per accendere la luce. Premere di nuovo il tasto per spegnere la luce. Impostare il colore della luce Premere a lungo LUCE per impostare il colore desiderato. Il display mostra [0]. Premere più volte brevemente VELOCITÀ per regolare il colore della luce da [L1] a [L9]. L1 = bianco L2 = rosso L3 = verde...
-
Page 85: Gestione Tramite Smartphone
Per collegare il telefono al dispositivo Klarstein, procedere come segue: Per prima cosa scaricare l‘app Klarstein scansionando il codice QR con lo smartphone (vedere sotto) o scaricarla direttamente dall‘App Store o da Google Play. - Page 86 • Il dispositivo è collegato? • La funzione WiFi del telefono è abilitata? • La funzione WiFi del dispositivo Klarstein è attivata? (Seguire le istruzioni nell‘app) • La password WLAN è stata immessa correttamente? • Il router, il dispositivo Klarstein e lo smartphone sono nelle immediate vicinanze durante il tentativo di connessione? (Idealmente a non più...
-
Page 87: Pulizia E Manutenzione
PULIZIA E MANUTENZIONE Spegnere la cappa e staccare la spina dalla presa elettrica prima di pulizia o manutenzione. Le superfici dell’alloggiamento possono graffiarsi e macchiarsi. Rispettare le avvertenze relative alla pulizia per garantire i migliori risultati possibili senza causare danni. Non utilizzare prodotti abrasivi e rimuovere immediatamente residui di sostanze alcaline o acide (come succo di limone, aceto, ecc.) dalle superfici. -
Page 88: Risoluzione Dei Problemi
RISOLUZIONE DEI PROBLEMI Problema Causa possibile Soluzione La luce è accesa ma il L´areazione è bloccata. Rimuovere l´ostruzione. motore non funziona. Il condensatore è guasto. Sostituire il condensatore. Il motore è guasto. Sostituire il motore. Il motore emette un odore Sostituire il motore. -
Page 89: Indicazioni Per La Tutela Dell'ambiente
INDICAZIONI PER LA TUTELA DELL’ AMBIENTE • Mentre si cucina, assicurare un sufficiente flusso d’aria, in modo che la cappa aspirante possa funzionare in modo efficiente e con bassa rumorosità operativa. • Regolare la velocità della ventola in base alla quantità di vapore generato durante la cottura. -
Page 90: Scheda Dati Del Prodotto
SCHEDA DATI DEL PRODOTTO Indicazioni conformi alla direttiva (UE) N° 65/2014 Metodi di misurazione e calcolo conformi a EN 61591:1997+A1:2006+A2:201 1+A1 1: 2014+A12:2015 Numero articolo 10035709, 10035710, 1003571 1 Definizione Simbolo Valore Unità Consumo energetico annuale 44,3 kWh/Anno hood Classe di efficienza energetica... - Page 91 Indicazioni conformi alla direttiva (UE) N° 66/2014 Metodi di misurazione e calcolo conformi a EN 61591:1997+A1:2006+A2:201 1+A1 1: 2014+A12:2015 Numero articolo 10035709, 10035710, 1003571 1 Definizione Simbolo Valore Unità Consumo energetico annuale 44,3 kWh/Anno hood Fattore di incremento nel tempo...
-
Page 92: Avviso Di Smaltimento
Chal-Tec GmbH, Wallstraße 16, 10179 Berlino, Germania. Importatore per la Gran Bretagna: Chal-Tec UK limited Unit 6 Riverside Business Centre Brighton Road Shoreham-by-Sea BN43 6RE United Kingdom La dichiarazione di conformità completa del produttore è disponibile al seguente link: https://use.berlin/10035709...