Publicité

Les langues disponibles
  • FR

Les langues disponibles

  • FRANÇAIS, page 44

Liens rapides

H23MOBS5HG

Publicité

Table des Matières
loading

Sommaire des Matières pour Hisense H23MOBS5HG

  • Page 1 H23MOBS5HG...
  • Page 3 Instrucciones para el uso / Horno microondas ES ..............................Istruzioni per l’uso / Forno a microonde IT ..............................Notice d’utilisation / Micro-ondes ............................44 Instruções de utilizção / Forno de Micro-ondas ............................65 Gebruiksaanwijzing / Magnetron oven NL ..............................Gebrauchsanweisung / Mikrowellengerät ............................106 Instruction manual / Microwave oven EN ..............................
  • Page 4: Horno Microondas

    HORNO MICROONDAS ESTIMADO CLIENTE Le agradecemos haber escogido nuestro producto. Pronto descubrirá que puede confi ar en él. Para facilitarle el manejo adjuntamos amplias instrucciones que le ayudarán a familiarizarse con su nuevo aparato lo antes posible. Le rogamos que lea detenidamente las instrucciones antes del primer uso.
  • Page 5: Instrucciones De Seguridad Importantes

    INSTRUCCIONES DE SEGURIDAD IMPORTANTES Nunca toque las superfi cies de calefacción o aparatos de cocina. Ellos se calientan durante el funcionamiento. Mantenga a los niños a una distancia segura. Existe el riesgo de quemaduras! La energía de microondas y de alto voltaje! No quite la cubierta.
  • Page 6 • ADVERTENCIA: Algunas partes del aparato que son de fácil acceso se calientan mucho durante su funcionamiento. Tener cuidado de no tocar los dispositivos de calentamiento. Los ninos que tengan menos de 8 anos deben estar todo el tiempo bajo supervisión.
  • Page 7 • Cuando caliente alimentos en recipientes de plástico o de papel, vigile el horno debido a la posibilidad de ignición; • Si se observa humo, apague o desconecte el aparato y mantenga la puerta cerrada para ahogar cualquier llama; • El calentamiento de bebidas con microondas puede producir un hervido posterior, por lo tanto, debe tener cuidado cuando maneje el recipiente;...
  • Page 8 INSTRUCCIONES DE A continuación, como en todos los aparatos, le SEGURIDAD PARA USO presentamos determinadas normas de seguridad que debe GENERAL seguir para asegurar un rendimiento óptimo de este horno: Mantenga siempre la bandeja de cristal, el brazo giratorio, el acople y la rejilla giratoria en su lugar cuando utilice el horno.
  • Page 9 – No utilice cables recubiertos de papel para sujetar las bolsas de plástico. – No utilice platos de melamina ya que contienen un material que puede absorber la energía de microondas. Esto puede provocar que el plato se rompa y ralentizará la velocidad de cocinado. –...
  • Page 10: Panel De Mando

    PANEL DE MANDO VISUALIZADOR Mostrar el reloj, el tiempo de cocción y la confi guración. COOKING TIME Usar esta tecla para cocinar la comida según el tiempo. WGT•TIME DEFROST Usar esta tecla para descongelar la comida según el tiempo o el peso. CLOCK•TIMER Utilizar esta tecla para confi...
  • Page 11 1. Cierre de la puerta 2. Ventanilla del horno 3. Anillo giratorio 4. Bandeja de vidrio 5. Panel de mando 6. Guía de ondas (por favor no retire la placa de mica que cubre la guía de ondas) INSTRUCCIONES DE MANDO RELOJ El horno está...
  • Page 12 TEMPORIZADOR Con el temporizador de cuenta regresiva puede ajustar el recordatorio que le avisará después de haber transcurrido el tiempo ajustado. Presionar la tecla “Clock•Timer” dos veces. El visualizador mostrará »00:00«. Presionar las teclas numéricas (0-9) e introducir la hora del temporizador. El tiempo más largo que puede ajustar es de 99 minutos y 99 segundos.
  • Page 13 NOTA: Cuando se selecciona PL0 (0%), no habrá potencia de microondas. Este ajuste es sólo para fi nes de desodorización. Presionar Visualizador PL10 PL9 PL8 PL7 PL6 PL5 PL4 PL3 PL2 PL1 PL0 Potencia 100% 90% 80% 70% 60% 50% 40% 30% 20% 10% PLANCHA –...
  • Page 14 FUNCIONAMIENTO El horno funcionará un 36 % de tiempo con microondas, y COMBINADO C-2 un 64 % de tiempo con la plancha. Este modo es idóneo para hornear pescado o platos gratinados. Presionar la tecla Grill•Combi tres veces y en el visualizador aparecerá...
  • Page 15: Cocción Automática

    COCCIÓN AUTOMÁTICA Para alimentos en el menú automático debe ajustar sólo el tipo y la masa/unidad del alimento. El horno le ayudará a justar la potencia y el tiempo. Por ejemplo: Si desea cocinar 2 trozos de patata, por favor siga los siguientes pasos.
  • Page 16 Menú Pantalla Masa Tiempo Popcorn 0'55˝ (palomitas) 100g 2'00˝ 230g 4'00˝ Potato (patatas) 460g 8'00˝ 690g 13'00˝ 100g 0'40˝ Pizza 200g 1'10˝ 400g 2'30˝ Vegetable 150g 4'00˝ (vegetal congelado) 350g 8'00˝ 500g 11'00˝ 120ml 1'00˝ Beverage (bebida) 240ml 2'00˝ 360ml 3'00˝...
  • Page 17 300g 8'00˝ 500g 11'00˝ Meat (carne) Carne de BEEF 700g 15'00˝ vaca 900g 18'00˝ 1100 1100g 20'00˝ 150g 8'00˝ 300g 14'00˝ Meat (carne) Carne de 450g 18'00˝ cerdo 600g 22'00˝ 750g 26'00˝ NOTA: • En el caso de algunos alimentos, es posible que tenga que darles la vuelta durante la cocción para asegurarse de que se cocinen completamente y se doren de forma uniforme.
  • Page 18 PESO (AUTO) DE En el horno se puede descongelar diferentes tipos de DESCONGELAMIENTO carnes y mariscos. El tiempo de descongelación se ajusta automáticamente en función del peso preajustado. El peso de alimentos congelados puede ser entre 100 g y 2000 g. Presionar la tecla “Wgt•Time Defrost”...
  • Page 19: Función De Memoria

    NOTA: Los alimentos de gran tamaño pueden estar congelados en el centro. Por lo tanto, para asegurar una descongelación uniforme, hay que darles la vuelta de vez en cuando y partirlos en trozos más pequeños durante el descongelamiento. Escurrir los líquidos durante el descongelamiento ya que los jugos de los alimentos pueden calentarse y cocinar los alimentos.
  • Page 20 INICIO RÁPIDO Consejos de utilización Esta función (100 % de microondas) se utiliza para calentar o cocer rápidamente los alimentos. En el estado de espera pulse la tecla “START” y el horno empezará a funcionar por 30 segundos. Con cada nueva pulsación de la tecla “START”...
  • Page 21: Medio Ambiente

    CUIDADOS DE SU HORNO MICROONDAS Apague el horno y desconecte el enchufe de la toma de pared antes de limpiar. 2. Mantenga limpio el interior del horno. Cuando las salpicaduras de los alimentos se adhieran a las paredes del horno, límpielas con un paño húmedo. No se recomienda el uso de detergentes abrasivos.
  • Page 22: Instalación Del Horno Microondas

    INSTALACIÓN DEL HORNO MICROONDAS INSTALACIÓN Asegúrese de que todos los materiales de empaquetado se eliminan del interior de la puerta. 2. inspeccione el horno tras desempaquetarlo en busca de daños visuales como: – Puerta desalineada. – Puerta dañada – Golpes o agujeros en la ventana de la puerta y en la pantalla –...
  • Page 23 ESPECIFICACIONES Consumo de energía: ........230V~50Hz, 1250W Salida: ....................800W Resistencia de grill ..............1000W Frecuencia de operación: ..........2450MHz Dimensiones exteriores: ......485 x 293 x 410 mm Capacidad del horno: ............23 litros Peso desembalado: ............aprox. 13 Kg Nivel de ruido (Lc IEC): ..........< 58 dB (A) Este aparato está...
  • Page 24: Garantía Y Servicio

    GARANTÍA Y SERVICIO Si necesita información o tiene algún problema, en contacto con el Servicio de Atención al Cliente de Hisense en su país (hallará el número de teléfono en el folleto de la garantía mundial). Si no hay Servicio de Atención al Cliente de Hisense en su país, diríjase a su distribuidor local Hisense o póngase...
  • Page 25: Forno A Microonde

    FORNO A MICROONDE GENTILE ACQUIRENTE La ringraziamo sinceramente per il Suo acquisto. Crediamo che Lei presto troverà una ampia conferma che ci si può affi dare davvero sui nostri prodotti. Per rendere l'utilizzo dell'apparecchio più semplice, alleghiamo questo manuale di istruzioni esauriente. Le istruzioni La aiuteranno a familiarizzare con il Suo nuovo apparecchio.
  • Page 26: Importanti Istruzioni Di Sicurezza

    IMPORTANTI ISTRUZIONI DI SICUREZZA Non toccare mai le superfi ci di riscaldamento o apparecchi di cottura. Essi surriscaldarsi durante il funzionamento. Tenere i bambini a distanza di sicurezza. Vi è il rischio di ustioni! L'energia a microonde e ad alta tensione! Non rimuovere il coperchio.
  • Page 27 • L'uso da parte dei bambini va sorvegliato dagli adulti. • AVVERTENZA : Se la guarnizione dello sportello è danneggiato, l'uso dell'aparecchio è vietato fi nchè non riparato da un tecnico autorizzato. • AVVERTENZA: La riparazione d'apparecchio può essere eseguito solo da un tecnico autorizzato. •...
  • Page 28 • Non cercate di sostituire da soli la lampadina del forno, e fatela sostituire solo da personale autorizzato. Se la lampadina si guasta, rivolgetevi al rivenditore o ad un tecnico di servizio Hisense autorizzato. • ATTENZIONE! Non utilizzare su nessuna parte...
  • Page 29 In Di seguito troverete alcune regole e norme di sicurezza LE ISTRUZIONI DI che, come con per gli altri apparecchi, bisogna rispettare SICUREZZA PER per assicuraresi un' uso sicuro e un funzionamento ottimale UN'USO GENERALE del forno: Durante il funzionamento del forno tutti gli accessori all'interno del forno devono essere al loro posto (vasoio girevole,..) il piatto di vetro, il braccio del rullo, il collegamento elettrico e l’incastro per il rullo devono...
  • Page 30 9. Gli accessori per il forno a microonde possono essere usati secondo le istruzioni del produttore. 10. Non cercate di friggere il cibo nel forno a microonde. 11. Fate attenzione che nel microonde si scaldia solo il liquido, ma non anche il recipiente. E' È possibile che quando togliete il coperchio, il liquido nella vaschetta nel recipiente produce il emana vapore oppure fuoriescono le goccioline anche se il coperchio stesso...
  • Page 31: Pannello Di Controllo

    PANNELLO DI CONTROLLO DISPLAY Visualizzare l'orologio, il tempo di cottura e le impostazioni. COOKING TIME Utilizzare questo tasto per impostare il tempo di cottura. TIME•WGT DEFROST Utilizzare questo tasto per scongelare gli alimenti in base al tempo o al peso. CLOCK•TIMER Utilizzare questo tasto per impostare l'orologio e il timer di cottura.
  • Page 32: Istruzioni Di Funzionamento

    1. Chiusura di sicurezza dello sportello 2. Finestra del forno 3. Anello rotante 4. Piatto di vetro 5. Pannello di controllo 6. Guida onde (Si prega di non rimuovere la guida in mica che ricopre la guida onde). ISTRUZIONI DI FUNZIONAMENTO OROLOGIO Il forno è...
  • Page 33: Timer Da Cucina

    TIMER DA CUCINA Con il conto alla rovescia del tempo si può impostare un allarme che avviserà del tempo trascorso. Premere due volte il tasto “Clock•Timer”. Sul display verrà visualizzato “00:00”. Premere i tasti numerici (0-9) e impostare il tempo desiderato.
  • Page 34 GRIGLIA – G-1 La cottura con il grill è particolarmente adatta per le fette sottili di carne, bistecche, braciole, spiedini, salsicce, o pezzi di pollo. Il grill è adatto anche per la preparazione di panini caldi e piatti gratinati. Premere una volta il tasto Grill•Combi e sul display verrà...
  • Page 35: Cottura Automatica

    NOTA: Si consiglia di utilizzare la griglia in dotazione. Posizionare gli alimenti sulla griglia, quindi posizionare la griglia direttamente sul vassoio di vetro. Si consiglia di girare di tanto in tanto gli alimenti per garantire una cottura più uniforme. COTTURA AUTOMATICA Per il cibo nel menù...
  • Page 36 120ml 1'00˝ Beverage 240ml 2'00˝ (bevanda) 360ml 3'00˝ 250g 3'30˝ My Plate (il mio piatto) 350g 4'30˝ 500g 6'30˝ 400g 19'00˝ 600g 23'00˝ Meat (carne) CHIC 800g 25'00˝ Pollo 1000 1000g 28'00˝ 1200 1200g 32'00˝ 300g 8'00˝ 500g 11'00˝ Meat (carne) BEEF 700g...
  • Page 37 NOTA: • Alcuni alimenti dovranno essere girati durante la cottura per assicurarsi che siano ben cotti in modo uniforme. • La densità e lo spessore dell’alimento possono infl uire sul suo tempo di cottura. • Tutti i tempi di cottura sono solo indicativi e possono essere modifi...
  • Page 38: Quick Start

    SCONGELAMENTO A Il forno consente anche uno scongelamento rapido. TEMPO (RAPIDO) Premere due volte il tasto una volta il tasto ”WGT•TIME Defrost” a peso e sul display verrà visualizzato “dEF1”. Premere i tasti numerici (0-9) e impostare il tempo di scongelamento desiderato. Ad esempio, inserire il tempo di scongelamento premendo “5”, “3”, “0”...
  • Page 39: Sicurezza Bambini

    SICUREZZA BAMBINI Questa funzione automatica di protezione è attivata un minuto dopo che il forno ha avuto accesso alla modalità di “standby”. Quando la funzione di protezione è attiva la porta deve essere aperta e chiusa per iniziare la cottura, diversamente il display visualizzerà...
  • Page 40 CURA DEL FORNO A MICROONDE – PULIZIA E MANUTENZIONE Prima di eff ettuare la pulizia del forno bisogna staccare il cavo di collegamento dalla rete elettrica. 2. L'interno del forno deve essere sempre pulito. Quando i pezzi di cibo, il liquido fuoriuscito o le gocce di grasso sporcano le pareti interne del forno, bisogna pulirle subito con una spugna umida.
  • Page 41 SI RISERVA IL DIRITTO DI APPORTARE QUALSIASI MODIFICA CHE NON INFLUISCE SULLE FUNZIONALITÀ DELL’APPARECCHIO. ISTRUZIONI DI FUNZIONAMENTO Verifi care se avete tolto dall'interno dello sportello MONTAGGIO DEL tutto il materiale dl' d’imballaggio. Non rimuovere il cartone di protezione che serve da protezione del FORNO A MICROONDE magnetron.
  • Page 42 SPECIFICAZIONI Consumo energia elettrica ......230V~50Hz, 1250W Potenza d'uscita ................. 800W 1000W Bruciatore per grill: ................Frequenza di funzionamento: ........2450MHz Misure esterne:..........485x 293 x 410 mm Volume del forno: ................23 litri Peso senza imballaggio ..........Circa 13 kg Livello rumore: ............Lc < 58 dB(A) Lc Questo apparecchio dispone di contrassegno ai sensi della direttiva europea 2012/19/EU in materia di apparecchi elettrici ed elettronici (waste electrical...
  • Page 43: Garanzia E Assistenza

    GARANZIA E ASSISTENZA Per ulteriori informazioni o eventuali problemi, contattate il Centro Assistenza Clienti Hisense locale (il numero di telefono è riportato nella foglio di garanzia internazionale). Qualora non fosse disponibile un Centro Assistenza Clienti locale nel vostro Paese, rivolgetevi...
  • Page 44: Micro-Ondes

    MICRO-ONDES CHÈRE CLIENTE Nous vous remercions vivement d’avoir acheté un appareil de notre marque et vous félicitons de votre choix. Pour vous faciliter l’utilisation de votre nouvel appareil, nous avons rédigé une notice détaillée ; elle vous aidera à vous familiariser avec lui. Nous vous recommandons de la lire attentivement avant de mettre votre appareil en service.
  • Page 45: Consignes De Sécurité Importantes

    CONSIGNES DE SÉCURITÉ IMPORTANTES Ne touchez jamais les éléments chauff ants des appareils de cuisson. Ils deviennent chauds pendant le fonctionnement. Tenez les enfants à distance de sécurité. Il existe un risque de brûlure! Énergie micro-ondes et haute tension ! Ne retirez pas le panneau de protection contre l'exposition aux micro-ondes.
  • Page 46 • ATTENTION : lorsque l’appareil fonctionne en mode combiné, les enfants ne devraient s’en servir que sous la surveillance d’un adulte en raison de la température élevée générée par le gril. (Cette consigne s’applique seulement aux modèles disposant de la fonction gril). •...
  • Page 47 les récipients avec précaution. • Afi n d’éviter tout risque de brûlure, agitez les biberons, remuez le contenu des petits pots pour bébés et testez la température avant consommation. • Ne faites pas cuire d’œufs durs ou à la coque aux micro-ondes, car ils peuvent éclater, même lorsque le temps de cuisson s’est écoulé.
  • Page 48 CONSIGNES Vous trouverez ci-dessous un certain nombre de règles GÉNÉRALES DE à suivre, comme pour tous les appareils. Elles vous SÉCURITÉ permettront d’utiliser ce four en toute sécurité et d’obtenir des performances maximales. Lorsque vous vous servez du four, veillez à ce que le plateau tournant, la couronne à...
  • Page 49 11. Souvenez-vous que dans un four à micro-ondes, le contenu du récipient chauff e plus vite que le récipient lui-même. Par conséquent, même si le couvercle ne vous semble pas très chaud au toucher, le liquide ou les aliments qui sont à l’intérieur dégagent la même quantité...
  • Page 50: Bandeau De Commandes Électronique

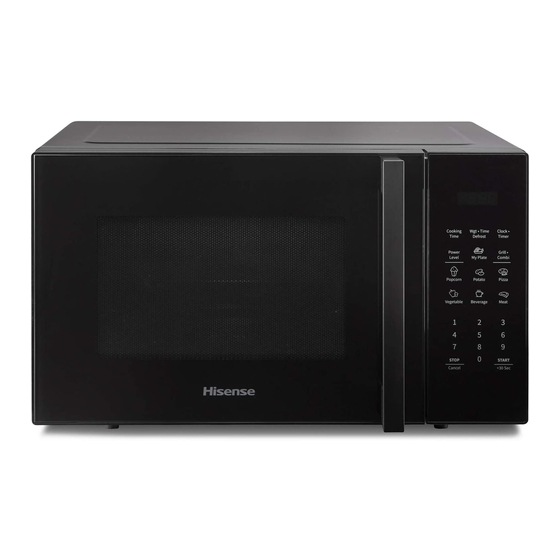
    BANDEAU DE COMMANDES ÉLECTRONIQUE ÉCRAN Indique l'horloge, le temps de cuisson et le réglage. COOKING TIME Utilisez cette touche pour cuire les aliments en touche du temps. WGT•TIME Utilisez cette touche pour décongeler les aliments en touche du temps ou du poids. CLOCK•TIMER Utilisez cette touche pour régler l'horloge et la minuterie de cuisson.
  • Page 51: Fonctionnement

    1. Verrouillage de sécurité de la porte 2. Hublot 3. Couronne à roulettes 4. Plateau tournant en verre 5. Bandeau de commandes 6. Répartiteur d'ondes (n'enlevez pas la plaque en mica recouvrant le répartiteur). FONCTIONNEMENT HORLOGE Le four est équipé d’une horloge à affi chage numérique ; quand le four est en veille, vous pouvez régler l'heure au format 12 heures en effl eurant la touche Clock•Timer.
  • Page 52 REMARQUE: • Lorsque la minuterie de la cuisine est en marche, les autres touches ne peuvent pas être utilisées. • Lorsque le micro-ondes n'est pas utilisé, cette touche vous permet d'utiliser le micro-ondes comme minuterie. • Veuillez vous assurer que l'horloge a été réglée. CUISSON Appuyez sur la touche Cooking Time.
  • Page 53 GRIL – G-1 Le gril est particulièrement adapté à la cuisson de la viande en tranches : escalopes, steaks, côtelettes, brochettes, saucisses, ou morceaux de poulets. Il convient aussi pour les toasts ou les sandwichs chauds et pour faire dorer les gratins. Appuyez une fois sur la touche Grill•Combi et l'écran affi chera »G-1«.
  • Page 54 REMARQUE: Nous vous recommandons d'utiliser le grill fourni. Placez vos aliments sur la grille puis sur le plateau tournant en verre. Nous vous recommandons de retourner les aliments de temps en temps pour assurer une cuisson plus uniforme. SMARTCOOK – Appuyez sur les touches numériques (1-6) pour lancer CUISSON EXPRESS la cuisson express à...
  • Page 55: Cuisson Auto

    CUISSON AUTO En mode Cuisson automatique, il vous suffi t de sélectionner le type d'aliment et son poids ou sa quantité. Le four se charge de régler la puissance et la durée de cuisson qui conviennent. Par exemple : Si vous voulez faire cuire deux morceaux de pommes de terre, veuillez suivre les étapes ci-dessous.
  • Page 56 100g 0'40˝ Pizza 200g 1'10˝ 400g 2'30˝ Vegetable 150g 4'00˝ (legumes surgelés) 350g 8'00˝ 500g 11'00˝ 120ml 1'00˝ Beverage (boissons) 240ml 2'00˝ 360ml 3'00˝ 250g 3'30˝ My Plate (mon 350g 4'30˝ assiette) 500g 6'30˝ 400g 19'00˝ 600g 23'00˝ My Plate (mon CHIC 800g...
  • Page 57: Dégivrage Du Poids

    150g 8'00˝ 300g 14'00˝ Meat (viande) 450g 18'00˝ Porc 600g 22'00˝ 750g 26'00˝ REMARQUE: • Pour certains aliments, vous devrez peut-être les retourner pendant la cuisson afi n de vous assurer qu'ils sont bien cuits et qu'ils brunissent uniformément. • La densité...
  • Page 58: Temps De Dégivrage

    TEMPS DE DÉGIVRAGE Der Mikrowellenherd ermöglicht auch das schnelle (VITESSE) Auftauen von gefrorenen Lebensmitteln. Appuyez deux fois sur la touche de dégivrage Wgt•Time et l'écran affi chera »dEF2«. Appuyez sur les touches numériques (0-9) pour entrer le temps de dégivrage. Par exemple, entrez le temps de dégivrage en appuyant sur »5«, »3«, »0«...
  • Page 59: Démarrage Rapide

    FONCTION DE Vous pouvez régler la procédure de cuisson dans la MÉMORISATION mémorisation. Vous pouvez défi nir un maximum de 3 mémorisations, veuillez suivre les étapes ci-dessous. Exemple : Si vous voulez faire cuire des aliments avec un niveau de puissance de micro-ondes de 80 % pendant 3 minutes et 20 secondes comme deuxième mémorisation.
  • Page 60: Sécurité Enfants

    SÉCURITÉ ENFANTS Utilisez cette fonction pour empêcher les jeunes enfants de se servir du four sans surveillance. Tant que le four est verrouillé, l’icône de la Sécurité enfants s’affi che à l’écran et l’appareil ne peut pas fonctionner. Pour activer la Sécurité enfants, effl eurez la touche STOP pendant 3 secondes.
  • Page 61: Environnement

    ENTRETIEN ET NETTOYAGE Avant de procéder au nettoyage, mettez le four à l’arrêt et débranchez-le. 2. Maintenez l’intérieur du four en bon état de propreté. Si des éclaboussures adhèrent aux parois, enlevez-les avec une éponge humide. Les détergents agressifs ou abrasifs ne sont pas recommandés.
  • Page 62 INSTALLATION MICRO-ONDES INSTALLATION Veillez à retirer tous les matériaux d’emballage qui se trouvent à l’intérieur du four. 2. Après avoir déballé l’appareil, vérifi ez s’il est en bon état, en portant une attention particulière aux points suivants: – Porte mal alignée –...
  • Page 63 CARACTÉRISTIQUES Raccordement électrique ......230V~50Hz, 1250W TECHNIQUES Puissance des micro-ondes ..........800W Puissance du gril ............... 1000W Fréquence ................2450MHz Dimensions de l’appareil ......485 x 293 x 410 mm Volume du four................. 23 litres Poids net................environ 13 kg Niveau de bruit ............Lc < 58 dB (A) Cet appareil est pourvu du marquage conforme à...
  • Page 64: Avant De Contacter Le Service Après-Vente

    S’il n’existe pas de Service Consommateurs Hisense dans votre pays, renseignez-vous auprès de votre revendeur Hisense local ou contactez le « Service Department of Hisense Domestic Appliances ». Réservé à une utilisation domestique! NOUS VOUS SOUHAITONS BEAUCOUP DE PLAISIR LORS DE L’UTILISATION DE VOTRE APPAREIL...
  • Page 65 FORNO DE MICRO-ONDAS ESTIMADA(O) CLIENTE, Agradecemos-lhe por ter comprado um forno da nossa marca e felicitamo-lo pela sua escolha. Para facilitar-lhe a utilização do seu novo forno, redigimos um manual pormenorizado; ajudá-lo-á a familiarizar com o mesmo. Recomendamo-lhe a lê-lo atentamente antes de colocar o seu forno em serviço.
  • Page 66: Instruções De Segurança Importantes

    INSTRUÇÕES DE SEGURANÇA IMPORTANTES Nunca toque nos elementos aquecedores dos fornos de cozedura. Tornam-se extremamente quentes durante o funcionamento. Mantenha as crianças numa distância de segurança. Existe um risco de queimadura! Energia micro-ondas e alta tensão! Não retire o painel de proteção contra a exposição aos micro-ondas.
  • Page 67 • AVISO: se a porta ou a junta da porta estiverem danifi cadas, não utilize o forno enquanto não for reparado por um técnico competente. • AVISO: é perigoso para qualquer outra pessoa que não um técnico proceder a reparações que implica à...
  • Page 68 • Quando limpe a porta, a junta da porta e o interior do forno, utilize exclusivamente detergentes leves não abrasivos que colocará numa esponja ou num pano macio. • É necessário limpar o forno regularmente e retirar logo qualquer resíduo alimentar. •...
  • Page 69 INTRUÇÕES GERAIS DE Encontrará a seguir uma série de regras a seguir, como SEGURANÇA para todos os fornos. Permitir-lhe-ão utilizar este forno em toda a segurança e obter performances máximas. Quando se servir do forno, verifi que se o prato rotativo, a coroa de rodinhas e o arrastador estão bem no devido lugar.
  • Page 70 tampa não lhe pareçar muito quente ao toque, o líquido ou os alimentos que estão no interior libertam a mesma quantidade de vapor do que em cozedura convencional; fi que prudente quando retire a tampa. 12. Quando aquece um biberão ou alimentos para bebé, teste você...
  • Page 71: Painel De Comandos

    PAINEL DE COMANDOS ECRÃ Exibe o relógio, o tempo de cozedura e o ajuste. COOKING TIME Prima esta tecla para cozer os alimentos durante uma duração ajustada. WGT•TIME DEFROST Prima esta tecla para descongelar os alimentos em função do seu peso ou durante um determinado tempo.
  • Page 72 1. Fecho de segurança da porta 2. Vidro 3. Coroa com rodinhas 4. Prato rotativo de vidro 5. Painel de comandos 6. Espalhador de ondas (não retire a placa em mica que cobre o espalhador). FUNCIONAMENTO RELÓGIO O forno está equipado de um relógio com exibição digital;...
  • Page 73 OBSERVAÇÃO: • Quando o temporizador está em funcionamento, as outras funções já não estão disponíveis. • Quando o forno não está em funcionamento, pode utilizar o temporizador como conta-minutos. • Verifi que se o relógio foi acertado. COZEDURA Prima a tecla »Cooking Time”. O ecrã exibe então »00:00«.
  • Page 74 GRELHADOR – G-1 O grelhador é especialmente adaptado à cozedura da carne em fatias: escalopes, bifes, costeletas, espetadas, salsichas, ou pedaços de frangos. Convém igualmente para as tostas ou as sandes quentes e para dourar os gratinados. Prima uma vez a tecla Grill•Combi e o ecrã exibe »G-1«.
  • Page 75 COZEDURA O forno funciona 36% do tempo com micro-ondas e 64% COMBINADA – C-2 do tempo com grelhador. Este modo convém para a cozedura dos peixes e dos gratinados Prima três vezes a tecla Grill•Combi e o ecrã exibe »C-2«. Prima as teclas digitais (0 a 9) para indicar o tempo de cozedura.
  • Page 76 COZEDURA AUTO Em modo Cozedura automática, basta seleccionar o tipo de alimento e o seu peso ou a sua quantidade. O forno trata de ajustar a potência e a duração de cozedura que convém. Por exemplo, se quiser cozer duas batatas, siga as etapas abaixo.
  • Page 77 Pizza 100g 0'40˝ 200g 1'10˝ 400g 2'30˝ 150g 4'00˝ Vegetable (legumes 350g 8'00˝ congelados) 500g 11'00˝ 120ml 1'00˝ Beverage (boissons) 240ml 2'00˝ 360ml 3'00˝ 250g 3'30˝ My Plate (o meu 350g 4'30˝ prato) 500g 6'30˝ 400g 19'00˝ 600g 23'00˝ Meat (viande) CHIC 800g...
  • Page 78 150g 8'00˝ 300g 14'00˝ Meat (viande) Porc 450g 18'00˝ 600g 22'00˝ 750g 26'00˝ OBSERVAÇÃO: • Talvez tenha de virar alguns alimentos durante a cozedura para que estes fi quem bem cozidos e que alouram uniformemente. • A densidade e a espessura dos alimentos podem infl...
  • Page 79: Função Memória

    DESCONGELAMENTO O forno permite igualmente a descongelação rápida. CONSOANTE O TEMPO Prima duas vezes a tecla “Wgt•Time Defrost”; o ecrã (VELOCIDADE) exibe então »dEF2«. Prima as teclas digitais (0 a 9) para indicar o tempo de descongelamento. Por exemplo, indica a duração de descongelamento premindo »5«, »3«, »0«...
  • Page 80: Arranque Rápido

    OBSERVAÇÃO: Para esmagar um programa memorizado, repita as etapas 1 a 3 acima permanecendo neste programa. No caso de falha elétrica, os programas de cozedura memorizados são eliminados. ARRANQUE RÁPIDO Conselhos para a utilização do forno Utilize esta função para aquecer ou cozer rapidamente os seus alimentos no micro-ondas à...
  • Page 81: Manutenção E Limpeza

    MANUTENÇÃO E LIMPEZA Antes de proceder à limpeza, pare o forno e desligue-o. 2. Mantenha o interior do forno em bom estado de limpeza. Se alguns salpicos aderirem às paredes, remova-as com uma esponja húmida. Os detergentes agressivos ou abrasivos não são recomendados. 3.
  • Page 82: Instalação

    INSTALAÇÃO DO FORNO DE MICRO-ONDAS INSTALAÇÃO Tente retirar todos os materiais da embalagem que se encontram no interior do forno. 2. Após ter removido da embalagem o forno, verifi que se está em bom estado de funcionamento, tendo um especial cuidado para os seguintes pontos: –...
  • Page 83 CARATERÍSTICAS Ligação elétrica ..........230V~50Hz, 1250W TÉCNICAS Potência dos micro-ondas ............800W Potência do grelhador .............1000W Frequência ................2450MHz Dimensões do forno ........485 x 293 x 410 mm Peso do forno ................23 litros Peso líquido ..............cerca de 13 kg Nível sonoro ..............
  • Page 84: Antes De Contactar O Serviço Pós-Venda

    Se não existir nenhum Serviço Consumidores Hisense no seu país, informe-se junto do seu revendedor Hisense local ou contate o «Service Department of Hisense Domestic Appliances». Reservado para uma utilização doméstica! DESEJAMOS-LHE MUITO PRAZER NA UTILIZAÇÃO DO...
  • Page 85 MAGNETRON OVEN GEACHTE KOPER Wij danken u hartelijk voor de aankoop van deze magnetron. Wees ervan overtuigd, dat u op onze producten kunt vertrouwen. Voor een gemakkelijker gebruik van het product hebben we een uitgebreide gebruiksaanwijzing bijgevoegd met de bedoeling om u zo snel mogelijk bekend te maken met uw nieuwe apparaat.
  • Page 86 BELANGRIJKE WAARSCHUWINGEN VOOR UW VEILIGHEID Raak nooit het oppervlak van verwarmingselementen of kooktoestellen aan, deze kunnen erg warm worden. De binnenzijde van het apparaat en de verwarmingselementen raken sterk verhit. V erbrandingsgevaar! Houdt kinderen uit de buurt. Bron van microgolven en hoogspanning! Niet het deksel verwijderen.
  • Page 87 • LET OP: Als het apparaat in de gecombineerde stand werkt, mogen, door de hoge temperaturen die ontstaan, kinderen het apparaat slechts bedienen onder toezicht van volwassenen (alleen bij de grill functie ). • LET OP: Als de deur of het rubber van de deur beschadigd is, mag men het apparaat niet gebruiken, zolang deze niet door een erkende servicemonteur is gerepareerd.
  • Page 88 • Vervang de verlichting in de oven niet zelf en laat dit ook niet doen door iemand, die niet door Hisense gemachtigd is om dit te doen. Neem kontakt op met het Hisense servicecentrum. • LET OP: Gebruik voor de reiniging van de...
  • Page 89 VEILIGHEIDS- Hierna worden enkele maatregelen genoemd die in acht INSTRUCTIES VOOR moeten worden genomen, om zoals bij alle apparaten een ALGEMEEN GEBRUIK veilige en doelmatige werking te garanderen: Tijdens de werking van de oven moeten de glazen plaat, de hendel van de rol en de pen voor de rol zich altijd op de juiste plaats bevinden.
  • Page 90 11. Wees erop bedacht, dat in de oven alleen de vloeistof wordt verhit en niet de doos of schaal, waarin deze zich bevindt. Daarom bestaat de mogelijkheid, dat als u het deksel verwijdert hete stoom ontsnapt uit de doos, hoewel deze zelf niet warm wordt. 12.
  • Page 91 OVEN DIAGRAM DISPLAY Toont de klok, kooktijd en instelling. COOKING TIME Gebruik deze toets om voedsel met de tijdinstelling te koken. WGT•TIME DEFROST Gebruik deze toets om het voedsel op tijd of op gewicht te ontdooien. CLOCK•TIMER Gebruik deze toets om de klok en kooktimer in te stellen.
  • Page 92 1. Deursluiter 2. Ovenvenster 3. Rand van de plaat 4. Glasplaat 5. Display 6. Microgolfgeleider (het silicaten afdekplaatje van de microgolfgeleider niet verwijderen). FONCTIONNEMENT KLOK De oven is uitgerust met een digitale klok. Als de oven in de standby stand staat, kan met een druk op de knop Clock•Timer de tijd ingesteld worden op een 12-uurs cyclus.
  • Page 93 TIMER Met de aftelklok kunt u een alarm instellen, dat u wijst op de verstreken tijd. Druk tweemaal op de toets Clock•Timer. Het display zal »00:00« tonen. Druk op de cijfertoetsen (0-9) en voer de timertijd in. De langste tijd die u kunt instellen, is 99 minuten en 99 seconden.
  • Page 94 Keuze Display PL10 PL9 PL8 PL7 PL6 PL5 PL4 PL3 PL2 PL1 PL0 Energie 100% 90% 80% 70% 60% 50% 40% 30% 20% 10% SMARTCOOK – SNEL Druk op de numerieke toetsen (1-6) om het snelkoken KOKEN op 100% magnetronvermogen te starten. De maximale tijd die u kunt instellen is 6 minuten.
  • Page 95 COMBINATIE De oven zal voor 36 procent van de tijd werken op KOKEN – C-2 microgolven en 64 procent van de tijd op de grill. Deze manier van werken is geschikt voor het bereiden van vis of gegratineerd eten. Druk driemaal op de Grill•Combi-toets en het display zal »C-2«...
  • Page 96: Automatisch Koken

    AUTOMATISCH KOKEN Bij het automenu is het nodig het soort en de massa/ eenheid van voedsel in te stellen. De oven zal helpen met de instelling van het vermogen en de tijd. Bijvoorbeeld: als u 2 aardappels wilt koken, volg dan onderstaande stappen.
  • Page 97 Menu Scherm Massa Tijd 0'55˝ Popcorn 100g 2'00˝ 230g 4'00˝ Potato (aardappelen) 460g 8'00˝ 690g 13'00˝ 100g 0'40˝ Pizza 200g 1'10˝ 400g 2'30˝ Vegetable 150g 4'00˝ (bevroren groente) 350g 8'00˝ 500g 11'00˝ 120ml 1'00˝ Beverage (drank) 240ml 2'00˝ 360ml 3'00˝ 250g 3'30˝...
  • Page 98 300g 8'00˝ 500g 11'00˝ Meat (vlees) Rundvlees BEEF 700g 15'00˝ 900g 18'00˝ 1100 1100g 20'00˝ 150g 8'00˝ 300g 14'00˝ Meat (vlees) Varkensvlees 450g 18'00˝ 600g 22'00˝ 750g 26'00˝ OPMERKING: • Sommige gerechten dienen tijdens het bereiden omgedraaid te worden om ervoor te zorgen dat het gerecht goed gaar is en gelijkmatig bruin wordt.
  • Page 99 GEWICHT De oven maakt het mogelijk vlees, gevogelte en (AUTOMATISCH) zeebanket te ontdooien. De ontdooitijd wordt ONTDOOIEN automatisch ingesteld naar gelang het gewicht van de bevroren levensmiddelen, dat kan variëren van 100 tot 2000 gram. Druk op de Wgt•Time Defrost toets en het display zal »dEF1«...
  • Page 100: Snelstart

    GEHEUGENOPSLAG- U kunt de kookprocedure in het geheugen instellen. FUNCTIE U kunt maximaal 3 geheugens opslaan, volg de onderstaande stappen. Voorbeeld: u wilt het voedsel koken met een magnetronvermogen van 80% gedurende 3 minuten en 20 seconden als het tweede geheugenopslag. Druk eenmaal op »0«...
  • Page 101 KINDERVEILIGHEID Deze functie wordt gebruikt om ongecontroleerd gebruik van de oven door kinderen te voorkomen. Als de oven vergrendeld is zal op het display het sleutelsymbool verschijnen en het gebruik van de oven zal niet mogelijk zijn. Als u de oven wilt vergrendelen drukt u gedurende 3 seconden op de toets STOP.
  • Page 102 VERZORGING VAN UW MAGNETRON Neem voor het reinigen de stekker uit het stopkontakt. 2. Zorg dat het interieur van de oven altijd schoon is. Veeg voedselresten of gespatte vloeistofresten af met een vochtige doek. Het gebruik van schuurmiddelen of agressieve reiningsmiddelen wordt niet aanbevolen. 3.
  • Page 103 INBOUW VAN DE MAGNETRON PLAATSING Controleer eerst of u al het vepakkingsmateriaal heeft verwijderd. Verwijder geen karton, dat dient ter beschermng van de magnetron. 2. Controleer na de verwijdering van de verpakking of de oven zichtbare beschadigingen heeft, bijv.: – een hangende deur, –...
  • Page 104 TECHNISCHE Energieverbruik ..........230V~50Hz, 1250W GEGEVENS Uitgangsvermogen ..............800W Grill ....................1000W Werkfrequentie ..............2450MHz Afmetingen ............485 x 293 x 410 mm Inhoud ....................23 l Gewicht zonder verpakking: ..........ca. 13 kg Geluidsniveau: ............Lc < 58 dB (A) Het apparaat is gemerkt volgens de EU richtlijn 2012/19 voor elektrisch en elektronisch afval (waste electrical and electronic equipment –...
  • Page 105: Voordat U Een Monteur Belt

    GARANTIE EN SERVICE In geval van problemen of vragen kunt u zich richten tot het Hisense centrum voor hulp aan gebruikers in uw land (de telefoonnummers vindt u in het internationale garantiecertifi caat). Indien zich in uw land geen centrum...
  • Page 106 MIKROWELLENGERÄT SEHR GEEHRTER Wir bedanken uns für das Vertrauen, das Sie uns mit dem KUNDE Kauf unseres Geräts erwiesen haben. Beim Gebrauch wünschen wir Ihnen viel Vergnügen. Zum Verpacken unserer Produkte werden umweltfreundliche Materialien verwendet, die ohne Gefahr für die Umwelt wiederverwertet (recycelt), entsorgt oder vernichtet werden können.
  • Page 107: Wichtige Sicherheitshinweise

    WICHTIGE SICHERHEITSHINWEISE Berühren Sie niemals die Oberfl ächen von Heiz-oder Kochgeräte. Sie werden während des Betriebs heiß. Halten Sie Kinder in einem sicheren Abstand. Es kann die Gefahr von Leckstrahlung! Mikrowellenenergie&Hochspannung! Entfernen Sie keine Abdeckung. WARNUNG! Das Gerät und seine zugänglichen Teile werden im Betrieb heiß.
  • Page 108 des Geräts entfernt werden muß und die von nicht autorisierten Personen durchgeführt werden, ist gefährlich und riskant. • HINWEIS: Keine Flüssigkeiten oder Nahrungsmittel in dicht verschlossenen Gefäßen oder Verpackungen erhitzen, da diese bersten können. • Die Gerätefüße nicht entfernen und die Lüftungsöff nungen nicht bedecken.
  • Page 109 Kundendienst auswechseln lassen! • Wenn die Garraumlampe ausfallen sollte, wenden Sie sich bitte an Ihren Elektrohändler oder an den Hisense Werkskundendienst. • VORSICHT: Zur reinigung dürfen keinesfalls kommerzielle Ofenreiniger, Dampfreiniger, scheuermittel, scharfe Reinigungsmittel, natriumhydroxid enthaltende Reinigungsmittel oder Scheuerschwämme verwendet werden.
  • Page 110 Im nachfolgenden Text sind einige Regeln und ALLGEMEINE Sicherheitsmaßnahmen aufgeführt, die ähnlich wie beim SICHERHEITSHINWEISE Gebrauch anderer elektrischer Geräte, eingehalten werden müssen, damit eine sichere und effi ziente Funktion des Geräts gewährleistet wird: Sorgen Sie dafür, dass während des Betriebs des Mikrowellenherdes der Glasunterteller, die verbindungsstück und der Rollenring auf ihren Plätzen sind.
  • Page 111 9. Verwenden Sie Zubehör für den Mikrowellenherd nur unter Beachtung der Gebrauchsanweisung des Herstellers. 10. Verwenden Sie den Mikrowellenherd niemals zum Frittieren. 11. Beachten Sie, dass im Mikrowellenherd nur die Flüssigkeit im Gefäß erhitzt wird und nicht das Gefäß selbst. Deswegen ist es möglich, dass die Flüssigkeit nach Entfernung des Deckels im Gefäß...
  • Page 112 BEDIENUNGSHINWEISE DISPLAY Zeigt die Uhr, die Garzeit und die Einstellungen an. COOKING TIME Verwenden Sie diese Taste, um Lebensmittel nach Zeit zu kochen. WGT•TIME DEFROST Verwenden Sie diese Taste, um Gefriergut nach Zeit oder nach Gewicht aufzutauen. CLOCK•TIMER Verwenden Sie diese Taste, um die Uhr und den Timer einzustellen.
  • Page 113 1. Sicherheitsverriegelung der Gerätetür 2. Sichtfenster 3. Rollenring 4. Glasteller 5. Bedienfeld 6. Wellenführung (bitte die Silikatplatte, welche die Wellenführung überdeckt, nicht abnehmen. GEBRAUCHSANWEISUNG Der Mikrowellenherd ist mit einer Digitaluhr ausgerüstet. Wenn das Gerät im Stand-Bay Zustand ist, können Sie durch Drücken der Taste Clock•Timer die Zeit im 12-Stunden-Zyklus einstellen.
  • Page 114 TIMER Mit dem Timer können Sie den Kurzzeitwecker einstellen, der Sie nach einer beliebig einstellbaren Zeit akustisch warnt. Drücken Sie zweimal die Taste „Clock•Timer“. Das Display zeigt „00:00“ an. Drücken Sie die Ziff erntasten (0-9) und geben Sie die Zeit für den Timer ein. Die maximale mit dem Timer einstellbare Garzeit beträgt 99 Minuten und 99 Sekunden.
  • Page 115 HINWEIS: Wenn die Leistungsstufe PL0 (0%) gewählt wurde, ist der Mikrowellenherd nicht in Betrieb. Diese Einstellung wird nur zur Reinigung des Garraumes verwendet. Einstellung Display PL10 PL9 PL8 PL7 PL6 PL5 PL4 PL3 PL2 PL1 PL0 Leistung 100% 90% 80% 70% 60% 50% 40% 30% 20% 10% GRILL –...
  • Page 116: Mehrstufiges Garen

    KOMB-BETRIEB Der Mikrowellenherd arbeitet 36% der Zeit im GAREN – C-2 Mikrowellenbetrieb und 64% der Zeit im Grillbetrieb. Diese Betriebsart ist zur Zubereitung von Fisch oder gratinierten Speisen geeignet. Drücken Sie dreimal die Taste Grill•Combi, auf dem Display erscheint „C-2“. Drücken Sie die Ziff erntasten (0-9), um die Garzeit einzugeben.
  • Page 117 HINWEIS: Sie können die Auftaufunktion nur im ersten Schritt benutzen. Das Auto-Menü kann kein Schritt des Garvorgangs in Schritten sein. AUTOMATISCHES Zum Auftauen von gefrorenen Lebensmitteln mit dem GARPROGRAMM Auto-Menü, müssen Sie nur die Art und die Masse des Gefrierguts einstellen. Der Mikrowellenherd schlägt Ihnen die geeignete Leistungsstufe und Auftauzeit vor.
  • Page 118 Menü Display Masse Zeit 0'55˝ Popcorn 100g 2'00˝ 230g 4'00˝ Potato (Kartoff el) 460g 8'00˝ 690g 13'00˝ 100g 0'40˝ Pizza 200g 1'10˝ 400g 2'30˝ Vegetable 150g 4'00˝ (Gefrorenes Gemüse) 350g 8'00˝ 500g 11'00˝ 120ml 1'00˝ Beverage (Getränke) 240ml 2'00˝ 360ml 3'00˝...
  • Page 119 300g 8'00˝ 500g 11'00˝ Meat (Fleisch) BEEF 700g 15'00˝ Rindfl eisch 900g 18'00˝ 1100 1100g 20'00˝ 150g 8'00˝ 300g 14'00˝ Meat (Fleisch) Schweinefl eisch 450g 18'00˝ 600g 22'00˝ 750g 26'00˝ HINWEIS: • Einige Lebensmitteln müssen möglicherweise während des Garvorgangs umgedreht werden, um sicherzustellen, dass sie gründlich gegart und gleichmäßig gebräunt sind.
  • Page 120: Auftauen Nach Zeit

    (AUTO) AUFTAUEN Der Mikrowellenherd ermöglicht das automatische NACH GEWICHT Auftauen von Fleisch, Gefl ügel und Meeresfrüchten. Die Auftauzeit und die Leistungsstufe werden automatisch an das voreingestellte Gewicht angepasst. Sie können Gefriergut mit einem Gewicht zwischen 100 g und 2.000 g automatisch auftauen. Drücken Sie die Taste „Wgt•Time Defrost“, auf dem Display erscheint „dEF1“.
  • Page 121 HINWEIS: Größeres Gefriergut kann in der Mitte gefroren sein. Um ein gleichmäßiges Auftauen zu gewährleisten, drehen Sie größere Stücke von Zeit zu Zeit um und zerbrechen Sie sie beim Auftauen in kleinere Stücke. Gießen Sie während des Auftauens Flüssigkeiten ab, da die Säfte aus dem Gefriergut heiß...
  • Page 122 SCHNELLSTART Tipps Diese Funktion wird zum schnellen Erhitzen (Mikrowellen 100%) bzw. Garen verwendet. Wenn der Mikrowellenherd im Stand-By Zustand ist, drücken Sie die START-Taste und ein 30 Sekunden langer Betrieb wird gestartet. Durch jede weitere Betätigung der START-Taste wird die Betriebszeit um 30 Sekunden verlängert.
  • Page 123 PFLEGE DES MIKROWELLENGERÄTS Bevor Sie mit der Reinigung des Mikrowellenherdes beginnen, trennen Sie das Gerät vom elektrischen Versorgungsnetz. 2. Der Garraum sollte immer sauber gehalten werden. Wischen Sie getrocknete Speisereste, herausgespritzte oder verschüttete Flüssigkeiten mit einem feuchten Tuch von den Innenwänden ab. Die Verwendung von groben Reinigungs- oder abrasiven Scheuermitteln ist nicht empfehlenswert.
  • Page 124: Umweltschutz

    8. Eventuelle unangenehme Gerüche im Garraum können Sie entfernen, indem Sie ein hohes mikrowellengeeignetes Gefäß mit Zitronensaft und Zitronenschalen in das Geräteinnere hineinstellen. Stellen Sie das Gefäß für 5 Minuten in den Garraum und schalten Sie das Gerät ein. Wischen Sie nach Beendigung der eingestellten Zeit den Garraum mit einem weichen Tuch ab und reiben Sie ihn trocken.
  • Page 125 MONTAGE DER MIKROWELLENGERÄT AUFSTELLUNG Überprüfen Sie, ob das komplette Verpackungsmaterial aus dem Geräteinneren entfernt wurde. 2. Überprüfen Sie beim Entfernen der Verpackung, ob es am Mikrowellengerät zu sichtbaren Beschädigungen gekommen ist, wie z.B.: – schief hängende Gerätetür, – beschädigte Gerätetür, –...
  • Page 126: Technische Daten

    Stromaufnahme ..........230V~50Hz, 1250W TECHNISCHE DATEN Ausgangsleistung...............800W Grillheizkörper ..................1000W Betriebsfrequenz ..............2450MHz Außenmaße ............. 485 x 293 x 410 mm Volumen ....................23 l Masse ohne Verpackungsmaterial .......C.a. 13 kg Schallpegel – niveau ..........Lc < 58 dB (A) Dieses Gerät ist entsprechend der europäischen Richtlinie 2012/19/EU über Elektro- und Elektronikaltgeräte (waste electrical and electronic equipment - WEEE) gekennzeichnet.
  • Page 127: Bevor Sie Den Kundendienst Anrufen

    GARANTIE UND KUNDENDIENST Benötigen Sie weitere Informationen oder treten Probleme auf, setzen Sie sich mit einem Hisense Service-Center in Ihrem Land in Verbindung (Telefonnummer siehe internationale Garantieschrift). Sollte es in Ihrem Land kein Service- Center geben, wenden Sie sich bitte an Ihren Hisense Händler.
  • Page 128: Microwave Oven

    MICROWAVE OVEN DEAR CUSTOMER We sincerely thank you for your purchase. We believe you will soon fi nd ample evidence that you can really rely on our products. To make the use of the appliance easier, we attach these comprehensive instruction manual. The instructions should aid you in getting familiar with your new appliance.
  • Page 129: Important Safety Instructions

    IMPORTANT SAFETY INSTRUCTIONS Never touch the surfaces of heating or cooking appliances. They will become hot during operation. Keep children at a safe distance. There is a risk of burning! Microwave energy & High voltage! Do not remove the cover. WARNING! The appliance and its accessible parts become hot during use.
  • Page 130 • WARNING: If the door or door seals are damaged, the oven must not be operated until it has been repaired by a competent person; • WARNING: It is hazardous for anyone other than a competent person to carry out any service or repair operation that involves the removal of a cover which gives protection against exposure to microwave energy;...
  • Page 131 • Never replace the light bulb inside the oven. It must always be replaced by Hisense service. • Do not clean the appliance with steam cleaners, high-pressure cleaners, sharp objects, abrasive cleaning agents, and abrasive sponges and stain removers.
  • Page 132 SAFETY INSTRUCTIONS Listed below are, as with all appliances, certain rules to FOR GENERAL USE follow and safeguards to assure top performance from this oven: Always have the glass tray, roller arms, coupling and roller track in place when operating the oven. 2.
  • Page 133 hot to the touch when removed from the oven, please remember that the food/liquid inside will be releasing the same amount of steam and/or spitting when the lid is removed as in conventional cooking. 12. Always test the temperature of cooked food yourself especially if you are heating or cooking food/liquid for babies.
  • Page 134: Control Panel

    CONTROL PANEL DISPLAY Shows the clock, cooking time and setting. COOKING TIME Use this key to cook food by time. WGT•TIME DEFROST Use this key to defrost the food by time or by weight. CLOCK•TIMER Use this key to set the clock and cooking timer. POWER LEVEL Use this key to select the microwave power level.
  • Page 135 1. Door Safety Lock System 2. Oven Window 3. Roller Ring 4. Glass Tray 5. Control Panel 6. Wave guide (please do not remove the mica plate covering the wave guide) OPERATION INSTRUCTION CLOCK The oven is fi tted with a digital clock. When the oven is in the standby mode, the clock can be set in the 12-hour mode by pressing the Clock•Timer key.
  • Page 136 COOKING Press the Cooking Time key. The display will show “00:00”. Press the Numeric (0-9) keys to enter the cooking time. For example, enter the cooking time 5min by pressing “5”, “0”, “0”. Press the Power key and the display will show “PL10”. Press the Numeric (0-9) keys to enter the microwave power level.
  • Page 137: Combined Operation

    COMBINED OPERATION The oven will operate with microwaves 55 percent of the time, and with grill 45 percent of the time. This operating mode is suitable for cooking pudding, souffl és, omelets, baked potatoes, and poultry. Press the Grill•Combi key twice and the display will show “C-1”.
  • Page 138: Auto Cooking

    Press the Numeric (0-9) keys to enter the microwave power level. For example, enter the microwave power level by pressing “8”. Press the Grill•Combi key once and the display will show “G-1”. Press the Numeric (0-9) keys to enter the cooking time.
  • Page 139 Menu Display Weight Time 0'55˝ Popcorn 100g 2'00˝ 230g 4'00˝ Potato 460g 8'00˝ 690g 13'00˝ 100g 0'40˝ Pizza 200g 1'10˝ 400g 2'30˝ 150g 4'00˝ Vegetable (frozen) 350g 8'00˝ 500g 11'00˝ 120ml 1'00˝ Beverage 240ml 2'00˝ 360ml 3'00˝ 250g 3'30˝ My Plate (meat, side 350g 4'30˝...
  • Page 140 300g 8'00˝ 500g 11'00˝ Meat beef BEEF 700g 15'00˝ 900g 18'00˝ 1100 1100g 20'00˝ 150g 8'00˝ 300g 14'00˝ Meat pork 450g 18'00˝ 600g 22'00˝ 750g 26'00˝ NOTE: • For some food, you may need to turn it over during cooking to ensure it is thoroughly cooked and browns evenly.
  • Page 141 WEIGHT (AUTO) The oven allows defrosting of meat, poultry, and DEFROST seafood. Defrosting time and operating power will be adjusted automatically according to the preset weight. Weight of the food to be defrosted may be between 100 g and 2000 g. Press the Wgt•Time key and the display will show “dEF1”.
  • Page 142: Memory Function

    MEMORY FUNCTION You can set the cooking procedure in the memory. You can set a maximum of 3 memories, please follow the steps below. Example: If you want to cook the food with 80% microwave power level for 3 minutes and 20 seconds as the second memory.
  • Page 143: Child Lock

    CHILD LOCK This function is used to prevent uncontrolled or inadvertent use of the oven by children. When the control panel is locked, the relevant icon is displayed, and all functions are disabled. To lock the oven, press the STOP key and hold it When you hear a beep, the oven is locked, and the key symbol appears on the display unit.
  • Page 144: Care Of Your Microwave Oven

    CARE OF YOUR MICROWAVE OVEN Turn the oven off and remove the power plug from the wall socket before cleaning. 2. Keep the inside of the oven clean. When food splatters of spilled liquids adhere to oven walls,wipe with a damp cloth. The use of harsh detergent or abrasives is not recommended.
  • Page 145: Mounting The Microwave Oven

    MOUNTING THE MICROWAVE OVEN INSTALLATION Make sure all the packing materials are removed from the inside of the door. 2. Inspect the oven after unpacking for any visual damage such as: – Misaligned Door – Damaged Door – Dents or Holes in Door Window and Screen –...
  • Page 146 SPECIFICATIONS Power consumption ..........230V ~50Hz, 1250W Output power ..................800W Grill heater ................... 1000W Operating Frequency ..............2450MHz 485 x 293 x 410 Outside Dimensions ........... Oven Capacity .................. litres Uncrated Weight ..............Approx. 13 kg Noise level ................Lc < 58 dB (A) This appliance is marked according to the European directive 2012/19/EU on Waste Electrical and Electronic Equipment (WEEE).
  • Page 147: Before You Call For Service

    (you fi nd its phone number in the worldwide guarantee leafl et). If there is no Customer Care Centre in your country, go to your local Hisense dealer or contact the Service department of Hisense domestic appliances. For personal use only!
  • Page 148 H23MOBS5HG (06-20)

Table des Matières