Life ARMOR AR024 Mode D'emploi

Manuels Connexes pour Life ARMOR AR024


Sommaire des Matières pour Life ARMOR AR024
- Page 1 ARMOR Operator for swing gates Instructions and indications for installation and use MANUAL DESTINED TO PROFESSIONAL FITTERS ONLY Under law 46/90, installation may only be performed by professional fitters. Vers. 2.0-10/2005...
- Page 2 LIFE home integration. La verification by LIFE home integration. l’autorisation écrites et sans la vérification traduzione in altra lingua, anche parziale, Translation into other languages of all or de LIFE home intégration. Il est interdit è vietata senza preventiva part of the manual is strictly forbidden de traduire ce mode d’emploi dans une...
-
Page 3: Intended Use
DESTINAZIONE D’USO INTENDED USE EMPLOI • • • L’ARMOR è un attuatore meccanico ARMOR is a low voltage, irreversible, L’ARMOR actionneur articolato irreversibile a bassa articulated, mechanical operator mécanique articulé irréversible à basse tensione, concepito esclusivamente designed exclusively for opening and tension, conçu exclusivement pour per aprire e chiudere cancelli ad una o closing one- and two-leaf residential-... -
Page 4: Descrizione Prodotto
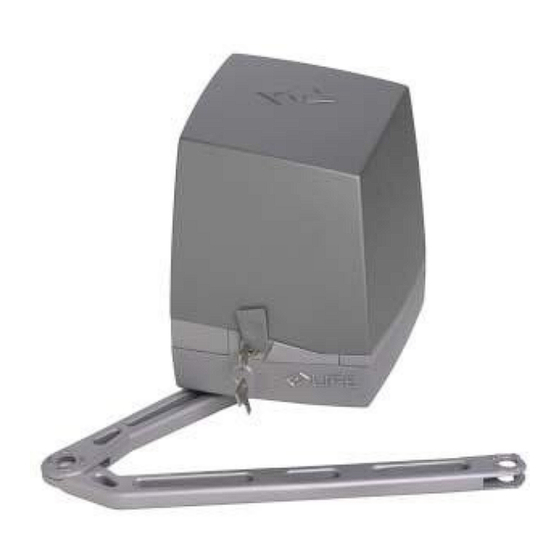
DESCRIZIONE DESCRIPTION OF THE DESCRIPTION DU PRODOTTO PRODUCT PRODUIT ARMOR è famiglia d’attuatori ARMOR is a family of irreversible articulated ARMOR est une famille d’actionneurs elettromeccanici articolati irreversibili per electromechanical operators for driving one- électromécaniques articulés irréversibles pour l’automazione di cancelli ad una o due ante and two-leaf swing gates. - Page 5 Tab. 2: descrizione contenuto scatola Tab. 2: description of contents of ARMOR Tab. 2: Description du contenu du boîtier attuatore ARMOR – fig. 2 operator box– fig. 2 de l’actionneur ARMOR – fig. 2 Pos. Descrizione Pos. Description RepèreDescription Scatola in cartone. Cardboard box.
- Page 6 PRESCRIZIONI E INSTRUCTIONS AND PRESCRIPTIONS ET AVVERTENZE PER WARNINGS FOR CONSEILS POUR L’INSTALLAZIONE INSTALLATION L’INSTALLATION Prima di procedere con l’installazione Before commencing installation read Avant l’installation, lire attentivement • • • leggere attentamente quanto riportato the SAFETY INSTRUCTIONS AND chap. PRESCRIPTIONS cap.
-
Page 7: Verifiche Preliminari
• Durante l’installazione tenere protetti i • Ensure that the place of installation is not • Pendant l’installation, protéger les componenti dell’automazione per evitare prone to flooding, does not contain composantes du système automatisé afin che vi possano penetrare all’interno liquidi sources of heat or naked flames, fires or d’éviter l’éventuelle pénétration de (es. -
Page 8: Limiti D'impiego
Verificare la presenza delle battute Check the opening and closure Vérifier la présence des dispositifs d’arresto meccanico in chiusura e in mechanical end stops; they must be: d’arrêt mécanique à la fermeture et à apertura; devono essere: • suited to the gate leaves and firmly l’ouverture. - Page 9 4.2.2 INSTALLAZIONI TIPO 4.2.2 TYPICAL INSTALLATION 4.2.2 INSTALLATIONS TYPE IMPIANTO A DUE ANTE: nel caso si TWO-LEAF SYSTEMS: when automatizzi un cancello a due ante si automating a two-leaf gate, one must INSTALLATION A DEUX VANTAUX : devono utilizzare l’ARMOR AR224XP e use ARMOR AR224XP and AR024.
-
Page 10: Installation Des Composantes Armor
INSTALLAZIONE INSTALLING ARMOR INSTALLATION DES COMPONENTI ARMOR COMPONENTS COMPOSANTES ARMOR • La zona di installazione dell’attuatore • The area in which the operator is installed deve prevedere lo spazio necessario per must be spacious enough to perform • La zone d’installation de l’actionneur doit effettuare le operazioni di manutenzione manual release and maintenance prévoir suffisamment d’espace pour... -
Page 11: Montage De L'étrier De Support De L'actionneur
Tipologia 2 (fig. 7), con cerniera Type 2 (fig. 7), with leaf hinge Typologie 2 (fig. 7), avec charnière dell’anta allineata alla superficie di aligned with the operator support du vantail alignée à la surface de montaggio della staffa di supporto bracket, in this case the maximum montage de l’étrier de support de attuatore. - Page 12 4.3.2 ASSEMBLAGGIO E 4.3.2 ASSEMBLING AND 4.3.2 ASSEMBLAGE ET MONTAGGIO BRACCIO MOUNTING THE JOINTED MONTAGE DU BRAS SNODATO ARTICULÉ Assemblare il braccio snodato come Assemble the jointed arm as shown in Assembler le bras articulé comme il est indicato in fig. 9, infilando i perni (1 fig. fig.
-
Page 13: Montage De L'étrier Du Bras Articulé
4.3.3 MONTAGGIO ATTUATORE 4.3.3 ASSEMBLING THE 4.3.3 MONTAGE DE OPERATOR L’ACTIONNEUR Smontare il coperchio (1 fig. 10) dell’attuatore. Remove the operator cover (1 fig. 10). Démonter le couvercle (1 fig. 10) de Infilare il corpo del motoriduttore (2 fig. Thread the body of the gearmotor (2 fig. l’actionneur. -
Page 14: Regolazione Finecorsa
4.3.5 MONTAGGIO FINECORSA 4.3.5 ASSEMBLY OF 4.3.5 MONTAGE DES FINS DE MECCANICI MECHANICAL END STOPS COURSE MÉCANIQUES L’attuatore è fornito con due finecorsa The operator is provided with two mechanical L’actionneur est équipé de deux fins de course meccanici che hanno la funzione di battute di end stops that serve as end stops;... -
Page 15: Déverrouillage
4.3.7 SBLOCCO ATTUATORE 4.3.7 OPERATOR RELEASE 4.3.7 DÉVERROUILLAGE L’ACTIONNEUR ATTENZIONE: ATTENTION: • L’installatore deve fissare • The Fitter must fix the manual release ATTENTION: permanentemente l’etichetta operation label close to the manual • L’installateur doit fixer de façon concernente l’operazione di sblocco release key. - Page 16 Smontare il coperchio (1 fig. 15) Dismantle the operator cover (1 fig. 15). Démonter le couvercle (1 fig. 15) de dell’attuatore. Loosen the screws that fasten the card l’actionneur. Svitare le viti che fissano il supporto support (2 fig. 15) and move sideways. Dévisser les vis fixant le support de la scheda (2 fig.
-
Page 17: Wiring And Connections
ALLACCIAMENTI E WIRING AND RACCORDEMENTS ET COLLEGAMENTI CONNECTIONS CONNEXIONS • Prima di procedere agli allacciamenti • Before commencing wiring and • Avant tout raccordement et connexion, e ai collegamenti leggere attentamente connection work, read the SAFETY lire attentivement les instructions dans quanto riportato cap. - Page 18 Tab. 4: elenco cavi elettrici – fig. 16 Tab. 4: list of electric cables – fig. 16 Tab. 4: Liste des câbles électriques – fig. Pos. Collegamento / Tipo di cavo Pos. Connection / Type of cable Pos. Connexion / Type de câble Linea elettrica d’alimentazione Electric power supply line Ligne électrique d’alimentation...
-
Page 19: Introduction Câbles Électriques Dans L'actionneur
INTRODUZIONE DEI INTRODUCING THE INTRODUCTION CAVI ELETTRICI ELECTRIC CABLES INTO CÂBLES ÉLECTRIQUES NELL’ATTUATORE THE OPERATOR DANS L’ACTIONNEUR accedere morsetti In order to access the power supply Pour accéder aux bornes d’alimentation alimentazione e della centrale di terminal and control unit, one must et de l’unité... -
Page 20: Connexion
COLLEGAMENTO CONNECTING THE 230 CONNEXION ALIMENTAZIONE (230 VAC POWER SUPPLY L’ALIMENTATION (230 VCA) VAC) E MESSA A TERRA AND EARTHING. ET MISE À LA TERRE. Collegare il cavo di alimentazione a 230Vac Connect the 230 Vac power supply cable Relier le câble d’alimentation à 230 Vca aux ai morsetti L (fase) e N (neutro) (1 e 2 to terminals L (phase) and N (neutral) (1 bornes L (phase) et N (neutre) (1-2 figure... -
Page 21: Declaration Of Ce Conformity
B (dichiarazione CE di conformità del B (Manufacturer’s Declaration of CE partie B (déclaration CE de conformité du fabbricante) Conformity). producteur) LIFE home integration s.r.l. LIFE home integration s.r.l. LIFE home integration s.r.l. Via 1 Maggio, 37 Via 1 Maggio, 37 Via 1 Maggio, 37 31043 FONTANELLE (TV) –... -
Page 22: Parti Di Ricambio
PARTI DI RICAMBIO SPARE PARTS 10 PIECES DETACHEES Tab. 21: elenco parti di ricambio Tab. 21: list of spare parts Tab. 21: liste des pièces détachées... - Page 23 Via I Maggio, 37 – 31043 FONTANELLE (TV) Italia + 39 0422 809 254 + 39 0422 809 250 www.homelife.it info@homelife.it...