Publicité

Les langues disponibles
  • FR

Les langues disponibles

  • FRANÇAIS, page 1

Liens rapides

C O S M O S

Publicité

Table des Matières
loading

Sommaire des Matières pour ROBLIN COSMOS

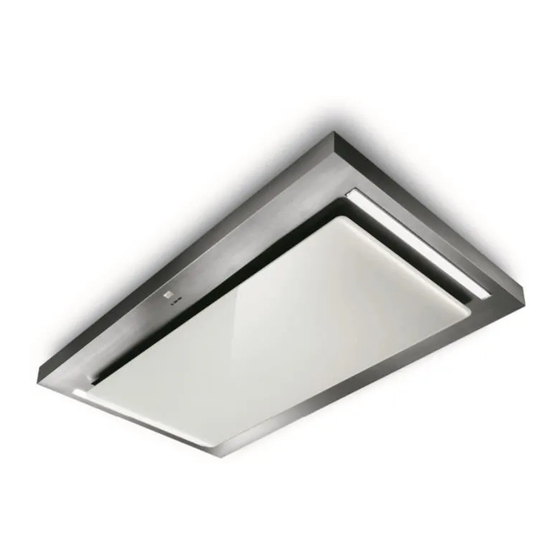
  • Page 1 C O S M O S...
  • Page 2: Table Des Matières

    SOMMAIRE CONSEILS ET SUGGESTIONS............................3 CARACTERISTIQUES................................6 INSTALLATION..................................8 UTILISATION ..................................11 ENTRETIEN..................................13 INDEX RECOMMENDATIONS AND SUGGESTIONS ........................15 CHARACTERISTICS ................................18 INSTALLATION..................................20 USE ...................................... 23 MAINTENANCE ................................... 25 INHALTSVERZEICHNIS EMPFEHLUNGEN UND HINWEISE ........................... 27 CHARAKTERISTIKEN ................................. 30 MONTAGE ...................................
  • Page 3: Conseils Et Suggestions

    CONSEILS ET SUGGESTIONS Les instructions pour l’utilisation se réfèrent aux différents modèles de cet appareil. Par conséquent, certaines descriptions de caractéristiques particulières pourraient ne pas appartenir spécifiquement à cet appareil. INSTALLATION • En aucun cas le fabricant ne peut être tenu pour responsable d’éventuels dommages dus à...
  • Page 4: Utilisation

    • Si les instructions d’installation du plan de cuisson à gaz spécifient une distance supérieure à celle indiquée ci-dessus, veuillez impérativement en tenir compte. Toutes les normes concernant l’évacuation de l’air doivent être respectées. • Utiliser exclusivement des vis et des petites pièces du type adapté pour la hotte. Attention : toute installation des vis et des dispositifs de fixation non conforme aux présentes instructions peut entraîner des risques de décharges électriques.
  • Page 5: Entretien

    • ATTENTION : les parties accessibles peuvent devenir très chaudes durant l’utilisation des appareils de cuisson. ENTRETIEN • Avant d’effectuer toute opération de nettoyage et d’entretien, éteindre ou débrancher l’appareil du secteur. • Nettoyer et/ou remplacer les filtres après le délai indiqué (danger d’incendie).
  • Page 6: Caracteristiques

    CARACTERISTIQUES Encombrement 1000 1200 650mm 500mm Min. Min. 1500mm 1500mm Max. Max.
  • Page 7 Composants Réf. Q.té Composants de Produit Corps Hotte équipé de: Comandes, Lumière, Filtres Réf. Q.té Composants pour l’installation Chevilles ø 10 Vis M6 x 80 Vis 5,2 x 70 Rondelles øi 6,4 Écrous M6 Q.té Documentation Manuel d’instructions Fixation de la Hotte •...
  • Page 8: Installation

    INSTALLATION Perçage plafond/étagère et fixation treillis PERÇAGE PLAFOND/ÉTAGÈRE • À l’aide d’un fil à plomb, reporter sur le plafond/étagère de support le centre du plan de cuisson. • En utilisant les dimensions indiquées dans le croquis, marquer les trous pour l’installation. •...
  • Page 10: Branchement Electrique

    BRANCHEMENT ELECTRIQUE • Brancher la hotte sur le secteur en interposant un interrupteur bipolaire avec ouverture des contacts d’au moins 3 mm. • Avant d’effectuer toute opération, débrancher la hotte en retirant la fiche de la prise ou en débranchant l’interrupteur général. •...
  • Page 11: Utilisation

    UTILISATION Tableau des commandes Touche Fonction Allume/Éteint l’éclairage à l’intensité maximum. Deux clignotements de la led S1 Appuyer sur cette touche pendant environ 4 = alarme activée secondes, lorsque toutes les charges sont étein- Un clignotement de la led S1 = tes (Moteur+Éclairage), pour activer / désacti- ver l’alarme filtres à...
  • Page 12 TELECOMMANDE Il est possible de commander cet appareil au moyen d’une télécommande, alimentée avec des piles alcalines zinc-charbon 1,5 V du type standard LR03-AAA25 (ne fournis pas). • Ne pas ranger la télécommande à proximité de sour- ces de chaleur. •...
  • Page 13: Entretien

    ENTRETIEN Ouverture panneau • Ouvrir le panneau en le tirant. • Le nettoyer à l’extérieur avec un chiffon humide et un détergent liquide neutre. • Le nettoyer également à l’intérieur avec un chiffon humide et un détergent neutre ; ne jamais utiliser des chiffons ou des éponges mouillés, ni des jets d’eau ;...
  • Page 14: Remplacement Du Filtre

    Filtres anti-odeur à charbon actif Le filtre anti-odeur à charbon actif est uniquement pré- sent sur les hottes en version filtrante. Il a pour fonction de retenir les odeurs du flux d’air qui le traverse jusqu’à ce qu’il atteigne la saturation. La partie spongieuse du filtre peut être lavée au lave-vaisselle au moins tous les 4 mois ou plus fréquemment en cas d’utilisation parti- culièrement intense, en garantissant ainsi le fonction-...
  • Page 15: Recommendations And Suggestions

    RECOMMENDATIONS AND SUGGESTIONS The Instructions for Use apply to several versions of this appliance. Accordingly, you may find descriptions of individual features that do not apply to your specific appliance. INSTALLATION • The manufacturer will not be held liable for any damages resulting from incorrect or improper installation.
  • Page 16 • If the instructions for installation for the gas hob specify a greater distance specified above, this has to be taken into account. Regulations concerning the discharge of air have to be fulfilled. • Use only screws and small parts in support of the hood. Warning: Failure to install the screws or fixing device in accordance with these instructions may result in electrical hazards.
  • Page 17 • “CAUTION: Accessible parts may become hot when used with cooking appliances.” MAINTENANCE • Switch off or unplug the appliance from the mains supply before carrying out any maintenance work. • Clean and/or replace the Filters after the specified time period (Fire hazard). •...
  • Page 18: Characteristics

    CHARACTERISTICS Dimensions 1000 1200 650mm 500mm Min. Min. 1500mm 1500mm Max. Max.
  • Page 19 Components Ref. Q.ty Product Components Hood Body, complete with: Controls, Light, Blower, Filters Charcoal Filters Ref. Q.ty Installation Components Wall Plugs ø 10 Screws M6 x 80 Screws 5,2 x 70 Screws 2,9 x 9,5 6.4 mm int. dia washers M6 nuts Q.ty Documentation Instruction Manual...
  • Page 20: Installation

    INSTALLATION Drilling the Ceiling/shelf and fixing the frame DRILLING THE CEILING/SHELF • Use a plumb line to mark the centre of the hob on the ceiling/support shelf. • Using the measurements of the Dimensional Drawing, mark the holes for the installation. •...
  • Page 22: Electrical Connection

    ELECTRICAL CONNECTION • Connect the hood to the mains through a two-pole switch having a contact gap of at least 3 mm.. • Before carrying out any operation the Hood must be disconnected by removing the plug from the power socket or turning off the main switch.
  • Page 23: Use

    Control panel Button Function Turns the lights ON/OFF at maximum intensity. LED S1 flashes twice = alarm Press and hold the button for approximately 4 seconds, with all the loads turned off (Motor LED S1 flashes once = alarm and Lights), to turn the Activated Charcoal Filter alarm on/off.
  • Page 24: Remote Control

    REMOTE CONTROL The appliance can be controlled using a remote control powered by a 1.5 V carbon-zinc alkaline batteries of the standard LR03-AAA type (not included). • Do not place the remote control near to heat sources. • Used batteries must be disposed of in the proper manner.
  • Page 25: Maintenance

    MAINTENANCE Opening Panel • Open the Panel by pulling it. • Clean the outside with a damp cloth and neutral detergent. • Clean the inside using a damp cloth and neutral detergent; do not use wet cloths or sponges, or jets of water; do not use abrasive substances.
  • Page 26: Changing The Filter

    Activated Charcoal Filter The Activated Charcoal Filter is only present on the Hoods in Recirculation version, and has the job of re- tain-ing smells in the flow of air that passes over it, un- til reach-ing saturation. The sponge-like part of the fil- ter can be washed in the dishwasher at least once every 4 months, or more frequently if use is particularly in- tense.
  • Page 27: Empfehlungen Und Hinweise

    EMPFEHLUNGEN UND HINWEISE Diese Gebrauchsanleitungen beziehen sich auf die verschiedenen Modelle der Abzugshaube. Darum kann es möglich sein, dass die Beschreibung bestimmter Merkmale für das vorliegende Gerät nicht zutrifft. INSTALLATION • Der Hersteller haftet nicht für etwaige Schäden, die durch die fehlerhafte Installation oder falschen Gebrauch entstehen könnten.
  • Page 28 • Falls die Montageanweisungen für die gasbetriebene Kochmulde einen größeren Abstand vorschreiben, als der oben angegebene, muss diese Vorgabe befolgt werden. Es sind sämtliche Abluftvorschriften zu beachten. • Nur für die Abzugshaube geeignete Schrauben und Kleinteile verwenden. Achtung: Werden die Schrauben und Befestigungselemente nicht entsprechend der vorliegenden Anleitungen verwendet, besteht Stromschlaggefahr.
  • Page 29 • ACHTUNG: Die zugänglichen Teile können während des Gebrauchs der Kochgeräte sehr heiß werden. WARTUNG • Vor Reinigungs- oder Wartungsarbeiten am Gerät, muss dieses ausgeschaltet und spannungslos gemacht werden. • Die Filter stets nach den angegebenen Intervallen reinigen oder auswechseln (Brandgefahr). •...
  • Page 30: Charakteristiken

    CHARAKTERISTIKEN Platzbedarf 1000 1200 650mm 500mm Min. Min. 1500mm 1500mm Max. Max.
  • Page 31: Montage Der Dunstabzugshaube

    Komponenten Pos. Produktkomponenten Haubenkörper mit Schaltern, Beleuchtung, Gebläse- gruppe, Filter Aktivkohlefilter Pos. Montagekomponenten Bügel ø 10 Schrauben M6 x 80 Schrauben 5,2 x 70 Schrauben 2,9 x 9,5 Unterlegscheiben ø 6,4 Schraubenmuttern M6 Dokumentation Bedienungsanleitung Montage der Dunstabzugshaube • Sollte die Decke am Befestigungspunkt nicht robust genug sein, muss der Installateur geeigne- te Platten und Gegenplatten verwenden, die an strukturell widerstandsfähigen Teilen verankert werden.
  • Page 32: Montage

    MONTAGE Bohren von Decke/Konsole und Befestigung des Gitters BOHREN VON DECKE/KONSOLE • Mit Hilfe eines Lotfadens an Decke/Haltekonsole die Mitte des Kochfelds anzeichnen. • Unter Verwendung der Werte der Maßzeichnung die für die Montage benötigten Bohrlöcher anzeichnen. • Die folgenden Punkte bohren: •...
  • Page 34: Elektroanschluss

    ELEKTROANSCHLUSS • Bei Anschluss der Haube an das Stromnetz muss ein zweipoliger Schalter mit einem Öff- nungsweg von mindestens 3 mm zwischengeschaltet werden. • Vor jeder weiteren Arbeit die Haube spannungslos machen, indem der Stecker ausgesteckt oder der Hauptschalter ausgeschaltet wird. •...
  • Page 35: Bedienung

    BEDIENUNG Schalttafel Taste Funktion Schaltet die Beleuchtung bei maximaler Inten- sität ein/aus. Mit zirka 4 Sekunden langem Gedrückthalten Zweimaliges Blinken der LED S1 = Alarm Aktiviert. der Taste bei abgeschalteten Verbrauchern Einmaliges Blinken der LED S1 (Motor+Licht) wird der Alarm der Aktivkohle- filter aktiviert / deaktiviert.
  • Page 36 FERNBEDIENUNG Dieses Gerät kann mit einer Fernbedienung gesteu- ert werden, welche mit alkalischen Zink-Kohle- Batterien 1,5 V des Standardtyps LR03-AAA ver- sorgt wird (nicht im Lieferumfang enthalten). • Die Fernbedienung nicht in die Nähe von Hitze- quellen legen. • Batterien müssen vorschriftsmäßig entsorgt werden. Schalttafel Taste Funktion...
  • Page 37: Wartung

    WARTUNG Öffnen des Paneels • Das Paneel herausziehen. • Die Außenflächen mit einem feuchten Lappen und einem neutralen Flüssigreiniger säubern. • Auch Innen mit einem feuchten Lappen und einem neutralen Reinigungsmittel säubern; keine nassen Tücher oder Schwämme, oder gar Wasser verwenden, und keine schleifenden Mittel einsetzen.
  • Page 38: Auswechseln Des Filters

    Aktivkohle-Geruchsfilter Der Aktivkohlefilter ist nur an Umluftversionen der Abzugs-hauben vorhanden und hat die Aufgabe die Ge- rüche des durchfließenden Luftstroms zurückzuhalten. Der poröse Teil des Filters kann mindestens alle 4 Mo- nate oder bei sehr in-tensivem Gebrauch auch öfter in der Spülmaschine gewa-schen werden, und zwar bis zu 5 Mal, bevor er ausgewechselt werden muss.
  • Page 39: Consigli E Suggerimenti

    CONSIGLI E SUGGERIMENTI Le Istruzioni per l’uso si riferiscono ai diversi modelli di questo apparecchio. Pertanto, si potrebbero trovare descrizioni di singole caratteristiche che non appartengono al proprio apparecchio specifico. INSTALLAZIONE • Il fabbricante non potrà ritenersi responsabile per eventuali danni risultanti da un’installazione o utilizzazione impropria.
  • Page 40 • Se le istruzioni di installazione del piano cottura a gas specificano una distanza maggiore di quella sopra indicata, è necessario tenerne conto. Devono essere rispettate tutte le normative riguardanti lo scarico dell'aria. • Usare solo viti e minuteria di tipo idoneo per la cappa. Avvertenza: la mancata installazione delle viti o dei dispositivi di fissaggio in conformità...
  • Page 41 • “ ATTENZIONE: le parti accessibili possono diventare molto calde durante l’uso degli apparecchi di cottura ”. MANUTENZIONE • Spegnere o scollegare l’apparecchio dalla rete di alimentazione prima di qualunque operazione di pulizia o manutenzione. • Pulire e/o sostituire i filtri dopo il periodo di tempo specificato (pericolo di incendio).
  • Page 42: Caratteristiche

    CARATTERISTICHE Ingombro 1000 1200 650mm 500mm Min. Min. 1500mm 1500mm Max. Max.
  • Page 43 Componenti Rif. Q.tà Componenti di Prodotto Corpo Cappa completo di: Comandi, Luce, Filtri, Moto- Filtro al carbone attivo Rif. Q.tà Componenti di Installazione Tasselli ø 10 Viti M6 x 80 Viti 5,2 x 70 Viti 2,5 x 9,5 Rondelle ø 6,4 Dadi M6 Q.tà...
  • Page 44: Installazione

    INSTALLAZIONE Foratura Soffitto/Mensola e Fissaggio Traliccio FORATURA SOFFITTO/MENSOLA • Con l’ausilio di un Filo a piombo riportare sul Soffitto/Mensola di supporto il centro del Piano di Cottura. • Usando le misure del Disegno Dimensionale, segnare i fori per l’installazione. • Forare i punti seguenti: •...
  • Page 46: Connessione Elettrica

    CONNESSIONE ELETTRICA • Collegare la Cappa all’Alimentazione di Rete interponendo un Interruttore bipolare con a- pertura dei contatti di almeno 3 mm. • Prima di procedere a qualsiasi operazione di- sinserire la Cappa togliendo la spina elettrica o spegnendo l’interruttore generale. •...
  • Page 47: Uso

    Quadro comandi Tasto Funzione Accende/Spegne le luci alla massima intensità. Doppio lampeggio del Led S1 = Tenendo il tasto premuto per circa 4 secondi, quando tutti i carichi sono spenti (Motore + Lu- allarme Attivato. Singolo lampeggio del Led S1 = ce), si Attiva/Disattiva l’Allarme dei Filtri al Carbone Attivo.
  • Page 48: Quadro Comandi

    TELECOMANDO Questo apparecchio può essere comandato per mezzo di un telecomando, alimentato con pile alcaline zinco- carbone da 1,5 V del tipo standard LR03-AAA (non incluse). • Non riporre il telecomando in prossimità di fonti di calore. • Non disperdere le pile nell’ambiente, depositarle ne- gli appositi contenitori.
  • Page 49: Manutenzione

    MANUTENZIONE Apertura Pannello • Aprire il Pannello tirandolo. • Pulirlo esternamente con un panno umido e detersivo liquido neutro. • Pulirlo anche internamente utilizzando un panno umido e de- tergente neutro; non utilizzare panni o spugne bagnate, né getti d’acqua; non utilizzare sostanze abrasive. Filtri antigrasso PULIZIA FILTRI ANTIGRASSO METALLICI AUTOPORTANTI •...
  • Page 50: Sostituzione Filtro

    Filtri antiodore al Carbone attivo l Filtro antiodore al Carbone attivo è presente solo sulle Cappe in Versione Filtrante, ha la funzione di trattenere gli odori del flusso d’aria che lo attraver- sa fino a raggiungere la saturazione. La parte spu- gnosa del filtro può...
  • Page 51: Consejos Y Sugerencias

    CONSEJOS Y SUGERENCIAS Las instrucciones de uso se aplican a varios modelos de este aparato. Por lo tanto, usted puede encontrar descripciones de características individuales que no pertenecen a su aparato en concreto. INSTALACIÓN • El fabricante no se hace responsable de los daños provocados por una instalación o uso indebido.
  • Page 52 • Si las instrucciones de instalación del plano de cocción de gas especifican una distancia mayor de la indicada anteriormente, es necesario tenerlo en cuenta. Se tienen que respetar todas las normativas con respecto a la descarga del aire. • Utilizar sólo los tornillos y accesorios metálicos de un tipo adecuado para la campana.
  • Page 53 • ATENCIÓN: las partes accesibles pueden calentarse mucho durante el uso de aparatos de cocción. MANTENIMIENTO • Apague o desconecte el aparato de la red eléctrica antes de cualquier operación de limpieza o mantenimiento. • Limpie y/o reemplace los filtros después del período de tiempo especificado (peligro de incendio).
  • Page 54: Características

    CARACTERÍSTICAS Dimensiones 1000 1200 650mm 500mm Min. Min. 1500mm 1500mm Max. Max.
  • Page 55 Componentes Ref. Cant. Componentes del Producto Cuerpo Campana dotado con: mandos, luz, filtros, Motor. Filtros antiodor al carbono activo. Ref. Cant. Componentes de Instalación Tarugos ø 10 Tornillos M6 x 80 Tornillos 5,2 x 70 Tornillos 2,9 x 9,5 Arandelas øi 6,4 Tuercas M6 Cant.
  • Page 56: Instalación

    INSTALACIÓN Perforación techo/repisa y fijación poste PERFORACIÓN TECHO/REPISA • Con la ayuda de un hilo de plomo marcar en el techo/repisa de soporte el centro del plano de cocción. • Usando las medidas del esquema dimensional, marque los orificios para la instalación. •...
  • Page 58: Conexión Eléctrica

    CONEXIÓN ELÉCTRICA • Conectar la campana a la red de alimentación eléctrica instalando un interruptor bipolar con apertura de los contactos de 3 mm como mínimo. • Antes de proceder a realizar cualquier operación, desconectar la campana extrayendo el enchufe eléctrico o apagando el interruptor general.
  • Page 59: Uso

    Tablero de mandos Tecla Función Enciende/Apaga las luces a la máxima intensidad. Doble parpadeo del Led S1 = Manteniendo la tecla presionada durante aproximadamente 4 segundos, cuando todas las alarma activada. Un sólo parpadeo del led S1 = cargas están apagadas (motor+luz) se activa/desactiva la alarma de los filtros al alarma desactivada.
  • Page 60: Mando A Distancia

    MANDO A DISTANCIA El aparato puede comandarse con un mando a distancia que funciona con pilas alcalinas zinkcarbón de 1,5 V del tipo standard LR03-AAA (no includo). • No dejar el mando a distancia cerca de una fuente de calor. •...
  • Page 61: Mantenimiento

    MANTENIMIENTO Apertura panel • Abrir el panel tirándolo. • Limpiarlo externamente con un paño húmedo y detergente líquido neutro. • Limpiarlo también internamente utilizando un paño húmedo y detergente neutro; no utilizar paños o esponjas mojadas, ni chorros de agua, no utilizar sustancias abrasivas. Filtros antigrasa LIMPIEZA DE LOS FILTROS ANTIGRASA METÁLICOS •...
  • Page 62 Filtro antiolor de carbón activo El filtro antiolor al carbono activo está presente solamente en las campanas en versión filtrante, tiene la función de retener los olores del flujo de aire que lo atraviesa hasta alcanzar la saturación. La parte esponjosa del filtro se puede lavar también en lavavajillas, y necesita ser lavado cada 4 meses de uso aproximadamente o con mayor frecuencia en caso de...
  • Page 63: Adviezen En Suggesties

    ADVIEZEN EN SUGGESTIES De gebruiksaanwijzingen hebben betrekking op verschillende modellen van dit apparaat. Mogelijk vindt u dan ook beschrijvingen van aparte kenmerken die niet over uw specifieke apparaat gaan. INSTALLATIE • De fabrikant is niet aansprakelijk voor eventuele schade als gevolg van een onjuiste installatie of oneigenlijk gebruik.
  • Page 64 • Als de installatievoorschriften van de gaskookplaat bepalen dat een grotere afstand in acht moet worden genomen dan hierboven is aangegeven, dan moet daar rekening mee worden gehouden. Alle regels voor de luchtafvoer moeten in acht worden genomen. • Gebruik alleen schroeven en kleine onderdelen die geschikt zijn voor de afzuigkap. Waarschuwing: indien de schroeven en bevestigingssystemen niet volgens deze aanwijzingen worden geïnstalleerd, bestaat het gevaar voor elektrische schokken.
  • Page 65 • “ LET OP: tijdens het gebruik van de kooktoestellen kunnen de toegankelijke delen erg heet worden ”. ONDERHOUD • Schakel het apparaat uit of koppel het los van het elektriciteitsnet alvorens reinigings- of onderhoudswerkzaamheden uit te voeren. • De filters reinigen en/vervangen na de aangegeven tijdsperiode (brandgevaar).
  • Page 66: Eigenschappen

    EIGENSCHAPPEN Buitenafmetingen 1000 1200 650mm 500mm Min. Min. 1500mm 1500mm Max. Max.
  • Page 67 Onderdelen Ref. Productonderdelen Wasemkap compleet met: Bedieningen, Licht, Filters Actief koolfilter. Ref. Installatieonderdelen Pluggen ø 10 Schroeven M6 x 80 Schroeven 5,2 x 70 Schroeven 2,9 x 9,5 Ringen øi 6,4 Moeren M6 Documentatie Gebruiksaanwijzing Bevestiging Afzuigkap • In alle gevallen waarin het plafond niet stevig genoeg is op het punt waar de kap wordt op- gehangen, dient de installateur het plafond te verstevigen met platen en tegenplaten die ve- rankerd worden aan delen met een resistente structuur.
  • Page 68: Installatie

    INSTALLATIE Gaten boren in het plafond/de draagconsole en bevestiging frame GATEN BOREN IN HET PLAFOND/DE DRAAGCONSOLE • Bepaal met behulp van een paslood het middelpunt van het kookvlak en kruis dit aan op het plafond/draagconsole. • Gebruik de maten in de dimensietekening en kruis de gaten voor de installatie aan. •...
  • Page 70: Elektrische Aansluiting

    ELEKTRISCHE AANSLUITING • Sluit de wasemkap aan op de netspanning met een tweepolige schakelaar ertussen met een opening tussen de contacten van tenminste 3 mm. • Alvorens werkzaamheden uit te voeren, moet de afzuigkap worden uitgeschakeld door de stekker uit het stopcontact te halen of door de hoofdschakelaar uit te schakelen.
  • Page 71: Gebruik

    GEBRUIK Bedieningspaneel Toets Functie Schakelt de lichten op de hoogste lichtsterkte in/uit. Als de toets ongeveer 4 seconden ingedrukt Twee maal knipperen van de led S1 = alarm aan. wordt gehouden als alle belastingen (motor+lamp) uitgeschakeld zijn, dan wordt het Eén maal knipperen van de led S1 = alarm uit.
  • Page 72 AFSTANDSBEDIENING Dit apparaat kan met behulp van een afstandsbediening worden bestuurd. Deze werkt op alkaline zinkkoolstof batterijen van 1,5 V van het standaardtype LR03-AAA (niet inbegrepen). • Bewaar de afstandsbediening niet in de buurt van warmtebron- nen. • De batterijen mogen na gebruik niet in het milieu terechtko- men, gooi ze in de hiervoor bestemde afvalbakken.
  • Page 73: Onderhoud

    ONDERHOUD Openen van het paneel • Trek het paneel open. • Reinig het aan de buitenkant met een vochtige doek en een neutraal vloeibaar schoonmaakmiddel. • Reinig het ook aan de binnenkant met behulp van een vochtige doek en een neutraal schoonmaakmiddel; gebruik geen natte doeken of sponzen of waterstralen;...
  • Page 74 Vervangen van de geurfilters met actieve koolstof Het geurfilter met actieve koolstof is alleen aanwezig op afzuigkappen met luchtcirculatie en het heeft de functie om de geuren in de erdoor gevoerde lucht vast te houden tot het verzadigd is. Het sponzige gedeelte van het filter mag minstens om de 4 maanden in de af- wasmachine worden gewassen, of vaker bij een zeer intensief gebruik.
  • Page 76 991.0500.821_01 - 170315 D003599_00...

Table des Matières