Table des Matières
Publicité
Liens rapides
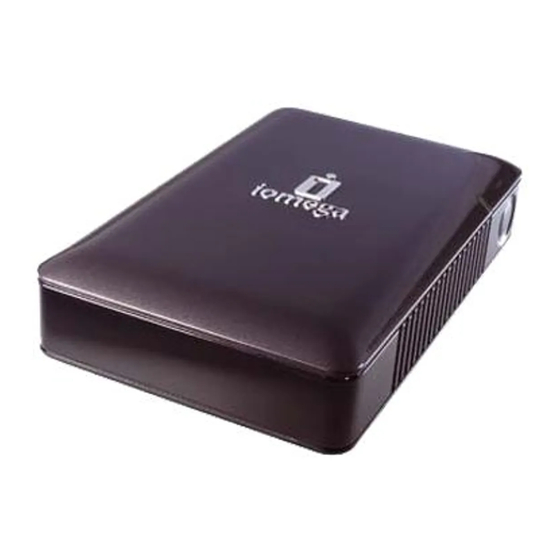
Desktop Hard Drive
USB/FireWire
Quick Start Guide
Guide de démarrage rapide
Schnellstart-Handbuch
Guida di installazione rapida
Guía de instrucciones rápidas
Guia de uso rápido
Snel aan de slag
Snabbstartguide
Introduktion
Hurtigreferanse
Pikaopas
Οδηγός γρήγορης εκκίνησης
Stručná příručka
Wprowadzenie
Gyors útmutató
®
Publicité
Table des Matières
Dépannage

Manuels Connexes pour Iomega DESKTOP USB FIREWIRE

Sommaire des Matières pour Iomega DESKTOP USB FIREWIRE
- Page 1 Desktop Hard Drive USB/FireWire ® Quick Start Guide Guide de démarrage rapide Schnellstart-Handbuch Guida di installazione rapida Guía de instrucciones rápidas Guia de uso rápido Snel aan de slag Snabbstartguide Introduktion Hurtigreferanse Pikaopas Οδηγός γρήγορης εκκίνησης Stručná příručka Wprowadzenie Gyors útmutató...
- Page 2 área de asistencia y descarga. Se você tiver um problema, nós podemos ajudar. NÃO devolva esse produto à loja! A resposta para você está na web. Site da web vencedor de prêmios www.iomega.com. Selecione a sua região e Suporte e Downloads.
-
Page 3: Table Des Matières
Contents • Matières • Inhalt • Sommario • Contenido Conteúdo • Inhoudsopgave • Innehåll • Indhold • Innhold Sisällys • Περιεχόµενα • Obsah • Spis treści • Tartalom Quick Install ........... . 4 Installation rapide . -
Page 4: Quick Install
Quick Install • Installation rapide 1. Insert the Solutions CD. If it does not start 1. Insérez le CD Solutions. S’il ne démarre pas automatically, double click the CD icon in My automatiquement, double-cliquez sur l’icône du CD Computer, Windows Explorer or on the Mac desktop,... -
Page 5: Installazione Rapida
Schnellstart • Installazione rapida 1. Legen Sie die Solutions-CD ins Laufwerk ein. Falls 1. Inserire il CD Soluzioni. Se il CD non si avvia das Programm nicht automatisch gestartet wird, automaticamente, fare doppio clic sull’icona del CD doppelklicken Sie im Bereich Arbeitsplatz, im Windows in Risorse del computer, in Esplora risorse/Gestione ®... -
Page 6: Instalación Rápida
Instalación rápida • Instalação rápida 1. Introduzca el CD de soluciones. Si la instalación no 1. Insira o CD Soluções. Caso ele não seja iniciado se inicia automáticamente, haga doble clic en el automaticamente, clique duas vezes no ícone do CD icono del CD en Mi PC, en el Explorador de Windows em Meu computador, no Windows Explorer ou na... -
Page 7: Snelle Installatie
Snelle installatie • Snabbinstallation 1. Plaats de cd Solutions (Opstarten) in de CD-ROM-drive. 1. Sätt i Solutions-CD:n. Om installationsprogrammet Als de cd niet automatisch start, dubbelklikt u op het cd- inte startar automatiskt dubbelklickar du på CD- pictogram in Deze Computer, of in Windows Verkenner ikonen i Den här datorn, Windows Utforskaren eller,... -
Page 8: Hurtig Installation
Hurtig installation • Rask installering 1. Indsæt Start-cd’en. Hvis cd’en ikke starter 1. Sett inn Solutions CD (oppstart). Hvis den ikke automatisk, skal du dobbeltklikke på cd-ikonet starter automatisk, dobbeltklikker du på CD-ikonet i i Denne computer i Windows Stifinder eller på... -
Page 9: Pika-Asennus
Pika-asennus • Γρήγορη εγκατάσταση 1. Aseta Solutions -levy CD-asemaan. Jos 1. Τοποθετήστε το CD Solutions. Εάν δεν ξεκινήσει αυτόµατα, asennusohjelma ei käynnisty automaattisesti, κάντε διπλό κλικ στο εικονίδιο του CD στο φάκελο Ο kaksoisnapsauta Windows Resurssienhallinnan υπολογιστής µου (My Computer), στην Εξερεύνηση των ®... -
Page 10: Skrócona Instrukcja Insalacji
Rychlá instalace • Skrócona instrukcja insalacji 1. Vložte disk CD Solutions. Pokud se program nespustí 1. Włóż dysk CD Solutions. Jeoli nie zostanie automaticky, poklepejte na ikonu disku CD ve složce uruchomiony automatycznie, kliknij dwukrotnie Tento počítač, v programu Průzkumník Windows nebo ikone dysku CD w oknie Mój komputer, w programie na pracovní... -
Page 11: Gyors Telepítés
Gyors telepítés 1. Helyezze be a Solutions CD-t. Ha nem indul el automatikusan, kattintson duplán a CD ikonjára a Sajátgép vagy Windows Intéző ablakban, illetve a Mac asztalán, majd kattintson duplán a Start ikonra. Csatlakoztassa a meghajtót a számítógéphez, miután a Solutions CD ellenőrizte a rendszert. -
Page 12: Using Your Drive
9. To format the drive with an NTFS file system, click Next, then click Finish. The drive will be ready to use when the format completes. NOTE: If you want to use the drive with other operating systems, download the Iomega FAT32 Formatter from the Support and Downloads area on www.iomega.com and use it to change the format to FAT32 (provides cross-platform compatibility). -
Page 13: Utilisation Du Lecteur
Windows : vous devez reformater le lecteur au format FAT32 ou NTFS. Les utilisateurs de Windows XP/2000 peuvent suivre les instructions ci-dessous pour formater le lecteur. Les utilisateurs de Windows 98/Me sont invités à visiter la section assistance du site www.iomega.com pour obtenir des instructions de formatage détaillées. -
Page 14: Verwenden Des Laufwerks
Sobald die Formatierung abgeschlossen ist, können Sie das Laufwerk verwenden. Hinweis: Wenn Sie das Laufwerk mit anderen Betriebssystemen verwenden möchten, laden Sie Iomega FAT32 Formatter aus dem Bereich “Support & Downloads” unter www.iomega.com herunter, und ändern Sie damit das Format in FAT32 um. Dadurch wird eine plattformübergreifende Kompatibilität gewährleistet. -
Page 15: Uso Dell'unità
Windows XP/2000 possono utilizzare le seguenti istruzioni per formattare l’unità. Per ulteriori istruzioni sulla formattazione per gli utenti di Windows 98/Me, visitare la sezione del supporto tecnico al sito www.iomega.com. ATTENZIONE! La riformattazione del disco rigido Iomega comporta l’eliminazione definitiva di tutti i dati presenti nell’unità. -
Page 16: Uso De La Unidad
¡PRECAUCIÓN! Si vuelve a formatear la unidad de disco duro Iomega, se eliminarán los datos existentes en la unidad. 1. Conecte el disco duro Iomega al ordenador siguiendo las instrucciones que se muestran en la página 5. -
Page 17: Utilização Da Unidade
Formatter (Formatador Iomega FAT32) na área de Suporte e Downloads a partir da página www.iomega.com. Altere para o formato FAT32 (oferece compatibilidade entre diferentes plataformas). Manual do usuário Está disponível na área de Suporte e Downloads no site www.iomega.com a versão completa do manual do usuário em formato HTML. -
Page 18: De Drive Gebruiken
9. Klik achtereenvolgens op Volgende en Voltooien. De drive is gebruiksklaar nadat de formattering is voltooid. OPMERKING: als u de drive in andere besturingssystemen wilt gebruiken, downloadt u de Iomega FAT32 Formatter vanuit de sectie Support & Downloads op www.iomega.com om het formaat in te stellen op FAT32 (wat vereist is voor compatibiliteit tussen platforms). -
Page 19: Customer Support
Assistenza clienti • Asistencia al cliente • Suporte ao cliente For service and support for your Iomega product, visit us at www.iomega.com. Pour obtenir du service et de l’assistance pour votre produit Iomega, visitez notre site à l’adresse suivante : www.iomega.com. - Page 20 Copyright © 2006 Iomega Corporation. All rights reserved. Iomega, the stylized “i” logo, and all Iomega brand blocks are either registered trademarks or trademarks of Iomega Corporation in the United States and/or other countries. Microsoft and Windows are either registered trademarks or trademarks of Microsoft Corporation in the United States and/or other countries.