Ergotron StyleView Mode D'emploi
Masquer les pouces
Voir aussi pour StyleView:
- Manuel de l'utilisateur (19 pages) ,
- Guide rapide (5 pages) ,
- Guide rapide (2 pages)
Les langues disponibles
Les langues disponibles
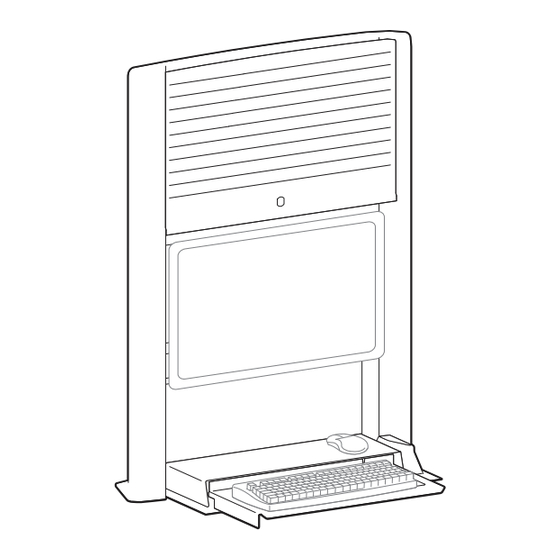
StyleView Sit Stand Enclosure
For the latest User Installation Guide please visit: www.ergotron.com
Para acceder a la última versión de la Guía de instalación para el usuario, ingrese a www.ergotron.com
Pour la dernière version du Guide d'installation de l'utilisateur, visitez : www.ergotron.com.
Die aktuellste Anleitung für die Montage durch den Benutzer fi nden Sie hier: www.ergotron.com
De nieuwste Gids voor installatie door de gebruiker kunt u vinden op: www.ergotron.com
Per la versione più recente della Guida all'installazione per l'utente, visitare il sito web: www.ergotron.com
För den senaste Installationshandboken se: www.ergotron.com
最新のユーザー インストール ガイドは、www.ergotron.com でご確認いただけます。
若需最新的用户安装指南,请访问:www.ergotron.com
English, Español, Français, Deutsch, Nederlands, Italiano, Svenska, 日本語, 汉语
www.ergotron.com |
|
|
|
USA: 1-800-888-8458
Europe: +31 (0)33-45 45 600
China: 400-120-3051
Japan: japansupport@ergotron.com
1 of 24
888-60-539-G-00 rev. T • 01/19

Manuels Connexes pour Ergotron StyleView


Sommaire des Matières pour Ergotron StyleView
- Page 1 StyleView Sit Stand Enclosure For the latest User Installation Guide please visit: www.ergotron.com Para acceder a la última versión de la Guía de instalación para el usuario, ingrese a www.ergotron.com Pour la dernière version du Guide d’installation de l’utilisateur, visitez : www.ergotron.com.
- Page 2 Important! You will need to adjust this product after installation is complete. Make sure all your equipment is properly installed on the product before attempting adjustments. This product should move smoothly and easily through the full range of motion and stay where you set it. If movements are too easy or diffi cult or if product does not stay in desired positions, follow the adjustment instructions to create smooth and easy movements.
- Page 4 M4 x 5mm 1/4-20 x 2" 5/32" M4 x 8mm M4 x 10mm M4 x 20mm M4 x 10mm M4 x 10mm M8 x 80mm AA Rechargeable Nickel Metal Hydride CAUTION! Only use rechargeable batteries. Using non-rechargeable batteries may cause product damage. AA recargable de níquel e hidruro metálico ¡PRECAUCIÓN! Utilice únicamente pilas recargables.
- Page 5 AVISO: Puesto que las superfi cies de montaje pueden variar de manera muy amplia y la última fase del montaje está fuera del control de Ergotron, es necesario que consulte con el profesional de montaje adecuado para asegurarse que el producto de Ergotron se instalará de manera correcta para soportar el peso del producto montado.
- Page 6 WOOD MADERA BOIS HOLZBALKENTRÄGER MASSIEF HOUTEN PILAREN DUE MONTANTI IN LEGNO MASSICCIO 木 木质 나무 16” (406mm) 56” (1422mm) fl oor suelo Boden vloer F l o o r pavimento golv フロア 地面 Ø 1/2" Ø 3/16" (13 mm) (5 mm) 1/2"-3/4"...
- Page 7 STEEL STUD >1/2" 16” (13mm) (406mm) 56” (1422mm) F l o o r Ø 1/2" (13 mm) 1/2"-3/4" (13-19mm) 1/4-20 x 2" 5/32" 7 of 24 888-60-539-G-00 rev. T • 01/19...
- Page 8 CONCRETE WARNING: Mounting holes must be at least WARNING: Anchors that are not CONCRETO 3-1/8” (80mm) deep and must be located fully set in solid concrete will not BÉTON within solid concrete, not mortar or covering support the applied load resulting MASSIVBETON material.
- Page 9 WOOD STEEL STUD CONCRETE MADERA CONCRETO BOIS BÉTON HOLZBALKENTRÄGER MASSIVBETON MASSIEF HOUTEN PILAREN BETON DUE MONTANTI IN LEGNO MASSICCIO CEMENTO 木 コンクリート 木质 水泥质 나무 콘크리트 M8 x 80mm 1/4-20 x 2" M8 x 80mm 1/4-20 x 2" 5/32" 5/32" 13 mm 13 mm 9 of 24...
- Page 10 AA Rechargeable Nickel Metal Hydride USB (Type A) AA recargable de níquel e hidruro metálico Piles AA rechargeables Nickel Métal Hybride (Tipo A) AA Nickel-Metall-Hybrid-Akku Oplaadbare AA batterij, nikkel-metaal-hydride (Typ A) AA al nichel-idruro metallico ricaricabili AA Laddningsbara nickelmetallhybrid 単三充電式ニッケル水素電池 (A 类)...
- Page 11 OPTIONAL Opcional Facultatif Optional Optioneel Opzionale オプション 可选 M4 x 5mm M4 x 20mm M4 x 10mm M4 x 10mm 11 of 24 888-60-539-G-00 rev. T • 01/19...
- Page 12 12 of 24 888-60-539-G-00 rev. T • 01/19...
- Page 13 M4 x 10mm M4 x 8mm M4 x 10mm M4 x 8mm 13 of 24 888-60-539-G-00 rev. T • 01/19...
- Page 17 Assurez-vous que les batteries sont bien installées dans le boîtier à piles. Remarque : Ergotron fournit des batteries rechargeables à la livraison, avec une charge suffi sante pour faire fonctionner les composants électroniques. Toutefois, si votre produit a été entreposé pendant une période prolongée avant l'installation, les batteries peuvent avoir besoin d'être rechargées avant l'utilisation.
- Page 24 将键盘向后倾斜 10 度,使手腕能保持放平。 www.ergotron.com | USA: 1-800-888-8458 Europe: +31 (0)33-45 45 600 China: 400-120-3051 Japan: japansupport@ergotron.com © 2018 Ergotron, Inc. All rights reserved. WorkFit is a registered trademark of Ergotron, Inc. ™ 24 of 24 888-60-539-G-00 rev. T • 01/19...