Publicité

Les langues disponibles
  • FR

Les langues disponibles

  • FRANÇAIS, page 81

Liens rapides

F60.2, F90.2, BT16.3, BT19.3
BT6.3, BT9.3

Publicité

Table des Matières
loading

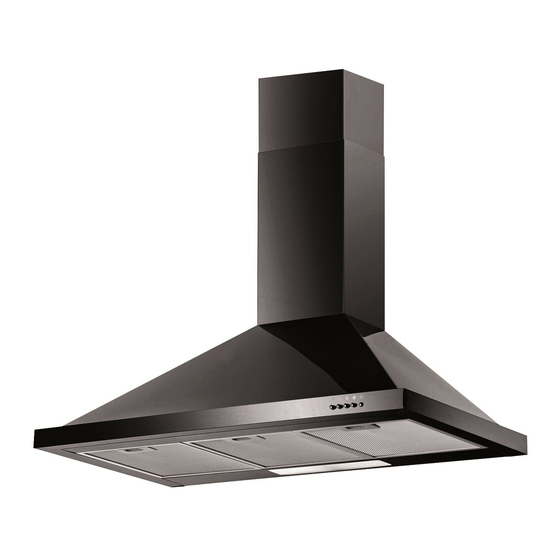
Sommaire des Matières pour Baumatic F60.2

  • Page 1 F60.2, F90.2, BT16.3, BT19.3 BT6.3, BT9.3...
  • Page 2 For future reference please record the following information which can be found on the Rating Plate and the date of purchase which can be found on your sales invoice. Model Number ………………………………. Serial Number ………………………………. Date of Purchase ……………………………….
  • Page 3: Important Safety Information

    IMPORTANT SAFETY • When installed between adjoining wall INFORMATION cabinets, the cabinets must not overhang the hob. • Please read this before installing & The edges of the cooker hood are using sharp – be mindful of this as you handle your appliance, especially Any installation work must be carried during installation and cleaning.
  • Page 4 these instructions. • Remember that when in extraction mode, your cooker hood is removing air from your room. Ensure that proper ventilation measures are being observed. Note that it removes odours from your room, not steam. • Warning - Always ensure that the cooker hood has been disconnected from the power supply before carrying out any work on the hood, including...
  • Page 5: Instructions For Installation

    Note second. Ask for the installation a properly INSTALLATION qualified and knowledgeable technician. The manufacturer is not responsible Before the installation, make sure for any damage or injury originating that the room is clean - avoid suction from not respecting the instructions for wooden chips or dust.
  • Page 6 Hang the cooker hood on the bolts (see Fig. 5) and fix it on the wall – Note tighten the auxiliary and anchoring Your cooker hood Baumatic should be bolts well-tight (over the page, at the installed on the wall only. DO NOT top).
  • Page 7 Fig. 2 – Rear view of the cooker hood...
  • Page 8 Fig. 3 Fig. 4 Fig. 5...
  • Page 9 Fig. 6 proper position of the cover catch points, marked “X“, see Fig. 7, against the rear Installation of the pipe part of the cooker hood. After the installation of the cooker hood, Install the cover “A“ onto the cooker hood: you can continue with the pipe.
  • Page 10 (N) on the upper part of the cooker hood Mark the side position of the moving (see Fig. 12) with the pipe intended for cover "B" and let it go back down (see removal of kitchen vapour, section at least Fig.
  • Page 11 Fig. 8 Fig. 9 Fig. 10...
  • Page 12 Fig.11 Fig. 12...
  • Page 13 Safety warning hood start shining. If you press the • Never allow children to operate the button again, the lights are switched device. off. Any press of the button is • The cooker hood is intended only for accompanied with one audio signal. households: it is not designed or intended for barbecue, fast food shops, Buttons...
  • Page 14 Follow carefully the instructions below. MODEL Width Control Type and Number and number of type of filters lights m*m*m/h F60.2 60 cm Button S1/ST1 Standard F90.2 90 cm Button S1/ST1 Standard BT6.3 60 cm Button Halogen BT9.3...
  • Page 15 Procedure 1: Put the filter sieve in clean machine. Before you start any cleaning, switch water, temperature 40 - 50 ºC. Add the main switch OFF. cleaning agent and let it work for 2 – 3 Do not expose the carbon filter to high minutes.
  • Page 16 TROUBLESHOOTING Defect Cause Solution Blocked ventilator Release the blockage Defective condenser Replace the Light shines but the condenser motor does not work Motor bearings are defective Replace the motor Inner motor winding is burnt, Replace the motor or the motor smells badly In addition to the above listed, check the following: Light does not shine Damaged light...
  • Page 17: Wiring Diagram

    WIRING DIAGRAM With halogenous light With standard bulb...
  • Page 18: Basic Parameters

    BASIC PARAMETERS With halogenous light Technical specifications 220 V-240 V, 50 Hz Nominal input 230 W Light input 20 W X 2 Motor performance 190 W Type of drive One motor Speed Speed I Speed II Speed III Diameter of air pipe 150 mm Air flow ≥12,5m...
  • Page 19 BAUMATIC LTD. CONDITIONS interfere with the appliance, the policy is OF GUARANTEE negated and Baumatic Ltd will be under no further liability. Dear Customer, The guarantee covers the appliance for Your new Baumatic appliance comes normal domestic use only, unless otherwise complete with a free 12 month guarantee stated.
  • Page 20 In the course of the work carried out it may be necessary to remove the appliance from its operating position. Whilst all reasonable care will be taken, Baumatic Ltd cannot accept responsibility for damage sustained to any property whatsoever in this process.
  • Page 21 F60.2, F90.2, BT16.3, BT19.3 BT6.3, BT9.3...
  • Page 22 Zur zukünftigen Verwendung vermerken Sie bitte hier nachfolgende Informationen, welche Sie auf dem Informationsaufkleber finden, und das Verkaufsdatum Ihres Kaufbeleges. Modell ……………………. Herstellungsnummer ……………………. Verkaufsdatum …………………….
  • Page 23: Umweltschutz

    • Bitte bewahren Sie diese für künftigen Fabriknummer • Bedarf auf. Einkaufsdatum des Gerätes Weil die Firma Baumatic fortwährend ihre Produkte verbessert, behält sie sich vor, Änderungen, die sie für unvermeidbar hält durchzuführen, ohne darauf in diesem Handbuch hinzuweisen. Garantie Auf Ihr neues Gerät bieten wir eine...
  • Page 24 Anmerkung die Beleuchtung sicherer. Wir danken Ihnen, dass Sie unsere Die spezielle Konstruktion des Dunstabzugshaube ausgewählt haben. Lufttunnels und die Form des Vor Gebrauch lesen Sie bitte sorgfältig Ölfängers sichert, dass die freien diese Anleitung durch. Verunreinigungen sofort aufgefangen Die Installation muss ein qualifizierter werden.
  • Page 25 (siehe abb. 4). Hängen Sie die Haube auf die Anmerkung Schrauben (siehe abb. 5) und Ihre Baumatic Abzugshaube sollte nur befestigen Sie sie an der Wand, indem direkt an der Wand angebracht werden. Sie die Hilfs- und Unterschreiten Sie dabei KEINESFALLS Befestigungsschrauben nun die Mindesthöhe von 700 mm (70 cm) über...
  • Page 26 Abb. 2 - Rückansicht Ihrer Abzugshaube.
  • Page 27 Abb. 3 Abb. 4 Abb. 5...
  • Page 28 Abb. 6 auf die Spitze der Abzugshaube, darauf achtend, dass die Gehäuselappen richtig Anbringung des Abzugsrohres auch der Rückseite der Abzugshaube Nachdem Ihre Abzugshaube installiert sitzen (siehe „X“ in Skizze 7). wurde, können Sie nun das Abzugsrohr 3. Befestigen Sie Gehäuse A auf der anbringen.
  • Page 29 soweit an, dass er die Decke erreicht NICHT ÜBERDREHEN ODER DAS und lotrecht sitzt. GERÄT KÖNNTE BESCHÄDIGT / Markieren Sie die Seitenabmessungen DEFORMIERT WERDEN: des beweglichen Teils „B“ und senken Sie es dann wieder ab (siehe abb. 8). Betrieb als Abluftventilator Nehmen Sie die Haltegabel „G“...
  • Page 30 Abzugshaube mitgeliefert. Siehe Skizze Dabei wird die Luft mittels des Ventilators links. „R“ (siehe Skizze 1 oben) umgewälzt. Bei Benutzung als Luftreiniger müssen zwei Luftreinigungs- (Umwälzungs-) Funktion Aktivkohlefilter installiert werden, um Die Abzugshaube kann als Luftreiniger Kochdämpfe zu absorbieren verwendet werden, falls kein anderer (siehe S.
  • Page 31 Abb. 11 Abb. 12...
  • Page 32 Sicherheitshinweis Kontrollleuchte 3 leuchtet auf, das • Gestatten Sie den Kindern nicht, die akustische Signal ertönt einmal, der Anlage zu bedienen. Motor läuft mit hoher Drehzahl. • Die Dunstabzugshaube ist nur für den Betätigen Sie sie erneut und der Motor Gebrauch im Haushalt bestimmt, sie hält an.
  • Page 33 Schiebeschalter Abschalten des Motors und Verringern Den Stecker in die Steckdose stecken der Geschwindigkeit Den Schalter in die Position “I” Die Betriebsgeschwindigkeit des verschieben, Glühbirne leuchtet auf, Ventilators wird durch Drücken der Taste 2 verschieben Sie ihn in die Position “0”, für weniger als 1 Sekunde verringert;...
  • Page 34 Modell Breite Bedienung Typ und Anzahl Anzahl und Typ Max. der für der Beleuchtung Leistung Rezirkulation m*m*m/h benötigten Filter F60.2 60 cm Drucktasten- S1/ST1 Standard Schaltung F90.2 90 cm Drucktasten- S1/ST1 Standard Schaltung BT6.3 60 cm Drucktasten- Halogen Schaltung BT9:3...
  • Page 35: Probleme Und Lösunge

    Der Kohlenstofffilter sollte keiner Hitze ausgestellt werden. Den Sicherheitsrahmen rund um den Kohlenfilter bitte nicht aufmachen. Wenn das Kabel oder der Stecker PROBLEME UND LÖSUNGE beschädigt ist, ersetzen Sie sie durch ein spezielles flexibles Kabel. Fehler Ursache Problemlösung Ventilator blockiert Blockade beseitigen Kondensator fehlerhaft Kondensator...
  • Page 36: Anschlussschema

    ANSCHLUSSSCHEMA...
  • Page 37 HAUPTPARAMETER Halogenlicht Anschlussparameter 220 V-240 V, 50 Hz Anschlusswert 230 W Anschlusswert Beleuchtung 20 W X 2 Motorleistung 190 W Antriebsart 1 Motor Drehzahl Drehzahl I Drehzahl II Drehzahl III Luftrohrdurchmesser 150 mm Luftdurchfluss ≥12,5m /min Luftdruck ≥250 Pa Geräuschpegel ≤72Db (A) Normale Glühbirne Anschlussparameter...
  • Page 38 UMWELTSCHUTZ In Übereinstimmung mit den Anforderungen der Europäischen Richtlinie 2002/96/EG über Elektro- und Elektronik- Altgeräte (WEEE) ist vorliegendes Gerät mit einer Markierung versehen. Sie leisten einen positiven Beitrag für den Schutz der Umwelt und die Gesundheit des Menschen, wenn Sie dieses Gerät einer gesonderten Abfallsammlung zuführen.
  • Page 39: Garantiebedingungen

    GARANTIEBEDINGUNGEN ausgeführt. Der Garantieschein hat Gültigkeit für den Durch die Erbringung von Endverbraucher im Gebiet der Garantieleistungen tritt keine Verlängerung Bundesrepublik Deutschland, unabhängig der ursprünglichen, ab Kaufdatum von den Verpflichtungen oder Zusagen, die eingeräumten, Garantiezeit ein. Die der Händler im Kaufvertrag eingegangen Garantiezeit für eingebaute Ersatzteile läuft ist.
  • Page 40 Diese entnehmen Sie bitte dem Typenschild. Erfuellung aller gesetzlichen Anforderungen der EU sowie dier Normen RoHS 2002/95/Ec sind mit Bezeichnung CE garantiert Baumatic GmbH Janderstraße 9 68199 Mannheim Telefon: +49 (0)621 129 19 0 Telefax: +49 (0)621 129 19 90...
  • Page 41 F60.2, F90.2, BT16.3, BT19.3 BT6.3, BT9.3...
  • Page 42 Pro budoucí použití si prosím poznamenejte následující informace, které najdete na informačním štítku a datum prodeje, který je uveden na Vašem účtu / faktuře: Model ……………………..Výrobní číslo ……………………..Datum prodeje ……………………..
  • Page 43: Ochrana Životního Prostředí

    9.00 do 17.00 hod. používat spotřebič. Prosíme, uschovejte si nebo na www.baumatic.cz ho pro budoucí potřebu. Prosíme, abyste měli připravené po ruce Protože Baumatic neustále vylepšuje své následující údaje : produkty, vyhrazuje si právo učinit změny, • typ výrobku / model které...
  • Page 44: Návod K Instalaci

    INSTALACE Poznámka Instalaci musí provést kvalifikovaný a znalý mechanik. Před instalací se ujistěte, že prostor je Výrobce nepřebírá odpovědnost za čistý, aby se zabránilo nasávání jakékoli škody nebo zranění vzniklá dřevěných třísek a prachu. v důsledku nedodržování pokynů Zařízení nemůže mít společnou k instalaci obsažených v následujícím ventilační...
  • Page 45 3 ). Do otvorů zasuňte roztažné špalíky Poznámka (hmoždinky) a zašroubujte Váš odsavač par Baumatic by měl být pomocné šrouby do poloviny (viz obr. 4). instalován pouze na zeď. NEUMISŤUJTE Zavěste odsavač na šrouby (viz jej níže než 700 mm (70 cm) nad plotnu obr.
  • Page 46 Obr. 2 - Zadní pohled na odsavač par...
  • Page 47 Obr. 3 Obr. 4 Obr. 5...
  • Page 48 Obr. 6 odsavače a přitom dbejte na správné nastavení pozice úchytek krytu, Montáž trubky označených jako část „X“ na obr. 7, na Poté, co jste nainstalovali váš odsavač par, zadní části odsavače. můžete namontovat trubku. Namontujte kryt „A“ na odsavač pomocí dvou šroubů...
  • Page 49 Zdvihněte pohyblivou část „B“ až ke nátrubek („N“) na vrchní část odsavače stropu a zkontrolujte, zda je v pozici pomocí dvou šroubů, které jsou součástí kolmo k odsavači. balení (obr. 1 vpravo). Pomocí trubky o Označte boční pozici pohyblivého krytu průměru 125 mm spojte nátrubek (N) na "B"...
  • Page 50 Obr 8 Obr 9 Obr. 10...
  • Page 51 Obr.11 Obr. 12...
  • Page 52: Nastavení Rychlosti

    Bezpečnostní upozornění Stiskněte tlačítko Light (světlo), rozsvítí • Nikdy nedovolte dětem, aby zařízení se kontrolka 4 a dvě žárovky obsluhovaly odsavače. Při opětovném stisknutí se • Odsavač par je určený pouze pro světla vypnou, s každým stisknutím použití v domácnosti, není vhodný pro jednou zazní...
  • Page 53 Postup 1: Vložte sítko filtru do čisté vody o teplotě 40 - 50 ºC, přidejte mycí prostředek MODEL Šířka Ovládání Typ a počet Počet a typ filtrů světel m*m*m/h F60.2 60 cm Tlačítkové S1/ST1 Standard F90.2 90 cm Tlačítkové S1/ST1 Standard BT6.3...
  • Page 54 a nechte působit 2 – 3 minuty. Použijte Před čištěním přístroje nezapomeňte rukavice a vyčistěte jej měkkým kartáčkem. prosím vypnout hlavní přívod proudu. Nepoužívejte prosím příliš velký tlak, Uhlíkový filtr by se neměl vystavovat protože sítko je choulostivé a snadno se horku.
  • Page 55: Problémy A Řešení

    PROBLÉMY A ŘEŠENÍ Závada Příčina Řešení Zablokovaný ventilátor Uvolněte zablokování Vadný kondenzátor Vyměňte kondenzátor Světlo svítí ale motor Motor má poškozená ložiska Vyměňte motor nepracuje Vnitřní vinutí motoru je Vyměňte motor spálené, nebo vychází z motoru zápach Kromě výše uvedeného dále zkontrolujte: Světlo nesvítí...
  • Page 56 ELEKTRICKÉ SCHÉMA ZAPOJENÍ S halogenovým světlem S normální žárovkou...
  • Page 57: Hlavní Parametry

    HLAVNÍ PARAMETRY S halogenovým světlem Parametry připojení 220 V-240 V, 50 Hz Jmenovitý příkon 230 W Příkon světel 20 W X 2 Výkon motoru 190 W Druh pohonu Jeden motor Otáčky Otáčky I Otáčky II Otáčky III Průměr vzduchové trubice 150 mm Průtok vzduchu ≥12,5m...
  • Page 58 ZÁRUČNÍ OPRAVY zásahem třetí osobou • Tyto opravy prosím nahlašujte výhradně na dřezy a kohoutky • bezplatné servisní lince Baumatic jakoukoli škodu způsobenou ® převozem, špatným zacházením nebo 800 185 263 zanedbáním, jemné součástky a v pracovní dny od 9.00 do 17.00 hodin.
  • Page 59 Podmínkou pro uplatnění práva ze záruky je předložení faktury (daňového dokladu) jako dokladu o koupi zboží a řádně vyplněného Záručního listu. Při neplatné nebo neoprávněné reklamaci, jakož i v případě, kdy reklamovaná vada zboží nebude zjištěna, je spotřebitel povinen uhradit náklady vzniklé v souvislosti s takovou reklamací.
  • Page 60 F60.2, F90.2, BT16.3, BT19.3 BT6.3, BT9.3...
  • Page 61 Per il futuro utilizzo, segnate per favore, le informazioni che, troverete sulla targhetta informativa adesiva e la data di vendita dal vostro documento dell’acquisto. Modello ……………………. Numero di matricola ……………………. Data di vendita …………………….
  • Page 62: Protezione Dell'ambiente

    • consultazioni. numero di matricola • data dell' acquisto dell' apparecchio Perché la ditta Baumatic in continuo migliora i suoi prodotti, si riserva il diritto di effettuare le modifiche che ritiene necessari, senza alcun preavviso in questo manuale. La garanzia del Vostro apparecchio nuovo si concede per 24 mesi.
  • Page 63: Istruzioni Per L'installazione

    Nota vengono raccolte in un attimo. L´installazione deve essere eseguita INSTALLAZIONE dal meccanico qualificato ed esperto. Il produttore non si assume la responsabilità per qualsiasi danno o Prima di installazione, controllate se, il ferimento causato in conseguenza di vano è pulito per evitare l´aspirazione non mantenimento delle istruzioni per del truciolo di legno della polvere.
  • Page 64 6 mm(vedi fig. 3 ). Nota Inserite nei fori i pioli allargati (i Il Vostro aspiratore dei vapori Baumatic, tasselli) ed avvitate le viti ausiliari fino dovrebbe essere installato solo sulla alla metà (vedi fig. 4).
  • Page 65 Dopo, collegate alla prolunga la tubazione di scarico, nel modo sotto specificato. Non dimenticate che questa tubazione deve corrispondere alla specificazione nelle note per i regimi di aspirazione /pulizia dell' aria (riciclo). Fig.2 – Vista posteriore sull’aspiratore dei vapori...
  • Page 66 Fig. 3 Fig. 4 Fig. 5...
  • Page 67 Fig. 6 parte „X“ sulla fig.7, nella parte posteriore dell' aspiratore. Montate il mantello „A“ sull’aspiratore Il montaggio del tubo tramite due viti „K“, forniti nel sacchetto Dopo l´installazione del vostro aspiratore con gli accessori (fig. 7). dei vapori potete montare il tubo. Alzate la parte mobile „B“...
  • Page 68 (vedi fig.8). 125 mm collegate il manicotto (N) sulla Prendete il supporto di fissaggio „G“ parte superiore dell’aspiratore (vedi fig.12) (fig.7-la pagina precedente), centrate con la tubazione per l´asportazioni dei con riguardo ai segni preparati prima, il vapori dalla cucina, del diametro almeno supporto sempre tocca il soffitto e, 150 cm2.
  • Page 69 Fig 8 Fig 9 Fig. 10...
  • Page 70 Fig.11 Fig. 12...
  • Page 71 Avvertimenti di sicurezza volta il segnale acustico. Il motore • Non permettere mai ai bambini di girerà ai giri alti . Premete il pulsante di comandare l´apparecchio nuovo ed il motore si fermerà. • L´aspiratore dei vapori é destinato solo Premete il pulsante Light (luce), Si per utilizzo nelle case, non é...
  • Page 72 1 al tempo più breve di 1 secondo; sullo schermo sarà La pulizia dello staccio del filtro a MODELLO LARGHEZZA Comando Tipo e Quantità e tipo quantità dei delle luci filtri m*m*m/h F60.2 60 cm Pulsante S1/ST1 Standard F90.2 90 cm Pulsante S1/ST1 Standard BT6.3...
  • Page 73 carbonio per i grassi La pulizia dell’aspiratore dei vapori Lo staccio del filtro è prodotto dal traliccio Per la protezione a lunga durata del molto denso dell' acciaio inossidabile. Non corpo principale contro la corrosione, utilizzate, per favore, per la pulizia, i l´aspiratore si dovrebbe pulire ogni due detersivi con l´effetto corrosivo.
  • Page 74 I PROBLEMI E LE SOLUZIONI Difetto Causa Soluzione Il ventilatore bloccato Allentate il blocco Il ventilatore difettoso Cambiate il La luce si accende condensatore ma non lavora il Il motore ha i cuscinetti Cambiate il motore motore danneggiati L´avvolgimento interno del Cambiate il motore motore è...
  • Page 75 LO SCHEMA ELETTRICO DI COLLEGAMENTO Con la luce alogena Con la lampadina normale...
  • Page 76: Parametri Principali

    PARAMETRI PRINCIPALI Con la luce alogena Parametri di collegamento 220 V-240 V, 50 Hz Potenza assorbita nominale 230 W Potenza assorbita delle luci 20 W X 2 Potenza del motore 190 W Tipo dell’azionamento Un motore Giri Giri I Giri II Giri III Diametro del tubo dell’aria 150 mm Passaggio dell’aria...
  • Page 77 L´AMBIENTE Conforme alla direttiva europea 2002/96/EG per gli apparecchi elettrici ed elettronici che non servono più al suo scopo (WEEE) questo apparecchio deve essere segnalato. Concederete il contributo positivo per la protezione dell' ambiente e della salute dell' uomo, se questo apparecchio consegnerete nel centro di raccolta dei rifiuti speciali.
  • Page 78: Condizioni Di Garanzia

    CONDIZIONI DI GARANZIA garanzia non sarà prolungato il periodo di garanzia concessa dal giorno dell' acquisto. Il certificato di garanzia è valido per Il tempo di garanzia per i componenti l´utente finale in Germania incorporati scade alla fine del periodo di indipendentemente agli accordi dei doveri e garanzia, concesso per l´apparecchio dal diritti, presi con il commerciante nell'...
  • Page 79 Questo è specificato sulla targhetta del prodotto. Il mantenimento di tutte le richieste di legge EU e delle norme RoHS 2002/95/Ec è garantito dal marchio CE. Baumatic GmbH Janderstraße 9 68199 Mannheim Telefono: +49 (0)621 129 19 0 Telefax: +49 (0)621 129 19 90...
  • Page 80 F60.2, F90.2, BT16.3, BT19.3 BT6.3, BT9.3...
  • Page 81 Pour l’utilisation ultérieure, nous vous prions de noter les renseignements placés à l’étiquette d’information ainsi que la date de la vente de votre pièce d‘achat. Modèle ……………………. Numéro de production ……………………. Date de la vente …………………….
  • Page 82: Protection De L'environnement

    Conservez-le pour l’utilisation ultérieure. numéro de production • date de l’achat de l’appareil Comme la firme Baumatic ne cesse pas à améliorer ses produits, elle réserve le droit d’effectuer de modifications qu’elle trouve nécessaire sans les indiquer dans le présent manuel.
  • Page 83 Remarque impuretés sont séparées L’installation doit être réalisée par une immédiatement. personne dûment qualifié et reconnue INSTALLATION compétente. Le fabricant n’assume pas la responsabilité des endommagements Avant d’installer, vérifiez que l’endroit ou des incidents consécutifs au non- est propre afin d’éviter l’aspiration respect des instructions d’installation d‘éclats de bois et de poussière.
  • Page 84 (voir Fig. 4). Remarque Suspendez la hotte sur les vis (voir Votre hotte aux vapeurs Baumatic ne Fig. 5 ) et fixez-la au mur en resserrant devrait être installée qu‘au mur. NE PAS PLACER la hotte plus bas que 700 mm (70 complètement les vis auxiliaires et les...
  • Page 85 doit correspondre aux spécifications relatives aux régimes évacuation / nettoyage d’air (circulation). Fig. 2 – Vue arrière de la hotte aux vapeurs...
  • Page 86 Fig. 3 Fig. 4 Fig. 5...
  • Page 87 Fig. 6 hotte. 3. Fixez le capot „A“ sur la hotte à l‘aide de Montage du tuyau deux vis „K“ qui sont livrées dans un Après avoir installé votre hotte aux sachet avec l’accessoire (Fig. 7). vapeurs, vous pouvez monter le tuyau Soulevez la part mobile „B“...
  • Page 88 Prenez l’élément de fixation „G“ (Fig. 7 de diamètre, liez la pièce de raccord (N) – page précédente), concentrez-le par sur la haute partie de la hotte (voir Fig. 12) rapport aux marques que vous avez fait avec le tuyau de sortie de vapeurs de (l’élément de fixation est tout près du cuisson de 150 cm2 de section au moins.
  • Page 89 Fig 8 Fig 9 Fig. 10...
  • Page 90 Fig.11 Fig. 12...
  • Page 91: Réglage De Vitesse

    Avertissements de sécurité Appuyez sur le poussoir Light • Ne permettez jamais aux enfants de (éclairage), le voyant 4 et deux démarrer l’appareil. ampoules s’allument. En réappuyant • La hotte aux vapeurs n’est destinée sur le poussoir, vous éteignez les que pour l’utilisation à...
  • Page 92: Modele Largeur

    Ne pas utiliser de MODELE Largeur Comman- Type et nbre de Nbre et type Maximum filtres d’éclairage m*m*m/h F60.2 60 cm Poussoirs S1/ST1 Standard F90.2 90 cm Poussoirs S1/ST1 Standard BT6.3...
  • Page 93 nettoyants corrosifs. Maintenez le filtre parce que ceux-ci pourraient propre et votre appareil fonctionnera sans endommager le corps. problème. Veuillez respecter les Ne laissez pas le moteur et d’autres instructions suivantes. éléments entrer en contact avec l’eau, parce que l’eau pourrait endommager Procédé...
  • Page 94: Problèmes Et Solution

    PROBLÈMES ET SOLUTION Panne Cause Solution Ventilateur bloqué. Débloquez le ventilateur. Condensateur défectueux. Remplacez le L’éclairage est allumé, condensateur. mais le moteur ne Les paliers du moteur sont Remplacez le moteur. marche pas. endommagés. Un enroulement intérieur du Remplacez le moteur. moteur est grillé...
  • Page 95: Schéma De Connexion Électrique

    SCHÉMA DE CONNEXION ÉLECTRIQUE Avec éclairage halogène Avec ampoule normale...
  • Page 96: Paramètres Principaux

    PARAMÈTRES PRINCIPAUX Avec éclairage halogène Paramètres électriques 220 V-240 V, 50 Hz Puissance nominale 230 W Puissance pour l’éclairage 20 W X 2 Puissance du moteur 190 W Entraînement Un moteur Tours Régime I Régime II Régime III Diamètre du tuyau d’air 150 mm Débit d’air ≥12,5m...
  • Page 97: Environnement

    ENVIRONNEMENT Conformément aux exigences de la Direction européenne 2002/96/EG pour les appareils électriques et électroniques usés (WEEE), le présent appareil doit être muni de l’indication. Vous allez aider la protection de l’environnement ainsi que la santé de l’homme, si vous transmettez le présent appareil dans un dépôt de déchet spécial.
  • Page 98: Conditions De Garantie

    CONDITIONS DE GARANTIE L’exécution d’actions de garantie ne prolonge pas le délai de garantie présenté Le bulletin de garantie est valable pour depuis du jour de l’achat. Le délai de l’utilisateur final dans la République garantie pour des pièces incorporées Fédérale d’Allemagne indépendamment expirera à...
  • Page 99 Désignation du modèle: Elle est indiquée à l’étiquette de type. L’accomplissement de toutes les exigences légales d’UE ainsi que de normes RoHS 2002/95/Ec est assuré par le marquage Baumatic GmbH Janderstraße 9 68199 Mannheim Téléphone: +49 (0) 621 129 19 0 Téléfax:...
  • Page 100 F60.2, F90.2, BT16.3, BT19.3 BT6.3, BT9.3...
  • Page 101 Noteer de gegevens die op de informatiesticker staan samen met de verkoopdatum die op uw aankoopbewijs staat, voor later gebruik. Model ……………………. Fabricatienummer ……………………. Aankoopdatum …………………….
  • Page 102 Bewaar hem a.u.b. voor later gebruik. product type / model • fabricatienummer • Gezien de firma Baumatic steeds haar aankoopdatum van het toestel producten verbetert, behoudt zij het recht voor om wijzigingen aan te brengen die zij noodzakelijk vindt zonder deze in deze brochure te vermelden.
  • Page 103: Installatie

    Opgelet worden snel opgezogen. Installatie moet door een INSTALLATIE gekwalificeerde en bekwame mechanicus worden uitgevoerd. Fabrikant is niet aansprakelijk voor Vóór installatie de ruimte van enige schade of ongevallen als gevolg houtsplinters, stof etc. ontdoen. van het niet opvolgen van de De afzuigkap op een aparte onderstaande montage-instructies.
  • Page 104 (zie fig. 4). Opgelet Hang de afzuigkap op de schroeven Uw Baumatic afzuigkap slechts op een (zie fig. 5 ) en zet het vast tegen de wand installeren. NIET lager dan 700 mm wand, door de hulpschroeven en (70 cm) boven de kookplaat PLAATSEN.
  • Page 105 Fig. 2 - Achteraanzicht afzuigkap...
  • Page 106 Fig. 3 Fig. 4 Fig. 5...
  • Page 107 Fig. 6 op de juiste positie van de bevestigingen, aangeduid als deel „X“ op fig. 7, aan de achterkant van de afzuigkap. Montage buis Monteer de „A“ kap op de afzuigkap Nadat u uw afzuigkap heeft geïnstalleerd, m.b.v. de twee „K“ schroeven, geleverd in kunt u de buis monteren.
  • Page 108 Til het beweegbare deel „B“ tot aan het Functie afzuigen plafond en controleer, of die loodrecht Controleer het met de twee meegeleverde t.o.v. de afzuiger ligt. schroeven opgezette verbindingsstuk („N“) Markeer de zijpositie van de beweegbare op de afzuigkap (fig. 1 rechts). M.b.v. een "B"...
  • Page 109 Fig. 8 Fig. 9 Fig. 10...
  • Page 110 Fig.11 Fig. 12...
  • Page 111: Veiligheidsinstructies

    Veiligheidsinstructies Drukknop Light (licht) indrukken, • Het apparaat nooit door kinderen laten controlelichtje 4 en twee lampen van bedienen de afzuigkap lichten op. Na opnieuw • Afzuigkap is slechts voor gebruik indrukken doven de lampen, elke keer binnenshuis bestemd, niet voor hoort u een geluidsignaal.
  • Page 112 2 – 3 min laten inwerken. van de snelheid Gebruik handschoenen en zachte borstel. MODEL Breedte Bediening Type en Aantal en type aantal filters verlichting m*m*m/uur F60.2 60 cm drukknoppen S1/ST1 Standaard F90.2 90 cm drukknoppen S1/ST1 Standaard BT6.3...
  • Page 113 Niet te hard drukken, de zeef is gemakkelijk de hitte. te beschadigen. Bevestigingframe rond de koolstoffilter Manier 2: Wanneer een dergelijke instructie niet open maken. in de gebruiksaanwijzing is, kan de zeef in Een beschadigde kabel of stekker met een speciale flexibele kabel de vaatwasser worden gewassen;...
  • Page 114: Problemen En Oplossingen

    PROBLEMEN EN OPLOSSINGEN Storing Oorzaak Oplossing Ventilator geblokkeerd Maak blokkering los Gebrekkige condensator Condensator Het lichtje werkt, vervangen maar de motor werkt Motorlagers beschadigd Motor vervangen niet Interne windingen in motor Motor vervangen zijn verbrand, motor stinkt Behalve het bovengenoemde nog controleren: Het lichtje licht niet Verlichting op beschadigd Lamp vervangen...
  • Page 115 SCHEMA ELEKTRISCHE AANSLUITING Met halogeenverlichting Met normale gloeilamp...
  • Page 116 VOORNAAMSTE PARAMETERS Met halogeenverlichting Parameters aansluiting 220 V-240 V, 50 Hz Nominale stroomafname 230 W Stroomafname verlichting 20 W X 2 Motorvermogen 190 W Soort aandrijving één motor Toerental toerental I toerental II toerental III Diameter luchtbuis 150 mm Doorstroming lucht ≥12,5m /min Luchtdruk...
  • Page 117 MILIEUBESCHERMING Conform de eisen van de Europese richtlijn 2002/96/EG voor de Oude elektrische en elektronische toestellen (WEEE) dient dit toestel van een aanduiding te zijn voorzien. Door dit toestel naar de betreffende milieudepot te brengen zal u positief tot de milieubescherming en de bescherming van de menselijke gezondheid bijdragen.
  • Page 118: Garantievoorwaarden

    GARANTIEVOORWAARDEN Door het uitvoeren van de garantiehandelingen wordt de Het garantiebewijs is voor de garantieperiode die vanaf de eindconsument in de Bondsrepubliek aankoopdatum loopt niet verlengd. De Duitsland geldig onafhankelijk ervan welke garantieperiode voor de ingebouwde verbintenissen of beloftes de handelaar is onderdelen verloopt op het einde van de in het koopcontract overeengekomen.
  • Page 119 Het voldaan hebben aan alle wettelijke vereisten van de EU en de RoHS-normen 2002/95/Ec wordt door de aanduiding CE gegarandeerd. Baumatic GmbH Janderstraße 9 68199 Mannheim Telefoon: +49 (0)621 129 19 0 Telefax: +49 (0)621 129 19 90...
  • Page 120 F60.2, F90.2, BT16.3, BT19.3 BT6.3, BT9.3...
  • Page 121 För användning vid senare tidpunkt får Ni göra anmärkningar här som hittas på information klisterlapp och datum av försäljningen från ert kvitto. Modell ……………………. Produktnummer ……………………. Datum av försäljningen …………………….
  • Page 122 • Vi ber Er vänligen att spara dessa datum för inköp anvisningar för senare användning. För att firma Baumatic förbättrar sina produkter ständigt, förbehåller den sig rätten att genomföra ändringar som anses vara nödvändiga utan att hänvisa till detta i denna anvisning.
  • Page 123 MONTERING Spisfläkten måste monteras av en kvalificerad och erfaren tekniker. Rengör installationsplatsen innan Tillverkaren ansvarar inte för skador spisfläkten monteras, så att damm orsakade av att nedanstående eller flisor inte kommer in. monteringsanvisningar inte har Spisfläkten måste ha ett eget respekterats.
  • Page 124 (ENDAST FRÅNLUFTSDRIFT) Installera spisfläktens övre del (se bild 6). Din Baumatic-spisfläkt ska installeras på en Koppla den till frånluftsledningen enligt vägg. Ställ den inte lägre än 700 mm (70 anvisningarna nedan. Kom ihåg att cm) över spishällen. frånluftsledningen måste motsvara de tekniska krav som anges i noterna till Ta av fettfiltrets galler (se bild 1).
  • Page 125 Bild 2 – Spisfläkten sedd bakifrån...
  • Page 126 Bild 3 Bild 4 Bild 5...
  • Page 127 kommer på rätt plats på spisfläktens Bild 6 bakre del enligt bild 7. Montering av frånluftsröret Montera ”A”-skyddet med hjälp av två När spisfläkten har installerats kan ni skruvar (”K”) som ingår i produkten (bild montera röret. Lyft den rörliga ”B”-delen ända upp till Ta skydden ”A”...
  • Page 128 Markera det rörliga ”B”-skyddets Om det inte finns någon sidoposition och lägg den ner igen (bild frånluftsledning och spisfläkten installeras mot byggnadens yttre vägg, borra ett hål i Lyft hållaren (”G”, bild 7 – föregående väggen som är tillräckligt stor för ett sida) och centrera den enligt vindskydd på...
  • Page 129 Bild 8 Bild 9 Bild 10...
  • Page 130 Bild 11 Bild 12...
  • Page 131 Säkerhetsanvisningar och varningar kokhällsbelysningen. Tryck igen på Tillåt aldrig barn hantera spisfläkten • knappen, så släcks Spisfläkten är avsedd endast för • kokhällsbelysningen. Varje gång man hemmabruk. Den ska inte användas i trycker på knappen ger spisfläkten en gatukök, restauranger eller andra ljudsignal.
  • Page 132 Metod 2: Om så anges i anvisningarna är Spisfläktens effektläge sänker man genom det möjligt att tvätta filtret i diskmaskin; ställ MODELL Bredd Kontroll Filtertyp Ljustyp och och -antal -antal m*m*m/h F60.2 60 cm Knappar S1/ST1 Standard F90.2 90 cm Knappar S1/ST1 Standard BT6.3...
  • Page 133 den med en extraelastisk sladd. in temperaturen till 60 ºC. Rengöring av spisfläkten För att enheten ska skyddas mot korrosion rekommenderar vi att tvätta den med varmt vatten och antikorrosivt tvättmedel var annan månad. Använd inte ett abrasivt rengöringsmedel. Spisfläkten skulle kunna skadas.
  • Page 134: Problemlösning

    PROBLEMLÖSNING Problem Orsak Lösning Blockerad fläkt Blockera av den Felaktig kondensator Byt kondensator Kokhällsbelysningen Fläktmotorns lager är Byt fläktmotor fungerar men inte skadade fläktmotorn Fläktmotorn är bränd, den Byt fläktmotor luktar bränt Förutom att följa anvisningarna ovan, kontrollera Varken följande: kokhällsbelysningen Skadad glödlampa Byt glödlampa...
  • Page 135 SCHEMA FÖR ELANSLUTNING Med halogenlampa Med vanlig lampa...
  • Page 136 HUVUDPARAMETRAR Med halogenlampa Parametrar för elanslutning 220 V-240 V, 50 Hz Nominell effektförbrukning 230 W Ljusens effektförbrukning 20 W X 2 Fläktmotorns effekt 190 W Motorantal En motor Varv Varv I Varv II Varv III Rörets diameter 150 mm Luftgenomflöde ≥12,5m /min Lufttryck...
  • Page 137 GARANTI garantitiden som lämnades ut den dag apparaten köptes. Garantisedeln är giltig för den slutliga Efter 24 månades sedan inköpsdatum användaren i Tyskland oberoende av vilka upphör garantitiden och ingripande av förpliktelser eller löften avtalades av kundservisen skall genomföras och affärsmannen i köpeavtalet.
  • Page 138 Modell angivelse: Det finns angivet på typskylt. Uppfyllelse av alla lagliga krav av EU och standarder RoHS 2002/95/Ec garanteras av markeringen CE. Baumatic GmbH Janderstraße 9 68199 Mannheim Telefon: +49 (0)621 129 19 0 Telefax: +49 (0)621 129 19 90...
  • Page 139 F60.2, F90.2, BT16.3, BT19.3 BT6.3, BT9.3...
  • Page 140 Pentru un uz ulterior, vă rugăm să notaţi aici informaţiile pe care le veţi găsi pe eticheta informativă, precum şi data achiziţiei de pe bonul de vânzare. Model ……………………. Număr de fabricaţie ……………………. Data achiziţiei …………………….
  • Page 141: Protecţia Mediului Înconjurător

    Vă rugăm să le păstraţi pentru un uz • ulterior. tipul produsului / modelul • numărul de fabricaţie • Deoarece firma Baumatic îşi îmbunătăţeşte data achiziţiei aparatului permanent produsele, îşi rezervă dreptul de a efectua modificări, considerate indispensabile, fără a le menţiona în acest manual. Garanţia Pentru aparatul dumneavoastră...
  • Page 142: Instrucţiuni De Instalare

    INSTALARE Observaţie Instalarea trebuie executată de către un mecanic calificat şi competent. Înaintea instalării asiguraţi-vă că Producătorul nu îşi asumă spaţiul este curat, pentru a se responsabilitatea pentru orice daune împiedica aspiraţia aşchiilor de lemn şi sau răniri apărute ca urmare a a prafului.
  • Page 143 Introduceţi în orificii diblurile şi înşurubaţi până la jumătate şuruburile Observaţie (vezi fig. 4). Hota dumneavoastră Baumatic ar trebui Atârnaţi hota pe şuruburi (vezi fig. 5) şi instalată numai pe perete. NU O strângeţi până la limită şuruburile AMPLASAŢI la o distanţă mai de 700 mm ajutătoare şi cele de fixare (pagina...
  • Page 144 Fig. 2 – Imaginea din spate a hotei...
  • Page 145 Fig. 3 Fig. 4 Fig. 5...
  • Page 146 Fig. 6 poziţiei dispozitivelor de prindere ale capacului, însemnate ca piesa „X“ în fig. Montajul tubului 7, să fie corectă pe partea din spate a După ce v-aţi montat hota, puteţi să montaţi hotei. tubul. Cu ajutorul celor două şuruburi „K”, care sunt livrate în punga cu accesorii (fig.
  • Page 147 Ridicaţi până la tavan partea mobilă „B” Funcţia de aspiraţie şi controlaţi dacă are o poziţie Asiguraţi-vă că, cu ajutorul celor două perpendiculară pe hotă. şuruburi care sunt parte componentă a Însemnaţi poziţia laterală a capacului ambalajului, aţi montat pe partea mobil „B”...
  • Page 148 aburilor de bucătărie. Fig. 8 Fiq. 9 Fig. 10...
  • Page 149 Fig.11 Fig. 12...
  • Page 150: Reglarea Vitezei

    Avertismente privind securitatea din nou butonul şi motorul se opreşte. • Niciodată nu permiteţi copiilor să Apăsaţi butonul Light (lumină), se deservească instalaţia. aprinde lampa de control 4 şi cel două • Hota este destinată exclusiv utilizării în becuri ale hotei. Repetând apăsarea, gospodării, nu poate fi utilizată...
  • Page 151 întocmai instrucţiunile mare. menţionate mai jos. Procedeul 1: Introduceţi sita filtrului în MODEL Lăţime Comandă Tip şi număr de Tip şi număr filtre lămpi m*m*m/h F60.2 60 cm Cu buton S1/ST1 Standard F90.2 90 cm Cu buton S1/ST1 Standard BT6.3...
  • Page 152 apă curată cu temperatura de 40 - 50 ºC, alimentarea cu energie electrică. adăugaţi detergent şi lăsaţi să acţioneze Filtrul din cărbune nu ar trebui expus 2 – 3 minute. Folosiţi mănuşi şi curăţaţi-l unor temperaturi înalte. Vă rugăm să nu deschideţi rama de cu o perie moale.
  • Page 153 PROBLEME ŞI SOLUŢIONĂRI Defect Pricină Soluţionare Ventilator blocat Eliberaţi blocarea Condensator defect Schimbaţi Iluminatul condensatorul funcţionează însă Motorul are rulmenţii Schimbaţi motorul motorul nu deterioraţi Bobinajul interior al Schimbaţi motorul motorului este ars sau din motor se simte un miros urât În afară...
  • Page 154 SCHEMA ELECTRICĂ DE RACORDARE Cu bec halogen Cu bec normal...
  • Page 155 PARAMETRII PRINCIPALI Cu bec halogen Parametrii de branşare 220 V-240 V, 50 Hz Puterea nominală 230 W Consumul de putere lămpi 20 W X 2 Puterea motorului 190 W Tipul de antrenare Un motor Turaţia Turaţie I Turaţie II Turaţie III Diametrul tubului de aer 150 mm Debitul de aer...
  • Page 156: Mediul Înconjurător

    MEDIUL ÎNCONJURĂTOR În conformitate cu prevederile Directivei Europene 2002/96/EG pentru aparatele electrice şi electronice scoase din uz (WEEE), acest aparat trebuie să fie prevăzut cu însemnare. Prin predarea acestui aparat la un centru de colectare a reziduurilor speciale, veţi avea un aport pozitiv la protecţia mediului înconjurător şi a sănătăţii omului.
  • Page 157: Condiţii De Garanţie

    CONDIŢII DE GARANŢIE prelungeşte termenul de garanţie acordat la data achiziţiei produsului. Termenul de În Republica Federală Germană, pentru garanţie al componentelor încorporate ia consumatorii finali, certificatul de garanţie sfârşit o dată cu terminarea perioadei de este valabil indiferent de ce obligaţii sau garanţie acordată...
  • Page 158 Însemnarea modelului: Aceasta este menţionată pe eticheta de tip. Împlinirea tuturor exigenţelor UE şi a normelor RoHS 2002/95/Ec este garantat prin însemnul Baumatic GmbH Janderstraße 9 68199 Mannheim Telefon: +49 (0)621 129 19 0 Telefax: +49 (0) 621 129 19 90...

Ce manuel est également adapté pour:

F90.2Bt16.3Bt19.3Bt6.3Bt9.3

Table des Matières