Table des Matières
Publicité
Les langues disponibles
Les langues disponibles
Liens rapides
Publicité
Table des Matières

Manuels Connexes pour auna MVD-260

Sommaire des Matières pour auna MVD-260
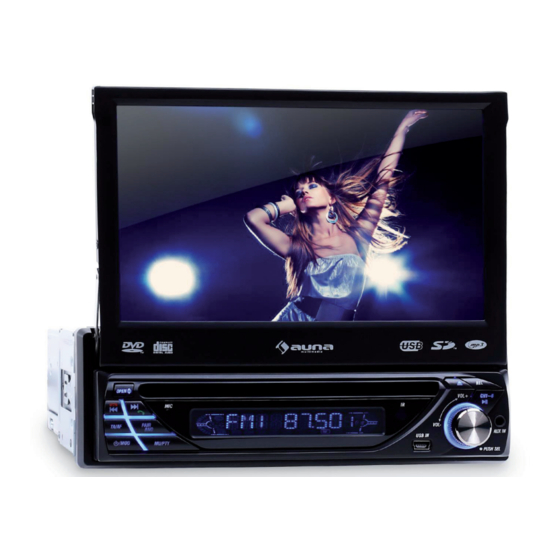
- Page 1 MVD-260 Moniceiver 10019192 www.auna-multimedia.com...
-
Page 2: Sicherheitshinweise Und Gewährleistung
Sehr geehrter Kunde, zunächst möchten wir Ihnen zum Erwerb Ihres Gerätes gratulieren. Bitte lesen Sie die folgenden Anschluss- und Anwendungshinweise sorgfältig durch und befolgen Sie diese um möglichen technischen Schäden vorzubeugen. Sicherheitshinweise und Gewährleistung • Diese Bedienungsanleitung dient dazu, Sie mit der Funktionsweise dieses Produktes vertraut zu ma- chen. -
Page 3: Technische Daten
Technische Daten Artikelnummer 10019192 Allgemein: Stromversorgung DC12V Energieverbracuh 10A max. Audio Signal Ausgang 2 x Stereo Pre-Out; 1x Subwoofer-Out Frequenzgang 20Hz - 20kHz S/N Ratio 90dB Monitor Größe 7“ Farbsystem PAL / NTSC umschaltbar Datenträger Kompatible Formate DVD, MPEG4, VCD, IMAGE, MP3, WMA, CD Radio Frequenzband FM 87.5 - 108MHz / MW 530 - 1710kHz Sensitivität FM: 15dBu / MW: 40dBu... - Page 4 Einbauhinweise • Wählen Sie einen Einbauort, an dem das Gerät den Fahrer nicht behindert. • Schließen Sie die Kabel testweise an und testen das Gerät bevor Sie das Gerät endgültig fixieren. • Verwenden Sie nur das mitgelieferte Montagezubehör. • Sollten Sie Veränderung an Ihrem Fahrzeug vornehmen bzw. Löcher bohren müssen, fragen Sie vorher bei Ihrem Fahrzeughersteller nach.
-
Page 5: Fernbedienung Vorbereiten
Um das Gerät aus dem Einbaurahmen zu entfernen, müssen Sie zuerst den Abdeckrahmen abbauen, danach die beiden Montageschlüssel an beiden Seiten neben das Gerät einschieben und dieses dann herausziehen. Fernbedienung vorbereiten • Drücken Sie den Batteriehalter wie auf den Bild zu sehen (1) und ziehen Sie diesen heraus (2). •... -
Page 6: Anschlussschema
Anschluss-Schema... - Page 7 Bedienelemente / Übersicht Fernbedienung: Monitor ein-/ausfahren - gedrückt halten Zum Hauptmenü / Senderspeicher 4 MENU/4 zur Einstellung d. Winkels Einschalten / Ausschalten (gedrückt VOL+/- Lautstärke ändern halten); Auswahl der Musik-Quelle MODE Mehfach drücken zum Anpassen von Bass/ CD/USB: Schneller Vor-/Rücklauf Treble/Balance/SWF Vol/Freq (im Radiomo- Radio: Manuelles Tuning dus gedrückt halten;...
- Page 8 Front: Abgenommenes Bedienteil:...
- Page 9 Kurz drücken: Aus- und Einfahren des Monitors; OPEN Gedrückt halten: Einstellen des Neigungswinkels; Normaler Betrieb: Drehen zum Ändern der Lautstärke SEL: Drücken für die Einstellung von BASS / TREBLE / BALANCE / SWF VOL / FREQ.; Zum Einstellen der Werte drehen (oder Fernbedienung: VOL+/-). VOL / SEL Radio-Modus: SEL drücken, um MANUAL/AUTO Scan-Modus zu wählen;...
-
Page 10: Bedienung - Grundlagen
Bedienung - Grundlagen Ein- und Ausschalten Drücken Sie am Front-Panel oder auf der Fernbedienung, um das Gerät einzuschalten. Halten Sie ge- drückt zum Ausschalten (Front-Panel, Fernbedienung oder Touch-Screen). Disc einlegen / auswerfen Schieben Sie CDs mit der bedruckten Seite nach oben in den CD-Schlitz. Sobald Sie einen leichten Wieder- stand wahrnehmen, zieht das Laufwerk die CD selbsttätig weiter ein. -
Page 11: Home Screen
Bedienung per Touch-Screen: Grundlagen Alle Funktionen lassen sich auch über das Touch-Screen-Menü abrufen und verwalten. Der Funktions-Um- fang ist gegenüber der Bedienung über das Front-Panel oder die Fernbedienung deutlich umfangreicher. Bitte beachten Sie, dass die Bedienung des Touch-Screens vom Fahrer während der Fahrt untersagt ist. Home-Screen Bildschirm ausschalten (um wieder einzuschalten, beliebige Stelle antippen) Ausschalten - der Monitor fährt automatisch ein. -
Page 12: Menüeinstellungen
Menü: Einstellungen ( Nutzen Sie die Pfeiltasten zum Blättern, oder den aktiven Menüpunkt zu wählen. Tippen Sie in Menüs und Untermenüs auf den Pfeil (obere rechte Ecke), um einen Schritt zurück zu gehen. Übersicht: MENÜPUNKT UNTERMENÜS / PARAMETER Animation (Off / 10s / 30s / 1m / 90s / 2m / 3m / 4m) Keybeep (on/off) Disc... - Page 13 Bedienung per Touch-Screen: Radio Drücken Sie auf den Radio-Icon (oder mehrfach auf MOD/MODE), um in den Radio-Modus zu wechseln. Standard-Funktionen Drücken Sie den BAND Button mehrfach zum Wechseln der verfügbaren Frequenzband wechseln: Bänder FM1 - FM2 - FM3 - AM1 (MW) - AM2 (MW). Auf jedem der Bänder stehen 6 Speicherplätze für Radio- sender zur Verfügung (insgesamt 30).
- Page 14 Drücken Sie , um zwischen den TA (Verkehrsmeldungs)-Modi Local und Distant zu wählen. LO/DX: Presets speichern: Halten Sie die Zifferntaste gedrückt, auf der Sie den aktuellen Sender für zukünftige Schnellzugriffe speichern möchten. Zum Aufrufen, drücken Sie die jeweilige Zifferntaste kurz. Halten Sie den Such-Button Sendersuchlauf &...
- Page 15 Bedienung per Touch-Screen: Medienwiedergabe Der Medien-Bildschirm ist im Audio-, Foto- und Video- Modus, also bei der Wiedergabe von Medien von USB, SD, CD oder BT zu sehen - allerdings nur bei gezogener Handbremse (bei korrektem Anschluss): Über die Touch-Buttons im unteren Bereich des Bildschirms haben Sie bequemen Zugriff auf alle Funk- tionen, die auch Fernbedienung und Frontblende bereitstellen.
- Page 16 Weitere Funktionen bei der Video-Wiedergabe Bei der Wiedergabe von DVD / VCD/SVCD rufen Sie das OSD (=OnScreenDisplay) per DISP- OSD: Taste auf der Fernbedienung oder per Druck auf eine beliebige Stelle auf dem Video auf. Der Vollbildmo- dus wird beendet. Am unteren Bildschirmrand werden Funktionstasten und Zeitleiste eingeblendet. Oben erscheint die Track/Ordner-Anzeige (mit entsprechenden weiterführenden Optionen, je nach eingelegtem Medium): Tippen Sie auf die Track-Anzeige am oberen Bildschirmrand (hier: T001/004),...
- Page 17 Eingehende Telefonate und Musikwiedergabe können nun vom Smartphone (o. Tablet/Laptop etc.) auf die Car-Hifi-Anlage transferiert werden. BT Telefonie Wenn Ihr Smartphone erfolgreich per BT mit dem MVD-260 verbunden wurde, können Sie Telefonate über die Car-HiFi-Anlage tätigen. Das integrierte Mikrofon sorgt dabei für die reibungslose Kommunikation mit Ihrem Gesprächspartner.
- Page 18 Rücklauf) nutzen. Bedienung per Touchscreen: USB & SD Sie können mit dem MVD-260 Mediendateien (MP3, WMA, WAV, JPEG und MP4) von UBS-Sticks (bzw. MP3-playern oder ähnlichen USB-Massenspeichern) und SD-Karten abspielen. Verbinden Sie wie im Ab- schnitt „Grundlagen“ illustriert und rufen Sie den USB- bzw. SD-Modus über den Home-Screen oder per MOD/MODE über die Fernbedienung oder das Front-Panel auf.
- Page 19 Einstellung der Lenkrad-Tasten (SWC) Tippen Sie im Home-Screen auf den SWC-Button, um zu den Einstellungsoptionen der Lenkrad-Steuerung zu gelangen. Hierüber können Sie Schnellzugriffstasten auf Ihrem Multifunktionslenkrad neu zuweisen: • Drücken Sie zunächst , um etwaige vor- handene (unpassende) EInstellungen zu lö- schen.
-
Page 20: Region-Code
Anhang: Kindersicherung / Regional-Codes Kindersicherung / Parental Control Nach dem Einlegen einer DVD kann es dazu kommen, dass eine Dialog-Box erscheint und Sie zur Eingabe eines Passworts aufgefordert werden. Dies liegt daran, dass die Disc ein bestimmtes Rating aufweist - und das in den Einstellungen freigegebene Rating darunter liegt. -
Page 21: Important Safety Advice
Dear Customer, Congratulations on purchasing this product. Please read and follow these instructions, in order to avoid damaging the item. We do not cover any damages that may arise from improper use of the item or the disregard of the safety instructions. Important Safety Advice •... -
Page 22: Technical Data
Technical Data Article No. 10019192 General Power supply DC12V Power consumption 10A max. Audio Signal outputs Line-Out 2ch & 4ch Frequency range 20Hz - 20kHz S/N Ratio 90dB Monitor Size 7“ Color systems PAL / NTSC switchable Storage media Formats playable DVD, MPEG4, VCD, IMAGE, MP3, WMA, CD Radio Bands FM 87.5 - 108MHz / MW 530 - 1710kHz Sensitivity FM: 15dBu / MW: 40dBu... - Page 23 Installation • Choose the mounting location where the unit will not interfere with the normal driving. • Before finally installing the unit, connect the wiring temporarily and make sure it is all connected up properly and the unit and the system work properly. •...
-
Page 24: Preparing The Remote Control
If you want to take CHASSIS out of the SLIDE BRACKET HOUSING, first remove the PLASTIC TRIM OUT of the both sides away, then insert the two KEY PLATE into left and right side of chassis as above illustration. Preparing the Remote Control •... -
Page 25: Connection Diagram
Connection Diagram... - Page 26 Controls / Overview Remote Control Press to open/close monitor Jump to main menu / Preset 4 MENU/4 Press and hold to adjust monitor angle Press to switch on/ hold to switch off VOL+/- Change output volume Press repeatedly to switch modes MODE Press repeatedly to adjust bass/treble/balan- CD/USB: Fast forward / fast rewind ce/SWF vol.&freq.
- Page 27 Front: With front panel detached:...
- Page 28 Press: Open/close monitor; OPEN Hold: Adjust monitor angle; Music modes: Rotate to adjust output volume; SEL: Press to change BASS / TREBLE / BALANCE / SWF VOL / FREQ.; (rotate knob or use VOL+/- on RC to adjust values); VOL / SEL Radio mode: Press SEL to set MANUAL/AUTO scan modes;...
-
Page 29: Power On/Off
Operation - Basics Power on/off Press on the front panel or on the RC to power the device on. Hold to switch off (RC / panel / screen). Insert / Eject Discs Insert discs with the printed side facing up into the disc slot. Do not push any further when you feel slight resistance. - Page 30 Touch Screen Operation: Basics All functions of the device can also be operated and adjusted by using the touch screen menu which off ers an even more extensive functionality. Please note: Operating the touch screen while driving is prohibited! When correctly installed, the device requires the handbrake of the vehicle to be fastened.
-
Page 31: Menu: Preferences
Menu: Preferences ( Use the arrow buttons below the list to scroll and find the desired menu item. In menues and sub menues, tap the left arrown (in the upper right display corner) to return to the previous menu. Overview: MENU ITEM SUB MENUES / PARAMETERS Animation... -
Page 32: Basic Functions
Touch Screen Operation: Radio Tap on the radio icon (or press MOD/MODE repeatedly), to change to radio mode: Basic functions Press the BAND button repeatedly to toggle through the available bands FM1 Switch Frequency Bands: - FM2 - FM3 - AM1 (MW) - AM2 (MW). In every band, there are 6 memory presets available to save radio station frequencies to (total: 30). - Page 33 toggle between modes LOCAL DISTANT. LO/DX: Press and hold the number button you want to save the current station upon for future Save Presets: quick access. Press and hold the search button for 2 seconds. An automatic Automatic Scan and Preset Saving: station scan will be performed.
-
Page 34: Button Function
Touch Screen Operation: Media Playback The media playback screen pops up when you choose to playback audio, photo or video data from any media storage (USB, SD, CD or BT). When connected properly, this works with the handbrake pulled, only. Use the touch buttons in the lower display area for convenient access to all functions that RC and front panel also offer. - Page 35 Additional Functions (for Video Playback) Open the OSD menu by pressing DISP on the RC or tap anywhere on the screen while a video OSD: file/DVD video is playing. The video time line and the track/folder information with further options will be displayed above and beneath the video which is lo longer displayed in full screen mode.
- Page 36 BT Phone After successfully pairing your smartphone with the MVD-260, you can use the car hifi for hands free calls thanks to the internal microphone. From the home screen - and from any other mode - tap...
- Page 37 Touch Screen Operation: USB & SD With the MVD-260 you can play back media files (MP3, WMA, WAV, JPEG, MP4) from USB storage drives and SD cards. Connect as depicted in the section "Basics" and use the home screen icons or MOD/MODE...
- Page 38 Steering Wheel Control (SWC) In the home screen, tap on the SWC button to call the SWC menu. Here you cann (re-)assign the buttons of your multi function steering wheel to functions of the car hifi. • First, press , to delete any older settings. •...
-
Page 39: Parental Control
Appendix: Parental Control Parental Control After inserting a DVD it might happen that a message is displayed, prompting you to enter a password. This may be caused by the DVD rating. You have to enter a password if the DVD rating is above the parental control rating. -
Page 40: Consignes De Sécurité Et Garantie
Chère cliente, cher client, Toutes nos félicitations pour l’acquisition de ce nouvel appareil. Veuillez lire attentivement et respecter les consignes suivantes de branchements et d’utilisation pour éviter d’éventuels dommages techniques. Consignes de sécurité et garantie • Ce mode d’emploi sert à vous familiariser aux fonctions de ce produit. Conservez-le bien afin de pouvoir vous y référer à... -
Page 41: Fiche Technique
Fiche technique Numéro d’article 10019192 Général : Alimentation électrique DC12V Consommation énergétique 10A max. Audio Sortie du signal 2x sorties pour enceintes stéréo ; 1x sortie pour caisson de basse Réponse en fréquence 20Hz - 20kHz Rapport signal sur bruit 90dB Écran Taille 7“... - Page 42 Instructions de montage • Monter l’appareil à un endroit où l’appareil ne dérange pas le conducteur. • Brancher le câble pour tester s’il fonctionne et tester l’appareil avant de le fixer définitivement. • Utiliser exclusivement les accessoires de montage fournis. •...
-
Page 43: Préparer La Télécommande
Pour enlever l’appareil du boîtier de montage, il faut démonter le cadre de protection, puis introduire les deux clés de montage des deux côtés de l’appareil puis sortir celui-ci. Préparer la télécommande • Appuyer sur le compartiment à pile comme décrit sur le schéma (1) et tirer dessus pour le sortir (2). •... -
Page 44: Schéma Des Branchements
Schéma des branchements... -
Page 45: Éléments De Commande
Éléments de commande Déployer/rabattre l’écran - maintenir Accéder au menu principal / Station MENU/4 enfoncé pour régler l’inclinaison mémorisée 4 Mettre en marche / éteindre (maintenir Régler le volume VOL+/- enfoncé) ; choix de la source musicale MODE Appuyer plusieurs fois pour régler : les bas- CD/USB : avance/retour rapide ses/les aigus/ la balance le volume SWF/la Radio : recherche manuelle de station... - Page 46 Avant : Façade détachable :...
- Page 47 Appuyer brièvement : déployer et rabattre l’écran ; OPEN Rester appuyer : régler l’inclinaison ; Fonctionnement normal : tourner pour régler le volume SEL : réglage de BASS (basses) / TREBLE (aigus) / BALANCE / SWF VOL (volume SWF) / FREQ. (fréquence) ; tourner pour choisir la valeur (ou sur la télécommande : VOL +/-). VOL / SEL Mode radio : appuyer sur Sel pour sélectionner le mode de recherche MANUAL/ AUTO ;...
-
Page 48: Utilisation - Les Bases
Utilisation - les bases Allumer / éteindre Appuyer sur le bouton de la façade ou de la télécommande pour allumer l’appareil. Rester appuyer sur ce bouton pour l’éteindre (façade, télécommande ou écran tactile). Insérer/éjecter un disque Insérer les CD avec la face imprimée vers le haut dans la fente pour CD. Dès qu’une légère résistance se fait sentir au moment de son introduction, le mécanisme de l’appareil entraîne automatiquement le CD à... -
Page 49: Utilisation Par Écran Tactile : Fonctions De Base
Utilisation par écran tactile : fonctions de base Toutes les fonctions sont activables et utilisables depuis le menu de l’écran tactile. Le nombre des fonctions y est signifi cativement plus important que celui proposé par la façade ou la télécommande. À noter qu’il est interdit au conducteur d’utiliser l’écran tactile pendant la conduite. - Page 50 Menu : paramètres ( Utiliser les touches directionnelles pour passer en revue et sélectionner les différents éléments du menu. Dans les menus et les sous-menus, appuyer sur la flèche (en haut à droite) pour revenir à l’étape précédente. Aperçu : ÉLÉMENT DU SOUS-MENUS / PARAMÈTRES MENU...
-
Page 51: Utilisation Par Écran Tactile : Radio
Utilisation par écran tactile : radio Appuyer sur l’icône Radio (ou plusieurs fois sur MOD/MODE) pour basculer en mode radio. Fonctions standard Changer la bande de fréquence : appuyer plusieurs fois sur la touche BAND pour passer à d’autres bandes de fréquence disponibles FM1 - FM2 - FM3 - AM1 (MW) - AM2 (MW). - Page 52 LO/DX : appuyer sur , pour choisir entre le mode TA (informations routières) local ou distant. Mémoriser les présélections : rester appuyer sur une touche numérotée pour enregistrer la station en cours de lecture pour pouvoir y accéder rapidement à l’avenir. Recherche de stations et mémorisation des présélections : Fonction automatique : rester appuyer sur la touche de recherche pendant 2 secondes.
-
Page 53: Utilisation Par Écran : Lecture De Fichiers Multimédia
Utilisation par écran : lecture de fichiers multimédia L’écran multimédia s’affiche en mode audio, photo et vidéo, c’est-à-dire pour toute lecture de fichiers multi- média depuis un support USB, SD, CD, ou BT - uniquement quand le frein à main est relevé. Les touches tactiles situées en bas de l’écran donnent un accès facile à... -
Page 54: Autres Fonctions Pour La Lecture Des Vidéos
Autres fonctions pour la lecture des vidéos OSD : Lors de la lecture de DVD/VCD/SVCD, activer l’OSD (=OnScreenDisplay) avec la touche DISP de la télécommande ou en touchant un endroit quelconque de la vidéo. Le mode plein écran est désactivé. En bas de l’écran, des touches de commande et une ligne temporelle s’affichent. -
Page 55: Utilisation Par Écran Tactile : Bt
(ou la tablette/l’ordinateur portable) vers le système de son Hi-Fi de la voiture. Téléphone BT Si la connexion BT entre le smartphone et le MVD-260 est fructueuse, il est possible de passer des appels téléphoniques via le système Hi-Fi de la voiture. Le microphone intégré permet d’établir une communica- tion fluide avec son correspondant. -
Page 56: Utilisation Par Écran Tactile : Usb & Sd
Utilisation par écran tactile : USB & SD Le MVD-260 permet de lire des fichiers multimédia (MP3, WMA, WAV, JPEG et MP4) depuis une clé USB (ou bien un lecteur MP3 ou tout autre périphérique de stockage de masse USB) ou depuis une carte SD). Établir la connexion comme indiqué... -
Page 57: Paramétrage Des Boutons Du Volant (Swc)
Paramétrage des boutons du volant (SWC) Appuyer sur la touche SWC de l’écran d’accueil pour accéder aux options de paramétrage des comman- des du volant. Ici, il est possible de personnaliser les touches d’accès rapide du volant multifonction : • Appuyer d’abord sur pour supprimer les paramètres disponibles indésirables. -
Page 58: Annexe : Sécurité Enfant / Codes De Région
Annexe : sécurité enfant / codes de région Sécurité enfant / contrôle parental Après l’insertion d’un DVD, il arrive qu’une boîte de dialogue apparaisse exigeant de saisir un mot de pas- se. Cela provient du fait que certains DVD répondent à une certaine classifi cation et que le paramétrage de l’appareil verrouille l’accès des fi chiers au-delà...