Table des Matières

Publicité

Les langues disponibles

Les langues disponibles

Liens rapides

Hisense 2.0 Channel Sound Bar Home Theater System
Model: HS201C1
USER MANUAL
Before using the sound bar, please read this manual
thoroughly and retain it for future reference.

Publicité

Table des Matières
loading

Sommaire des Matières pour Hisense HS201C1

  • Page 1 Hisense 2.0 Channel Sound Bar Home Theater System Model: HS201C1 USER MANUAL Before using the sound bar, please read this manual thoroughly and retain it for future reference.
  • Page 3: Table Des Matières

    Contents Important Safety Instructions Package Contents Product Diagram Main Unit ....................................5 Remote Control ..................................6 Instructions Prepare the Remote Control ..............................6 Replace the Remote Control Battery ..........................6 Placement and Mounting ..............................7 Wall Mounting ..................................7 Connections HDMI socket ....................................8 Use the OPTICAL Socket ...............................8 COAXIAL Socket ..................................9 Use the AUX Socket ................................9 Connect Power ..................................9...
  • Page 4: Important Safety Instructions

    Important Safety Instructions plug has two blades with one wider than the CAUTION other. A grounding plug has two blades and a RISK OF ELECTRIC SHOCK third grounding prong. The wide blade or the DO NOT OPEN third prong is provided for your safety. If the provided plug does not fit into your outlet, CAUTION: TO REDUCE THE RISK OF ELECTRIC consult an electrician for replacement of the...
  • Page 5 Important Safety Instructions any servicing other than that contained in the operating instructions unless you are qualified to do so. The Bluetooth® word mark and logos are Avoid foreign bodies and liquids entering the registered trademarks owned by Bluetooth SIG, device.
  • Page 6: Package Contents

    IC Notice: This device complies with Canada Industry licence-exempt RSS standard(s). Operation is subject to the following two conditions: (1) this device may not cause interference. and (2) this device must accept any interference. Including interference that may cause undesired operation of the device. IC :...
  • Page 7: Product Diagram

    Product Diagram Main Unit Front View Rear View 9 10 LED Indicators (ON/OFF) • Red/Green: In STANDBY/AUX mode. Switch the unit between ON and STANDBY • Orange/flash: In Optical/Coaxial mode. mode. • Blue: In Bluetooth mode. • White/flash: In HDMI ARC/USB mode. (SOURCE) Wall bracket screws Select the play mode.
  • Page 8: Remote Control

    Remote Control (ON/OFF) Switch the unit between ON and STANDBY mode. SOURCE buttons Select the play mode. (MUTE) Mute or resume volume. VOL+/VOL- Increase/decrease the volume level. /PAIR • Play/pause/resume playback in Bluetooth mode. Press and hold to activate the pairing function in Bluetooth mode or disconnect the existing paired Bluetooth device.
  • Page 9: Placement And Mounting

    Option - A Option - B Placement and Mounting Normal Placement (Place Soundbar on leveled surface in front of TV) Wall Mounting (if using option-B) Note: Installation must be carried out by qualified personnel only. Incorrect assembly can result in severe personal injury and property damage (if you intend to install this product yourself, you must check for installations such as electrical wiring and plumbing that may be buried inside the wall).
  • Page 10: Connections

    Connections HDMI socket Use HDMI to connect the Soundbar, AV equipment and TV: ARC (Audio Return Channel) The ARC (Audio Return Channel) function allows you to send audio from your ARC- compliant TV to your sound bar through a single HDMI connection.
  • Page 11: Coaxial Socket

    Connections COAXIAL Socket You also can use the COAXIAL (included) cable to connect the TV's COAXIAL OUT socket and COAXIAL socket on the unit. Use the AUX Socket A. Use a RCA to 3.5mm audio cable (included) to connect the TV’s audio output sockets to the AUX socket on the unit.
  • Page 12: Basic Operation

    Basic Operation Standby/ON • When you first connect the unit to the main socket, the unit will be in STANDBY mode. The POWER indicator will light up red. • Press the button on the remote control to switch the main unit ON or OFF. •...
  • Page 13: Bluetooth Operation

    After the “Pairing” voice prompt and the Blue indicator will flash rapidly. 3 Activate your Bluetooth device and select the search mode. “HS201C1” will appear on your Bluetooth device list. 4 Select “HS201C1” in the pairing list. After the “Paired” voice prompt, the system is successfully connected and the Blue indicator will light up solidly.
  • Page 14: Usb Operation

    USB Operation 1 Insert the USB device. button on the unit or the USB button on the 2 Press the remote control to select USB mode. 3 Play starts automatically. If play does not start automatically, press /PAIR button. To skip to the previous/next track, press the buttons on the remote control.
  • Page 15: Specifications

    Specifications Sound Bar Power Supply .............................AC100-240V~ 50/60Hz Power Consumption ................................30 W Output Power ..................................15 W x 2 Audio input sensitivity ..............................500mV Frequency Response ............................40Hz - 20KHz Speaker Impedance ................................8 Ω x 2 Unit Dimension (W x H x D): ................37.4 x 2.5 x 2.5 inch (950 x 63 x 63 mm) Net weight ................................3.3 lbs (1.5kg) Remote Control Distance/Angle ............................19.7 feet (6m) / 30°...
  • Page 16 HS201C1 Model: Hisense 2.0 Channel Sound Bar Home Theater System...
  • Page 17 Système Home Cinéma - Barre de son 2.0 Hisense Hisense 2.0 Channal Sound Bar Home Theater System Model: HS201C1 MANUEL DE L’UTILISATEUR USER MANUAL Veuillez lire le manuel en entier avant d’utiliser le barre de son. Conservez le manuel pour référence ultérieure.
  • Page 19 Table des matières Consignes de sécurité Contenu de l'emballage Diagramme du produit Unité principale ..................................5 Télécommande ..................................6 Instructions Préparer la télécommande ..............................6 Remplacer la pile de la télécommande ..........................6 Placement et montage ................................7 Support mural ....................................7 Connexions Prise HDMI ....................................8 Prise Optique ....................................8 Prise COAXIAL .....................................9 Prise AUX ......................................9...
  • Page 20: Consignes De Sécurité

    Consignes de sécurité une plus large que l’autre. Une prise avec ATTENTION terre possède deux lames et une troisième broche pour la masse. La lame plus large RISQUE D’ELECTROCUTION et la troisième broche sont là pour votre NE PAS OUVRIR sécurité.
  • Page 21 Consignes de sécurité Ne placez pas de bougies allumées et sans SIG, Inc. Nous sommes autorisés à utiliser protection sur ou à côté de l’appareil. ces marques. Les autres noms de marques N’utilisez pas des produits de nettoyage et de produits déposés sont des marques c o r r o s i f s o u a b r a s i f s .
  • Page 22: Contenu De L'emballage

    Contenu de l'emballage Manuel de l'utilisateur Unité principale Télécommande Guide de configuration rapide Gabarit en papier Support mural Cordon d'alimentation Câble optique Mousse EVA Câble audio RCA vers 3,5 mm Câble audio 3,5 mm vers 3,5 mm Câble coaxial...
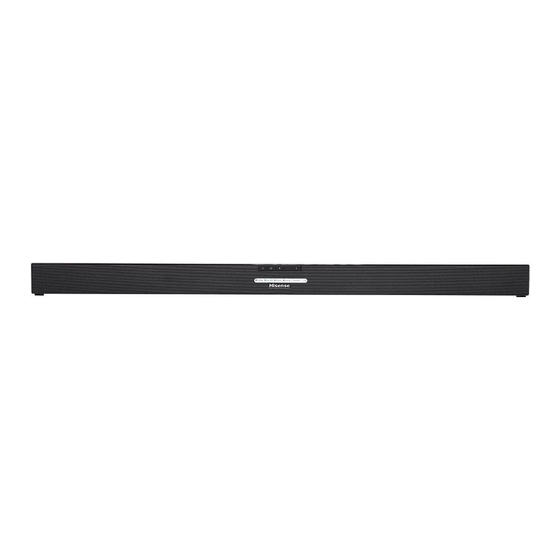
  • Page 23: Diagramme Du Produit

    Diagramme du produit Unité principale Front View Vue de face Vue arriere Rear View 9 10 Voyants LED (Allumer/Éteindre) Mettre l'appareil entre les modes ALLUMÉ et VEILLE. Blanc/clignotant : Dans les modes HDMI ARC/ (SOURCE) USB. Sélectionner le mode de lecture. Vis du support mural (Bluetooth) Prise COAXIAL...
  • Page 24: Télécommande

    Télécommande Télécommande Passe l’appareil du mode ALLUMé au (Allumer / (Allumer/Éteindre) Passe l’appareil du mode éteindre) mode VEILLE. ALLUMé au mode VEILLE. 2 Touches SOURCE Sélectionner le mode de lecture. Touches SOURCE Sélectionner le mode de lecture. Mettre en muet ou rétablir le son. (MUET) 4 VOL+ / VOL- (MUTE)
  • Page 25: Placement Et Montage

    Placement et montage Option - A Option - B Placement normal (Placez la barre de son sur une surface nivelée en face du téléviseur) Support mural (si vous utilisez l’option-B) Remarque : L’installation doit être effectuée par un personnel qualifié. Un montage incorrect peut entraîner des blessures et des pertes matérielles (si vous avez l'intention d'installer ce produit vous-même, vous devez vérifier la présence d’installations tels que le câblage électrique et la plomberie qui pourraient se trouver à...
  • Page 26: Connexions

    Connexions Prise HDMI Utiliser la prise HDMI pour relier la barre de son à un appareil audiovisuel ou à un téléviseur : ARC (Audio Return Channel) La fonction ARC (Audio Return Channel) vous permet d’envoyer l’audio de votre téléviseur compatible avec la norme ARC à votre barre de son à...
  • Page 27: Prise Coaxial

    Connexions Prise COAXIAL Vous pouvez également utiliser le câble COAXIAL (inclus) pour connecter la prise SORTIE COAXIALE du téléviseur sur la prise COAXIALE de l’unité. Prise AUX A. Utilisez le câble audio RCA vers 3,5 mm (inclus) pour connecter les prises de sortie audio de votre téléviseur à la prise AUX de Casque l’unité.
  • Page 28: Réglages De Base

    Réglages de base Veille / ALLUMÉ POWER s’illumine en rouge. de la télécommande ou sur l’appareil pour ALLUMER ou ARRÊTER l’unité. Si un téléviseur ou un appareil externe est connecté, l’unité s’allumera automatiquement lorsque le téléviseur ou l'appareil externe est allumé. Lorsqu’aucun signal d’entrée n’arrive sur l’unité...
  • Page 29: Fonctionnement Avec Source Bluetooth

    être reconnus. Après, le message vocal « Pairing » (En association) se fera entendre et le voyant bleu clignotera rapidement. 3 Activez votre appareil Bluetooth et sélectionnez le mode de recherche. « HS201C1 » apparaîtra sur la liste de votre appareil Bluetooth.
  • Page 30: Fonctionnement Usb

    Fonctionnement USB 1 Insérez le périphérique USB. de l’unité ou sur la touche USB de la 2 Appuyez sur la touche télécommande pour sélectionner le mode USB. 3 La lecture démarre automatiquement. Si la lecture ne démarre / PAIR . pas automatiquement, appuyez sur la touche Pour passer à...
  • Page 31: Caractéristiques

    Caractéristiques Barre de son Alimentation électrique AC100-240V~ 50/60Hz ............................. Consommation électrique ..............................30 W Puissance de sortie ................................15 W x 2 Sensibilité d’entrée audio .............................. 500 mV Réponse en fréquence ............................40 Hz - 20 KHz Impédance des haut-parleurs ............................8 Ω x 2 Dimensions de l’unité (L x H x P) : ............37,4 x 2,5 x 2.5 pouces (950 x 63 x 63 mm) Poids net .................................3,3 lbs (1,5 kg) Télécommande Distance / Angle............................19,7 pieds (6 m) / 30°...
  • Page 32 HS201C1 Modèle : Système Home Cinéma - Barre de son 2.0 Hisense Model: Hisense 2.0 Channal Sound Bar Home Theater System...
  • Page 33 Hisense 2.0 Channal Sound Bar Home Theater System Sistema Home Theater dom barra de som de 2.0 canais Hisense Model: HS201C1 Modelo: HS201C1 MANUAL DO UTILIZADOR USER MANUAL Antes de utilizar a barra de som, leia atentamente este manual e guarde-o para referência futura.
  • Page 35 Contents Conteúdo Instruções de segurança importantes Conteúdos da embalagem Diagrama do produto Aparelho principal ..................................5 Controlo remoto ..................................6 Instruções Preparar o controlo remoto ..............................6 Substituir as pilhas do controlo remoto ...........................6 Colocação e montagem ................................7 Colocação normal ..................................7 Ligações Tomada HDMI .....................................8 Utilizar a tomada ÓTICA ................................8 Tomada COAXIAL ..................................9 Utilizar a tomada AUX ................................9...
  • Page 36: Instruções De Segurança Importantes

    Instruções de segurança importantes polarizada tem duas lâminas, uma mais larga CUIDADO que a outra. Uma ficha terra tem duas lâminas RISCO DE CHOQUE e um terceiro pino terra. A lâmina larga ou o ELÉTRICO NÃO ABRIR terceiro pino é facultado para sua segurança. Se a ficha fornecida não encaixar na sua CUIDADO: PARA REDUZIR O RISCO DE CHOQUE ELÉTRICO, tomada, consulte um eletricista para trocar a...
  • Page 37 Instruções de segurança importantes ser para uso de pessoal de reparação qualificado. Para reduzir o risco de choque elétrico, não realize qualquer reparação A marca Bluetooth® e os logotipos são marcas além daquela apresentada nas instruções de registadas, propriedade da Bluetooth SIg, Inc. funcionamento, exceto se estiver qualificado Estamos licenciados para utilizar essas marcas.
  • Page 38: Conteúdos Da Embalagem

    Cabo áudio de 3,5mm para 3,5mm 3,5mm Bem-vindo à família Hisense! Certifique-se de que se mantém informado sobre o seu produto e tira partido de todas as vantagens que advêm de registá-lo. Para começar, visite a nossa página Web em https://www.hisense-usa.com/support/register.
  • Page 39: Diagrama Do Produto

    Diagrama do produto Aparelho principal Vista frontal Front View Visão traseira Rear View 9 10 Indicadores LED (LIGAR/DESLIGAR) • Vermelho/Verde: Em modo STANDBY/AUX. Alterna entre LIgADO e modo STANDBY. • Laranja/Intermitente: Em modo ótico/coaxial. • Azul: Em modo Bluetooth. (SOURCE) • Laranja/Intermitente: Em modo HDMI ARC/USB. Branco/Intermitente: Em modo HDMI ARC/USB. Seleciona o modo de reprodução. Parafusos de suporte para parede (Bluetooth) Tomada COAXIAL...
  • Page 40: Controlo Remoto

    Controlo remoto Controlo remoto (LIGAR/DESLIGAR) Alterna entre LIGADO e modo (LIGAR/ Alterna entre LIgADO e modo STANDBY. STANDBY. DESLIGAR) Teclas SOURCE Seleciona o modo de reprodução. Teclas SOURCE Seleciona o modo de reprodução. (MUTE) Silencia ou retoma o volume. (MUTE) Silencia ou retoma o volume.
  • Page 41: Colocação E Montagem

    Colocação e montagem Opção - A Opção - B Option - A Option - B Colocação normal (Coloque a barra de som numa superfície nivelada em frente da TV) Montagem na parede (se utilizar a opção B) Nota: A instalação só deve ser realizada por pessoal qualificado. A montagem incorreta pode resultar em graves ferimentos pessoais e danos a propriedade (se pretender instalar você...
  • Page 42: Ligações

    Ligações Tomada HDMI Utilize a tomada HDMI para ligar a barra de som, equipamento AV e a TV: ARC (canal de retorno áudio) A função ARC (canal de retorno áudio) permite- lhe enviar áudio da tua TV em conformidade ARC para a sua barra de som, apenas através de uma ligação HDMI.
  • Page 43: Tomada Coaxial

    Ligações Tomada COAXIAL Também pode utilizar o cabo COAXIAL (incluído) para ligar a tomada de SAÍDA COAXIAL da TV e a tomada COAXIAL no aparelho. Utilizar a tomada AUX A. Utilize um cabo RCA para áudio 3,5mm (incluído) para ligar as tomadas de saída Auscultadores áudio TV à...
  • Page 44: Funcionamento Básico

    Funcionamento básico Standby/LIGAR • Quando liga pela primeira vez o aparelho à corrente elétrica, o aparelho fica no modo STANDBY. O indicador POWER, de interruptor, acende-se vermelho. • Prima a tecla no controlo remoto ara LIgAR ou DESLIgAR o aparelho principal. • Desligue a ficha elétrica da tomada se quiser desligar o aparelho por completo. Se uma TV ou dispositivo externo for ligado, o aparelho liga-se automaticamente quando a TV ou o aparelho externo é...
  • Page 45: Funcionamento De Bluetooth

    Após a indicação de voz “Pairing” (Emparelhar) e o indicador azul pisca rapidamente. 3 Ative o seu aparelho Bluetooth e selecione o modo de pesquisa. “HS201C1” vai aparecer na sua lista de dispositivos Bluetooth. 4 Selecione “HS201C1“ na lista de emparelhar. Depois de ouvir a indicação “Paired” (Emparelhado) o sistema está...
  • Page 46: Funcionamento Usb

    Funcionamento USB 1 Insira um dispositivo USB. no aparelho ou a tecla USB no controlo 2 Prima a tecla remoto para selecionar o modo USB. 3 A reprodução começa automaticamente. Se a reprodução não começar automaticamente, prima a tecla /PAIR (emparelhar). Para saltar para faixa anterior/seguinte, prima as teclas no controlo remoto.
  • Page 47: Especificações

    Especificações Barra de som AC 100-240V~ 50/60Hz Fonte de alimentação ............................ AC120V~ 60Hz Consumo elétrico ..................................30 W Potência de saída ................................15 W x 2 Sensibilidade de entrada áudio ........................... 500mV Resposta de frequência ............................40Hz - 20KHz Impedância das colunas ..............................8 Ω x 2 Dimensões da unidade (L x A x P): ..........37,4 x 2,5 x 2,5 polegadas (950 x 63 x 63 mm) Peso liquido ................................3,3lbs (1,5 kg) Controlo remoto...
  • Page 48 HS201C1 Modelo: Sistema Home Theater com barra de som de 2.0 canais Hisense Model: Hisense 2.0 Channal Sound Bar Home Theater System...

Table des Matières