
Manuels Connexes pour Adam Equipment CORE Série


Sommaire des Matières pour Adam Equipment CORE Série
- Page 1 Adam Equipment CORE SERIES (EN) SERIES CORE (FR) CORE SERIE (DE) SERIE CORE (ES) SERIE CORE (IT) (P.N. 308669539, Revision B6, Mar2017) © Adam Equipment 2016...
- Page 2 ENGLISH: P1 ‐ 17 FRANÇAIS: P18 ‐ 37 DEUTSCH: P38 ‐ 58 ESPAÑOL: P59 ‐ 74 ITALIANO: P75 ‐ 92 EU DECLARATION: P93 © Adam Equipment 2016...
- Page 3 EN Easy Reference: Model name of the balance: Serial number of the unit: Software revision number (Displayed when power is first turned on): Date of Purchase: Name of the supplier and place: © Adam Equipment 2016 308669539revB6-Mar17...
-
Page 4: Table Des Matières
SETTING THE BACKLIGHT ......................11 ENABLING THE WEIGHING UNITS ....................11 CALIBRATION ............................. 13 TROUBLE SHOOTING ........................14 ERROR MESSAGES ........................14 REPLACEMENT PARTS AND ACCESSORIES ................15 SPECIFICATIONS ..........................16 WARRANTY STATEMENT ......................... 17 © Adam Equipment 2016 308669539revB6-Mar17... -
Page 5: Set Up
Shipping protection screw Round cover around the screw 2) Place the pan (which comes separately packed) in the receptacles on the top cover. Gently place the plastic pan support into the receptacle and secure with the screw supplied in the plastic bag. Be careful when putting the screw in that you do not use too much force as it can damaged the loadcell. You should just be able to use light force to secure the screw. 3) Place the stainless steel pan on top of the plastic pan. 4) Place the balance on a firm and flat surface for accurate weighing. © Adam Equipment 2016 308669539revB6-Mar17... -
Page 6: Installing Batteries
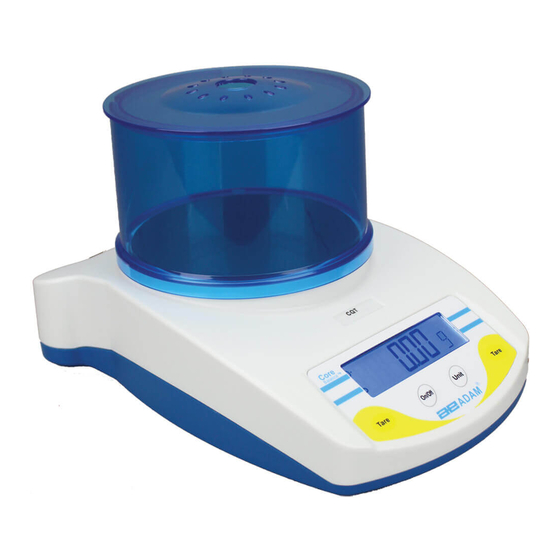
2.3 OVERVIEW ‐ DISPLAY BOARD BEHIND DC adapter socket Lock down slot TOP Stainless Steel pan Plastic Pan LCD display [On/Off] key Turns the balance power on/off [Unit] key Changes weighing units. Also used when calibrating [Tare] key Sets display to zero or tares the balance © Adam Equipment 2016 308669539revB6-Mar17... - Page 7 Battery compartment screws Battery compartment cover Batteries are not included DISPLAY battery indicator ZERO indicator Indicates when the balance zero is correct. STABLE indicator Indicates when the reading is stable. © Adam Equipment 2016 308669539revB6-Mar17...
-
Page 8: Locating And Protecting Your Balance
In order to keep your balance functioning at its best we suggest that you do the following: Avoid extremes of temperature. Do not place in direct sunlight or near air conditioning vents. Make sure the balance is located on a strong table and free from vibration. Avoid unstable power sources. Do not operate near large users of electricity such as welding equipment or large motors. Do not leave batteries in the balance if you are not using it for a long time. Keep free from vibration. Do not place near heavy or vibrating machinery. Avoid high humidity that might cause condensation, and keep away from direct contact with water. Do not place near open windows, air‐conditioning vents or fans that may cause a draft and unstable readings. Keep the balances clean, and do not stack material on the balance when it is not in use. The Core has a stacking feature allowing more than one unit to be stacked on top of each other. For more details on this see the section on storing. © Adam Equipment 2016 308669539revB6-Mar17... -
Page 9: Storing When Not In Use
EN 2.5 STORING WHEN USE If you have any of the Highland series or Core Balance lines you can store them easily on top of each other. This helps to save space and protect them from damage. Without Shield With Shield Note: Only 4.7” / 120mm ø pan size models can be stacked for storage. Core models with 5.7” / 145mm ø may be stacked at the top of the pile but machines cannot be stacked on top of them due to the larger pan size. © Adam Equipment 2016 308669539revB6-Mar17... -
Page 10: Basic Operation
[Tare] key, providing the container weight is more than 3% of the maximum capacity of the balance, the display will show zero and NET will light up on the display. You can then weigh your object in the container. Tared weight is subtracted from the total balance’s capacity. Note: When the container is removed a negative value will be shown. If the balance was tared just before removing the container, this value is the gross weight of the container plus all items inside the container which were removed. © Adam Equipment 2016 308669539revB6-Mar17... -
Page 11: Weighing
To determine the weight of a sample, first tare an empty container (if used), then place the sample in the container. The display will show the weight and the unit of weight currently in use. The stable indicator will light up when the reading is stable. WEIGHING UNITS To change the weighing units, press [Unit] to cycle through the available units. See the Parameter section to enable or disable the weighing units. Once the unit has been selected, the weight will be displayed in the selected unit and a symbol for the weight will be shown. © Adam Equipment 2016 308669539revB6-Mar17... -
Page 12: Parameters
Off PWR Auto power off 10 PWR 10 seconds before the power will switch off 20 PWR 20 seconds before the power will switch off 30 PWR 30 seconds before the power will switch off 40 PWR 40 seconds before the power will switch off 50 PWR 50 seconds before the power will switch off 60 PWR 60 seconds before the power will switch off 70 PWR 70 seconds before the power will switch off 80 PWR 80 seconds before the power will switch off 90 PWR 90 seconds before the power will switch off 4) Press the [Unit] key to confirm the setting 5) To exit turn the balance off and back on again © Adam Equipment 2016 308669539revB6-Mar17... -
Page 13: Setting The Backlight
UNITS You can enable and disable the weighing units available to the user when they press the [Unit] key as described in section 4.4 Weighing Units. 1) To set this parameter turn the power off, press and hold the [Tare] key then press the [on/off] key once, then release the [Tare] key. 2) The display will show the first function PWR 3) Press the [Unit] key until the display shows you XX g where XX is the last setting on or off. 4) Press the [Tare] key to select on or oFF. 5) Press the [Unit] key to move to the next weighing unit. 6) Repeat steps 5 and 6 until you have set all of the weighing units. © Adam Equipment 2016 308669539revB6-Mar17... - Page 14 Used for weighing jewelry and gems, ct etc. Dram Avoirdupois unit there are 16 DR in an 0.564383 ounce. Grains A basic weighing unit in the imperial 15.432 system. Used to weigh gun powder. Newtons Used to measure force 0.009808 N Taiwanese Used to weigh coral, pearls etc. 0.026666 Tl.t taels © Adam Equipment 2016 308669539revB6-Mar17...
-
Page 15: Calibration
6) LOAD will be displayed, place the calibration weight on the pan. 7) Once the stable sign is shown press the [Tare] key. 8) If the weight is within 5% of the last calibration value the display will show PASS and exit the calibration mode. If the calibration is not successful the display will show FAIL and exit the calibration mode, if the calibration fails try it again. © Adam Equipment 2016 308669539revB6-Mar17... -
Page 16: Trouble Shooting
Unit-E Unit error. Low battery indicator. Batteries may be flat. Charge the battery. FAIL Calibration failure. Incorrect mass used to calibrate. Try to recalibrate, check that The user calibration is not within the weight used to calibrate 5% of factory calibration. matches that of the value of Possible damaged to loadcell. the balance. Unstable – machine Possible damage to the Loadcell. Make sure the balance is on a cannot get a stable flat surface and away from reading. vibration. No Power when turning Battery may be flat. DC adapter Change the batteries. Or use on. may not be working. the DC adapter © Adam Equipment 2016 308669539revB6-Mar17... -
Page 17: Replacement Parts And Accessories
- EURO 7.00.4.0.0027 POWER SUPPLY STANDARD MODEL 12VDC 800mAa - SA 3.08.1.2.2009 TOP PAN 120mm 3.08.1.2.2011 TOP PAN 145mm 3.08.2.3.2031 BREEZE SHIELD WITH LID 3.08.2.3.2033 IN USE COVER 7.00.1.0.0046 SECURITY LOCK AND CABLE © Adam Equipment 2016 308669539revB6-Mar17... -
Page 18: Specifications
Operating 0ºC to 40ºC Temperature 32ºF to 104ºF Power Supply 12VDC adapter 800mA South Africa, 500mA rest of world), or 6x AA batteries Calibration Push button calibration using external mass Calibration Mass 200g 250g 600g 1500g 2000g 2000g 5000g Display 6 digit LCD, 18mm digits, with backlight Draft shield 132mm ø x 82mm N/A (diameter x h) (5.2” ø x 3.2”) Balance Housing ABS Plastic Pan Size 120mm ø (4.7” ø) 145mm ø (5.7” ø) Overall Dimensions 173 x 255 x 86mm (6.8” x 10” x 3.4”) (w x d x h) Without draft shield Net Weight 820g (1.8lb) © Adam Equipment 2016 308669539revB6-Mar17... -
Page 19: Warranty Statement
STATEMENT Adam Equipment offers Limited Warranty (Parts and Labour) for any components that fail due to defects in materials or workmanship. Warranty starts from the date of delivery. During the warranty period, should any repairs be necessary, the purchaser must inform its supplier or Adam Equipment Company. - Page 20 FR Adam Equipment SERIES CORE (P.N. 9539, Révision B5, Mars 2017) © Adam Equipment 2016 308669539revB6-Mar17...
- Page 21 FR Référence simple: Nom du modèle de la balance: Numéro de série de l’unité: Numéro de révision du logiciel (Affiche lors de la mise en marche): Date d’achat: Nom du fournisseur et lieu: © Adam Equipment 2016 308669539revB6-Mar17...
- Page 22 CALIBRAGE ............................32 GUIDE DE DEPANNAGE ........................33 7.1 MESSAGES D’ERREUR ..........................33 REMPLACEMENT DES PIECES DETACHEES ET ACCESSOIRES ..........34 CARACTERISTIQUES ........................35 CERTIFICAT DE CALIBRAGE ......................36 10.0 INFORMATION SUR LA GARANTIE ....................37 © Adam Equipment 2016 308669539revB6-Mar17...
-
Page 23: Introduction
FR 2.0 INTRODUCTION Nous vous remercions pour l’achat de votre nouvelle balance Core . Toutes les séries de balances Core possèdent une étendue de fonctions et d’options les rendant idéales pour le laboratoire et les classes. Nous espérons que vous profiterez de l’utilisation de votre nouvelle balance Core. © Adam Equipment 2016 308669539revB6-Mar17... -
Page 24: Installation
Vous devez seulement serrer légèrement la vis. 7) Placez le plateau en acier inoxydable sur le plateau en plastique. 8) Placez la balance sur une surface plate et stable afin d’obtenir un pesage précis. © Adam Equipment 2016 308669539revB6-Mar17... -
Page 25: Installation Des Piles
3.3 DESCRIPTION ‐ECRAN CLAVIER ARRIERE Prise adaptateur DC Connexion anti‐vol DESSUS Plateau inox Plateau plastique Ecran LCD Touche [On/Off] Mise marche de la balance on/off Touche [Unit] Change les unités de pesage. Utilisé également lors du calibrage Touche [Tare] Règle l’écran zéro ou tare la balance © Adam Equipment 2016 308669539revB6-Mar17... - Page 26 Vis du compartiment des piles Couvercle du compartiment des piles Les piles ne sont pas incluses ECRAN Indicateur batterie Indicateur ZERO Indique quand le zéro de la balance est juste. Indicateur STABLE Indique quand la lecture est stable. © Adam Equipment 2016 308669539revB6-Mar17...
-
Page 27: Positionner Et Proteger Votre Balance
Evitez des sources d’alimentations instables. Ne pas fonctionner prés de gros utilisateurs d’électricités tels que les postes à souder ou gros moteurs. Ne pas laisser les piles dans la balance si vous ne les utilisez pas pendant une longue période. Gardez‐les à distances des vibrations. Ne pas les placer prés de machines vibrantes ou industrielles. Eviter les zones très humides qui pourraient causer de la condensation, et gardez loin de tout contact avec l’eau. Ne pas les placer prés de fenêtres ouvertes, climatisation, ventilateurs, qui pourraient causer des courants d’air et donc des lectures instables. Gardez les balances propres, et ne pas empiler du matériel dessus quand elles ne sont pas utilisées. La Core possède la fonction d’empilement permettant d’empiler les balances les unes sur les autres. Pour plus de renseignements sur cette fonction allez à la section suivante. 3.5 RANGER BALANCES LORSQU’ELLES SONT UTILISEES © Adam Equipment 2016 308669539revB6-Mar17... - Page 28 Avec cage de pesée Note: Seulement les modèles avec des plateaux de 120mm de ø peuvent être empilés pour le rangement. Les modèles Core avec des plateaux de 145mm ø peuvent seulement être posés sur le dessus des modèles avec le plus petit plateau mais ne peuvent pas être elles‐mêmes empilées à cause de leur plus grande taille de plateau. © Adam Equipment 2016 308669539revB6-Mar17...
-
Page 29: Fonctionnement De Base
Faire la tare revient à soustraire le poids de la capacité total de la balance. Note: Lorsque le récipient est enlevé, une valeur négative sera affichée. Si la balance a été tarée juste avant de retirer le récipient, cette valeur sera alors le poids brut du récipient plus tous les objets qui ont été retirés. © Adam Equipment 2016 308669539revB6-Mar17... -
Page 30: Pesage
Pour changer les unités de pesage, appuyez sur [Unit] pour faire défiler les unités disponibles. Voir la section Paramètre pour activer et désactiver les unités de pesage. Une fois que l’unité a été sélectionnée, le poids sera affiché dans l’unité sélectionnée et un symbole pour le poids sera indiqué. © Adam Equipment 2016 308669539revB6-Mar17... -
Page 31: Parameteres
8) Appuyez sur [Tare] pour sélectionner les réglages suivants: Off PWR Auto extinction éteint 10 PWR 10 secondes avant que l’alimentation ne s’éteigne 20 PWR 20 secondes avant que l’alimentation ne s’éteigne 30 PWR 30 secondes avant que l’alimentation ne s’éteigne 40 PWR 40 secondes avant que l’alimentation ne s’éteigne 50 PWR 50 secondes avant que l’alimentation ne s’éteigne 60 PWR 60 secondes avant que l’alimentation ne s’éteigne 70 PWR 70 secondes avant que l’alimentation ne s’éteigne 80 PWR 80 secondes avant que l’alimentation ne s’éteigne 90 PWR 90 secondes avant que l’alimentation ne s’éteigne 9) Appuyez sur [Unit] pour confirmer le réglage © Adam Equipment 2016 308669539revB6-Mar17... -
Page 32: Reglage Du Retro Eclairage
5.3 ACTIVATION UNITES PESAGE Vous pouvez activer ou désactiver les unités de pesage disponible pour l’utilisateur quand celui‐ci appuie sur [Unit] comme décrit en section 4.4 unités de pesage. 8) Pour régler ce paramètre, éteignez la balance, appuyez et maintenez la touche [Tare] ensuite appuyez sur [on/off] une fois, ensuite relâchez la touche [Tare]. 9) L’écran affichera la première fonction PWR © Adam Equipment 2016 308669539revB6-Mar17... - Page 33 Unité Avoirdupois, il y a 16 DR dans une 0.564383 DR livre. Grains Une unité de pesage de base dans le 15.432 GN système impérial. Utilisé pour peser de la poudre à canon. Newtons Utilisé pour mesurer la force 0.009808 N Taiwanese Utilisé pour peser le corail, les perles, etc. 0.026666 Tl.t taels © Adam Equipment 2016 308669539revB6-Mar17...
-
Page 34: Calibrage
Si le poids est dans 5% du dernier calibrage l’écran affichera PASS et sortira du mode de calibrage. Si le calibrage n’est pas accompli avec succès, l’écran affichera alors FAIL et sortira du mode de calibrage, si le calibrage échoue, essayez de nouveau. © Adam Equipment 2016 308669539revB6-Mar17... -
Page 35: Depannage
Indicateur de batterie Les piles sont peut être trop Changez les piles. faible. faibles. FAIL Echec du calibrage. Masse utilisée incorrecte pour Essayez de recalibrer, vérifiez calibrer. Le calibrage n’est pas que le poids utilisé pour dans les 5% du calibrage usine. calibrer corresponde a la Possibilité que le capteur soit valeur de balance. endommagé. Instable – la machine ne Possibilité que la mécanique ou Soyez sur que la balance soit peut pas obtenir une le capteur soit endommagé. sur une surface plate et loin lecture stable. de toute source de vibration. Pas d’alimentation lors Les piles sont peut être trop Changez les piles. Ou utilisez de la mise en marche. faibles. Adaptateur DC ne marche l’adaptateur secteur. peut être pas. © Adam Equipment 2016 308669539revB6-Mar17... -
Page 36: Remplacement Des Pieces Detachees Et Accessoires
Adam Equipment. Une liste partielle des pièces les plus communes est indiquée ci‐dessous: Numéro Description pièces 4178 Adaptateur DC prise USA 12VDC 9541 Adaptateur DC UK prise 12VDC 9542 Adaptateur DC Euro prise 12VDC 9543 Adaptateur DC SA prise 12VDC 5099 Adaptateur DC Australien prise 12VDC 9502 Plateau en inox de 120 mm 9540 Plateau en inox de 145mm 9511 Couvercle de la cage de pesée 9510 Cage de pesée (sans couvercle) 9306 Coque en plastique 8030 Câble de sécurité avec code © Adam Equipment 2016 308669539revB6-Mar17... -
Page 37: Caracteristiques
Alimentation Adaptateur 12VDC 500mA (12VDC 800mA South Africa), ou 6 piles AA Calibrage Bouton de calibrage utilisant une masse externe Masse de 200g 250g 600g 1500g 2000g 2000g 5000g calibration Afficheur 6 chiffres LCD, 18mm de haut, avec rétro éclairage Cage de pesée 132mm ø x 82mm N/A (diamètre x h) Structure de la Plastique ABS Balance Taille du plateau 120mm ø 145mm ø Dimensions totales 173 x 255 x 86mm (l x p x h) Sans cage de pesée Poids Net 820g © Adam Equipment 2016 308669539revB6-Mar17... -
Page 38: Certificat De Calibrage
FR 9.0 CERTIFICAT CALIBRAGE © Adam Equipment 2016 308669539revB6-Mar17... -
Page 39: Information Sur La Garantie
Au cours de la période de garantie, pour toutes les réparations nécessaires, l'acheteur doit informer son fournisseur ou Adam Equipment. La société ou son technicien agréé se réserve le droit de réparer ou de remplacer les composants sur le site de l'acheteur ou dans l'un de ses ateliers en fonction de la gravité des problèmes, sans frais supplémentaires. - Page 40 DE Adam Equipment CORE SERIE (P.N. 9539, Revision B5, März 2017) © Adam Equipment 2016 308669539revB6-Mar17...
- Page 41 DE Übersicht: Modellname der Waage: Seriennummer der Einheit: Software‐Revisionsnummer (Erscheint beim Einschalten der Waage): Kaufdatum: Name und Ort des Händlers: © Adam Equipment 2016 308669539revB6-Mar17...
- Page 42 Automatisches Abschalten ........................49 Einstellen der Hintergrundbeleuchtung ....................50 Aktivieren der Wägeeinheiten ......................50 KALIBRIERUNG ..........................52 FEHLERDIAGNOSE........................... 54 Fehlermeldungen ..........................54 Ersatztele und Zubehör ........................55 TECHNISCHE DATEN ........................56 KALIBRIERZERTIFIKAT ........................57 10.0 GARANTIEERKLÄRUNG ........................58 © Adam Equipment 2016 308669539revB6-Mar17...
-
Page 43: Einführung
DE 2.0 EINFÜHRUNG TM Danke, dass Sie sich für die neue Core Waage entschieden haben. Jede Waage der Core Serie hat eine Reihe Merkmale und Optionen, die für die Arbeitsumgebung in Laboren und Klassenzimmern gleichermaßen ideal sind. Wir hoffen, dass Sie an der Arbeit mit der Core Waage viel Freude haben werden. © Adam Equipment 2016 308669539revB6-Mar17... -
Page 44: Einrichten
Sie darauf, dass Sie beim Einsetzen und Anziehen der Schraube nicht zu viel Kraft aufwenden, da dies die Wägezelle beschädigen kann. Es reicht, die Schraube nur leicht anzuziehen. Setzen Sie die Edelstahlwägeplatte auf die Plastikunterlage auf. Stellen Sie die Waage auf eine feste, ebene Fläche, um genaue Ergebnisse zu erhalten. © Adam Equipment 2016 308669539revB6-Mar17... -
Page 45: Einlegen Der Batterien
– BERBLICK NZEIGE ASTATUR RÜCKSEITE Anschluss Netzadapter Sicherungsschlitz OBERSEITE Edelstahlwägeplatte Plastikunterlage LCD Anzeige [On/Off] Taste Schaltet Waage an/aus [Unit] Taste Ändern der Wägeeinheiten, auch für Kalibrierung [Tare] Taste Setzt Anzeige auf Null oder tariert Waage © Adam Equipment 2016 308669539revB6-Mar17... - Page 46 Batteriefachs Abdeckung des Batteriefach Batterien werden nicht mitgeliefert ANZEIGE Batterieanzeige NULL Anzeige erscheint, wenn Nullstelle korrekt STABIL Anzeige erscheint, sobald Ergebnis stabil. © Adam Equipment 2016 308669539revB6-Mar17...
-
Page 47: Aufstellort Und Schutzmassnahmen Für Ihre Waage
Instabile Energiequellen vermeiden. Nicht neben Maschinen mit großem Elektrizitätsverbrauch wie Schweißausrüstung oder große Motoren verwenden. Lassen Sie keine Batterien in der Waage, wenn sie über längere Zeit nicht verwendet wird. Vibrationen vermeiden. Nicht neben schweren oder vibrierenden Maschinen aufstellen. Hohe Feuchtigkeit, die Kondensation verursachen könnte, vermeiden. Direkten Kontakt mit Wasser vermeiden. Kein direkter Kontakt mit Wasser. Nicht in der Nähe von offenen Fenstern und Türen, Klimaanlagen oder Ventilatoren aufstellen, die durch Luftzug instabile Ergebnisse verursachen. Halten Sie die Waage sauber. Lagern Sie keine Gegenstände auf der Waage, wenn diese nicht in Betrieb ist. Core‐Waagen sind so gebaut, dass sie aufeinander gestapelt werden können. Weitere Einzelheiten entnehmen Sie bitte dem nächsten Abschnitt zur Aufbewahrung. © Adam Equipment 2016 308669539revB6-Mar17... -
Page 48: Aufbewahrung
So sparen Sie Platz, und die Waagen sind besser vor Beschädigung geschützt. Ohne Windschutz Mit Windschutz Anmerkung: Nur Modelle mit Wägeplattengröße 120mm / 4.8” ø sind zur Aufbewahrung stapelbar. Core‐Modelle mit 145mm / 5.7” ø können als oberste des Stapels aufgesetzt werden, aber es können aufgrund der größeren Wägeplatte keine Waagen auf diese Modelle aufgesetzt werden. © Adam Equipment 2016 308669539revB6-Mar17... -
Page 49: Grundbetriebsfunktionen
Wägeplatte stellen und die Waage mit [Tare] tarieren, vorausgesetzt, der Behälter ist schwerer als 4% der Waagenkapazität. Auf der Anzeige wird dann Null angezeigt, und NET erscheint. Nun können Objekte im Behälter gewogen werden. Das tarierte Gewicht wird von der Gesamtkapazität der Waage abgezogen. Anmerkung: Sobald der Behälter entfernt wird, wird ein negativer Wert angezeigt. Wurde die Waage direkt vor Entfernen des Behälters tariert, entspricht dieser Wert dem Bruttogewicht des Behälters plus aller weiteren entfernten Objekte. © Adam Equipment 2016 308669539revB6-Mar17... -
Page 50: Wiegen
Die Anzeige ‘stabil’ wird angezeigt, sobald ein stabiles Ergebnis erreicht ist. ÄGEEINHEITEN Um die Wägeeinheiten zu ändern, drücken Sie [Unit] um durch die verfügbaren Einheiten blättern. (Siehe Abschnitt Parameter bezüglich Aktivieren oder Deaktivieren von Wägeeinheiten.) Sobald die Wägeeinheit ausgewählt wurde wird das Gewicht in dieser Einheit angezeigt, und Gewichtssymbol erscheint. © Adam Equipment 2016 308669539revB6-Mar17... -
Page 51: Parameter
[Tare] erst los, wenn (nach 1, 2 Sekunden) XX PWR erscheint, wobei XX für die letzte Einstellung steht. Drücken Sie [Tare], um eine der folgenden Einstellungen zu wählen: Off PWR Automatisches Abschalten deaktiviert 10 PWR 10 Sekunden bis zum Abschalten der Waage 20 PWR 20 Sekunden bis zum Abschalten der Waage 30 PWR 30 Sekunden bis zum Abschalten der Waage 40 PWR 40 Sekunden bis zum Abschalten der Waage 50 PWR 50 Sekunden bis zum Abschalten der Waage 60 PWR 60 Sekunden bis zum Abschalten der Waage 70 PWR 70 Sekunden bis zum Abschalten der Waage 80 PWR 80 Sekunden bis zum Abschalten der Waage 90 PWR 90 Sekunden bis zum Abschalten der Waage © Adam Equipment 2016 308669539revB6-Mar17... -
Page 52: Einstellen Der Hintergrundbeleuchtung
Um diesen Parameter einzustellen, schalten Sie, wenn Sie im normalen Wägemodus sind, die Waage aus, halten Sie [Tare] gedrückt, schalten Sie die Waage mit [on/off] wieder ein. Lassen Sie [Tare] los, wenn (nach 1, 2 Sekunden) XX PWR erscheint. Drücken Sie die [Unit] Taste 1x. XX BL erscheint, wobei XX für die letzte Einstellung steht. Mit [Tare] können sie durch die verschiedenen Einstellungen blättern. Bestätigen Sie Ihre Einstellung mit [Unit]. Danach sind Sie automatisch im nächsten Parameter Wägeeinheiten Zum Beenden der Parameter schalten Sie die Waage aus und wieder an. KTIVIEREN DER ÄGEEINHEITEN Sie können die Wägeeinheiten aktivieren bzw. deaktivieren. Dadurch sind sie beim Wiegen für die Anwender verfügbar, wenn sie wie in Abschnitt 4.4 Wägeeinheiten beschrieben die [Unit] Taste betätigen. Um diesen Parameter einzustellen, schalten Sie die Waage aus, halten Sie [Tare] gedrückt, schalten Sie die Waage mit [on/off] wieder ein. Lassen Sie [Tare] erst los, wenn (nach 1, 2 Sekunden) XX PWR erscheint. © Adam Equipment 2016 308669539revB6-Mar17... - Page 53 Karat Zum Wiegen von Schmuck, ct Edelsteinen, etc. Dram Avoirdupois‐Einheit, 16 DR ergeben 0.564383 DR eine Unze. Grain Eine Grundeinheit im Imperialen 15.432 GN System. Zum Wiegen von Schießpulver. Newton Einheit zum Messen der Kraft 0.009808 N Taiwan. Taels Zum Wiegen von Korallen, Perlen, etc. 0.026666 Tl.t © Adam Equipment 2016 308669539revB6-Mar17...
-
Page 54: Kalibrierung
Entfernen Sie jedes Gewicht. Stellen Sie die Waage mit [Tare] auf Null. Der zuletzt bei einer Kalibrierung verwendete Gewichtswert wird angezeigt. Mit [Unit] können Sie einen anderen Wert wählen. Sobald das zu verwendende Gewicht gewählt wurde, bestätigen Sie mit [Tare]. LOAD wird angezeigt. Stellen Sie das Kalibriergewicht auf die Waage. Sobald das Symbol für stabil erscheint drücken Sie [Tare]. Liegt das Gewicht innerhalb von 5% des letzten Kalibrierwertes, wird PASS angezeigt, und der Kalibriervorgang wird beendet. Ist die Kalibrierung © Adam Equipment 2016 308669539revB6-Mar17... - Page 55 DE nicht erfolgreich, wird FAIL angezeigt, und der Kalibriervorgang beendet. Versuchen Sie es in diesem Fall erneut. © Adam Equipment 2016 308669539revB6-Mar17...
-
Page 56: Fehlerdiagnose
FAIL Kalibrierung Falsche Masse bei Kalibrierung Versuchen Sie neu zu fehlgeschlagen. verwendet. kalibrieren. Überprüfen Sie, Die Kalibrierung ist nicht dass das verwendete Gewicht innerhalb 5% der dem Wert für die Waage Werkskalibrierung. entspricht. Wägezelle möglicherweise beschädigt. Instabil – Die Waage Wägezelle möglicherweise Stellen Sie sicher, dass die erzielt kein stabiles beschädigt. Waage auf einer ebenen, Ergebnis. vibrationsfreien Oberfläche steht. Kein Strom beim Batterien schwach oder leer. Wechseln Sie die Batterien Einschalten. Netzadapter möglicherweise Verwenden Sie einen defekt. funktionierenden Netzadapter. © Adam Equipment 2016 308669539revB6-Mar17... -
Page 57: Ersatztele Und Zubehör
DE RSATZTELE UND UBEHÖR Wenn Sie Ersatzteile oder Zubehör benötigen, kontaktieren Sie Ihren Händler oder Adam Equipment. Hier eine Teilliste mit einigen übliche Artikeln: Artikelnummer Beschreibung 4178 Netzteil mit USA Stecker 12VDC 9541 Netzteil mit UK Stecker 12VDC 9542 Netzteil mit Eurostecker 12VDC 9543 Netzteil mit SA Stecker 12VDC 5099 Netzteil mit Stecker für Australien 12VDC 9502 120 mm Wägeplatte aus Edelstahl 9540 145mm Wägeplatte aus Edelstahl 9511 Deckel für Windschutz 9510 Windschutz (ohne Deckel) 9306 Arbeitsschutzhaube 8030 Sicherheitsschloss mit Kabel © Adam Equipment 2016 308669539revB6-Mar17... -
Page 58: Technische Daten
0ºC bis 40ºC temperatur 32ºF bis 104ºF Stromversorgung 12VDC 500mA Adapter (12VDC 800mA Sud Afrika), oder 6x AA Batterien Kalibrierung Kalibrierung per Tastendruck mit externer Masse Kalibriermasse 200g 250g 600g 1500g 2000g 2000g 5000g Anzeige 6‐stellige LCD, 18mm Ziffern, hinterleuchtet Windschutz 132mm ø x 82mm N/A (Durchmesser x h) (5.2” ø x 3.2”) Waagengehäuse ABS Kunststoff Größe Wägeplatte 120mm ø (5.1” ø) 145mm ø (5.7” ø) Gesamt‐ 173 x 255 x 86mm (6.8” x 10” x 3.3”) abmessungen ohne Windschutz (w x d x h) Nettogewicht 820g (1.8lb) © Adam Equipment 2016 308669539revB6-Mar17... -
Page 59: Kalibrierzertifikat
DE 9.0 KALIBRIERZERTIFIKAT © Adam Equipment 2016 308669539revB6-Mar17... -
Page 60: Garantieerklärung
DE 10. GARANTIEERKLÄRUNG Adam Equipment bietet eine beschränkte Garantie (Teile und Arbeitskraft) für Komponenten, die auf Grund von Material- oder Bearbeitungsmängeln ausgefallen sind. Die Garantie beginnt am Tag der Lieferung. Sollten während des Garantiezeitraums Reparaturen jeglicher Art von Nöten sein, so muss der Käufer seinen Händler oder Adam Equipment Company davon in Kenntnis setzen. - Page 61 ES Adam Equipment Serie Core (P.N. 9539, Revision B5, Marzo 2017) © Adam Equipment 2016 308669539revB6-Mar17...
- Page 62 Nombre del modelo de la balanza: Numero de serie de la unidad: Numero de revisión del software (Demostrado al encender la balanza): Fecha de compra: Nombre y lugar del suministrador: © Adam Equipment 2016 308669539revB6-Mar17...
- Page 63 ACCEDIENDO LAS UNIDADES DE PESAJE ................69 CALIBRACIÓN ........................... 70 TRATAMIENTO DE PROBLEMAS ....................71 MENSAJES DE ERROR ........................ 71 REPUESTOS Y ACCESORIOS ..................... 71 ESPECIFICACIONES ........................72 CERTIFICADO DE CALIBRACIÓN ....................73 10.0 GARANTÍA ............................74 © Adam Equipment 2016 308669539revB6-Mar17...
-
Page 64: Introducción
Coloque el plato de acero inoxidable encima del plato de plástico. Coloque la balanza sobre una superficie sólida y plana para pesajes exactos. © Adam Equipment 2016 308669539revB6-Mar17... -
Page 65: Instalando Baterias
Plato de plástico Display LCD Tecla [On/Off] Enciende y apaga la balanza Tecla [Unit] Cambia las unidades de pesaje. Tanbien usado para calibración Tecla [Tare] Ajusta el display a cero o tara la balanza © Adam Equipment 2016 308669539revB6-Mar17... - Page 66 (Baterías no son incluidas) DISPLAY Indicador de batería Indicador CERO Indica cuando el cero de pesaje es correcto. Indicador STABLE Indica cuando el resultado es estable. © Adam Equipment 2016 308669539revB6-Mar17...
-
Page 67: Situando Y Protegiendo Su Balanza
No rocíe ni sumerja la balanza en agua. No la coloque cerca ventanas abiertas, aberturas de aire acondicionado o ventiladores que pueden causar lecturas inestables. Mantenga la balanza limpia. No amontone material sobre la balanza/báscula cuando no está en el uso. © Adam Equipment 2016 308669539revB6-Mar17... -
Page 68: Almacenando Cuando No En Uso
NOTA: Sólo os modelos con el tamaño del plato de4,8”/120mm ø el pueden ser amontonados para el almacenamiento. Modelos Core con platos de 5,7”/145mm ø puede ser amontonado encima de el pilar, pero balanzas adicionales no pueden ser amontonadas encima de este modelo debido al tamaño más grande del plato. © Adam Equipment 2016 308669539revB6-Mar17... -
Page 69: Operación Básica
Para cambiar las unidades de pesaje, pulse la tecla [Unit] para ver las unidades disponibles. Vea la sección de parámetros para permitir o incapacitar las unidades de pesaje. Al seleccionar la unidad de pesaje, el peso será demostrado en la unidad seleccionada y su símbolo será indicado. © Adam Equipment 2016 308669539revB6-Mar17... -
Page 70: Parametros
Ajusta la retroiluminación a que opere automáticamente cuando un peso es colocado en sobre la balanza o una tecla es pulsada. Ajusta la retroiluminación a que opere permanentemente. 2 BL OFF BL Apaga la retroiluminación. © Adam Equipment 2016 308669539revB6-Mar17... -
Page 71: Accediendo Las Unidades De Pesaje
La unidad de Avoirdupois que hay 16 DR en 0.564383 una onza. Granos Una unidad básica que pesa en el sistema 15.432 imperial. Usado para pesaba pólvora. Newton Usado para pesar fuerza 0.009808 Tales Taiwanés Usado para pesar coral, perlas etc. 0.026666 Tl.t © Adam Equipment 2016 308669539revB6-Mar17... -
Page 72: Calibración
32) Si el peso está dentro del 5% del último valor de calibración el display indicará PASS y saldrá el modo de calibración. Si la calibración no es exitosa el display indicara FAIL y saldrá el modo de calibración. Si la calibración falla trate otra vez. © Adam Equipment 2016 308669539revB6-Mar17... -
Page 73: Tratamiento De Problemas
Cambie las baterías o use el no esta funcionando. adaptador DC REPUESTOS Y ACCESORIOS Si usted necesita pedir cualquier repuesto o accesorios, contacte a su vendedor o a Adam Equipment. Una lista parcial de los artículos más comunes sigue: Numero de Parte Descripción 4178... -
Page 74: Especificaciones
ABS Plástico Tamaño del plato 120mm ø (5.1” ø) 145mm ø (5.7” ø) Dimensiones 173 x 255 x 86mm (6.8” x 10” x 3.3”) (a x p x a) Sin parabrisas Peso bruto 820g (1.8lb) © Adam Equipment 2016 308669539revB6-Mar17... -
Page 75: Certificado De Calibración
ES CERTIFICADO DE CALIBRACIÓN © Adam Equipment 2016 308669539revB6-Mar17... -
Page 76: Garantía
© Copyright by Adam Equipment Co. Ltd. Todos los derechos reservados. Ninguna parte de esta publicación puede ser reimpresa o traducida de ninguna forma o a través de ningún medio sin la previa autorización de Adam Equipment. Adam Equipment se reserva el derecho de hacer cambios en la tecnología, características, especificaciones y diseño de su equipamiento sin previo aviso. -
Page 77: Manuale D'istruzione
IT Adam Equipment Serie “CORE” ‐ CQT MANUALE D’ISTRUZIONE (P.N. 3.08.6.6.9539, Revision B5, Marzo 2017) © Adam Equipment 2016 308669539revB6-Mar17... - Page 78 IT Dati strumento: Modello: Numero di serie: Revisione software (Appare all’accensione): Data di acquisto: Dati fornitore: © Adam Equipment 2016 308669539revB6-Mar17...
- Page 79 4.3 ATTIVAZIONE DELLE UNITÀ DI PESO ..........85 5.0 CALIBRATURA ..............87 6.0 RISOLUZIONE DI PROBLEMI ..........88 6.1 MESSAGGI DI ERRORE ..............88 6.2 PEZZI DI RICAMBIO E ACCESSORI, ..........89 7.0 SPECIFICHE TECNICE ............90 INFORMAZIONE DI GARANZIA..........91 © Adam Equipment 2016 308669539revB6-Mar17...
-
Page 80: Installazione
Vite di protezione usata durante la spedizione Coperchio rotundo intorno a lla vite 2) Mettere il piatto (imballato separatamente) nel ricettacolo del coperchio. Posizionare con cautela il supporto di plastica nel ricettacolo e fissarlo con la vite fornita. Fare attenzione di non serrare la vite con troppa forza per non danneggiare la cellula di carico. Si dovrebbe essere in grado di fissare la vite in modo leggero. 3) Posizionare il piatto in acciaio inossidabile sulla parte superiore della vaschetta in plastica. 4) Installare la bilancia su una superficie piana per una pesatura accurata. © Adam Equipment 2016 308669539revB6-Mar17... -
Page 81: Installazione Batterie
Rimuovere il coperchio dal compartimento delle batterie e inserire sei batterie (R6P/LR6/AA) 2.3 DISPLAY/TASTIERA DIETRO Cavita’ dell’ adattatore DC Fessura di chiusura SOPRA Piatto in acciaio inossidabile Piatto in plastica Display LCD Tasto [On/Off] Accensione e spegnimento dell’ alimentazione Tasto [Unit] per chambiare unita’ di peso. Usato anche per calibratura. Tasto di taratuta [Tare] Mettere il display a zero o tarare la bilancia © Adam Equipment 2016 308669539revB6-Mar17... - Page 82 IT FONDO Viti per il compartimento batterie Coperchio per il compartimento batterie (Batterie non sono incluse) DISPLAY Indicatore di batteria Indicatore ZERO indica quando lo zero della bilancia e’ corretto Indicatore STABLE indica quando la lettura e’ stabile © Adam Equipment 2016 308669539revB6-Mar17...
-
Page 83: Posizionare E Proteggere La Bilancia
Perché la bilancia funzioni al meglio, si consiglia quanto segue: Evitare temperature estreme. Non esporre alla luce diretta del sole o in prossimità di ventole per il condizionamento dell’aria Evitare piani instabili. Il piano di appoggio o il pavimento devono essere rigidi e non vibrare Quando si spegne la bilancia premendo (ON/OFF) la potenza non e’ completamente isolato. Scollegare il cavo di alimentazione, se non sara’ utilizzato per un lungo periodo ‐ Evitare alimentazioni instabili. Non usare vicino a macchine ad alto assorbimento come attrezzature per saldatura o grandi motori. Non lasciare che la batteria si scarichi completamente – in caso di non utilizzo per periodi prolungati, ricaricare periodicamente la batteria per assicurarsi che non perda la carica Non collocare vicino a macchinari che producono vibrazioni Evitare umidità che possa causare condensa. Non mettere in contatto direttamente con acqua. Non spruzzare o immergere la macchina in acqua Non collocare vicino a finestre aperte o ventole per il condizionamento dell’aria che potrebbero causare letture instabili a causa delle correnti d’aria Mantenere le bilance pulite e non accatastarvi materiale sopra quando non sono in uso. Il CORE ha la caratteristica che permette di accatastare un’ unità sull'altra. (Per ulteriori informazioni, consultare la sezione 2.5 MAGAZZINAGGIO.) © Adam Equipment 2016 308669539revB6-Mar17... -
Page 84: Magazzinaggio Quando Non In Uso
Tutte le balance della serie CORE possono essere riposte facilmente una sopra l’altra per consentire risparmio di spazio e proteggerle da eventali danni. Senza paravento Con paravento Nota: Solamente modelli con piatto di 120mm di dimensioni possono essere impilati per il magazzinaggio. Modelli con piatto di 145mm possono essere posati in cima alla pila ma le bilancie non possono essere impilate su di essi a causa della maggiore del piatto.) © Adam Equipment 2016 308669539revB6-Mar17... -
Page 85: Operazioni Di Base
Per cambiare l'unità di peso, premere [Unit] per scorrere attraverso le unità disponibili. Vedere la sezione PARAMETRI per abilitare o disabilitare l'unità di peso. Una volta che l'unità è stata selezionata, il peso verra’ visualizzato nel gruppo selezionato e un simbolo per il peso sarà mostrato. © Adam Equipment 2016 308669539revB6-Mar17... -
Page 86: Parametri
22) Premere [Tara] per selezionare le impostazioni di seguito: Off PWR Spegnimento di energia automatica 10 PWR 10 secondi prima che l’energia si spenga 20 PWR 20 secondi prima che l’energia si spenga 30 PWR 30 secondi prima che l’energia si spenga 40 PWR 40 secondi prima che l’energia si spenga 50 PWR 50 secondi prima che l’energia si spenga 60 PWR 60 secondi prima che l’energia si spenga 70 PWR 70 secondi prima che l’energia si spenga 80 PWR 80 secondi prima che l’energia si spenga 90 PWR 90 secondi prima che l’energia si spenga 4) Premere il tasto [Unit] per confermare l'impostazione. © Adam Equipment 2016 308669539revB6-Mar17... -
Page 87: Impostazione Della Retroilluminazione
Si puo’ attivare e disattivare le unità di peso a disposizione dell'utente quando si preme il tasto [Unit]. Come descritto nella sezione 4.4 unità di peso. Per impostare questo parametro spegnere la bilancia, premere e tenere premuto il tasto [Tare], premere il tasto [on/off] una volta, quindi rilasciare il tasto [Tare] . Il display visualizzera’ la prima funzione PWR © Adam Equipment 2016 308669539revB6-Mar17... - Page 88 Usato per pesare gioielli e pietre ct preziose ,etc. Dramma Unita’ avoirdupois eguale a 16 DR 0.564383 Grano Unita’ di peso base nel sistema 15.432 imperiale. Usato per pesare polvere da sparo. Newtone Usato per misurare forza. 0.009808 N Tael Usato per pesare d’coralli, perle etc. 0.026666 Tl.t taiwanese © Adam Equipment 2016 308669539revB6-Mar17...
-
Page 89: Calibratura
1) Per calibrare inserire energia e accendere la bilancia e mentre il display scorre attraverso la procedura di prova premere i tasti [Tare] e [Unit] contemporaneamente, quindi rilasciare dopo 1 secondo. 2) Il display mostrerà Unload quindi rimuovere ogni oggetti dal piatto. 3) Premere il tasto [Tare] per entrare un valore zero. 4) I’ultimo valore utilizzato per la calibratura sarà visualizzato (vedi tabella sopra). Per selezionare un diverso peso di calibratura, premere il tasto [Unit]. 5) Una volta che avete selezionato il peso di calibratura premere il tasto [Tare]. 6) Quando LOAD verrà visualizzato, inserire il peso di calibratura sul piatto. 7) Una volta che il segno di stabilita’ è visualizzato, premere il tasto [Tare] . 8) Se il peso è entro il 5% dell’ultimo valore di calibratura il display visualizza PASS e esce dalla modalità di calibratura. Se la calibrazione non è avvenuta il display mostrerà FAIL e uscira dalla modalita’ di calibratura e se la calibratura fallisce provare nuovamente. © Adam Equipment 2016 308669539revB6-Mar17... -
Page 90: Risoluzione Di Problemi
Errore di Unita’. Indicatore di bassa Le batteries possono essere Caricare le batterie. batteria scariche. FAIL Errore di calibratura. Peso Incorretto usato per la Provare di ricalibrare e calibratura. La calibratura non e’ controllare che il peso usato entro il limite del 5% specificato corresponda al valore della dalla fabbrica. bilancia. Possibile danno alla cellula di carico. La bilancia non puo’ Possibile danno alla cellula di Controllare che la bilancia sia dare lettura stabile. carico. posata su una superfice piatte lontana da vibrazioni. Nessun energia La batteria puo’ essere bassa.o Cambiare le batterie o usare all’accensione adattore DC inattivo. adattatore DC. © Adam Equipment 2016 308669539revB6-Mar17... -
Page 91: Pezzi Di Ricambio Eaccessori
Adattatore standard modello 7.00.4.0.0026 12VDC 500mA - EURO Adattatore standard modello 7.00.4.0.0027 12VDC 800mA - SA 3.08.1.2.2009 Piatto 120mm 3.08.1.2.2011 Piatto 145mm 3.08.2.3.2031 Paravento con coperchio 3.08.2.3.2033 Copertura 7.00.1.0.0046 Serratura di sicurezza e cavo. © Adam Equipment 2016 308669539revB6-Mar17... -
Page 92: Specifiche Tecnice
Temperatura di 0ºC to 40ºC utilizzo 32ºF to 104ºF Alimentazione 12VDC 500mA adattore (12VDC 800mA SA) o 6x AA batterie Calibratura Bottone di calibratura con uso di peso externo Peso di calibratura 200g 250g 600g 1500g 2000g 2000g 5000g Display 6 digitale LCD, 18mm digitale con retroilluminazione Paravento 132mm ø x 82mm N/A (diametri x h) (5.2” ø x 3.2”) Custodia ABS Plastica Misura del piatto 120mm ø (4.7” ø) 145mm ø (5.7” ø) Dimensioni 173 x 255 x 86mm (6.8” x 10” x 3.4”) (larg.xpro.xalt.) Senza paravento Peso netto 820g (1.8lb) © Adam Equipment 2016 308669539revB6-Mar17... -
Page 93: Informazione Di Garanzia
GARANZIA ADAM Equipment offre una Garanzia Limitata (Parti di ricambio e mano d’opera) per i component che non funzionano a causa di difetti in materiale o di lavorazione. La garanzia decorre dalla data di consegna. Durante il periodo di garanzia qualora si renda necessaria una riparazione l’acquirente deve informare il fornitore o ADAM Equipment. - Page 94 IT CERTIFICATO DI CALIBRATURA. La bilancie fabbricate e distribuite da ADAM Equipment, al momento della fabbricazione ha superato le prove di calibratura per le tolleranze indicate in questo manuale.Le influenze esterne possono influenzane la calibratura, in quanto il tempo può determinare un cambiamento dei dati. Si raccomanda pertanto che venga eseguita una calibratura sul posto e periodicamente Peso di calibratura: I pesi utilizzati dalla fabrica per calibrare corrispondono allo standard ASTM/OIML e corrispondono alla OIML classe M1/ASTM classe 4 Standard di calibratura: La calibratura dalla fabbrica è stata effettuata come descritto in sezione calibratura di questo manuale. © Adam Equipment 2016 308669539revB6-Mar17...
- Page 95 Adam Equipment products have been tested with, and are always supplied with mains power adaptors which meet all legal requirements for the intended country or region of operation, including electrical safety, interference and energy efficiency.
- Page 96 © Adam Equipment 2016 308669539revB6-Mar17...
- Page 97 © Adam Equipment 2016 308669539revB6-Mar17...
- Page 98 © Adam Equipment 2016 308669539revB6-Mar17...
- Page 99 E-mail: info@adamequipment.com.cn © Copyright by Adam Equipment Co. Ltd. All rights reserved. No part of this publication may be reprinted or translated in any form or by any means without the prior permission of Adam Equipment. Adam Equipment reserves the right to make changes to the technology, features, specifications and design of the equipment without notice.