Publicité

Les langues disponibles
  • FR

Les langues disponibles

Liens rapides

PELER 6C
IT
ISTRUZIONI PER INSTALLAZIONE, USO E MANUTENZIONE
EN
INSTRUCTIONS FOR INSTALLATION, USE AND MAINTENANCE
FR
INSTRUCTIONS POUR L'INSTALLATION, L'EMPLOI ET L'ENTRETIEN
DE
HANDBUCH FÜR INSTALLATION, GEBRAUCH UND WARTUNG
ES
INSTRUCCIONES PARA LA INSTALACIÓN, USO Y MANTENIMIENTO

Publicité

Table des Matières
loading

Sommaire des Matières pour Olimpia splendid PELER 6C

  • Page 1 PELER 6C ISTRUZIONI PER INSTALLAZIONE, USO E MANUTENZIONE INSTRUCTIONS FOR INSTALLATION, USE AND MAINTENANCE INSTRUCTIONS POUR L’INSTALLATION, L’EMPLOI ET L’ENTRETIEN HANDBUCH FÜR INSTALLATION, GEBRAUCH UND WARTUNG INSTRUCCIONES PARA LA INSTALACIÓN, USO Y MANTENIMIENTO...
  • Page 3 1. L’apparecchio può essere utilizzato da bambini di età non inferiore a 8 anni e da persone con ridotte capacità fisiche, sensoriali o mentali, o prive di esperienza o della necessaria conoscenza, purché sotto sorveglianza oppure dopo che le stesse abbiano ricevuto istruzioni relative all’uso sicuro dell’apparecchio e alla comprensione dei pericoli ad esso inerenti.
  • Page 4 1. This appliance can be used by children aged from 8 years and above and person with reduced physical, sensory or mental capabilities or lack of experience and knowledge if they have been given supervision or instruction concerning use of the appliance in a safe way and understand the hazards involved.
  • Page 5 1. Cet appareil peut être utilisé par des enfants âgés de moins de 8 ans et par des personnes dont les des capacités physiques, sensorielles ou mentales sont limitées, qui manquent d’expérience ou des connaissances nécessaires, à condition qu’elles soient sous surveillance ou après avoir reçu des instructions concernant l’utilisation en toute sécurité...
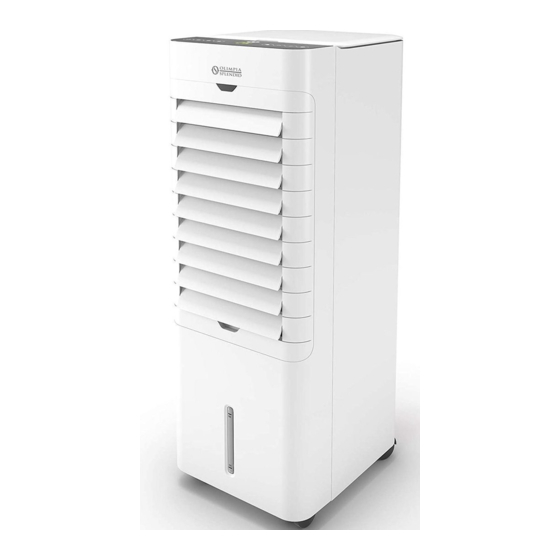
  • Page 6 1. Kindern ab 8 Jahren und Personen mit eingeschränkten körperlichen, sinnlichen oder geistigen Fähigkeiten, von unerfahrenen oder unwissenden Personen können das Gerät benutzen, wenn diese überwacht werden oder Anleitungen zum sicheren Gebrauch des Geräts erhalten und dessen Gefahren verstanden haben. Kinder dürfen nicht mit dem Gerät spielen.
  • Page 7 1. El aparato puede utilizarse por niños con una edad no inferior a los 8 años y por personas con reducidas capacidades físicas, sensoriales o mentales, o sin experiencia ni el necesario conocimiento, siempre y cuando bajo supervisión o después de que las mismas hayan recibido instrucciones relativas al uso seguro del aparato y a la comprensión de los peligros inherentes.
  • Page 8 PELER 6C...
  • Page 9 m i n . 1 5 c m...
  • Page 12 ILLUSTRAZIONI Le illustrazioni sono raggruppate nella seconda pagina e nella penultima pagina del manuale. INDICE GENERALE L’indice generale del presente manuale è riportato a pagina “IT-3” 0 - AVVERTENZE 0.1 - INFORMAZIONI GENERALI Desideriamo innanzitutto ringraziarVi per aver deciso di accordare la vostra preferenza ad un apparecchio di nostra produzione.
  • Page 13 • Indica che il personale di assistenza deve maneggiare l’apparecchio attenendosi al manuale di installazione. ATTENZIONE • Segnala che potrebbero esserci delle informazioni aggiuntive su manuali allegati. • Indica che sono disponibili informazioni nel manuale d’uso o nel manuale di installazione. ATTENZIONE Indica che il personale di assistenza deve maneggiare l’apparecchio attenendosi al manuale di installazione. IT - 2 PELER 6C...
  • Page 14: Table Des Matières

    1. Documento riservato ai termini di legge con divieto di riprodu- zione o di trasmissione a terzi senza esplicita autorizzazione della ditta OLIMpIA SpLENDID. Le macchine possono subire aggiornamenti e quindi presen- tare particolari diversi da quelli raffigurati, senza per questo costituire pregiudizio per i testi contenuti in questo manuale.
  • Page 15 10. Durante le operazioni di riempimento e pulizia, staccare la spina dalla presa di corrente. 11. In caso di sostituzione di componenti utilizzare esclusiva- mente ricambi originali OLIMpIA SpLENDID. 12. Non utilizzare detergenti liquidi o corrosivi per pulire l’appa- recchio, non spruzzare acqua o altri liquidi sull’apparecchio in quanto potrebbero danneggiare i componenti in plastica o, addirittura, provocare scosse elettriche.
  • Page 16 14. Non scollegare la spina di alimentazione durante il funziona- mento. Rischio di incendio o scosse elettriche. 15. Non appoggiare oggetti pesanti o caldi sopra l’apparecchio. 16. prima di collegare elettricamente l’apparecchio accertarsi che i dati targa siano rispondenti a quelli della rete di distribuzione elettrica.
  • Page 17 36. Non utilizzare l’apparecchio all’esterno o su superfici bagnate. Evitare il versamento di liquidi sull’apparecchio. Non utilizzare l’apparecchio vicino a lavelli o rubinetti. 37. Non immergere l’apparecchio in acqua o altri liquidi. 38. per mantenere l’apparecchio pulito, cambiare l’acqua di frequente. IT - 6 PELER 6C...
  • Page 18 39. Non esporre l’apparecchio a gocce o a spruzzi di acqua. 40. Non posizionare l’apparecchio in spazi ristretti, come ad esem- pio su una mensola o all’interno di un armadietto. 41. prima di procedere all’introduzione dell’acqua, spegnere l’ap- parecchio e staccare la spina dalla presa di corrente. Fare attenzione a non superare il livello massimo indicato con la scritta “MAX”.
  • Page 19 Si raccomanda inoltre di rendere innocue quelle parti dell’apparecchio suscettibili di costituire un pericolo, spe- cialmente per i bambini che potrebbero servirsi dell’apparecchio fuori uso per i propri giochi. IT - 8 PELER 6C...
  • Page 20 Questo apparecchio è destinato solo per un utilizzo domestico o similare. • Un uso improprio dell’apparecchio con eventuali danni causati a persone, cose o animali esulano OLIMpIA SpLENDID da ogni re- sponsabilità. 0.5 - ZONE DI RISCHIO • L’apparecchio non deve essere installato in ambienti con presenza di gas infiammabili, gas esplosivi, in ambienti molto umidi (lavan- derie, serre, ecc.), o in locali dove sono presenti altri macchinari...
  • Page 21: Principali Caratteristiche Efunzionamento

    Pompa acqua 15 - Supporto filtri Cavo di alimentazione 6 - Gancio di fissaggio serbatoio 16 - Filtro aria 17 - Filtro in carta acqua 7 - Serbatoio acqua 18 - Telecomando Ruote 19 - Ice box (2) Ricevitore telecomando 20 - Libretto istruzioni 10 - Flap orizzontale IT - 10 PELER 6C...
  • Page 22: Installazione

    2 - INSTALLAZIONE 2.1 - TRASpORTO DELL’AppARECCHIO • Il trasporto e la movimentazione dell’apparecchio deve avvenire in posizione verticale. AVVERTENZA Trasporto del raffrescatore su pavimenti delicati (es. pavimenti in legno): • Svuotare l’acqua dai serbatoi. • Prestare particolarmente attenzione durante gli spostamenti del raffrescatore in quanto le ruote potrebbero segnare il pavimento. Le ruote pur essendo in materiale rigido e piroettanti, possono essere danneggiate dall’uso o essere sporche.
  • Page 23: Uso Dell'apparecchio

    3 - USO DELL’AppARECCHIO Le modalità di funzionamento dell’apparecchio possono essere selezionate sia tramite il telecomando che dal pannello comandi. La ricezione della funzione selezionata viene confermata dall’emissione di un “beep” da parte del cicalino. IT - 12 PELER 6C...
  • Page 24 3.1 - pANNELLO COMANDI E TELECOMANDO (Fig.1) A1. Tasto ON/OFF A9. Tasto timer A2. Tasto Raffreddatore/Umidificatore B1. LED modalità “normale” A3. Tasto modalità B2. LED modalità “naturale” A4. Tasto illuminazione/spegnimento B3. LED modalità “riposo” B4. LED Raffreddatore/Umidificatore display A5. Display B5. LED oscillazione A6. Tasto velocità aria B6. LED modalità funzione “ionizzan- A7. Tasto oscillazione te”...
  • Page 25 • Durante l’uso non interporre ostacoli fra il telecomando e l’apparecchio. • Nel caso in cui nell’ambiente vengano utilizzati altri apparecchi dotati di telecomando (TV, gruppi stereo, ecc...), si potrebbero verificare delle interferenze. • Lampade elettroniche e fluorescenti possono interferire nelle trasmissioni tra tele- comando e l’apparecchio. • Estrarre le batterie di alimentazione nel caso di inutilizzo prolungato del telecomando. 3.2.a - Inserimento delle batterie Le batterie di alimentazione sono comprese nella fornitura. Per inserire correttamente le batterie: a. Sfilare lo sportello (T1) del vano batterie (Fig.E). b. Inserire le batterie nell’apposito vano (Fig.E). Rispettare scrupolosamente le polarità indicate sul fondo del vano batterie. c. Richiudere correttamente lo sportello (Fig.F). 3.2.b - Sostituzione delle batterie Le batterie vanno sostituite se premendo uno dei tasti non si sente il “beep” di ricezione del segnale dell’apparecchio. IT - 14 PELER 6C...
  • Page 26 Utilizzare sempre batterie nuove. L’utilizzo di batterie vecchie o di tipo diverso potrebbe generare un malfunzio- namento del telecomando. Il telecomando utilizza due batterie alcaline a secco da 1,5V (tipo A AA) (Fig.E). Una volta scariche, le batterie vanno sostituite entrambe ed eliminate negli appositi centri di raccolta o come previsto dalle normative locali. • Se non si utilizza il telecomando per alcune settimane o anche più, togliere le batterie. Eventuali perdite delle batterie potrebbero danneggiare il telecomando. Non ricaricare o smontare le batterie. Non gettate le batterie nel fuoco.
  • Page 27 Per aggiungere acqua dalla parte superiore, aprire il coperchio di riem- pimento (1) (fig.G), versare lentamente l’acqua nel serbatoio (7) quindi richiudere il coperchio (1). Per rimuovere il serbatoio acqua (7) dal corpo apparecchio (fig.H): • premere il gancio (6) e sfilare il serbatoio (7); • versare l‘acqua nel serbatoio (7); • riposizionare il serbatoio (7) nell‘apparecchio. • Verificare il livello dell’acqua nel serbatoio (7) tramite l’indicatore di livello (12) (fig.L). • Non riempire il serbatoio (7) oltre il livello massimo indicato. • Utilizzare sempre acqua pulita. • L’apparecchio potrebbe produrre un leggero odore o l’acqua nel serba- toio (7) potrebbe essere leggermente colorita durante il primo utilizzo; questi eventi sono normali ed assolutamente non nocivi per la salute dell’utilizzatore. IT - 16 PELER 6C...
  • Page 28 3.4 - ISTRUZIONI DI FUNZIONAMENTO a. Inserire la spina nella presa di corrente. Quando l’apparecchio viene acceso per la prima volta emette un “beep” e si posiziona in stand-by; tutti i tasti sono disabilitati ad eccezione del tasto ON/OFF. Le funzioni possono essere abilitate o modificate sia dal pannello comandi che dal telecomando. b. Per accendere l’apparecchio premere il tasto ON/OFF (A1) (si sente un beep). c. Per spegnere l’apparecchio premere di nuovo il tasto ON/OFF (A1) (si sente un beep). Ad ogni pressione di un tasto si sente un beep. d. Sollevare manualmente i flap orizzontali come desiderato. 3.4.a - Tasto ON/OFF (A1) In modalità stand-by tutti i tasti sono disabilitati, ad eccezione del tasto ON/OFF.
  • Page 29 03h ---> .. 12h ---> 00h (spento) ---> .. 3.4.f - Tasto “LIGHT” (A4) Quando l’apparecchio è acceso, premendo questo tasto si spegne il display (l’apparecchio continua a funzionare). Premere di nuovo questo tasto per riaccendere il display. IT - 18 PELER 6C...
  • Page 30 3.4.g - Tasto funzione “ionizzante” (A8) Quando l’apparecchio è acceso, premendo questo tasto si attiva la funzione ionizzante e il LED (B5) si accende, la funzione rende l’aria ambiente più fresca. Premere di nuovo il tasto per disattivare la funzione. 3.4.h - Tasto raffreddatore/umidificatore (A2) Quando l’apparecchio è acceso, premere questo tasto per avviare o spegnere la funzione raffreddatore/umidificatore.
  • Page 31: Manutenzione E Pulizia

    Utilizzare un panno asciutto per pulire l’apparecchio e il telecomando. b. E’ possibile utilizzare un panno inumidito con acqua fredda per pulire l’ap- parecchio se questo è molto sporco. Non utilizzare un panno trattato chimicamente o antistatico per pulire l’apparecchio. Non utilizzare, benzina, solvente, pasta per lucidare, o solventi similari. Questi prodotti potrebbero provocare la rottura o la deformazione della superficie in plastica. 4.1.b - Pulizia filtri Operare come segue: a. Con un cacciavite a stella (non fornito a corredo) rimuovere le viti (22) (fig. N). b. Rimuovere il supporto filtri (15) dal corpo apparecchio (fig.O). c. Sfilare dal supporto (15) il filtro in carta (17) e il filtro aria (16). d. Pulire entrambi i filtri (16 e 17) con acqua e detergente neutro. Sciacquare bene i filtri con acqua pulita. e. Se necessario utilizzare un pennello a setole morbide per pulire a fondo il filtro aria (16). f. Far asciugare i filtri quindi riposizionarli nel supporto (15). IT - 20 PELER 6C...
  • Page 32: Prima Di Riporre L'apparecchio A Fine Stagione

    g. Fissare il supporto (15) con entrambe le viti (22) (fig.P). Non usare l’apparecchio senza i filtri correttamente posizionati o se gli stessi sono danneggiati o consumati. 4.1.c - pulizia serbatoio Se non si intende utilizzare l’apparecchio per un periodo di tempo prolungato: a. Scollegare la spina dalla presa di corrente. b. Premere il gancio (6) e sfilare il serbatoio (7) (fig.Q). c. Sganciare il supporto pompa (3) ed estrarre la pompa (4) dal serbatoio (7) (fig.R). d. Rimuovere completamente il serbatoio (7) dal corpo apparecchio. e. Pulire ed asciugare accuratamente il serbatoio (7). f. Riposizionare il serbatoio nel corpo apparecchio e assicurarsi che la pompa (4) e il relativo supporto (3) siano correttamente posizionati.
  • Page 33: Smaltimento

    Per informazioni più dettagliate sul riciclaggio di questo prodotto, contattare l’ufficio comunale, il servizio locale di smaltimento rifiuti o il negozio in qui è stato acquistato il prodotto. Questa disposizione è valida solamente negli stati membri dell’UE. 7 - DATI TECNICI Per i dati tecnici consultare la targa dati (23) caratteristici applicata sul prodotto. IT - 22 PELER 6C...
  • Page 34 ILLUSTRATIONS The illustrations are grouped on the initial pages of the manual MAIN INDEX The main index of this manual is given on page “EN-3” 0 - WARNINGS 0.1 - General information First of all, we would like to thank you for choosing our appliance. 0.2 - SYMBOLS The pictograms in the next chapter provide the necessary informa- tion for correct, safe use of the machine in a rapid, unmistakable...
  • Page 35 • Indicates that the assistance personnel must handle the appliance following the installation manual. ATTENTION • Indicates that there may be additional information in attached manuals. • Indicates that information is available in the user manual or in the installation manual. ATTENTION Indicates that the assistance personnel must handle the appliance following the installation manual. EN - 2 PELER 6C...
  • Page 36 1. This document is restricted in use to the terms of the law and may not be copied or transferred to third parties without the ex- press authorization of the manufacturer, OLIMPIA SPLENDID. Our machines are subject to change and some parts may ap- pear different from the ones shown here, without this affecting the text of the manual in any way.
  • Page 37 For repair work contact solely the technical service centres au- thorised by the manufacturer and ask for original spare parts to be used. Failure to do this can affect the safety of the appliance. EN - 4 PELER 6C...
  • Page 38 14. Do not disconnect the power plug during functioning. Fire or electrical shocks hazard. 15. Do not place heavy or hot objects on top of the appliance. 16. Before electrically connecting the appliance, make sure the plate data correspond to those of the distribution network. The plate (23) is located on the sides of the appliance (Fig.C).
  • Page 39 37. Do not immerse the appliance in water or in other liquids. 38. Change the water frequently to keep it clean. 39. This unit shall not be exposed to dripping or splashing water. EN - 6 PELER 6C...
  • Page 40 40. Do not install the unit in a confined space, such as a bookcase or built-in cabinet. 41. Switch OFF and unplug the unit before filling with water. Make sure the water is below the “MAX” water level line. 42. The unit should not be adjusted or repaired by anyone except specialized technicians.
  • Page 41 Hazardous parts of the appliance must be rendered harmless, especially as there is a risk of chil- dren playing with it. EN - 8 PELER 6C...
  • Page 42 • This appliance is only intended for a domestic use or similar. • An improper use of the appliance with possible damages caused to people, things or animals releases OLIMPIA SPLENDID from any responsibility. 0.5 - HAzARDOUS zONES • The appliance must not be installed in places with inflammable gas- es, explosive gases or excess humidity (laundries, greenhouses, etc.), or in places with other machines that generate a strong heat...
  • Page 43: Main Features And Functioning

    15 - Filter support Power cord 6 - Water tank fixing hook 16 - Air filter 7 - Water tank 17 - Paper filter 8 - Wheels 18 - Remote control Remote control receiver 19 - Ice box (2) 10 - Horizontal flap 20 - Instruction booklet EN - 10 PELER 6C...
  • Page 44: Installation

    2 - INSTALLATION 2.1 - HANDLING THE APPLIANCE • Transport and handling of the appliance must be carried out in ver- tical position. CAUTION Moving the cooler on delicate flooring (e.g. wooden flooring): • Empty the water compartments. • Take great care when moving the cooler as the wheels could mark the flooring.
  • Page 45: Use Of The Appliance

    3 - USE OF THE APPLIANCE The appliance operating modes can be selected either using the remote control supplied or the control panel. The reception of the selected function is confirmed by the emission of a “beep” by the buzzer. EN - 12 PELER 6C...
  • Page 46 3.1 - CONTROL PANEL AND REMOTE CONTROL (Fig.1) A1. ON/OFF key A9. Timer key A2. Cooling/Humidifier key B1. “Normal” mode LED A3. Mode key B2. “Natural” mode LED A4. Display light on/off button B3. “Rest” mode LED A5. Display B4. Cooling/Humidifier LED A6. Air speed key B5. Oscillation LED A7. Oscillation key B6. “Ionizing” function mode LED A8. Ionizing function ON/OFF button B7.
  • Page 47 . c. Close the compartment correctly (Fig.F). 3.2.b - Replacement of batteries Replace the batteries when you no longer hear a beep from the appliance when pressing any key on the remote control. EN - 14 PELER 6C...
  • Page 48 Always use new batteries. The use of old or different batteries could generate malfunctioning of the remote control. The remote control uses two dry alkaline 1.5V batteries (AAA.) (Fig.E). When replacing batteries, replace both and dispose of the dead batteries in the appropriate collection centres and as required by law. •...
  • Page 49 • Always use clean water. • The appliance could produce a slight smell or the water in the tank (7) could be slightly coloured during first use; this events are normal and absolutely harmless for the user’s health. EN - 16 PELER 6C...
  • Page 50 3.4 - INSTRUCTIONS FOR OPERATION a. Insert the plug in the power socket. When the appliance is switched on for the first time, you will hear a beep and it will go into stand-by. All buttons will be disabled, with the exception of the ON/OFF one. The functions can be enabled or modified either from the control panel or from the remote control.
  • Page 51 00h (off) ---> 01h ---> 02h ---> 03h ---> .. 12h ---> 00h (off) ---> .. 3.4.f - “LIGHT” button (A4) When the appliance is on, pressing this button will make the display go off (the appliance continues to run). Press it again to make the display light up. EN - 18 PELER 6C...
  • Page 52 3.4.g - “Ionizing” function button (A8) When the appliance is on, pressing this button will activate the ionizing function and the relative LED (B5) will light up. This function leaves the air fresher in the room. Press the button again to deactivate the function. 3.4.h - Cooling/humidifier key (A2) When the appliance is running, press this key to start or stop the cooling/humid- ifier function. Press it once to start the function; the pump (4) and the cooling/humidifier LED (B4) switch on. Press it a second time to stop the function. 3.4.i - Water shortage function When the cooling function is on (“B4” LED on), if the appliance detects lack of water for 5-10 consecutive seconds, it will sound a beep, the (B4) LED will flash, the pump (4) will stop working and the function will be disabled.
  • Page 53: Maintenance And Cleaning

    These products could cause the breakage or deformation of the plastic surface. 4.1.b - Cleaning the filters Operate as follows: a. Use a Phillips head screwdriver (not included) to remove the screws (22) (fig.N). b. Remove the filter support (15) from the body of the appliance (fig.O). c. Slide out from the support (15) the paper filter (17) and the air filter (16). d. Clean both filters (16 and 17) with water and neutral soap. Rinse the filters well with clean water. e. If necessary, use a soft brush to clean the air filter more deeply (16). f. Let the filters dry, then replace them into their support (15). EN - 20 PELER 6C...
  • Page 54: Before Storing The Appliance

    g. Fix the support (15) with both screws (22) (fig.P). Do not use the appliance unless the filters are properly installed. Do not use the appliance if the filters are damaged or worn 4.1.c - Cleaning the reservoir If the appliance is not going to be used for a long period of time: a.
  • Page 55: Specifications

    Further information about the recycling of this product can be obtained from your local town hall, your refuse collection service, or in the store at which you bought the product. This regulation is valid only in EU member states. 7 - SPECIFICATIONS For the technical data, consult the characteristics plate (23) affixed to the product. EN - 22 PELER 6C...
  • Page 56 IllUStRAtIoNS Les illustrations sont regroupées dans les pages initiales de la notice. tABlE DES MAtIÈRES GéNéRAlE La table des matières générales de cette notice figure à la page « FR-3 » 0 - MISES EN GARDE 0.1 - INFoRMAtIoNS GéNéRAlES Tout d’abord, nous tenons à...
  • Page 57 • Il indique que des informations sont disponibles dans la notice d’utilisation ou dans la notice d’installation. AttENtIoN Indique que le personnel préposé à la réparation doit gérer l’appareil conformément à la notice d’installation. FR - 2 PELER 6C...
  • Page 58 1. Document réservé aux termes de la loi avec interdiction de reproduction ou de transmission à tiers sans l’autorisation ex- presse de la société olIMPIA SPlENDID. les machines peuvent subir des mises à jour et par consé- quent présenter des éléments différents de ceux qui sont re- présentés, sans que cela constitue pour autant un préjudice...
  • Page 59 11. En cas de remplacement de composants, utiliser exclusive- ment des pièces de rechange originales olIMPIA SPlENDID. 12. N’utilisez pas de détergents liquides ou corrosifs pour net- toyer l’appareil, ne vaporisez pas d’eau ou d’autres liquides sur l’unité...
  • Page 60 14. Ne pas débrancher la fiche secteur pendant le fonctionne- ment. Risque d’incendie ou de choc électrique. 15. Ne pas appuyer d’objets lourds ou chauds sur l’appareil. 16. Avant de connecter l’électroménager électriquement, assu- rez-vous que les données de la plaque signalétique corres- pondent à...
  • Page 61 36. Ne pas utiliser l’appareil à l’extérieur ou sur des surfaces mouil- lées. éviter le déversement de liquides sur l’appareil. Ne pas uti- liser l’appareil à proximité d’éviers ou de robinets. 37. Ne pas immerger l’appareil dans de l’eau ou autres liquides. FR - 6 PELER 6C...
  • Page 62 38. Pour que l’appareil reste propre, changer l’eau fréquemment. 39. Ne pas exposer l’appareil aux gouttes ou aux jets d’eau. 40. Ne pas positionner l’appareil dans des espaces étroits comme, par exemple, sur une étagère ou dans une armoire. 41. Avant d’introduire l’eau, éteindre l’appareil et débrancher la fiche de la prise de courant.
  • Page 63 Il est en outre recommander de rendre inoffensives les éléments de l’appareil susceptibles de constituer un danger, no- tamment pour les enfants, qui pourraient se servir de l’appareil hors d’usage pour jouer. FR - 8 PELER 6C...
  • Page 64 0.4 - UtIlISAtIoN PRéVUE • L’appareil doit être utilisé exclusivement pour rafraichir, refroidir et humidifier, dans le seul but de rendre la température ambiante agréable. • Cet appareil est conçu UNIQUEMENT pour une utilisation domes- tique ou semblable. • Un usage impropre de l’appareil avec d’éventuels dommages cau- sés aux personnes, biens ou animaux déchargent olIMPIA SPlEN- DID de toute responsabilité.
  • Page 65: Principales

    Crochet de fixation du réservoir 17 - Filtre en papier d’eau 18 - Télécommande Réservoir à eau Roues 19 - Bac à glace (2) Récepteur de télécommande 20 - Notice d’instructions 10 - Déflecteur horizontal FR - 10 PELER 6C...
  • Page 66: Installation

    2 - INStAllAtIoN 2.1 - tRANSPoRt DE l’APPAREIl • Le transport et la manutention de l’appareil doivent être effectués en position verticale. Recommandation déplacement du refroidisseur sur sols délicats (ex. planchers en bois): • Vider l’eau des réservoirs. • Faire très attention lors des déplacements du refroidisseur, car les roulettes pourraient rayer le sol. Les roulettes, bien qu’elles soient réalisées dans un matériau rigide et qu’elles soient pivo- tantes, peuvent s’abîmer à l’usage ou s’encrasser.
  • Page 67: Utilisation De L'appareil

    Les modes de fonctionnement de l’appareil peuvent être sélectionnés à partir de la télécommande ou du panneau de commande. La réception de la fonction sélectionnée est confirmée par l’émission d’un « bip » de l’avertisseur. FR - 12 PELER 6C...
  • Page 68 3.1 - PANNEAU DE CoMMANDES Et téléCoMMANDE (Fig.1) A1. Touche oN/oFF A9. Touche Minuteur A2. Touche Refroidissement/Humidifi- B1. Voyant mode « normal » B2. Voyant mode « naturel » cateur A3. Touche mode B3. Voyant mode « repos » A4. Touche allumage/extinction de B4.
  • Page 69 Respecter scrupuleusement les signes de polarité indiqués au fond du compartiment. c. Fermez le cache correctement (Fig.F). 3.2.b - Remplacement des piles Les piles doivent être remplacées en absence de bip sonore lorsque les touches sont enfoncées, indiquant l’absence de réception du signal par l’appareil. FR - 14 PELER 6C...
  • Page 70 Utilisez toujours de nouvelles piles. L’utilisation de piles usagées ou différentes peut entraîner une défaillance de la télécommande. La télécommande utilise deux piles alcalines sèches de 1,5 V (type AAA.) (Fig.E). Un fois déchargées, toutes les piles doivent être remplacées en même temps et jetées aux points de récolte prévus à cet effet ou conformément aux normes locales en vigueur. • Si vous n’utilisez pas la télécommande pendant quelques semaines ou plus, retirez les piles. D’éventuelles fuites des piles risquent d’endommager la télécommande. ne rechargez pas ou ne démontez pas les piles.
  • Page 71 (7), • replacer le réservoir (7) dans l’appareil. • Vérifier le niveau de l’eau dans le réservoir (7) à l’aide de la jauge (12) (fig.L). • Ne pas remplir le réservoir (7) au-delà du niveau maximum indiqué. • Utiliser toujours de l’eau propre. • L’appareil pourrait émettre une légère odeur ou l’eau dans le réservoir (7) pourrait être légèrement colorée au cours de sa première utilisation ; ces événements sont normaux et absolument pas nocifs pour la santé de l’utilisateur. FR - 16 PELER 6C...
  • Page 72 3.4 - CoNSIGNES DE FoNCtIoNNEMENt a. Insérer la fiche dans la prise de courant. Lors du premier allumage de l’appareil, celui-ci émet deux « bips » sonores et passe en mode veille. Toutes les touches sont désactivées à l’exception de la touche ON/ OFF. Les fonctions peuvent être activées ou modifiées à partir du panneau de commande et de la télécommande. b. Pour allumer l’appareil presser la touche oN/oFF (A1) (on entend un bip sonore). c. Pour éteindre l’appareil presser la touche oN/oFF (A1) (on entend un biiip sonore).
  • Page 73 03h ---> .. 12h ---> 00h (éteint) ---> .. 3.4.f - touche « lIGHt » (A4) Lorsque l’appareil est allumé, appuyer sur cette touche pour éteindre l’écran (l’appareil continue de fonctionner). Appuyer à nouveau sur cette touche pour rallumer l’écran. FR - 18 PELER 6C...
  • Page 74 3.4.g - touche de fonction « ionisante » (A8) Lorsque l’appareil est allumé, appuyer sur cette touche pour activer la fonction d’io- nisation. Le voyant (B5) s’allume. Cette fonction permet de refroidir l’air de la pièce. Appuyer à nouveau sur cette touche pour désactiver la fonction. 3.4.h - Touche refroidisseur/humidificateur (A2) Quand l’appareil est allumé, presser cette touche pour mettre en marche ou éteindre la fonction refroidisseur/humidificateur.
  • Page 75: Maintenance Et Nettoyage

    Nettoyer les deux filtres (16 et 17) avec de l’eau et un produit détergent neutre. Bien rincer les filtres avec de l’eau propre. e. Si nécessaire, utiliser une brosse à poils doux pour nettoyer le filtre à air (16) en profondeur. FR - 20 PELER 6C...
  • Page 76: Avant De Ranger L'appareil À La Fin De La Saison

    f. Laisser sécher les filtres puis les remettre dans le support (15). g. Fixer le support (15) avec les deux vis (22) (fig.P). Ne pas utiliser l’appareil sans que les filtres des réservoirs ne soient correctement installés ou s’ils sont endommagés ou usés. 4.1.c - Nettoyage du réservoir Si l’appareil ne doit pas être utilisé pendant une période prolongée : a.
  • Page 77: Élimination

    été acheté. Cette disposition est uniquement valable dans les États-membres de l’UE. 7 - DoNNéES tECHNIqUES Pour des informations d’ordre technique, consulter la plaque signalétique (23) apposée sur le produit. FR - 22 PELER 6C...
  • Page 78 IllUSTRATIONEN Die Illustrationen sind auf den Anfangsseiten des Handbuchs zusammengefasst AllgEmEINES INHAlTSVERZEICHNIS Das allgemeine Inhaltsverzeichnis des Handbuchs finden Sie auf Seite “DE-3” 0 - HINWEISE 0.1 - AllgEmEINE HINWEISE Wir möchten uns zunächst dafür bedanken, dass Sie sich für ein Gerät unserer Herstellung entschieden haben. 0.2 - BIlDSYmBOlE Die im folgenden Kapitel aufgeführten Bildsymbole liefern schnell und eindeutig Informationen zum korrekten und sicheren Gebrauch...
  • Page 79 ACHTUNg • Weist auf mögliche Zusatzinformationen in den beiliegenden Handbüchern hin. • Zeigt an, dass im Gebrauchs- oder Installationshandbuch weiterer Informationen verfügbar sind. ACHTUNg Zeigt an, dass das Assistenzpersonal beim Umgang des Geräts auf die Anweisungen im Installationshandbuch zu achten hat. DE - 2 PELER 6C...
  • Page 80 1. laut gesetz ist dies ein vertrauliches Dokument, daher gilt das Verbot der Vervielfältigung oder Übermittlung an Dritte ohne ausdrückliche genehmigung der firma OlImpIA SplENDID. An den geräten können technische Neuerungen vorgenommen werden, d.h. Einzelteile können u.U. anders aussehen als auf den Abbildungen, was jedoch die gültigkeit der Anweisungen in...
  • Page 81 10. Ziehen Sie beim Befüllen und Reinigen den Netzstecker aus der Steckdose. 11. Bei der Auswechslung von Einzelteilen bitte ausschließlich original OlImpIA SplENDID-Ersatzteile verwenden. 12. Zur Reinigung des Geräts weder flüssige oder korrosive Rei- niger verwenden; kein Wasser oder andere flüssigkeiten auf das Gerät spritzen, da diese die Kunststoffkomponenten be-...
  • Page 82 14. Den Versorgungsstecker nicht während des Betriebs tren- nen. Brand- oder Stromschlaggefahr. 15. Keine schweren oder heißen gegenstände auf das gerät legen. 16. Bevor das gerät an die Stromversorgung angeschlossen wird, sicherstellen, dass die Angaben auf dem Typenschild mit denen des Stromnetzes übereinstimmen.
  • Page 83 36. Das gerät nicht im freien oder auf nassen flächen benutzen. Vermeiden, dass flüssigkeiten auf das gerät gelangen. Das ge- rät nicht in der Nähe von Wasch-/Spülbecken oder Wasserhäh- nen benutzen. 37. Das gerät nicht in Wasser oder andere flüssigkeiten tauchen. DE - 6 PELER 6C...
  • Page 84 38. Um das gerät sauber zu halten, wechseln Sie das Wasser regelmäßig. 39. Setzen Sie das gerät keinem Tropf- oder Spritzwasser aus. 40. Stellen Sie das gerät nicht in engen Räumen auf, z. B. in einem Regal oder in einem Schrank. 41.
  • Page 85 58. Das gerät weder zerlegen, noch abändern. 59. Es ist äußerst gefährlich, das gerät selbst zu reparieren. 60. Bei der Entsorgung des gerätes das Netzkabel durchschneiden und alle Teile entfernen, mit denen Kinder spielen und sich dabei verletzen können. DE - 8 PELER 6C...
  • Page 86 0.4 - BESTImmUNgS-gEmäSSE VERWENDUNg • Das Gerät darf ausschließlich zur Kühlung und Befeuchtung mit dem einzigen Zweck benutzt werden, die Raumtemperatur komfor- tabel zu gestalten. • Dieses Gerät ist nur für den Hausgebrauch oder ähnliche Zwecke bestimmt. • Der unsachgemäße Gebrauch des Geräts enthebt OLIMPIA SPLEN- DID von jeglicher Haftung für Schäden an personen, gegenständen und Tieren.
  • Page 87: Wichtigste Eigenschaften Und Funktionsweisen

    Wasserpumpe 15 - Filterhalterung Netzkabel 16 - Luftfilter Haken zur Befestigung des Was- 17 - Papierfilter sertanks 18 - Fernbedienung Wassertank 8 - Lenkrollen 19 - Ice-Box (2) Fernbedienungsempfänger 20 - Gebrauchsanweisung 10 - Horizontale Luftleitlamellen DE - 10 PELER 6C...
  • Page 88: Installation

    2 - INSTAllATION 2.1 - TRANSpORT DES gERäTS • Das Gerät muss in senkrechter Position bewegt und gehandhabt werden. Hinweis Transport des Kühler auf empfindlichen Fußböden (z.B. Holzfußböden.): • Das Wasser aus den Tanks leeren. • Handeln Sie mit besonderer Vorsicht bei der Versetzung des Küh- ler, da die Räder den Fußboden zeichnen könnten.
  • Page 89: Gebrauch Des Geräts

    Kühler dimensioniert ist. 3 - gEBRAUCH DES gERäTS Die Betriebsweisen des Geräts können sowie mit der Fernsteuerung als auch am Bedienfeld gewählt werden. Wurde die ausgewählte Funktion empfangen, dann sendet der Summer ein „Beep“ aus. DE - 12 PELER 6C...
  • Page 90 3.1 - BEDIENfElD UND fERNBEDIENUNg (Abb.1) A1. Taste ON/Off A9. Timer-Taste A2. Taste Kühler/Befeuchter B1. LED Normalmodus A3. Modus-Taste B2. LED Natürlicher Modus A4. Taste Ein- bzw. Ausschaltung B3. LED Ruhemodus B4. LED Kühler/Befeuchter Display-Beleuchtung A5. Display B5. LED Schwingfunktion A6. Taste Luftgeschwindigkeit B6. LED Ionisierungsmodus A7. Taste Schwingfunktion B7.
  • Page 91 Die auf dem Boden des Batteriefachs angezeigte Polarität ist strikt einzuhalten. c. Klappe wieder korrekt schließen (Abb.F). 3.2.b - Austausch der Batterien Die Batterien sind zu ersetzen, wenn bei Drücken einer der Tasten nicht der „Piepton“ des Signalempfangs des Geräts zu hören ist. DE - 14 PELER 6C...
  • Page 92 Immer neue Batterien verwenden. Die Verwendung alter Batterien oder Batterien verschiedenen Typs können die Funktionsweise der Fernbedienung beeinträchtigen. Die Fernbedienung funktioniert mit zwei 1,5V Alkalibatterien (Typ AAA) (Abb.E). Wenn die Batterien leer sind, müssen sie jeweils paarweise ausgetauscht und den vorgesehenen Sammelbehältern zugeführt oder gemäß den örtlichen Vorschriften entsorgt werden.
  • Page 93 • Immer sauberes Wasser verwenden. • Das Gerät kann einen leichten Geruch entwickeln oder das Wasser im Tank (7) kann sich bei der ersten Benutzung leicht verfärben; dies ist normal und absolut nicht gesundheitsschädlich für den Benutzer. DE - 16 PELER 6C...
  • Page 94 3.4 - BETRIEBSANWEISUNgEN a. Den Stecker in die Steckdose stecken. Beim ersten Einschalten gibt das Gerät einen „Piepton“ von sich und wechselt in den Standby-Modus; alle Tasten bis auf die ON/OFF-Taste sind deaktiviert. Die Funktionen können sowohl vom Bedienfeld als von der Fernbedienung aus aktiviert bzw.
  • Page 95 03h ---> .. 12h ---> 00h (ausgeschaltet) ---> .. 3.4.f - „lIgHT“-Taste (A4) Ist das Gerät eingeschaltet, wird das Display bei Drücken dieser Taste ausge- schaltet (das Gerät lauft weiter). Diese Taste erneut drücken, um das Display wieder einzuschalten. DE - 18 PELER 6C...
  • Page 96 3.4.g - Taste „Ionisierungs“-funktion (A8) Bei Drücken dieser Taste bei eingeschaltetem Gerät wird die Ionisierungs-Funktion aktiviert und die LED (B5) leuchtet auf, die Funktion macht die Raumluft frischer. Die Taste nochmals drücken, um die Funktion auszuschalten. 3.4.h - Taste kühler/befeuchter (A2) Bei eingeschaltetem Gerät auf diese Taste drücken, um die Kühler/Befeuchter- funktion zu starten oder zu stoppen. Die Taste einmal drücken, um die Funktion zu starten; die Pumpe (4) und die LED Kühler/Befeuchter (B4) werden eingeschaltet.
  • Page 97: Wartung Und Reinigung

    Die Filterhalterung (15) aus dem Gerätekörper herausnehmen (Abb. O). c. Den Papierfilter (17) und den Luftfilter (16) aus der Halterung (15) ziehen. d. Beide Filter (16 und 17) mit Wasser und neutralem Reinigungsmittel reinigen. Die Filter mit sauberem Wasser gut ausspülen. e. Falls erforderlich, einen Pinsel mit weichen Borsten verwenden, um den Luftfilter (16) gründlich zu reinigen. DE - 20 PELER 6C...
  • Page 98: Vor Der Einlagerung Des Gerätes Am Ende Der Saison

    f. Die Filter trocknen lassen und erneut in der Halterung (15) platzieren. g. Die Halterung (15) mit beiden Schrauben (22) befestigen (Abb. P). Das Gerät nicht ohne die ordnungsgemäß eingesetzten Filter benutzen oder wenn diese beschädigt oder verbraucht sind. 4.1.c - Reinigung des Tanks Wenn man beabsichtigt, das Gerät für einen längeren Zeitraum nicht zu benutzen: a.
  • Page 99: Entsorgung

    Gemeindestelle, Ihren örtlichen Entsorgungsdienst oder an die Verkaufsstelle, in der Sie das Produkt erworben haben. Diese Bestimmung gilt nur in den EU-Mitgliedstaaten. 7 - TECHNISCHE DATEN Die technischen Daten entnehmen Sie dem am Gerät angebrachten Typen- schild (23). DE - 22 PELER 6C...
  • Page 100 IlUSTRACIoNES Las ilustraciones están agrupas en las páginas iniciales del manual. ÍNDICE gENERAl El índice general de este manual se proporciona en la página “ES-3” 0 - ADVERTENCIAS 0.1 - INfoRmACIoNES gENERAlES En primer lugar, deseamos darle las gracias por haber elegido uno de nuestros aparatos.
  • Page 101 • Indica que el personal de asistencia debe manejar el aparato ateniéndose al manual de instalación. ATENCIóN • Señala que puede haber información adicional en manuales adjuntos. • Indica que se encuentra disponible información en el manual de uso o en el manual de instalación. ATENCIóN Indica que el personal de asistencia debe manejar el aparato ateniéndose al manual de instalación. ES - 2 PELER 6C...
  • Page 102 1. Documento reservado según la ley con prohibición de reproduc- ción o transmisión a terceros sin la expresa autorización de la empresa olImpIA SplENDID. las máquinas pueden ser actualizadas y por lo tanto presentar de- talles distintos respecto a aquellos representados, sin constituir por ello, perjuicio para los textos contenidos en el presente manual.
  • Page 103 11. En caso de substitución de componentes utilizar exclusiva- mente repuestos originales olImpIA SplENDID. 12. No utilice detergentes líquidos o corrosivos para limpiar la unidad ni pulverice agua u otros líquidos en ella, ya que es- tos productos pueden dañar los componentes de plástico o,...
  • Page 104 para eventuales reparaciones diríjanse solamente a un cen- tro de asistencia técnica autorizado por el fabricante y soli- citen el empleo de piezas de recambio originales. la falta de respeto de todo lo antes expuesto puede poner en peligro la seguridad del aparato. 14. No desconecte el enchufe de alimentación durante el funcio- namiento. Riesgo de incendio o descargas eléctricas.
  • Page 105 Evite la caída de líquidos sobre el aparato. No utilice el aparato cerca de lavamanos o grifos. 37. No sumerge el aparato en agua o en otros líquidos. 38. para mantener el aparato limpio, cambie el agua frecuentemen- ES - 6 PELER 6C...
  • Page 106 39. No exponga el aparato a gotas o chorros de agua. 40. No coloque el aparato en espacios reducidos (por ejemplo, una ménsula o un armario. 41. Antes de introducir agua, apague el aparato y extraiga el en- chufe de la toma de corriente. No supere el nivel máximo, indi- cado por la palabra “mAX”.
  • Page 107 Se recomienda además inutilizar las partes del apara- to susceptibles de constituir un peligro, especialmente para los niños que podrían usar el aparato fuera de uso para sus propios juegos. ES - 8 PELER 6C...
  • Page 108 único propósito de hacer que la temperatura en el ambiente sea confortable. • Este aparato se destinará sólo para un utilizo doméstico o similares. • Un uso inapropiado del aparato con eventuales daños causados a personas, cosas o animales liberan olImpIA SplENDID de cual- quiera responsabilidad. 0.5 - ZoNAS DE RIESgo • El aparato no debe instalarse en ambientes con presencia de gases inflamables, gases explosivos o en ambientes muy húmedos (la- vanderías, invernaderos, etc.); tampoco deben instalarse en locales...
  • Page 109: Características Principales Y Funcionamiento

    15 - Soporte filtros Cable de alimentación 6 - Gancho de fijación tanque del 16 - Filtro del aire 17 - Filtro de papel agua 7 - Tanque del agua 18 - Mando a distancia Ruedas 19 - Ice box (2) Receptor mando a distancia 20 - Manual de instrucciones 10 - Flap horizontal ES - 10 PELER 6C...
  • Page 110: Instalación

    2 - INSTAlACIóN 2.1 - TRANSpoRTE DEl ApARATo • El trasporto y la manipulación del aparato deben ocurrir en posición vertical. Advertencia Transporte del refrigerador sobre pavimentos delicados (por ejemplo, pavimentos de madera): • Vaciar el agua de los depósitos. • Preste particular atención durante los desplazamientos del refri- gerador, ya que las ruedas podrían marcar el pavimento. A pesar de ser pivotantes y de material rígido, las ruedas pueden estar sucias o deterioradas por el uso. Se recomienda averiguar que las ruedas estén limpias y que se muevan libremente.
  • Page 111: Uso Del Aparato

    3 - USo DEl ApARATo Los modos de funcionamiento del aparato se pueden seleccionar tanto con el mando a distancia suministrado como desde el panel de mandos. La recepción de la función seleccionada se confirma por la emisión de un “bip” por el zumbador ES - 12 PELER 6C...
  • Page 112 3.1 - pANEl DE mANDoS Y mANDo A DISTANCIA (fig.1) A1. Tecla oN/off A9. Tecla temporizador A2. Tecla Refrigerador/Humidificador B1. LED modalidad “normal” A3. Tecla modo B2. LED modalidad “natural” A4. Botón iluminación/apagado panta- B3. LED modalidad “reposo” B4. LED Refrigerador/Humidificador A5. Pantalla B5. LED oscilación A6. Tecla velocidad aire B6. LED modalidad función “ionizante” A7. Tecla oscilación B7. Temperatura ambiente detectada A8.
  • Page 113 Extraiga la tapa (T1) del compartimento de las baterías (Fig.E). b. Coloque las baterías en su compartimento (Fig.E). Respetar escrupulosamente las polaridades indicadas en el fondo del espacio. c. Cierre correctamente la tapa (Fig.F). 3.2.b - Substitución de las pilas Las pilas deben ser reemplazadas si no oye el “bip” cuando pulsa uno de los botones para recibir la señal del aparato. ES - 14 PELER 6C...
  • Page 114 Siempre utilice baterías nuevas. El uso de baterías viejas o de tipo diferente puede hacer que el control remoto funcione mal. El control remoto utiliza dos baterías alcalinas en seco de 1,5 V (tipo AAA.) (Fig.E). Una vez descargadas, ambas pilas tienen que ser substituidas y elimi- nadas en los apropiados centros de recolección o como está previsto por las normativas locales. • Si no va a utilizar el control remoto durante varias semanas o más, quite las baterías. Eventuales pérdidas de las baterías podrían dañar el control remoto. No recargue ni desarme las baterías. No arroje las baterías al fuego. Pueden quemarse o explotar. Si el líquido de las baterías cae sobre la piel o la ropa, lave con abun- dante agua limpia. No utilice el control remoto con baterías que hayan sufrido pérdidas. Los productos químicos de las baterías pueden provocar quemaduras u otros riesgos para la salud. 3.2.c - posición del control remoto Mantenga el control remoto en una posición desde la cual la señal pueda llegar al receptor del aparato (distancia máxima unos 6 metros - con las baterías cargadas) (Fig.D).
  • Page 115 3.3.b - llenado Es necesario añadir agua en el tanque (7) antes de que la función refrigera- dor/humidificador sea activada. El agua puede ser añadida desde la parte superior del aparato o quitando el tanque (7) del agua: Para añadir agua desde arriba, abra la tapa de llenado (1) (fig. G), vierta lentamente el agua en el depósito (7) y cierre la tapa (1). Desmontar el depósito de agua (7) del cuerpo del aparato (fig. H): • presione el gancho (6) y saque el depósito (7); • vierta el agua en el depósito (7); • vuelva a colocar el depósito (7) en el aparato. • Verifique el nivel de agua en el tanque (7) a través del indicador de nivel (12) (fig.L). • No llene el tanque (7) más allá del nivel máximo indicado. • Siempre utilice agua limpia. • El aparato podría producir un ligero olor o el agua en el tanque (7) podría ser ligeramente coloreada durante el primer utilizo; estos eventos son normales y absolutamente no peligrosos para la salud del usuario. ES - 16 PELER 6C...
  • Page 116 3.4 - INSTRUCCIoNES DE fUNCIoNAmIENTo a. Inserte el enchufe en la toma de corriente. Cuando el dispositivo se enciende por primera vez, emite un “bip” y pasa al modo de espera; todos los botones están desactivados excepto el botón ON/OFF. Las funciones pueden activarse o modificarse desde el panel de control o desde el mando a distancia. b. Para encender el aparato, presione la tecla oN/off (A1) (se oye un bip). c. Para apagar el aparato, presione la tecla oN/off (A1) (se oye un bip). Se oye un bip cada vez que se presiona una tecla. d. Levante manualmente los flaps horizontales como desee.
  • Page 117 03h ---> .. 12h ---> 00h (apagado) ---> .. 3.4.f - Botón “lIgHT” (A4) Cuando se enciende el aparato, al pulsar este botón se apaga la pantalla (el aparato sigue funcionando). Presione de nuevo este botón para volver a encender la pantalla. ES - 18 PELER 6C...
  • Page 118 3.4.g - Botón función “ionizante” (A8) Al encender el aparato, al pulsar este botón se activa la función ionizante y el LED (B5) se enciende, haciendo que el aire del ambiente se enfríe. Presione de nuevo este botón para desactivar la función. 3.4.h - Tecla refrigerador/humidificador (A2) Cuando el aparato está encendido, presione esta tecla para iniciar o apagar la función refrigerador/humidificador. Presiónela una vez para iniciar la función; la bomba (4) y el LED refrigerador/ humidificador (B4) se encienden. Presiónela una segunda vez para apagar la función. 3.4.i - función escasez de agua Cuando la función de refrigeración está activada (LED “B4” encendido), si el aparato detecta una falta de agua durante 5-10 segundos consecutivos emite un “bip”,...
  • Page 119: Mantenimiento Y Limpieza

    Se puede utilizar un paño humedecido con agua fría para limpiar el aparato si está muy sucio. No utilice un paño tratado químicamente o antiestático para limpiar el aparato. No utilice gasolina, solventes, pastas para limpiar ni solventes similares. Estos productos pueden provocar la rotura o la deformación de la su- perficie de plástico. 4.1.b - Limpieza de los filtros Proceda como se indica a continuación: a. Retire los tornillos (22) con un destornillador en forma de estrella (no suminis- trado) (fig. N). b. Desmonte el soporte de los filtros (15) del cuerpo del aparato (fig. O). c. Quitar del soporte (15) el filtro de papel (17) y el filtro de aire (16). d. Limpie ambos filtros (16 y 17) con agua y detergente neutro. Enjuague bien los filtros con agua limpia. e. Si es necesario, utilice un pincel de cerdas suaves para limpiar a fondo el filtro de aire (16). ES - 20 PELER 6C...
  • Page 120: Antes De Guardar El Aparato Al Final De La Temporada

    f. Secar los filtros luego volver a colocarlos en el soporte (15). g. Fijar el soporte (15) con ambos tornillos (22) (fig.P). No use el aparato sin los filtros colocados correctamente o si están dañados o desgastados. 4.1.c - limpieza depósito Si no tiene intención de utilizar el dispositivo durante un período de tiempo pro- longado: a. Desconecte el enchufe de la toma de corriente. b. Presione el gancho (6) y retire el depósito (7) (fig. Q). c. Desconecte el soporte de la bomba (3) y retire la bomba (4) del depósito (7) (fig.R). d. Extraiga completamente el depósito (7) del cuerpo del aparato. e. Limpie y seque bien el depósito (7). f. Vuelva a colocar el depósito en el cuerpo del aparato y asegúrese de que la bomba (4) y su soporte (3) estén correctamente colocados. g. Cierre el depósito en el cuerpo del aparato. h. Levante la tapa (1) y limpie y seque el compartimento de agua.
  • Page 121: Eliminación

    Esta disposición es válida solamente en los estados miembros de la UE. 7 - DAToS TÉCNICoS Para los datos técnicos consulte la placa de datos característicos (23) apli- cada en el producto. ES - 22 PELER 6C...

Table des Matières