Roland EDIROL UM-3EX Mode D'emploi
Table des Matières
Liens rapides
Owner's Manual
Bedienungsanleitung
Manual del usuario
Thank you, and congratulations on your choice of the UM-3EX USB MIDI Interface.
201a
Before using this unit, carefully read the sections entitled: "USING THE UNIT
SAFELY" and "IMPORTANT NOTES" (p. 2; p. 4). These sections provide
important information concerning the proper operation of the unit. Additionally,
in order to feel assured that you have gained a good grasp of every feature
provided by your new unit, Owner's manual should be read in its entirety. The
manual should be saved and kept on hand as a convenient reference.
202
Copyright © 2005 ROLAND CORPORATION
All rights reserved. No part of this publication may be reproduced in any form
without the written permission of ROLAND CORPORATION.
Mode d'emploi
Manuale d'uso
Table des Matières

Manuels Connexes pour Roland EDIROL UM-3EX


Sommaire des Matières pour Roland EDIROL UM-3EX
- Page 1 Owner’s manual should be read in its entirety. The manual should be saved and kept on hand as a convenient reference. Copyright © 2005 ROLAND CORPORATION All rights reserved. No part of this publication may be reproduced in any form without the written permission of ROLAND CORPORATION.
- Page 2 • Subject to high levels of vibration. directing you to do so). Refer all servicing ....................to your retailer, the nearest Roland • This unit should be used only with a rack Service Center, or an authorized Roland mount adaptor (RAF-70) that is recom- distributor, as listed on the “Information”...
- Page 3 • When using the unit with a rack or stand • In households with small children, an recommended by Roland, the rack or adult should provide supervision until stand must be carefully placed so it is the child is capable of following all the level and sure to remain stable.
- Page 4 IMPORTANT NOTES 291a In addition to the items listed under “USING THE UNIT SAFELY” on page p. 2, please read and observe the following: Power Supply Maintenance 401a • Before connecting this unit to other devices, turn • For everyday cleaning wipe the unit with a soft, off the power to all units.
- Page 5 Handling CD-ROMs * Microsoft and Windows are registered trademarks of Microsoft Corporation. • Avoid touching or scratching the shiny underside 206e (encoded surface) of the disc. Damaged or dirty * The screen shots in this document are used in com- CD-ROM discs may not be read properly.
-
Page 6: Table Des Matières
Contents Names of Things and What They Do ................10 Front Panel............................ 10 Rear Panel ............................. 12 Getting Connected and Installing Drivers (Windows) ........... 14 Before you install the driver....................... 14 Installing the Driver ........................15 Windows XP/2000 users ..........................15 Windows Me/98 users............................ - Page 7 Vorderseite ........................... 58 Rückseite ............................60 Anschlüsse herstellen und Treiber installieren (Windows) .......... 62 Vor dem Installieren des Treibers ..................... 62 Treiber installieren........................63 Windows XP/2000-Anwender ........................63 Anschlüsse herstellen und Treiber installieren (Macintosh) ........66 Vor dem Installieren des Treibers ..................... 66 Installation und Einstellungen des Treibers ................
- Page 8 Collegamento e installazione dei driver (Windows)............94 Prima di installare il driver ......................94 Installazione del driver ....................... 95 Utenti Windows XP/2000 ..........................95 Collegamento e installazione dei driver (Macintosh)............. 98 Prima di installare il driver ......................98 Installazione e configurazione del driver................. 99 Utenti Mac OS X...............................
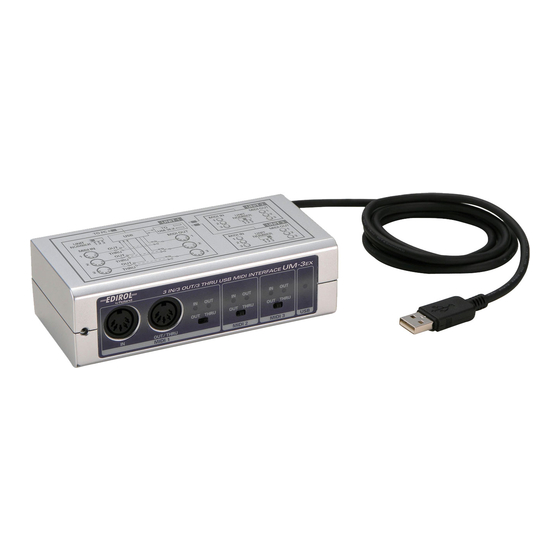
- Page 9 Contents of the Package The UM-3EX includes the following items. When you open the package, first make sure that all items are included. If any are missing, contact the dealer where you purchased the UM-3EX. USB MIDI Interface UM-3EX fig.um-3-front.eps_50 CD-ROM This contains drivers for use with the UM-3EX.
-
Page 10: Names Of Things And What They Do
Names of Things and What They Do Front Panel fig.front.eps_25 MIDI IN Connectors Connect these to the MIDI OUT connectors of the devices (such as a MIDI keyboard) that will be transmitting MIDI messages to your computer. MIDI OUT/THRU Connectors Connect these to the MIDI IN connectors of sound modules or other devices to which you’ll be sending MIDI messages from your computer for playback. - Page 11 ■ ON/OFF Settings of the THRU Switches You can use the THRU switches to select the transmission destinations for MIDI messages from the devices (MIDI keyboard, digital piano, etc.) connected to the MIDI IN connectors. There is no need to change any cable connections. MIDI messages arriving via the corresponding MIDI IN connector are THRU Switch: sent to your computer (sequencer software).
-
Page 12: Rear Panel
Rear Panel fig.rear.eps_25 USB Cable Connect this to the USB connector of your computer. MODE select switch The UM-3EX can be set to function as either the master or a slave device by means of this switch. Select the MASTER setting if you’re using a single UM-3EX When using a single UM-3EX unit unit. - Page 13 UNIT number select switch Specifies the UNIT number (p. 42) of the UM-3EX. If you’re connecting multiple UM-3EX units, you must set each unit’s UNIT number select switch appropriately. Set each UM-3EX to a different UNIT number. * Don’t change the setting of the UNIT number select switch while the UM-3EX is connected to your computer.
-
Page 14: Getting Connected And Installing Drivers (Windows)
Getting Connected and Installing Drivers (Windows) Before you install the driver Here’s the procedure for installing a single UM-3EX. If you’re using Windows XP, you can simultaneously connect up to three UM-3EX units to a single computer via USB. * Connection of multiple units is supported only in Windows XP. For details, refer to “Connecting multiple UM-3EX units”... -
Page 15: Installing The Driver
Installing the Driver What is a driver? A “driver” is software that transfers data between the UM-3EX and application software running on your computer, when your computer and the UM-3EX are connected. The driver sends data from your application to the UM-3EX, and from the UM-3EX to your application. The installation procedure will differ depending on your system. - Page 16 3. Click the Hardware tab, then click [Driver Signing]. The Driver Signing Options dialog box will open. 4. In the Driver Signing Options dialog box, select “Ignore,” then click [OK]. If the current setting is “Warn” or “Block,” change this to “Ignore.” Then, when you’ve finished installing the driver, change it back to the original setting.
- Page 17 Set the UM-3EX’s MODE select switch to MASTER. Operation of the UM-3EX Set the UM-3EX’s UNIT number select switch to 1. Operation of the UM-3EX Connect only one UM-3EX to your computer. Operation of the UM-3EX A message of “Found New Hardware” will appear. Please wait. * This unit is equipped with a protection circuit.
- Page 18 ■ Giving priority to Background Services To ensure that MIDI data is handled smoothly, proceed as follows to make this setting. Windows XP users: 1. Open the System Properties dialog box. 1. From the Windows start menu, choose Control Panel. 2.
- Page 19 Windows 2000 users: 1. Click the Windows Start button, and from the menu that appears, select Settings | Control Panel. 2. In Control Panel, double-click the System icon. 3. Click the Advanced tab. 4. At the right of the Performance field, click [Performance Options]. The Performance Options dialog box will appear.
-
Page 20: Windows Me/98 Users
Windows Me/98 users 1. With the UM-3EX left unconnected, start up Windows. Do not connect the UM-3EX to the computer until you reach Step 10. 2. Exit all currently running software. Also close any open windows. If you are using virus checking or similar software, be sure to exit it as well. -
Page 21: Setting The Driver
Setting the Driver The following describes the settings needed to use the UM-3EX with Media Player or other sequencer software using Windows standard device settings. If you are using sequencer software that does not utilize Windows standard device settings, make the device settings within the sequencer software. -
Page 22: Windows 2000/Me Users
Windows 2000/Me users 1. Open the Sounds and Multimedia Properties dialog box. 1. Click the Windows start button, and from the menu that appears, select Settings | Control Panel. 2. In Control Panel, double-click the Sounds and Multimedia icon. If Sounds and Multimedia icon is not displayed, click “Show all control panel options” in the frame at the left. -
Page 23: Windows 98 Users
Windows 98 users 1. Open the Multimedia Properties dialog box. 1. Click the Windows Start menu, and from the menu that appears, select Settings | Control Panel. 2. In Control Panel, double-click the Multimedia icon. 2. Click the MIDI tab. fig.device-98-e.eps_60 3. -
Page 24: Getting Connected And Installing Drivers (Macintosh)
Getting Connected and Installing Drivers (Macintosh) Before you install the driver Here’s the procedure for installing a single UM-3EX. If you’re using Mac OS X, you can simultaneously connect up to three UM-3EX units to a single Macintosh via USB. * Connection of multiple units is supported only in Mac OS X. -
Page 25: Driver Installation And Settings
Driver Installation and Settings What is a driver? A “driver” is software that transfers data between the UM-3EX and application software running on your Macintosh, when your Macintosh and the UM-3EX are connected. The driver sends data from your application to the UM-3EX, and from the UM-3EX to your application. The installation procedure will differ depending on your system. -
Page 26: Mac Os X Users
Mac OS X users ■ Installing the driver * If the “Authenticate” dialog box appears during the installation, input the password and click “OK.” * What you actually see on your Macintosh screen may be different, depending on your computing environment and the operating system you’re using. - Page 27 ■ Setting the driver The following describes the settings enabling use of the UM-3EX with sequencer software using Macintosh standard device settings. If you are using sequencer software that does not utilize Macintosh standard device settings, make the device settings within the sequencer software. * What you actually see on your Macintosh screen may be different, depending on your computing environment and the operating system you’re using.
- Page 28 8. Specify the device name for each new external device. 1. Click the new external device you added, and then click Show Info. 2. Enter the name in the Device Name field. fig.osx-8e.eps First external device 1: UM-3 1 1: UM-3 2 Second external device Third external device 1: UM-3 3...
- Page 29 11. Click Test Setup. The shape of the mouse cursor changes fig.osx-10e.eps 11, 13 Test Setup Click the icon 12. Click the area shown in the illustration. If the corresponding MIDI OUT indicator of the UM-3EX blinks, the settings are correct. 13.
-
Page 30: Mac Os 9 Users
Mac OS 9 users ■ Installing the UM-3 driver Use either OMS or FreeMIDI as the MIDI driver. The included UM-3 driver is an add-on module for using the UM-3EX with OMS or FreeMIDI. OMS can be found in the OMS 2.3.8 E folder within the OMS (Mac OS 9) folder of the CD-ROM. If you would like to know more about OMS, refer to OMS_2.3_Mac.pdf which can be found in the same folder. - Page 31 fig.os9-6e.eps 6. If a message like the following is displayed, click [Continue]. The other currently running software will exit, and installation will continue. 7. A dialog box will indicate Installation was successful. Click [Restart] to restart your Macintosh. Next, make the driver settings. •...
- Page 32 ■ OMS settings If you are using FreeMIDI, proceed to “FreeMIDI settings” (p. 36). Set the UM-3EX’s MODE select switch to MASTER. Operation of the UM-3EX Set the UM-3EX’s UNIT number select switch to 1. Operation of the UM-3EX Connect only one UM-3EX to your Macintosh. Operation of the UM-3EX * Connect the cable to the USB connector of the Macintosh itself, not to the USB connector of the keyboard.
- Page 33 fig.oms-7e.eps_35 7. The Create a New Studio Setup dialog box will appear. Click [Cancel]. If you accidentally clicked [OK], click [Cancel] in the next screen. fig.oms-8e.eps_35 8. Choose Open from the File menu. From the OMS Setting folder that you copied in step 4, select the UM-3 file, and click [Open].
- Page 34 fig.oms-9e.eps_35 9. From the Edit menu, select OMS MIDI Setup. In the OMS MIDI Setup dialog box that appears, check Run MIDI in background, and click [OK]. fig.oms-10e.eps_35 A diamond mark ( ) indicates the settings are enabled. 10. From the File menu, choose Make Current. If you are unable to select Make Current, it has already been applied, and you may continue to the next step.
- Page 35 fig.oms-12e.eps_35 12. When you move the mouse cursor near the MIDI connector icon, the cursor will change to a shape. Click the MIDI connector icon shown in the illustration. If the corresponding MIDI OUT indicator of the UM-3EX blinks, the settings are correct. 13.
- Page 36 ■ FreeMIDI settings Set the UM-3EX’s MODE select switch to MASTER. Operation of the UM-3EX Set the UM-3EX’s UNIT number select switch to 1. Operation of the UM-3EX Connect only one UM-3EX to your Macintosh. Operation of the UM-3EX * Connect the cable to the USB connector of the Macintosh itself, not to the USB connector of the keyboard. * This unit is equipped with a protection circuit.
- Page 37 fig.freemidi-10.eps_35 10. The mouse cursor will change to the shape of a keyboard. Click the icon shown in the illustration. If the corresponding MIDI OUT indicator of the UM- 3EX blinks, the settings are correct. 11. Once again choose the MIDI menu command Check Connections to end the test. 12.
-
Page 38: Basic Use
Basic Use This chapter describes different basic methods of connecting the UM-3EX according to how the UM- 3EX is to be used. Basic Connections and MIDI Flow Transmitting MIDI messages from a MIDI keyboard or digital piano to the sequencer software To transmit MIDI messages from a MIDI keyboard or digital piano to the sequencer software or make a MIDI recording of a keyboard performance or other performance using sequencer software on your computer, make the following connections and settings. -
Page 39: Transmitting Midi Messages From The Sequencer Software To A Midi Sound Module Or Digital Piano
Transmitting MIDI Messages from the sequencer software to a MIDI sound module or digital piano If transmitting MIDI messages from the sequencer software to a MIDI sound module or digital piano, or if using a MIDI sound module’s or digital piano’s sound generator to play the sounds from the playback of sequencer software on the computer, make the following connections and settings. -
Page 40: Transmitting Midi Messages From A Midi Keyboard Or Other Device To A Midi Sound Module
Transmitting MIDI messages from a MIDI Keyboard or other device to a MIDI sound module If you want to play a MIDI keyboard and send MIDI messages to a MIDI sound module, make the connections and settings shown below. There is no need to connect the UM-3EX to a computer. fig.connect-thru-e.eps_60 Connect to the MIDI IN connector of the MIDI sound module. - Page 41 ■ ON/OFF Settings of the THRU Switches You can use the THRU switches to select the transmission destinations for MIDI messages from the devices (MIDI keyboard, digital piano, etc.) connected to the MIDI IN connectors. There is no need to change any cable connections. Switch Setting MIDI Message Destination Device MIDI messages are transmitted to your computer (sequencer software).
-
Page 42: Appendices
Appendices Connecting multiple UM-3EX units If you’re using Windows XP or Mac OS X, you can simultaneously connect up to three UM-3EX units via USB to a single computer. Depending on your system, the second or subsequent unit may not be usable depending on the limitations imposed by the CPU processing speed, hard disk, memory, and the performance of your software. -
Page 43: Installing The Driver
Installing the Driver * If you are using Windows XP, log on as a user that has administrative privileges (e.g., Administrator). 1. As described in Getting Connected and Installing Drivers (Windows) (p. 14) and Getting Connected and Installing Drivers (Macintosh) (p. 24), install only one unit. * Do not connect the second and third UM-3EX units. -
Page 44: Connection Examples
Connection examples ■ Connecting two UM-3EX units fig.double-e.eps_67 Set this to Set this to MASTER. First unit Set this to Set this to Connect to the USB connector SLAVE. of your computer. Connect to the UM-3EX connector of the first unit (MASTER). - Page 45 ■ Connecting three UM-3EX units fig.triple-e.eps_67 Set this to Set this to MASTER. First unit Set this to Set this to Connect to the SLAVE. USB connector of your computer. Connect to the Second unit UM-3EX connector of the first unit (MASTER) Set this to Set this to...
- Page 46 Don’t make connections like the following. UM-3EX set to SLAVE and connected to a computer fig.ng-double-e.eps_70 Set this to Set this to MASTER. SLAVE. First unit UM-3EX set to MASTER and connected to a UM-3EX connector fig.ng-double2-e.eps_70 Set this to Set this to SLAVE.
-
Page 47: Troubleshooting
Troubleshooting If you experience problems, read this chapter first. It contains tips for solving most problems. * For details on operating your Windows or Macintosh computer, refer to the owner’s manual of the computer and operating system you are using. Problems Related to the USB Driver Cannot install the driver correctly Install the UM-3EX driver once again as described in “Getting Connected and Installing Drivers... - Page 48 Is your computer’s power-conservation mode turned off? If power-conservation settings are enabled on your computer, please disable any such settings. For the procedure, refer to the owner’s manual of your computer. Is there sufficient free space on your hard disk? Delete unneeded files to increase the amount of free space.
- Page 49 You are asked to install the driver file even though you installed the driver (Windows) Could the MODE select switch of the UM-3EX that’s connected to your computer be set to SLAVE? Set the UM-3EX’s MODE select switch to MASTER, and reconnect it. Did you connect the UM-3EX to a different USB connector than the one you used when installing the driver? If your computer or USB hub has two or more USB connectors, and you connect the UM-3EX to a...
- Page 50 Windows XP/2000 displays a “Hardware Installation” or “Digital Signature Not Found” dialog box Did you make “Driver Signing Options”? In order to install/re-install the driver, you must make the settings described in “Driver Signing Options” (p. 16). “Find new hardware wizard” does not execute automatically “Find new hardware wizard”...
- Page 51 UM-3EX is not detected when making OMS or FreeMIDI settings (Mac OS 9 users) Is the UM-3EX detected? • Reconnect the UM-3EX. • If other USB devices are connected, connect only the UM-3EX. • It is possible that the Macintosh did not correctly detect and initialize the UM-3EX. Leave the UM-3EX connected, and restart your Macintosh.
- Page 52 Deleting the Driver If you were unable to install the driver according to the procedure given, the UM-3EX may not be recognized correctly by the computer. In this case, use the following procedure to delete the driver, and then follow the procedure to install the driver once again. Windows users 1.
- Page 53 Macintosh (Mac OS X) users 1. Start up Macintosh with the UM-3EX disconnected. Disconnect all USB cables other than a USB keyboard or USB mouse. 2. Prepare the CD-ROM. Insert the CD-ROM into the CD-ROM drive of your Macintosh. 3. In the Driver (Mac OS X) folder of the CD-ROM, double-click “UM3_Uninstaller.” 4.
- Page 54 Problems When Using the UM-3EX Sound is interrupted during MIDI playback In Windows XP/2000, did you make the setting described in “Giving priority to background services”? In order to ensure that MIDI processing occurs smoothly, make the setting described in “Giving priority to Background Services”...
- Page 55 Operating system becomes unstable Operation becomes unstable when the computer is started up with the UM-3EX already connected Please start up your computer with the UM-3EX disconnected, and then connect the UM-3EX. On a computer that uses a USB keyboard, starting up the computer with the UM-3EX already connected may cause operation to become unstable.
-
Page 56: Main Specifications
Main Specifications ■ UM-3EX: USB MIDI Interface Controllers THRU switch 1 THRU switch 2 THRU switch 3 MODE select switch UNIT number select switch Connectors MIDI IN Connector x 3 (16 MIDI Channels x 3) MIDI OUT/THRU Connector x 3 (16 MIDI Channels x 3) USB Cable UM-3EX Connector x 2 Power Supply... - Page 57 Memo...
-
Page 58: Name Und Funktion Der Bedienungselemente
Name und Funktion der Bedienungselemente Vorderseite fig.front.eps_25 MIDI IN Anschlüsse Hier stellen Sie eine Verbindung mit den MIDI OUT Anschlüssen der Geräte her (wie beispielsweise mit einem MIDI Keyboard), die MIDI-Signale an Ihren Computer senden werden. MIDI OUT/THRU Anschlüsse Hier stellen Sie eine Verbindung mit den MIDI IN Anschlüssen der Soundmodule oder der anderen Geräte her, an die Sie MIDI-Signale von Ihrem Computer zur Wiedergabe senden werden. - Page 59 ■ ON/OFF Einstellungen der THRU Schalter Sie können die THRU Schalter verwenden, um die Übertragungsziele der MIDI-Signale von den Geräten (MIDI Keyboard, digitales Klavier etc.) zu wählen, die an die MIDI IN Anschlüsse angeschlossen sind. Die Kabelanschlüsse müssen dazu nicht verändern. MIDI-Signale, die an dem entsprechenden MIDI IN Anschluss empfan- THRU Schalter: gen werden, werden an Ihren Computer (Sequenzersoftware) gesendet.
-
Page 60: Rückseite
Rückseite fig.rear.eps_25 USB-Kabel Schließen Sie das Kabel an den USB-Anschluss Ihres Computers an. MODE Wahlschalter Mit diesem Schalter kann eingestellt werden, ob das UM-3EX als Master- oder als Slave-Gerät arbeiten soll. Wenn nur ein einzelnes Wählen Sie die Einstellung MASTER, wenn Sie nur ein UM-3EX UM-3EX verwendet wird verwenden. - Page 61 UNIT Nummer-Wahlschalter Bezeichnet die UNIT Nummer (Gerätenummer) des UM-3EX. Wenn Sie mehrere UM-3EX anschließen, müssen Sie bei jedem Gerät die UNIT Nummer entspre- chend einstellen. Dabei erhält jedes UM-3EX eine unterschiedliche UNIT Nummer. * Verändern Sie die Einstellung des UNIT Wahlschalters nicht, solange das UM-3EX an Ihren Computer angeschlossen ist.
-
Page 62: Anschlüsse Herstellen Und Treiber Installieren (Windows)
Anschlüsse herstellen und Treiber installieren (Windows) Vor dem Installieren des Treibers Im Folgenden finden Sie die Beschreibung der Installation eines einzelnen UM-3EX. Wenn Sie mit dem Betriebssystem Windows XP arbeiten, können Sie gleichzeitig bis zu drei UM-3EX Geräte über USB an einen Computer anschließen. * Der Anschluss mehrerer Geräte wird jedoch nur von Windows XP unterstützt. -
Page 63: Treiber Installieren
Treiber installieren Was ist ein Treiber? Ein “Treiber” ist eine Software, die Daten zwischen UM-3EX und der Anwendungssoftware auf Ihrem Computer überträgt, wenn Ihr Computer und UM-3EX miteinander verbunden sind. Der Treiber übermittelt Daten von Ihrer Anwendungssoftware an das UM-3EX und umgekehrt. Schritte, die am UM-3EX vorgenommen werden müssen, sind mit gekennze- Operation of the UM-3EX... - Page 64 5. Klicken Sie auf [OK] zum Schließen des Dialogfelds Systemeigenschaften. 6. Beenden Sie alle aktuell ausgeführten Programme (Anwendungen). Schließen Sie außerdem alle noch geöffneten Programmfenster. Wenn Sie eine Anti-Virus- oder ähnliche Software benutzen, müssen Sie diese Programme ebenfalls beenden. 7. Halten Sie die CD-ROM bereit. Legen Sie die CD-ROM in das CD-ROM-Laufwerk Ihres Computers.
- Page 65 Stellen Sie den MODE Wahlschalter des UM-3EX auf MASTER. Operation of the UM-3EX Stellen Sie den UNIT Nummer-Wahlschalter des UM-3EX auf 1. Operation of the UM-3EX Schließen Sie nur ein UM-3EX an Ihren Computer an. Operation of the UM-3EX Die Mitteilung “Neue Hardware gefunden” erscheint. Bitte warten Sie. * Dieses Gerät ist mit einem Schutzschaltkreis ausgestattet.
-
Page 66: Anschlüsse Herstellen Und Treiber Installieren (Macintosh)
Anschlüsse herstellen und Treiber installieren (Macintosh) Vor dem Installieren des Treibers Im Folgenden finden Sie die Beschreibung der Installation eines einzelnen UM-3EX. Wenn Sie mit dem Betriebssystem Mac OS X arbeiten, können Sie gleichzeitig bis zu drei UM-3EX Geräte über USB an einen Macintosh anschließen. * Der Anschluss mehrerer Geräte wird nur von Mac OS X unterstützt. -
Page 67: Installation Und Einstellungen Des Treibers
Installation und Einstellungen des Treibers Was ist ein Treiber? Ein “Treiber” ist eine Software, die Daten zwischen UM-3EX und der Anwendungssoftware auf Ihrem Macintosh überträgt, wenn Ihr Macintosh und UM-3EX miteinander verbunden sind. Der Treiber übermittelt Daten von Ihrer Anwendungssoftware an das UM-3EX und umgekehrt. Schritte, die am UM-3EX vorgenommen werden müssen, sind mit Operation of the UM-3EX gekennzeichnet. - Page 68 8. In der Anzeige erscheint “Installing this software requires you to restart your computer when the installation is done” (Neustart nach Installation erforderlich). Klicken Sie auf [Continue Installation] (Installation fortsetzen). 9. In der Anzeige erscheint “The software was successfully installed” (Die Software wurde erfolgre- ich installiert).
- Page 69 6. Stellen Sie sicher, dass 1: UM-3 im Dialogfenster des Audio MIDI Setup erscheint. * Die Nummer “1:” zu Beginn des Gerätes ist die Gerätenummer des UM-3EX. Dieser Wert ist abhängig von der Einstellung des UNIT Nummer-Wahlschalters. * Wenn “1: UM-3” nicht erscheint oder grau unterlegt ist, wurde das UM-3EX nicht korrekt erkannt. Klicken Sie dann auf Rescan MIDI.
- Page 70 9. Ziehen Sie Mit der Maus die Symbole ▼ und ▲, die für die Eingänge und Ausgänge des 1: UM-3 und des neuen externen Gerätes stehen, dass sie folgendermaßen verbunden sind. fig.osx-9de.eps_61 Stellen Sie durch Ziehen mit der Maus eine Verbindung her 10.
- Page 71 11. Klicken Sie auf Test Setup. Die Form des Mauszeigers verändert sich fig.osx-10de.eps_61 11, 13 Test Setup Auf das Symbol klicken 12. Klicken Sie auf den in der Illustration gezeigten Bereich. Wenn die entsprechende MIDI OUT Anzeige des UM-3EX blinkt, sind die Einstellungen korrekt. 13.
-
Page 72: Anhang
Anhang Anschluss mehrerer UM-3EX Geräte Wenn Sie mit den Betriebssystemen Windows XP oder Mac OS X arbeiten, können Sie gleichzeitig bis zu drei UM-3EX Geräte über USB an einen einzelnen Computer anschließen. Abhängig von dem von Ihnen verwendeten Computersystem kann das zweite oder dritte Gerät unter Umständen nicht funktionieren, weil Prozessorgeschwindigkeit, Speicherplatz auf der Festplatte und Leistung Ihrer Software möglicher- weise nicht ausreichen. - Page 73 Einstellungen der MODE Wahlschalter und UNIT Nummer-Wahlschalter • Wählen Sie die Einstellung MASTER bei dem UM-3EX, das an den Computer angeschlossen ist. MODE Wahlschalter • Wählen Sie die Einstellung SLAVE bei den UM-3EX, die an den UM-3EX Anschluss angeschlossen sind. •...
-
Page 74: Description
Description Face avant fig.front.eps_25 Connecteurs MIDI IN Permettent le branchement des connecteurs MIDI OUT des périphériques (par ex. un clavier MIDI) qui transmettront des signaux MIDI à votre ordinateur. Connecteurs MIDI OUT/THRU Permet le branchement des connecteurs MIDI IN de modules de sonorisation ou d’autres périphé- riques vers lesquels l’ordinateur envoie des messages MIDI pour les lire. - Page 75 ■ Paramétrage ON/OFF des commutateurs THRU Les commutateurs THRU permettent de sélectionner les destinations de transmission des messages MIDI provenant des périphériques (clavier MIDI, piano numérique, etc.) branchés sur les connecteurs MIDI IN. Il n’est pas nécessaire de modifier les connexions des câbles. les messages MIDI arrivant par le connecteur MIDI IN correspondant Commutateur THRU : sont envoyés vers votre ordinateur (logiciel séquenceur).
-
Page 76: Face Arrière
Face arrière fig.rear.eps_25 Câble USB Connecter ce câble sur le connecteur USB de votre ordinateur. Sélecteur de MODE Ce sélecteur permet de déterminer si l’UM-3EX fonctionne en maître ou en esclave. Lorsqu’une seule unité UM-3EX Sélectionner MASTER lorsqu’une seule unité UM-3EX est est utilisée utilisée. - Page 77 Sélecteur du numéro d’UNITÉ Définit le d’UNITÉ de l’UM-3EX. Lorsque plusieurs unités UM-2EX sont connectées, le sélecteur doit définir correctement le numéro de chacune. Sélectionner un numéro d’UNITÉ différent pour chaque UM-3EX. * Ne pas modifier le numéro d’UNITÉ pendant que l’UM-3EX est connecté à l’ordinateur. Avant toute chose, débrancher l’UM-3EX de l’ordinateur.
-
Page 78: Connexion Et Installation Des Pilotes (Windows)
Connexion et installation des pilotes (Windows) Avant d’installer le pilote Procédure d’installation d’un seul UM-3EX. Si vous utilisez Windows XP, vous pouvez connecter simultanément jusqu’à trois unités UM-3EX à un seul ordinateur via USB. * Seul Windows XP prend en charge la connexion d’unités multiples. Pour plus d'informations, voir “Connexion de plusieurs unités UM-3EX”... -
Page 79: Installation Du Pilote Spécial
Installation du pilote spécial Qu'est-ce qu'un pilote ? Un “pilote” est un logiciel qui sert à transférer les données entre l’UM-3EX et le logiciel tournant sur votre ordinateur, lorsque votre ordinateur et l’UM-3EX sont reliés. Le pilote transmet les données de l'application à... - Page 80 5. Cliquer sur [OK] pour fermer la boîte de dialogue Propriétés système. 6. Fermer tous les logiciels (applications) actifs. Fermer également toutes les fenêtres éventuellement ouvertes. Tout programme de type antivirus, etc., en cours d’exécution doit être fermé également. 7. Se munir du CD-ROM et l’introduire dans le lecteur de l’ordinateur.
- Page 81 12. Placer le sélecteur de MODE de l’UM-3EX sur la position MASTER. Operation of the UM-3EX Positionner le Sélecteur du numéro d’UNITÉ de l'UM-3EX sur 1. Operation of the UM-3EX Ne connecter qu'un seul UM-3EX sur l'ordinateur. Operation of the UM-3EX Le message “Nouveau matériel détecté”...
-
Page 82: Connexions Et Installation Des Pilotes (Macintosh)
Connexions et installation des pilotes (Macintosh) Avant d’installer le pilote Procédure d’installation d’un seul UM-3EX. Les utilisateurs de Mac OS X peuvent connecter simultanément jusqu’à trois unités UM-3EX sur un seul Macintosh via USB. * Seul Mac OS X prend en charge la connexion d’unités multiples. Pour plus d'informations, voir “Connexion de plusieurs unités UM-3EX”... -
Page 83: Installation Et Configuration Du Pilote
Installation et configuration du pilote Qu'est-ce qu'un pilote ? Un “pilote” est un logiciel qui sert à transférer les données entre l’UM-3EX et le logiciel tournant sur le Macintosh lorsque celui-ci et l’UM-3EX sont reliés. Le pilote transmet les données de l'application à l'UM-3EX et vice-versa. - Page 84 9. Le message “The software was successfully installed” s’affiche une fois l'installation du logiciel terminée. Cliquer sur [Restart] pour redémarrer le Macintosh. L'installation du pilote UM-3EX est terminée. Procéder ensuite au paramétrage du périphérique MIDI. (➔“Réglage du pilote” (p. 84)) ■...
- Page 85 6. Vérifier que 1: UM-3 apparaît dans la boîte de dialogue Audio MIDI Setup. * Le numéro “1:” au début du nom de périphérique est le numéro d'unité du UM-3EX. Ce numéro dépend de la position du sélecteur de numéro de l'unité. * Si “1: UM-3”...
- Page 86 9. À l'aide de la souris, déplacer les symboles ▼ et ▲ correspondant aux entrées et sorties de l'icône 1: UM-3 et sur les icônes des nouveaux périphériques externes pour les connecter comme suit. fig.osx-9fr.eps_61 Déplacer la connexion voulue à l’aide de la souris.
- Page 87 11. Cliquer sur Test Setup. Le curseur de la souris change de forme fig.osx-10fr.eps_61 11, 13 Test Setup Cliquer sur l’icône 12. Cliquer sur la zone indiquée dans l’illustration. Si le témoin MIDI OUT correspondant de l’UM-3EX clignote, cela veut dire que le paramétrage est correct. 13.
-
Page 88: Annexes
Annexes Connexion de plusieurs unités UM-3EX Les utilisateurs de Windows XP ou Mac OS X peuvent connecter simultanément jusqu'à trois unités UM-3EX sur un seul ordinateur via USB. En fonction du système utilisé, la seconde unité ou l’unité suivante ne sera peut-être pas utilisable. Cela dépend des limites imposées par la vitesse de l’unité centrale, le disque dur, la mémoire et les performances de votre logiciel. - Page 89 Réglage du sélecteur de MODE et du sélecteur de numéro d'UNITÉ • Sélectionner le paramètre MASTER pour l’unité UM-3EX connectée à l’ordinateur. Sélecteur de MODE • Sélectionner le paramètre SLAVE pour les unités UM-3EX branchées sur le connecteur UM-3EX. • Régler la première unité sur 1. •...
-
Page 90: Nomi E Funzioni Degli Elementi
Nomi e funzioni degli elementi Pannello frontale fig.front.eps_25 Connettori MIDI IN Collegare ai connettori MIDI OUT dei dispositivi (ad esempio la tastiera MIDI) che trasmetteranno i messaggi MIDI al computer. Connettori MIDI OUT/THRU Collegare ai connettori MIDI IN dei moduli sonori o altri dispositivi ai quali verranno inviati i messaggi MIDI dal computer per la riproduzione. - Page 91 ■ Impostazioni ON/OFF degli interruttori THRU È possibile utilizzare gli interruttori THRU per selezionare le destinazioni di trasmissione per i messaggi MIDI dai dispositivi (tastiera MIDI, piano digitale, ecc...) collegati ai connettori MIDI IN. Non è necessario cambiare le connessioni dei cavi. I messaggi MIDI che giungono dal connettore MIDI IN corrispondente Interruttore THRU: sono inviati al computer (software sequencer).
-
Page 92: Pannello Posteriore
Pannello posteriore fig.rear.eps_25 Cavo USB Collegarlo al connettore USB del computer. Interruttore di selezione modo (MODE) L’UM-3EX può essere impostato per funzionare come dispositivo principale o come dispositivo secondario utilizzando questo interruttore. Se si utilizza un’unica unità Selezionare l’impostazione MASTER se si utilizza un’unica unità UM-3EX. - Page 93 Interruttore di selezione numero unità (UNIT) Specifica il numero unità dell’UM-3EX. Se si collegano più unità UM-3EX, è necessario impostare l’interruttore UNIT di ogni unità in modo opportuno. Impostare ogni UM-3EX su un numero UNIT diverso. * Non modificare l’impostazione dell’interruttore di selezione UNIT mentre l’UM-3EX è collegato al computer.
-
Page 94: Collegamento E Installazione Dei Driver (Windows)
Collegamento e installazione dei driver (Windows) Prima di installare il driver Procedura per l’installazione di un singolo UM-3EX. Se si sta utilizzando Windows XP, è possibile collegare contemporaneamente fino a tre unità UM-3EX a un solo computer tramite USB. * La connessione di più unità è supportata solo su Windows XP. Per ulteriori informazioni fare riferimento alla sezione “Collegare più... -
Page 95: Installazione Del Driver
Installazione del driver Definizione di un driver Un “driver” è il software che trasferisce i dati tra l’UM-3EX e il programma utilizzatosul computer, quando il computer e l’UM-3EX sono collegati. Il driver trasmette i dati dall’applicazione all’UM-3EX e viceversa. I passi da eseguire sull’UM-3EX stesso sono indicati con il simbolo Operation of the UM-3EX Utenti Windows XP/2000 1 Avviare Windows con l’UM-3EX scollegato. - Page 96 5 Fare clic su [OK] per chiudere la finestra di dialogo Proprietà del sistema. 6 Chiudere tutti i programmi in esecuzione. Chiudere inoltre tutte le finestre aperte. Se si utilizza un antivirus o un programma simile, chiuderlo. 7 Preparare il CD-ROM. Inserire il CD-ROM nell’apposita unità...
- Page 97 Impostare l’interruttore di selezione MODE dell’UM-3EX su MASTER. Operation of the UM-3EX Impostare l’interruttore di selezione UNIT dell’UM-3EX su 1. Operation of the UM-3EX Collegare solo una UM-3EX al computer. Operation of the UM-3EX Viene visualizzato il messaggio “Found New Hardware” (Trovato nuovo hardware) Attendere. * Questo apparecchio è...
-
Page 98: Collegamento E Installazione Dei Driver (Macintosh)
Collegamento e installazione dei driver (Macintosh) Prima di installare il driver Procedura per l’installazione di un singolo UM-3EX. Se si sta utilizzando Mac OS X, è possibile collegare contemporaneamente fino a tre unità UM-3EX a un solo Macintosh tramite USB. * La connessione di molteplici unità... -
Page 99: Installazione E Configurazione Del Driver
Installazione e configurazione del driver Definizione di un driver Un “driver” è il software che trasferisce i dati tra l’UM-3EX e il programma utilizzato sul Macintosh, quando il Macintosh e l’UM-3EX sono collegati. Il driver trasmette i dati dall’applicazione all’UM-3EX e viceversa. - Page 100 9 Verrà visualizzato il seguente messaggio “The software was successfully installed” (Il software è stato installato in modo corretto). Fare clic su [Restart] per riavviare il Macintosh. L’installazione del driver UM-3EX è giunta al termine. Successivamente, configurare il dispositivo MIDI. (➔“Configurazione del driver” (p. 100)) ■...
- Page 101 6 Verificare che 1: UM-3 viene visualizzato nella finestra di dialogo Audio MIDI Setup. * Il numero “1:” davanti al nome del dispositivo corrisponde al numero dell’unità dell’UM-3EX. Questo valore dipende dalle impostazioni dell’interruttore di selezione UNIT. * Se “1: UM-3 non viene visualizzato o se non è attivo, significa che l’UM-3EX non è stato riconosciuto in modo corretto.
- Page 102 9 Utilizzare il mouse per trascinare i simboli ▼ e ▲ che indicano i segnali in ingresso e quelli in uscita dell’icona 1: UM-3 e delle icone nuovo dispositivo esterno in modo tale che risultino collegati come segue. fig.osx-9it.eps_61 Utilizzare il mouse per trascinare una connessione 10 Se si sta utilizzando Mac OS X v10.2:...
- Page 103 11 Fare clic su Test Setup. La forma del cursore del mouse cambia fig.osx-10it.eps_61 11, 13 Test Setup Fare clic sull’icona 12 Fare clic sull’area raffigurata nell’immagine. Se l’indicatore MIDI OUT corrispondente dell’UM-3EX lampeggia, le impostazioni sono corrette. 13 Fare clic su Test Setup e completare la verifica. 14 Chiudere la finestra di dialogo Audio MIDI Setup.
-
Page 104: Appendici
Appendici Collegare più unità UM-3EX Se si sta utilizzando Windows XP o Mac OS X, è possibile collegare contemporaneamente fino a tre unità UM-3EX a un solo computer tramite USB. A seconda del sistema, la seconda unità o quella successiva potrebbero non essere utilizzabili in base alle limitazioni imposte da velocità di elaborazione della CPU, disco fisso, memoria e prestazioni del software. - Page 105 Impostazioni degli interruttori di selezione MODE e UNIT • Selezionare l’impostazione MASTER per l’UM-3EX collegato al computer. Interruttore di selezione MODE • Selezionare l’impostazione SLAVE per le unità UM-3EX che sono collegate al connettore UM-3EX. • Impostare la prima unità su 1. •...
-
Page 106: Nombres De Los Diferentes Elementos Y Sus Funciones
Nombres de los diferentes elementos y sus funciones Panel frontal fig.front.eps_25 Conectores de entrada MIDI (MIDI IN) Conéctelos a los conectores de salida MIDI (MIDI OUT) de los dispositivos (como un teclado MIDI) que transmitirán mensajes MIDI a su PC. Conectores de salida MIDI/transmisión (MIDI OUT/THRU) Conéctelos a los conectores MIDI IN (entrada MIDI) de los módulos de sonido u otros dispositivos a los que enviará... - Page 107 ■ Ajustes de activado/desactivado (ON/OFF) de los interruptores THRU (transmisión) Puede utilizar los interruptores THRU (transmisión) para seleccionar los destinos de transmisión de los mensajes MIDI de los dispositivos (teclado MIDI, piano digital, etc.) conectados a los conectores MIDI IN (entrada MIDI). No es necesario cambiar ninguna conexión de cables.
-
Page 108: Panel Posterior
Panel posterior fig.rear.eps_25 Cable USB Conéctelo al conector USB del PC. Interruptor de selección de modo (MODE) La unidad UM-3EX puede ajustarse para funcionar como dispositivo maestro o dispositivo esclavo por medio de este interruptor. Cuando utilice una única unidad Seleccione el ajuste MASTER (maestro) si está... - Page 109 Interruptor de selección de número de unidad (UNIT) Especifica el número de unidad (UNIT) de la UM-3EX. Si conecta varias unidades UM-3EX, deberá establecer correctamente el ajuste de selección de número UNIT (unidad) de cada unidad. Ajuste cada unidad UM-3EX en un número UNIT (unidad) diferente. * No cambie el ajuste del interruptor de selección de número UNIT mientras la UM-3EX esté...
-
Page 110: Conexión E Instalación De Los Controladores (Windows)
Conexión e instalación de los controladores (Windows) Antes de instalar el controlador A continuación, se indica el procedimiento para instalar una única unidad UM-3EX. Si utiliza Windows XP, puede conectar simultáneamente hasta tres unidades UM-3EX a un único PC a través de USB. * La conexión de varias unidades sólo se admite en Windows XP. -
Page 111: Instalación Del Controlador
Instalación del controlador ¿Qué es un controlador? Un “controlador” es software que transfiere datos entre la unidad UM-3EX y el software de aplicación que se esté ejecutando en su PC, cuando éste y la unidad UM-3EX estén conectados. El controlador envía datos de la aplicación a la unidad UM-3EX, y de la UM-3EX a la aplicación. Los pasos que deben realizarse en la propia unidad UM-3EX aparecen marcados con el símbolo Operation of the UM-3EX Usuarios de Windows XP/2000... - Page 112 5. Haga clic en [Aceptar] para cerrar el cuadro de diálogo Propiedades del sistema. 6. Salga de todos los programas de software (aplicaciones) que esté ejecutando. Cierre todas las ventanas que estén abiertas. Si está utilizando un antivirus o software similar, deberá cerrar todos estos programas.
- Page 113 Ajuste el interruptor de selección MODE (modo) de la unidad UM-3EX en Operation of the UM-3EX MASTER (maestro). Ajuste el interruptor de selección de número UNIT (unidad) de la UM-3EX Operation of the UM-3EX en 1. Conecte sólo una unidad UM-3EX al PC. Operation of the UM-3EX Aparecerá...
-
Page 114: Conexión E Instalación De Los Controladores (Macintosh)
Conexión e instalación de los controladores (Macintosh) Antes de instalar el controlador A continuación, se indica el procedimiento para instalar una única unidad UM-3EX. Si utiliza Mac OS X, puede conectar simultáneamente hasta tres unidades UM-3EX a un único Macintosh a través de USB. * La conexión de varias unidades sólo se admite en Mac OS X. -
Page 115: Instalación Del Controlador Y Ajustes
Instalación del controlador y ajustes ¿Qué es un controlador? Un “controlador” es software que transfiere datos entre la unidad UM-3EX y el software de aplicación que se esté ejecutando en su Macintosh, cuando éste y la unidad UM-3EX estén conectados. El controlador envía datos de la aplicación a la unidad UM-3EX, y de la UM-3EX a la aplicación. - Page 116 8. Aparecerá el mensaje “Installing this software requires you to restart your computer when the installation is done” (Para instalar este software deberá reiniciar el equipo en el que se realizó la instalación). Haga clic en [Continue installation] (continuar con la instalación). 9.
- Page 117 fig.osx-4sp.eps_60 Haga clic en MIDI Devices Haga clic en Add Device Haga clic en Show Info 5. Haga clic en la ficha MIDI Devices (dispositivos MIDI). 6. Confirme que 1: UM-3 aparece en el cuadro de diálogo Audio MIDI Setup. * El número “1:”...
- Page 118 9. Utilice el ratón para arrastrar los símbolos ▼ y ▲ que indican las entradas y salidas del icono 1: UM-3 y los iconos de dispositivo externo nuevo de tal forma que se conecten de la siguiente manera. fig.osx-9sp.eps_61 Utilice el ratón para arrastrar una conexión 10.
- Page 119 11. Haga clic en Test Setup (probar configuración) Cambia la forma del cursor del ratón fig.osx-10sp.eps_61 11, 13 Test Setup Haga clic en el icono 12. Haga clic en el área que se muestra en la ilustración. Si el indicador MIDI OUT (salida MIDI) correspondiente de la unidad UM-3EX parpadea, significa que los ajustes son correctos.
-
Page 120: Apéndices
Apéndices Conexión de varias unidades UM-3EX Si utiliza Windows XP o Mac OS X, puede conectar simultáneamente hasta tres unidades UM-3EX a un único PC a través de USB. Dependiendo del sistema, es posible que la segunda unidad o la unidad siguiente no puedan utilizarse en función de las limitaciones impuestas por la velocidad de procesamiento de la CPU, el disco duro, la memoria y el rendimiento del software. - Page 121 Configuración de interruptor de selección MODE (modo) e interruptor de selección de número UNIT (unidad) • Seleccione el ajuste MASTER (maestro) para la unidad UM-3EX que esté conectada al PC. Interruptor de selección MODE (modo) • Seleccione el ajuste SLAVE (esclavo) para las unidades UM-3EX que estén conectadas al conector de la UM-3EX.
-
Page 122: Index
Index ..................... Add Device rack mount adaptor ............... RAF-70 ........– Background Services ....................BUS Power Single instrument ..............SLAVE ....Sounds and Audio Devices Properties ....Connecting multiple UM-3EX units ...... Sounds and Multimedia Properties .......... System Properties ............ - Page 123 Memo...
- Page 124 When you need repair service, call your nearest EDIROL/Roland Service Center or authorized Information EDIROL/Roland distributor in your country as shown below. SOUTH AFRICA MALAYSIA/ ECUADOR CENTRAL/LATIN SINGAPORE Paul Bothner(PTY)Ltd. Mas Musika AMERICA Royal Cape Park, Unit 24 Rumichaca 822 y Zaruma Roland Asia Pacific Sdn.
- Page 125 Amman 11192 JORDAN ITALY HOLLAND/ Landstrasse 5, Postfach, TEL: (06) 5692696 Beyoglu - Istanbul / TURKEY LUXEMBOURG Roland Italy S. p. A. CH-4452 Itingen, TEL: (0212) 249 85 10 KUWAIT Viale delle Industrie 8, SWITZERLAND Roland Central Europe N.V. U.A.E.
- Page 126 Memo...
- Page 127 For the USA DECLARATION OF CONFORMITY Compliance Information Statement Model Name : UM-3EX Type of Equipment : USB MIDI Interface Responsible Party : Roland Corporation U.S. Address : 5100 S. Eastern Avenue, Los Angeles, CA 90040-2938 Telephone : (323) 890 3700...