Table des Matières
Publicité
Liens rapides
10049036-041213
Manuel du propriétaire
Owner's Manual
™
ELEMENT
ELEMENT
™
P P H H A A R R M M A A C C I I E E P P O O R R T T E E S S I I M M P P L L E E / / S S I I N N G G L L E E D D O O O O R R C C A A B B I I N N E E T T
22
4
5
9
2
18
7
23
21
20
24
12
11
8
14
7
10
13
16
6
17
1
18
3
5
15
9
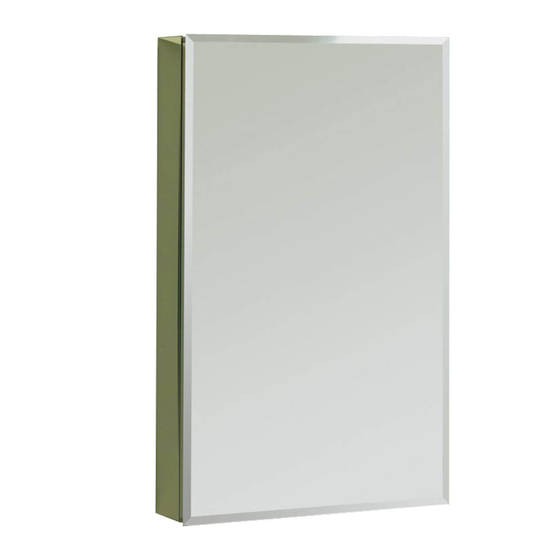
Illustration du cabinet SV2024, #124902 installé en surface
Picture of the SV2024, #124902 cabinet surface mounted
Veuillez lire les instructions avant de commencer
Please read instructions before proceeding
Publicité
Table des Matières

Manuels Connexes pour MAAX ELEMENT 124902

Sommaire des Matières pour MAAX ELEMENT 124902
- Page 1 10049036-041213 Manuel du propriétaire Owner’s Manual ™ ELEMENT ELEMENT ™ P P H H A A R R M M A A C C I I E E P P O O R R T T E E S S I I M M P P L L E E / / S S I I N N G G L L E E D D O O O O R R C C A A B B I I N N E E T T Illustration du cabinet SV2024, #124902 installé...
- Page 2 ILLUSTRATION DES PIÈCES ILLUSTRATION OF COMPONENTS Drawings not to scale Dessins non à l’échelle SAC DE QUINCAILLERIE (10049319) HARDWARE BAG (10049319) SAC DE QUINCAILLERIE (10049317) HARDWARE BAG (10049317) Des changements peuvent être apportés aux produits sans préavis. Veuillez utiliser le manuel fourni avec le produit. Des pièces supplémentaires ont été...
-
Page 3: Avant De Débuter
AVANT DE DÉBUTER BEFORE STARTING Lors de la réception, vérifiez si votre cabinet Carefully remove your cabinet from its pack- et ses pièces sont en bonne condition et si toutes les aging and ensure that all the components are in good pièces sont incluses dans le sac de quincaillerie. - Page 4 DESCRIPTION DES PRODUITS PRODUCTS DESCRIPTION # PRODUIT # OUVERTURE MURALE (L X H X P) NOM DU PRODUIT DIMENSIONS GÉNÉRALES (L X H X P) # PRODUCT # PRODUCT NAME WALL OPENING (W X H X D) OVERALL DIMENSIONS (W X H X D) 124902 SV2024 20 X 24 X4.5...
-
Page 5: Installation Instruction
Guide d’installation Installation Instruction STEP 1 - Door’s support installation ÉTAPE 1 - Installation du support pour la porte Fixez le support pour la porte (21) au cabi- Secure the door support (21) to the cabinet box net (24) à l’aide des vis hexagonales (7) et (24) using eight (7) button head screws. -
Page 6: Étape 3 - Installation Encastrée
ÉTAPE 3 Installation encastrée STEP 3 - Recess mount installation Deux montants de bois dans le mur sont néces- Arrange the wall opening with wall studs on saires, un de chaque côté du boîtier. both sides of the cabinet. **IMPORTANT** Pour l’installation encastrée, il faut **IMPORTANT** For the recess mount installation, au préalable avoir assemblé... -
Page 7: Étape 3B - Installation De L'espaceur
ÉTAPE 3B - Installation de l’espaceur STEP 3B - Recess spacer installation Appliquez le ruban de mousse adhésive (15) Using the miroir tape pads (15) from the cab- fournie dans le sac de quincaillerie du cabi- inet hardware bag, apply the pads onto the net sur le rebord du boîtier (24).Veuillez cabinet box (24) flanges.Please note that noter que les rubans appliqués aux... -
Page 8: Étape 3C - Installation Du Boîtier
ÉTAPE 3C - Installation du boîtier STEP 3C - Cabinet box installation Déterminez l’emplacement du cabinet et Prepare wall opening to the required dimen- préparez l’ouverture dans le mur aux dimen- sions according to the cabinet model (24) sions requises selon le modèle du boîtier (see products description on page 4). - Page 9 ÉTAPE 4 Installation en surface STEP 4 - Surface mount installation Déterminez l’emplacement du cabinet. Nivelez et Position the cabinet at the desired emplacement. marquez le dessous du boîtier (24). La distance Level and make a mark underneath the cabinet entre le plus haut point de la robinetterie et le (24).
-
Page 10: Installation Des Miroirs Latéraux
ÉTAPE 5 STEP 5 - Side mirrors installation - Installation des miroirs latéraux Seulement dans le cas d’un installation du Only in a surface mounting installation. cabinet en surface. Fixez deux supports de miroir (5) de chaque Fix two side mirrors brackets (5) on each côté... -
Page 11: Étape 6 - Installation De La Porte
ÉTAPE 6 - Installation de la porte STEP 6 - Door installation En utilisant la clé Allen fournie (19) Vissez légère- Install two (7) button head screws with the provide ment 2 vis hexagonales (7) en prenant soin de laisser Allen key (19). -
Page 12: Étape 7 - Installation Des Tablettes
ÉTAPE 7 - Installation des tablettes STEP 7 - Shelves installation Insérez les vis (14) sur les butoirs des sup- Install screw (14) into shelf stop (13) only one ports (13). Serrez environ un tour complet. full turn. **ATTENTION** Screw must not **ATTENTION** Les vis ne doivent pas extend into the cabinet groove. -
Page 13: Nettoyage
NETTOYAGE CLEANING Les nettoyeurs ménagers liquides doux Mild liquid household cleaners will keep sont suffisants pour garder la surface pro- the metal surface bright and clean. Rinse pre et brillante. Rincez à fond et asséchez well and dry with a clean cloth. avec un chiffon propre. -
Page 14: Garantie Limitée
MAAX procédera à la réparation ou au remplacement (avec un produit de même valeur), à sa discrétion, de tout produit dont le défaut sera rapporté au détaillant autorisé ou à MAAX durant la période de garantie. Cette garantie s’applique au propriétaire/utilisateur original et n’est pas transférable à un propriétaire subséquent. -
Page 15: Garantie De Service
EXPRESSE OU IMPLICITE, NI AUCUNE GARANTIE DE QUALITÉ MARCHANDE OU D’ADAPTABILITÉ À UN USAGE PARTICULIER OU DE CONFORMITÉ À UN CODE. Dans tous les cas, MAAX ne peut être tenue responsable de tout montant excédant le prix d’achat du produit déboursé par le propriétaire/utilisateur, l’entrepreneur ou le constructeur. - Page 16 Any product reported to the authorized dealer or to MAAX as being defective within the warranty peri- od will be repaired or replaced (with a product of equal value) at the option of MAAX. This warranty extends to the original owner/end-user and is not transferable to a subsequent owner.
-
Page 17: Warranty & Service
MAAX is not liable for personal injuries or death to any person or for any direct, special, incidental or consequential damage, loss of time, loss of profits, inconvenience, incidental expenses, labor or mate- rial charges, or any other costs resulting from the use of the product or equipment or pertaining to the application of the present warranty, or resulting from the removal or replacement of any product or ele- ment or part covered by this warranty. - Page 18 # 10049036 (041213)
- Page 19 # 10049036 (041213)
- Page 20 # 10049036 (041213)
- Page 21 # 10049036 (041213)
- Page 22 # 10049036 (041213)
- Page 23 # 10049036 (041213)
- Page 24 CANADA Tel.: 1-877-361-2044 Fax: 1-888-361-2045 Tel.:1-800-361-2045 Fax:1-888-361-2045 # 10049036 (041213)