Netatmo NCO01 Guide De L'utilisateur
Table des Matières
Smart Carbon Monoxide Alarm
EN Smart Carbon Monoxide Alarm | User guide
FR Détecteur de Monoxyde Carbone Intelligent | Guide de l'utilisateur
DE Smarter Kohlenmonoxidmelder | Benutzerhandbuch
ES Detector de Monóxido de Carbono Inteligente | Guía del usuario
More languages available at https://coalarm.netatmo.com
IT Rilevatore di Monossido di Carbonio Intelligente | Manuale di istruzioni
NL Slimme Koolmonoxidemelder | Gebruikershandleiding
PT Detetor de Monóxido de Carbono Inteligente | Manual de instruções
NCO01
Table des Matières

Manuels Connexes pour Netatmo NCO01

Sommaire des Matières pour Netatmo NCO01
- Page 1 FR Détecteur de Monoxyde Carbone Intelligent | Guide de l’utilisateur NL Slimme Koolmonoxidemelder | Gebruikershandleiding DE Smarter Kohlenmonoxidmelder | Benutzerhandbuch PT Detetor de Monóxido de Carbono Inteligente | Manual de instruções ES Detector de Monóxido de Carbono Inteligente | Guía del usuario NCO01 More languages available at https://coalarm.netatmo.com...
- Page 2 PT Um vídeo tutorial de instalação está disponível no seguinte endereço: DA Brugervejledningen fås på flere sprog på: CZ Uživatelská příručka v dalších jazykových verzích je k dispozici na adrese: PL Instrukcję obsługi dostępną w innych językach można znaleźć pod adresem: https://coalarm.netatmo.com https://coalarm.netatmo.com...
- Page 3 ES Lee atentamente estas instrucciones antes de empezar la instalación. Conserva la guía del usuario entregada con el producto durante toda su vida útil. El Detector debe ser instalado por una persona capacitada y de conformidad con las instrucciones de esta guía. El Detector activará la alarma a su debido tiempo solamente si está...
-
Page 4: Table Des Matières
Part 1 - Product installation Part 2 - Product use and maintenance Origin of carbon monoxide / Origine du monoxyde de carbone Pack contents / Contenu du pack / Packungsinhalt / Ursachen von Kohlenmonoxid / Origen del monóxido de carbono / Contenido de la caja / Contenuto della confezione / Origine del monossido di carbonio / Herkomst van koolmonoxide / In de doos / Conteùdo da embalagem... -
Page 5: Pack Contents / Contenu Du Pack / Packungsinhalt / Contenido De La Caja / Contenuto Della Confezione / In De Doos / Conteùdo Da Embalagem
Pack contents EN Pack contents: Contenuto della confezione: A. One Smart Carbon Monoxide Alarm A. Un Rilevatore di Monossido di Carbonio with a built-in 10-year battery Intelligente con una batteria integrata con 10 anni di autonomia. B. One wall mount B. -
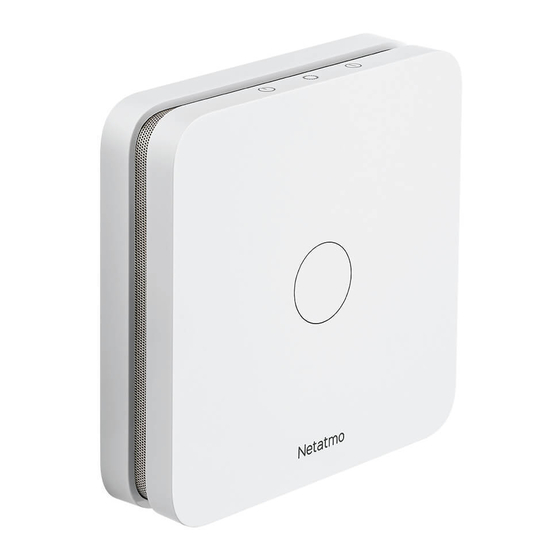
Page 6: Product Overview / Aperçu Du Produit / Produktübersicht / Descripción Del Producto / Descrizione Del Prodotto / Productoverzicht / Descrição Do Produto
EN Product overview Descripción del producto: Product overview A. Carbon monoxide detection vents and alarm A. Aberturas y alarma de detección de monóxido de carbono B. Red LED - Alarm B. LED roja - Alarma C. Orange LED - Fault C. - Page 7 Required tools (not included) EN Required tools (not included): Strumenti per l’installazione (non inclusi): A. One Phillips screwdriver A. Un cacciavite a croce B. One drill – Ø5 mm B. Un trapano – Ø5 mm C. One pencil C. Una matita NL Benodigd gereedschap (niet FR Outils nécessaires (non inclus) : inbegrepen):...
-
Page 8: Location Advice / Choix De L'emplacement / Wahl Des Standorts / Elección De La Ubicación / Scelta Del Punto Di Installazione / Keuze Van Installatie Locatie / Escolha Da Localização
Location advice DE Wahl des Standorts Statten Sie Ihr Haus für einen Komplett-Schutz mit mehreren Smarten Kohlenmonoxidmeldern aus. Es wird empfohlen, einen Smarten Kohlenmonoxidmelder pro Etage, pro Raum mit Brennstoffgerät (Heizkessel, Kamin, Ofen, Gasherd) und pro Raum mit Heizungsrohr (auch wenn dieses verschalt ist) zu installieren. Für optimalen Schutz können Sie je einen zusätzlichen Smarten Kohlenmonoxidmelder in den am meisten verwendeten Wohnräumen sowie in jedem Schlafzimmer installieren. - Page 9 EN Locations to avoid: DE Zu vermeidende Standorte: Do not install the Smart Carbon Monoxide Alarm: Den Smarten Kohlenmonoxidmelder nicht an folgenden Standorten installieren: - Less than 30 cm (12 inches) from the ceiling - Direkt unter der Zimmerdecke, d. h. mit einem Abstand unter 30 cm bis zur Decke - Outside - Im Außenbereich - In a place where the alarm would be difficult to hear, where the Alarm would be difficult to reach, or where the...
- Page 10 IT Posizione sconsigliata: PT Localização a ser evitada: Non installare il Rilevatore di Monossido di Carbonio Intelligente: Não instale o Detetor de Monóxido de Carbono Inteligente: - A meno di 30 cm dal soffitto - A menos de 30 cm do teto - All’aperto - No exterior - In un luogo in cui l’allarme sarebbe difficile da sentire, in cui il Rilevatore sarebbe difficile da raggiungere, in...
- Page 11 DE Ausrichtung Es wird empfohlen, den Melder wie folgt zu installieren: - Mit mehr als 2 m Abstand zu Brenngeräten, im Idealfall mit einem Abstand von maximal 4 m - An einem Ort, an dem der Alarm von allen Schlafzimmern aus gut hörbar ist Smart Carbon - In maximal Ecrire 1,5 m Bodenhöhe Monoxide Alarm...
- Page 12 ES Verificación de la señal Wi-Fi Comprueba con tu smartphone que el lugar elegido para la instalación del Detector de Monóxi- do de Carbono Inteligente beneficia de una señal Wi-Fi suficiente. En caso contrario, intenta acercar tu router Wi-Fi. Cabe señalar que, aunque la conexión Wi-Fi no esté configurada, el Detector de Monóxido de Carbono Inteligente detectará...
- Page 13 Installation DE Installation der Wandhalterung 1. Mit Hilfe der auf den vorherigen Seiten gegebenen Hinweise zur Standortwahl, halten Sie nun die Wandhal- terung an eine geeignete Stelle an die Wand und markieren die zwei Löcher mit einem Bleistift. 2. Bohren Sie die zwei Löcher und führen Sie die mitgelieferten Dübel ein. 3.
- Page 14 Powering on DE Anschluss an die Stromversorgung 1. Installieren Sie den Melder auf der Wandhalterung. Richten Sie dabei die Einkerbungen der Halterung auf jene des Melders aus. 2. Drehen Sie nun den Melder im Uhrzeigersinn, um ihn auf der Halterung zu befestigen. Achtung, der Melder wird ein lautes Signal von sich geben.
- Page 15 ES Descarga la app y sigue las instrucciones, Para configurar y controlar tu Detector desde tu smartphone o tableta, descarga la app. Home + Security Netatmo Scaricare l’App e seguire le istruzioni INSTALL Per configurare e controllare il Rilevatore da smartphone o tablet, scaricare l’app.
- Page 16 Successful installation EN Your Alarm has been successfully installed. Enjoy a safer home! FR Votre Détecteur a bien été installé. Profitez d’une maison plus sûre ! DE Ihr Melder wurde korrekt installiert. Genießen Sie nun ein sichereres Zuhause! ES Tu Detector se ha instalado correctamente. ¡Disfruta de una casa más seguro! Il Rilevatore è...
-
Page 17: Origin Of Carbon Monoxide / Origine Du Monoxyde De Carbone / Ursachen Von Kohlenmonoxid / Origen Del Monóxido De Carbono / Origine Del Monossido Di Carbonio / Herkomst Van Koolmonoxide / Origem Do Monóxido De Carbono
Origin of carbon monoxide ES Origen del monóxido de carbono El monóxido de carbono es un gas particularmente tóxico, incoloro, inodoro, que no irrita. Lo generan aparatos de combustible con fallos o sistemas de ventilación y evacuación obstruidos. Las potenciales fuentes de monóxido de carbono son los aparatos de calefacción con combustible doméstico, carbón y gas, las estufas de madera, las EN Origin of carbon monoxide calderas de gas y de madera, las placas de cocina con gas, las barbacoas, los conductos de humo o chimeneas... -
Page 18: Dangers Of Carbon Monoxide / Dangers Du Monoxyde De Carbone / Mit Kohlenmonoxid Verbundene Gefahren / Peligros Del Monóxido De Carbono / Rischi Del Monossido Di Carbonio / Gevaren Van Koolmonoxide / Perigos Do Monóxido De Carbono
Dangers of carbon monoxide DE Mit Kohlenmonoxid verbundene Gefahren Die Auswirkungen des giftigen Kohlenmonoxids sind die folgenden: - Bei 100 ppm: leichte Kopfschmerzen, Schwächegefühl, Übelkeit. - Bei 200 ppm: Starke Kopfschmerzen, Übelkeit, erschwerte Beweglichkeit der Gliedmaßen. EN Dangers of carbon monoxide - Bei 400 ppm: Schwindelgefühl, Übelkeit, Beeinträchtigung der Sehschärfe, Lebensgefahr nach The toxic effects of carbon monoxide are: 3 Stunden Ausgesetztsein mit Kohlenmonoxid dieser Intensität. - Page 19 PT Perigos do monóxido de carbono IT Rischi del monossido di carbonio Os efeitos tóxicos do monóxido de carbono incluem: Gli effetti tossici del monossido di carbonio sono: - Para 100 ppm: ligeiras dores de cabeça, fraqueza e náuseas. - Per 100 ppm: leggero mal di testa, debolezza, nausea. - Para 200 ppm: fortes dores de cabeça, náuseas e deterioração dos movimentos dos membros.
-
Page 20: Triggering The Alarm / Déclenchement De L'alarme / Alarmauslösung / Activación De La Alarma / Attivazione Dell'allarme / Alarmtrigger Disparo Do Alarme
300 ppm Less than 3 minutes ES Activación de la alarma El Detector de Monóxido de Carbono Inteligente Netatmo activará una alarma cuando se den las condiciones siguientes: FR Déclenchement de l’alarme Concentración de monóxido de Plazo antes de la activación de la Le Détecteur de Monoxyde de Carbone Intelligent Netatmo déclenchera une alarme dans les conditions suivantes :... - Page 21 IT Attivazione dell’allarme PT Disparo do alarme Il Rilevatore di Monossido di Carbonio Intelligente Netatmo farà scattare un allarme nel caso di: O Detetor de Monóxido de Carbono Inteligente Netatmo disparará um alarme nas seguintes condições: Concentrazione di monossido di Tempistiche di attivazione dell’al-...
-
Page 22: In The Event Of An Alarm / En Cas D'alarme / Bei Alarm / En Caso De Alarma / In Caso Di Allarme / Bij Alarm / No Caso De Alarme
In the event of an alarm DE Bei Alarm 1. Öffnen Sie Türen und Fenster. 2. Schalten Sie alle Brennstoffgeräte aus. EN In the event of an alarm 3. Verlassen Sie den Ort. 1. Open the doors and windows. 4. Wenn Sie den Ort verlassen haben, draußen sind, rufen Sie bei Verdacht auf Kohlenmonoxid-Vergiftung den 2. - Page 23 PT No caso de alarme IT In caso di allarme 1. Abra as portas e janelas. 1. Spalancare porte e finestre. 2. Spegnere tutti gli apparecchi a combustione. 2. Desligue todos os aparelhos de combustão. 3. Evacue o local. 3. Evacuare la zona. 4.
- Page 24 Test Test Effettuare un test mensile del Rilevatore per verificare il corretto funzionamento delle spie luminose e sonore. Per fare ciò, tenere premuto per almeno 3 secondi il pulsante sul fronte, poi rilasciarlo. Il Rilevatore emetterà 4 bip, seguiti da 5 secondi di silenzio e poi di nuovo 4 bip. Durante ciascuno dei segnali acustici, il LED rosso lampeggerà.
- Page 25 Maintenance Manutenzione Spolverare mensilmente il Rilevatore con un panno antistatico o con la spazzola dell’aspirapol- vere. ATTENZIONE: Non utilizzare bombolette spray ad aria compressa o simili. EN Maintenance Every month, remove the dust on your Alarm using an antistatic cloth or the brush attachment of your vacuum.
-
Page 26: Fault Indicators / Signalisation Des Défauts / Fehlermeldung / Señalización De Los Defectos / Segnalazione Dei Guasti / Signalering Van Storingen / Sinalização De Anomalias
Fault indicators DE Anzeigen EN Indicators Warnsignale Problem Problemlösung Überprüfen Sie Ihre Brennstoffgeräte. Ein kurzes 1 Mal Aufleuchten der roten LED und der grünen In den letzten 7 Tagen gab es einen Alarm Betätigen des Knopfs vorn auf dem Gerät deakti- LED im Abstand von 60 Sekunden viert den Signalton Signals... - Page 27 Spie PT Indicadores Segnale Problema Soluzione Sinalização Problema Solução Controllare gli apparecchi a combustione. Controle os seus aparelhos de combustão. Il LED rosso e il LED verde lampeggiano una 1 intermitência dos LED vermelho e verde a cada Negli ultimi 7 giorni è scattato un allarme Premere brevemente il pulsante sul fronte per Ocorreu um alarme nos últimos 7 dias Uma breve pressão no botão do painel frontal...
- Page 28 HOMEKIT cribed in the user guide. Doing so will void the warranty and Netatmo shall not be liable for any problems. Handling these To control this HomeKit-enabled accessory remotely and automatically, you need an Apple TV with tvOS 10 or later or an internal parts may damage the electronic parts and/or compo- iPad with iOS 10 or later set up as a hub.
- Page 29 Google Inc. conséquences négatives pour l’environnement et la santé humaine. ALIMENTATION Netatmo ne peut pas garantir le temps de latence Pour toute information supplémentaire au sujet du recyclage de ce Deux piles lithium 3 V non remplaçables avec une produit, vous pouvez vous adresser à...
- Page 30 Google Play und das Google-Play-Logo sind eingetragene Zwei nicht auswechselbare und für 10 Jahre autonome melsystem). Dieses auf dem Produkt oder seiner Verpackung Deko- und Renovierungsarbeiten den Melder. Netatmo kann Marken von Google Inc. 3-V-Lithium-Batterien. vorhandene Symbol weist darauf hin, dass dieses Produkt nicht mit die Latenzzeit der Kohlenmonoxidmelder-Benachrichtigungen dem Hausmüll entsorgt werden darf.
- Page 31 La utilización del logo HomeKit significa que un accesorio ropeos que disponen de un sistema de recolección). ALIMENTACIÓN Netatmo no puede garantizar el tiempo de latencia de las electrónico fue diseñado específicamente para conectarse a Dos pilas litio 3 V no sustituibles con autonomía de un iPod touch, iPhone o iPad y ha sido certificado por el desar- notificaciones del Detector.
- Page 32 ALIMENTAZIONE Netatmo non può garantire il tempo di latenza delle notifiche nico è stato progettato appositamente per essere collegato a Due batterie al litio non sostituibili da 3 V con una un iPod touch, iPhone o iPad ed è...
- Page 33 Het moet worden afgegeven bij een geschikt inzamelpunt https://netatmo.com/usage/nco. Als u een probleem heeft ti- voor het recyclen van elektrische en elektronische apparatuur. Door jdens de installatie, kunt u naar de Netatmo-Hulpcentrum gaan: Apple en het Apple-logo zijn geregistreerde handelsmerken ALARM ervoor te zorgen dat dit product op de juiste manier wordt afge- https://helpcenter.netatmo.com of de technische ondersteuning...
- Page 34 MENÇÕES LEGAIS (Aplicável nos países da União Europeia e noutros países europeus ção de decoração ou renovação. A Netatmo não pode garantir A utilização do logótipo HomeKit significa que um acessório com um sistema de recolha). Este símbolo, aposto no produto ou na ALIMENTAÇÃO...
- Page 35 BS EN 50291-1 : 2018. Hereby, NETATMO, declares that the radio equipment type NCO01 is in compliance with Radio Equipment Regulations 2017 and The Restriction of the Use of Malti [Maltese] - B’dan, NETATMO, niddikjara li dan it-tip ta’ tagħmir tar-radju NCO01 huwa konformi mad-Direttiva Certain Hazardous Substances in Electrical and Electronic Equipment Regulations 2012 The full text of the EU and UKCA 2014/53/UE kif ukoll mad-Direttiva 2011/65/UE dwar RoHS u l-emenda tagħha 2015/863/UE.
- Page 36 UE, z dyrektywą RoHS 2011/65/UE i z załącznikiem do niej 2015/863/UE. Czujnik Tlenku Węgla NCO01 jest zgodny ze ws- zystkimi istotnymi parametrami określonymi normą zharmonizowaną EN 50291-1 : 2018. Pełny tekst deklaracji zgodności CE marking is the manufacturer’s declaration that the product meets the UE jest dostępny pod następującym adresem internetowym:...
- Page 37 M/N: NCO01 https://helpcenter.netatmo.com DAACO Copyright Netatmo © 2021 All rights reserved. Reproduction and distribution prohibited without written authorization from Netatmo...