Table des Matières

Publicité

Les langues disponibles
  • FR

Les langues disponibles

Liens rapides

Technisches Handbuch
Technical manual
EN
Manuale tecnico
I
Manuel technique
F
Manual técnico
ES
S18
V 1.0.0

Publicité

Table des Matières
loading

Sommaire des Matières pour Variovac S18

  • Page 1 Technisches Handbuch Technical manual Manuale tecnico Manuel technique Manual técnico V 1.0.0...
  • Page 3: Table Des Matières

    BEDIENUNGSANLEITUNG • Typ: Zentral-Staubsauger Zivilbereich Linie • Revision 1.0.0 Zentralstaubsauger INHALTSVERZEICHNIS TECHNISCHE MERKMALE VORGESEHENE NUTZUNG DER MASCHINE NICHT VORGESEHENE NUTZUNG DER MASCHINE SICHERHEITSVORRICHTUNGEN 4.1 Warnungen 4.2 Schutzklasse IP 4.3 Schutzklasse der elektrischen Isolierung 4.4 Erklärung der Abwesenheit giftiger Substanzen 4.5 Sicherheitsvorrichtungen in Bezug auf feste Abschlussabdeckungen 4.6 Sicherheitsvorrichtungen in Bezug auf bewegliche Abschlussabdeckungen 4.7 Identifi...
  • Page 4: Technische Merkmale

    Bedienungsanleitung 1 - TECHNISCHE MERKMALE Modell Ansaug-/Abluftstutzen Ø mm Schutzgrad Spannung V ac 220/240 Frequenz 50/60 Leistung Stromaufnahme Anschlussdosen Spannun V dc Luftumwälzung max Unterdruc max mbar Filteroberfl äche 3100 Fassungsvermögen Behälter Abluft Abluft (Ø 50 mm) Gewicht Maß Maß Maß...
  • Page 5: Vorgesehene Nutzung Der Maschine

    2 - VORGESEHENE NUTZUNG DER MASCHINE Die Saugzentrale wurde entwickelt um ausschließlich Staub, Feststoffe geringsten Ausmaßes und trok- kene Materialien aufzusaugen. Die vorgesehene Nutzung bezieht sich auf den häuslichen und zivilen Zentralgebrauch über einen An- schluss an einem PVC-Rohrnetz in der Wand und am normalen häuslichen Stromnetz. Das Gerät wird in Wohnungen mit folgenden Eigenschaften installiert: •...
  • Page 6: Sicherheitsvorrichtungen

    Bedienungsanleitung Es ist nicht erlaubt die Anlage für andere als die oben genannten Zwecke einzusetzen. Jede Veränderung der Anlage, um sie für besondere Einsatzgebiete, oder für das Absaugen be- sonderer Materialien tauglich zu machen, bedarf der Zustimmung durch den Hersteller. Die Verwendung der Saugzentrale für andere Zwecke als die für die sie entwickelt und gebaut wurde, stellt ein Sicherheitsrisiko für Anlage und Benützer dar.
  • Page 7: Schutzklasse Ip

    Wir erinnern daran, dass die Symbole oder Gefahrenmeldungen und Verbotsmeldungen an den Teilen der Maschine angebracht sind, wo Risikosituationen auftreten können, wenn sie nicht beachtet werden. 4.2 Schutzklasse IP IP 44: Gerät mit Schutz gegen solide Gegenstände mit einer Abmessung von mehr als 1 mm IP 44 und gegen Spritzwasser (das Spritzwasser kann, aus allen Richtungen, keine Schäden verur- sachen).
  • Page 8: Transformation Der Version Dx (Rohrausgang Rechts) Auf Die Version Sx (Rohrausgang Links)

    Bedienungsanleitung Änderungen vornimmt. 4.7 Identifi kationsplakette An der Seite des Rohrnetzanschlusses befi ndet sich die CE-Identifi kationsplakette Das Schild darf nicht entfernt oder beschädigt werden. Identifi zierung des Herstellers Anlagentyp Schutzklasse der elektri- ........schen Isolierung ................. Kennzeichnung CE Model: für die Konformität P/N: S/N:...
  • Page 9: Installation

    6 - INSTALLATION - ACHTUNG - DIE MONTAGE MUSS VOM FACHMANN VORGENOMMEN WERDEN 6.1 Vorbereitende Arbeiten Die Maschine wird komplett montiert und verpackt geliefert. Vor der Inbetriebnahme der Maschine müssen nachstehende Kontrollen ausgeführt werden: • Mängelfreiheit der Verpackung. • Prüfen, dass die Maschine keine deutlichen Schäden aufweist und vor Allem kontrollieren, dass alle hervorstehenden Bauteile nicht beschädigt sind.
  • Page 10: Wandbefestigung Der Zentrale

    Bedienungsanleitung 6.3 Wandbefestigung der Zentrale Die Saugzentrale muss mit dem mitgelieferten Bügel und geeigneten Dübeln stabil und fest an einer ge- mauerten Wand befestigt werden. Dabei ist zu beachten, dass das zu stützende Gesamtgewicht auch sieben/acht Mal höher liegen kann, als das Gewicht der Zentrale selbst. Die Zentrale muss so hoch über dem Boden angebracht werden, dass die Abnahme des Staubbehälters zwecks Entleerung und der Wechsel des Filters möglich sind.
  • Page 11 6,4 Verbindungen der Rohrleitungsnetze 1. Mit dem Stutzen den Staubeingangsanschluss der Zyklonsaugung (A in Abbildung) der Zentrale am Saugrohr des Rohrleitungsnetzes anschließen. 2. Mit dem Stutzen den Abluftanschluss der Zentrale (B) an der Abluftleitung des Gebäudes anschlie- ßen. 3. Den Schalldämpfer (C) am Abluftrohr, in der Nähe des Abluftgitters, ankleben. Hinweis: Nicht die Enden des Rohrleitungsnetzes an den Anschlüssen für Staubeingang und Abluft verkleben, sondern immer die mitgelieferten Stutzen verwenden.
  • Page 12: Verbindung Mit Dem Stromnetz

    Bedienungsanleitung 6.5 Verbindung mit dem Stromnetz ACHTUNG: die Verkabelung darf NUR von Fachpersonal verlegt werden! Bevor die Zentrale an das Stromnetz angeschlossen wird, ist zu überprüfen, ob die Spannung des Net- zes den Angaben für die Saugzentrale entspricht (siehe Identifi kationsplakette). Der Hersteller übernimmt für Sach- oder Personenschäden, die durch ein nicht fachgerecht installiertes Stromnetz entstehen könnten, keine Verantwortung.
  • Page 13: Wartung

    7 - WARTUNG VOR ALLEN WARTUNGSARBEITEN MUSS DAS VERSORGUNGSKABEL VON DER STECKDOSE GETRENNT WERDEN UND MAN MUSS HANDSCHUHE UND SCHUTZMASKE TRAGEN 7.1 Programmierte Wartung Je nach Gesamt-Nutzungszeit der Zentrale muss man Wartungseingriffe ausführen, damit sie immer effi - zient ist und um schwere mechanische Schäden zu vermeiden. Ansaugzeit Art der Instandsetzung Durchgeführt von...
  • Page 14: Leerung Des Staubbehälters

    Bedienungsanleitung 7.3 Leerung des Staubbehälters Die Saugzentrale mit der Taste ON/OFF ausschalten. Den Staubbehälter abnehmen Den Führungstrichter herausnehmen Den Staubbehälter entleeren Den Führungstrichter wieder in seinen Sitz einsetzen Den Staubbehälter in seinem Sitz unter der Saugzentrale einbauen und die Verschlusshebel wieder schließen.
  • Page 15: Reinigung Der Filterpatrone

    7.4 Preinigung der Filterpatrone ACHTUNG DIE RICHTIGE BEFESTIGUNG DER FILTERPATRONE MUSS IMMER GEPRÜFT WERDEN. EINE FALSCHE POSITIONIERUNG ODER EINE LOSE FILTERPATRONE KÖNNTEN ZU EINER SCHWERWIEGENDEN BESCHÄDIGUNG DES PRODUKTS FÜHREN. DIE ZENTRALE DARF OHNE FILTERPATRONE NICHT IN BETRIEB GENOMMEN WERDEN. BEVOR MAN DIESE ARBEIT AUSFÜHRT, MUSS EINE ERSATPATRONE IN DER ZENTRALE EINGEBAUT WERDEN.
  • Page 16: Empfohlene Ersatzteile

    Bedienungsanleitung 8.2 Empfohlene Ersatzteile Es empfi ehlt sich rechtzeitig jene Ersatzteile zu besorgen, die einem besonderen Verschleiß unterworfen sind. Damit die Saugzentrale lange funktionstüchtig bleibt, wird die ausschließliche Verwendung von Origina- lersatzteilen von dringend geraten. ERSATZTEIL- BESCHREIBUNG CODENUMMER Siehe Filterpatrone Geschäftsbroschüre Siehe Beutel und Beutelspanner für die...
  • Page 17 FEHLER URSACHE ABHILFE Das Netzkabel ist nicht NETZKABEL EINSTECKEN eingesteckt Die Einschalttaste der Die Einschalttaste drücken Zentrale ist ausgeschaltet An allen Anschlüssen wird die Saugung Das Kabel der Linie Mikro ist Das Aktivierungskabel nicht aktiviert getrennt (Sensor) anschließen Der Motor-Überhitzungsschutz Führen Sie einen manuellen wurde ausgelöst Reset des Schutzschalters durch...
  • Page 18: Explodierte Zeichnungen

    Bedienungsanleitung 10 - Explodierte Zeichnungen Schallabsorbierende Abdeckhaube Sicherheitstemperaturfühler Ein-/Ausschalter Motor Thermoschalter Schallschluckende teuersignaleingang Abkleidung Micro Gehäuse Abluftstutzen Filterkartusche Netzanschluss Ansaugstutzen Führungstrichter Griff und Verschlusshaken Staubbehälter 13.10.2020 Rev:1.0.0...
  • Page 19 INSTRUCTION MANUAL • Type: domestic vacuum cleaner Line • Revision 1.0.0 Central vacuum systems INDEX TECHNICAL DATA AUTHORIZED USE OF THE VACUUM CLEANER UNAUTHORIZED USE OF THE VACUUM CLEANER SAFETY FEATURES 4.1 Warning 4.2 IP protection degree 4.3 Electrical insulation degree 4.4 Declaration of absence of dangerous substances 4.5 Fixed closure guards safety 4.6 Movable closure guards safety...
  • Page 20: Technical Data

    Instruction manual 1 - TECHNICAL DATA Model Suction / discharge connection Ø mm Supply Supply V ac 220/240 Frequency 50/60 Motor power Asbsorption Vacuum inlets supply V dc Maximum air fl ow max Maximum vacuum max mbar Filtering surface 3100 Dust container capacity Air vent Air exhaust silencer (Ø...
  • Page 21: Authorized Use Of The Vacuum Cleaner

    2 - AUTHORIZED USE OF THE VACUUM CLEANER These vacuum cleaners has been designed exclusively to vacuum clean house dust, very small-size solids and dry materials. The use of the central vacuum cleaner is authorized for household and civil uses, connected to a PVC wall-traced piping network and to a standard home electrical wiring. The vacuum cleaner can be installed in domestic dwellings with the following characteristics: •...
  • Page 22: Safety Features

    Instruction manual The use of the system for purposes other than those for which it was manufactured, represents an irregular condition which can cause damage to the product and seriously compromise the operatorʼs safety. 4 - SAFETY FEATURES WARNING: the constructor declines any form of responsibility or guarantee if the purchaser, or anyone in his stead, makes even the slightest modifi...
  • Page 23: Ip Protection Degree

    Finally, remind that pictograms or danger and warning signals can be found on those parts of the equip- ment where, if not strictly followed, potential risky situations may occur. 4.2 IP Protection Degree IP 44: The appliance features a protection against solid objects having a size exceeding 1 IP 44 mm and protection against splashes of water (splashes of water from any direction on the cover must not produce dangerous effects).
  • Page 24: Identifi Cation Plate

    Instruction manual 4.7 Identifi cation plate The CE identifi cation plate is assembled on the side of the connection to the piping network. This should not be removed or damaged. Type of Central Manufacturer Identifi cation vacuum cleaner Electrical insulation ........
  • Page 25: Installation

    6 - INSTALLATION - WARNING - THESE PROCEDURES MUST BE CARRIED OUT BY QUALIFIED PERSONNEL 6.1 Preliminary operations The suction system is shipped to the customer completely assembled and packed. Before switching the machine on, the following checks are advisable: •...
  • Page 26 Instruction manual 6.3 Fixing the vacuum cleaner to the wall The vacuum cleaner must be securely and permanently fi xed to a solid wall using the bracket provided and the suitable wall anchors or plugs taking into account that the total weight to be supported can be seven/eight times that of the system itself.
  • Page 27: Connection To The Pipe Network

    6,4 Connection to the piping network 1. Using the sleeve, connect the dust inlet coupling of the cyclonic vacuum cleaner, identifi ed with (A) in the picture, to the suction pipe from the piping network. 2. By using the sleeve, connect the air outlet of the central vacuum unit, marked with (B), to the air outlet of the house.
  • Page 28: Electrical Connection

    Instruction manual 6.5 Electrical connection WARNING: the electrical connection must be carried out ONLY by qualifi ed personnel. Before connecting the system to the electrical power supply check that the supply voltage corresponds to that required by the vacuum cleaner (see the identifi cation plate). The manufacturer declines any responsibility for damages to persons and/or objects due to a connec- tion to a non-complying electric wiring.
  • Page 29: Maintenance

    7 - MAINTENANCE BEFORE CARRYING OUT ANY MAINTENANCE OPERATION, IT IS MANDATORY TO UNPLUG THE POWER SUPPLY CABLE FROM THE POWER SUPPLY INLET. PROTECTIVE MASK AND GLOVES MUST ABSOLUTELY BE WORN 7.1 Programmed routine maintenance Maintenance should be carried out according to the effective running time of the system so to ensure effi...
  • Page 30: Emptying The Dust Bin

    Instruction manual 7.3 Emptying the dust bin Switch the suction system off by pressing the ON/OFF switch. Remove the dust bin Remove the conveyor cone Empty the dust bin Put the conveyor cone back in position Reassemble the dust bin inside its housing under the suction system and lock the closing handles. The fi...
  • Page 31: Repairs And Spare Parts

    7.4 Disposal of the fi lter cartridge ATTENTION YOU SHALL ALWAYS CHECK THE RIGHT POSITIONING AND TIGHTENING OF THE FILTER CARTRIDGE. A WRONG POSITIONING OR A LOOSE FILTER CARTRIDGE MAY CAUSE A SERIOUS DAMAGE OF THE PRODUCT. DO NOT USE THE VACUUM CLEANER WITHOUT THE FILTER CARTRIDGE. ENSURE YOU HAVE REPLACED A SPARE FILTER CARTRIDGE BEFORE CARRYING OUT THIS OPERATION.
  • Page 32: Recommended Spare Parts

    Instruction manual 8.2 Recommended spare parts It is advisable to order in time those spare parts which need to be changed more often. In order to guarantee the optimal and long working life of the vacuum cleaner it is recommended to use only original spare parts, as detailed below.
  • Page 33 PROBLEM CAUSE SOLUTION The power cable is unplugged Connect the power cable The micro line cable is not Connect the activation cable connected (sensor) There is no suction from any of the The thermal protection of the Allow a few minutes stop for suction sockets motor has intervened the motor to cool down...
  • Page 34 Instruction manual 10 - Exploded view drawing Soundproofi ng top cover Thermical safety tablet Start push-button Power unit Thermal switch Acustic isulation Start input signal lagging Micro Body Air exhaust Filter cartridge Power supply inlet Dust inlet Conveyor cone Handle and clamping hook Dust container 13.10.2020 Rev:1.0.0...
  • Page 35 MANUALE ISTRUZIONI • Tipologia: aspirapolvere centralizzato settore civile Linea • Revisione 1.0.0 Aspirapolvere centralizzato INDICE CARATTERISTICHE TECNICHE USO PREVISTO DELLA MACCHINA USO NON PREVISTO DELLA MACCHINA CARATTERISTICHE DI SICUREZZA 4.1 Avvertenze 4.2 Grado di protezione IP 4.3 Grado di isolamento elettrico 4.4 Dichiarazione di assenza di sostanze nocive 4.5 Sicurezze relative ai ripari fi...
  • Page 36: Caratteristiche Tecniche

    Manuale istruzioni 1 - CARATTERISTICHE TECNICHE Modello Attacco aspirazione/scarico Ø mm Grado di protezione Alimentazione V ac 220/240 Frequenza 50/60 Potenza motore Assorbimento Alimentazione prese V dc Portata massima aria max Depressione max mbar Superfi cie fi ltrante 3100 Capacità contenitore polveri Sfi ato aria Silenziatore scarico aria (Ø...
  • Page 37: Uso Previsto Della Macchina

    2 - USO PREVISTO DELLA MACCHINA Le centrali aspiranti sono statre progettate per aspirare esclusivamente polvere domestica, corpi solidi di minuscole dimensioni e materiali asciutti. L’uso previsto è relativo all’utilizzo in ambiente domestico e civile dell’aspiratore centralizzato, collegato ad una rete tubiera di tubi in PVC sottotraccia murale ed alimentato dalla normale rete elettrica dome- stica.
  • Page 38: Caratteristiche Di Sicurezza

    Manuale istruzioni Non sono consentiti usi diversi da quelli sopraindicati. Qualsiasi adattamento o modifi ca della centrale al fi ne di renderla idonea ad aspirare un partico- lare tipo di materiale, deve essere approvata per iscritto dal costruttore. Qualsiasi impiego diverso da quello per cui la centrale è stata costruita, rappresenta una condi- zione anomala che può...
  • Page 39: Grado Di Protezione Ip

    Infi ne si ricorda che pittogrammi o segnalazioni di pericolo e di divieto si trovano nelle parti dell’appa- recchiatura dove, se non rispettate le condizioni dettate dalle segnalazioni, sicuramente si può incorrere in situazioni di rischio. 4.2 Grado di protezione IP IP 44: Apparecchio con protezione contro i corpi solidi di dimensioni superiori a 1 mm e pro- IP 44 tetto contro gli spruzzi d’acqua (l’acqua spruzzata sull’involucro da tutte le direzioni non deve...
  • Page 40: Targhetta Di Identifi Cazione

    Manuale istruzioni 4.7 Targhetta di identifi cazione E’ presente sul lato dell’attacco alla rete tubiera la targhetta di identifi cazione CE. Non rimuovere né danneggiare la targhetta. Identifi cazione del costruttore Tipo centrale Classe di isolamento ........elettrico ................. Marcatura CE Model: di conformità...
  • Page 41: Installazione

    6 - INSTALLAZIONE ATTENZIONE - QUESTE OPERAZIONI DEVONO ESSERE ESEGUITE DA PERSONALE QUALIFICATO 6.1 Operazioni preliminari La macchina è spedita completamente montata ed imballata. Prima di procedere alla messa in servizio della macchina è opportuno effettuare alcuni controlli: • Verifi care l’integrità della confezione •...
  • Page 42: Fissaggio Della Centrale Al Muro

    Manuale istruzioni 6.3 Fissaggio della centrale al muro La centrale aspirante deve essere fi ssata in modo stabile e permanente ad una parete in muratura utilizzando l’apposita staffa in dotazione ed adeguati tasselli considerando che il peso complessivo da sostenere può arrivare anche a sette/otto volte il peso della centrale stessa. L’altezza da terra deve consentire un’agevole intervento per lo svuotamento del contenitore raccolta polvere e la sostituzione del fi...
  • Page 43 6,4 Collegamento della rete tubiera 1. Utilizzando il manicotto collegare il raccordo di ingresso polveri aspirazione della centrale al tubo di aspirazione proveniente dalla rete tubiera. 2. Utilizzando il manicotto collegare il raccordo di sfi ato dell’aria della centrale al tubo di scarico dell’aria dell’abitazione.
  • Page 44: Collegamento Elettrico

    Manuale istruzioni 6.5 Collegamento elettrico ATTENZIONE: Il collegamento elettrico deve essere eseguito ESCLUSIVAMENTE da personale qualifi cato. Prima di effettuare il collegamento elettrico verifi care che il voltaggio di alimentazione corrisponda a quello richiesto dalla centrale aspirante (vedi targhetta di identifi cazione). Il Costruttore declina ogni responsabilità...
  • Page 45: Manutenzione

    7 - MANUTENZIONE PRIMA DI EFFETTUARE QUALSIASI INTERVENTO DI MANUTENZIONE È OBBLIGATORIO SCOLLEGARE IL CAVO DI ALIMENTAZIONE DALLA PRESA DI CORRENTE ED INDOSSARE GUANTI E MASCHERINA PROTETTIVI 7.1 Manutenzione ordinaria In funzione del tempo totale di utilizzo della centrale è necessario effettuare degli interventi di manutenzio- ne al fi...
  • Page 46: Svuotamento Contenitore Polveri

    Manuale istruzioni 7.3 Svuotamento contenitore polveri Spegnere la centrale aspirante agendo sul pulsante ON/OFF di accensione Smontare il contenitore polveri Togliere il cono convogliatore Svuotare il contenitore delle polveri Inserire nuovamente nella propria posi- zione il cono convogliatore Rimontare il contenitore delle polveri nella propria sede sotto la centrale aspirante e richiudere le leve di chiusura.
  • Page 47: Pulizia Cartuccia Fi Ltro

    7.4 Pulizia cartuccia fi ltro ATTENZIONE VERIFICARE SEMPRE IL CORRETTO SERRAGGIO DELLA CARTUCCIA FILTRO, UN ERRATO MONTAGGIO POTREBBE PROVOCARE IL DANNEGGIAMENTO DEL PRODOTTO. NON UTILIZZARE LA CENTRALE SENZA LA CARTUCCIA FILTRO. PRIMA DI ESEGUIRE QUESTA OPERAZIONE OCCORRE MONTARE UNA CARTUCCIA DI RICAMBIO SULLA CENTRALE.
  • Page 48: Ricambi Consigliati

    Manuale istruzioni 8.2 Ricambi consigliati È buona norma procurarsi per tempo quei ricambi soggetti a più rapida usura. Per garantire l’ottimale e duraturo funzionamento della centrale aspirante si raccomanda l’utilizzo esclu- sivo di ricambi originali. CODICE DESCRIZIONE RICAMBIO Vedi depliant Cartuccia fi...
  • Page 49 INCONVENIENTE CAUSA RIMEDIO Il cavo di alimentazione è Collegare il cavo di scollegato alimentazione Il pulsante di accensione della Premere il pulsante di centrale aspirante è spento accensione In tutte le prese non si attiva Il cavo della linea micro è Collegare il cavo della linea l’aspirazione d’aria scollegato...
  • Page 50: Spaccato Centrali

    Manuale istruzioni 10 - SPACCATO CENTRALI Copertura superiore insonorizzante Sonda termica di sicurezza Pulsante di accensione Gruppo motore Disgiuntore termico Rivestimento Ingresso segnale di attivazione fono assorbente Micro Corpo macchina Sfi ato aria Cartuccia fi ltro Ingresso alimentazione elettrica Ingresso polveri Cono convogliatore Maniglia e gancio di chiusura...
  • Page 51 MANUEL DʼUTILISATION • Typologie: aspirateur centralisé pour utilisation Line domestique Systèmes d’aspiration centralisés • Révision 1.0.0 INDEX CARACTÉRISTIQUES TECHNIQUES UTILISATION PRÉVUE DE LʼAPPAREIL UTILISATION NON PRÉVUE DE LʼAPPAREIL CARACTÉRISTIQUES DE SÉCURITÉ 4.1 Avertissements 4.2 Degré de protection IP 4.3 Degré d’isolation électrique 4.4 Déclaration d’absence de substances nocives 4.5 Mesures de sécurité...
  • Page 52: Caractéristiques Techniques

    Manuel d’utilisation 1 - CARACTÉRISTIQUES TECHNIQUES Modèle Joint aspiration/échappement Ø mm Degré de protection Alimentation V ac 220/240 Fréquence 50/60 Puissance moteur Absorption Alimentation prises V dc Portée maximale de l’air max Depressione max mbar Surface fi ltrante 3100 Capacité du bac à poussière Sortie air Silencieux de sortie de l’air (Ø...
  • Page 53: Utilisation Prévue De Lʼappareil

    2 - UTILISATION PRÉVUE DE LʼAPPAREIL La centrale d’aspiration a été projetée pour aspirer exclusivement des poussières, des corps solides de très petite taille et des matériaux secs. L’usage prévu se réfère à une utilisation domestique et civile de l’aspirateur centralisé, relié à un réseau de tubes en PVC situé...
  • Page 54: Caractéristiques De Sécurité

    Manuel d’utilisation Tout usage en-dehors de ceux énumérés ci-dessus est interdit. Toute adaptation ou modifi cation de la centrale afi n de la rendre apte à aspirer un type particulier de matériel, doit être approuvée par écrit par le constructeur. Toute autre utilisation que celle pour laquelle la centrale a été...
  • Page 55: Degré De Protection Ip

    Enfi n, nous vous rappelons que des pictogrammes ou des signaux de danger et d’interdiction se trouvent dans les parties de l’équipement où, si les conditions dictées par les alertes ne seront pas respectées, vous vous trouverez certainement dans des situations de risque. 4.2 Degré...
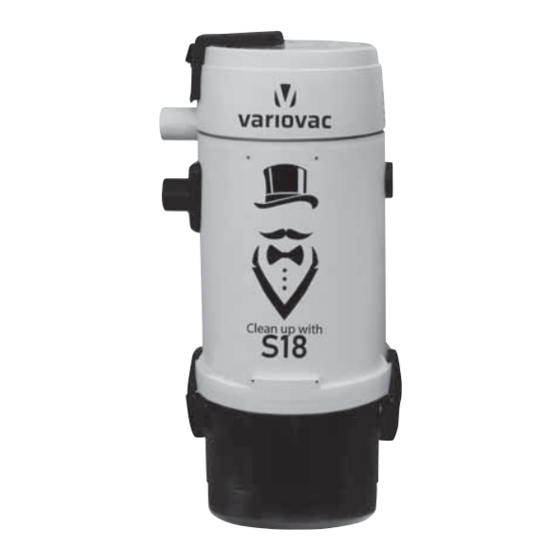
  • Page 56: Plaque Signalétique

    Manuel d’utilisation 4.7 Plaque signalétique La plaque signalétique CE est présente sur le côté de la machine où se trouve le raccordement au réseau de tubes. Elle ne doit être ni enlevée ni endommagée. Type de centrale Identifi cation du constructeur Degré...
  • Page 57: Installation

    6 - INSTALLATION - ATTENTION - CES OPÉRATIONS DOIVENT ETRE EFFECTUÉES PAR DU PERSONNEL QUALIFIÉ 6.1 Opérations préliminaires L’appareil est livré entièrement assemblé et emballé. Avant de procéder à la mise en service, il est opportun d’effectuer certains contrôles : •...
  • Page 58: Fixation De La Centrale Au Mur

    Manuel d’utilisation 6.3 Fixation de la centrale au mur La centrale d’aspiration doit être fi xée de façon stable et permanente à un mur en maçonnerie en utili- sant le support métallique fourni et des chevilles adaptées au poids à soutenir, qui peut être de sept à huit fois supérieur au poids de la centrale elle-même.
  • Page 59 6,4 Raccord au réseau de tubes 1. En utilisant le manchon, relier le raccord d’entrée des poussières (aspiration cyclonique) de la cen- trale, identifi é par le numéro (A) dans le dessin, au tube d’aspiration provenant du réseau de tubes. 2.
  • Page 60: Branchement Au Réseau Électrique

    Manuel d’utilisation 6.5 Branchement au réseau électrique ATTENTION: Le branchement au réseau électrique doit être effectué EXCLUSIVEMENT par un technicien qualifi é. Avant d’effectuer le branchement au réseau électrique, vérifi er que le voltage d’alimentation corres- ponde à celui de la centrale d’aspiration (voir plaque signalétique). Le constructeur décline toute responsabilité...
  • Page 61: Entretien

    7 - ENTRETIEN AVANT DʼEFFECTUER TOUTE INTERVENTION DʼENTRETIEN IL EST OBLIGATOIRE DE DEBRANCHER LE CABLE DʼALIMENTATION DE LA PRISE DE COURANT ET DE PORTER DES GANTS ET UN MASQUE DE PROTECTION 7.1 Entretien ordinaire programmé En fonction du temps total d’utilisation de la centrale, il est nécessaire d’effectuer des interventions d’entretien afi...
  • Page 62 Manuel d’utilisation 7.3 Vidage du réceptacle à poussière Arrêter la centrale d’aspiration en appuyant sur la touche ON/OFF de démarrage Retirer le réceptacle à poussières Enlever le convoyeur conique Vider le réceptacle poussières Remettre le convoyeur conique à sa place Remonter le réceptacle à...
  • Page 63: Mise Au Rebut De La Cartouche Fi Ltre

    7.4 Mise au rebut de la cartouche fi ltre ATTENTION TOUJOURS VÉRIFIER LE BON SERRAGE DE LA CARTOUCHE FILTRE. UNE INCORRECTE FIXATION PEUT PROVOQUER DES DOMMAGES AU PRODUIT. NE PAS UTILISER LA CENTRALE SANS CARTOUCHE FILTRE. AVANT DE REDEMARRER LA CENTRALE, IL EST NECESSAIRE DʼASSEMBLER UNE CARTOUCHE DE RECHANGE.
  • Page 64: Pièces Détachées Conseillées

    Manuel d’utilisation 8.2 Pièces détachées conseillées Il est conseillé de se procurer préalablement les pièces détachées soumises à une usure plus rapide. Pour garantir un fonctionnement optimal et durable de la centrale d’aspiration, nous vous recommandons d’utiliser exclusivement les pièces détachées originales énumérées ci-dessous. DESCRIPTION CODE DE LA PIÈCE DÉTACHÉE...
  • Page 65 PROBLÈME CAUSE SOLUTION Le câble d’alimentation est Brancher le câble débranché d’alimentation La touche de démarrage de la Appuyer sur la touche de centrale d’aspiration est sur arrêt démarrage Le câble d’alimentation de la Brancher le câble Les prises n’aspirent pas ligne micro est débranché...
  • Page 66: Détail Centrales

    Manuel d’utilisation 10 - Détail centrales Coupole antibruit Sonde thermique de sécurité Bouton-poussoir de démarrage Groupe moteur Disjoncteur thermique Revêtement Entrée signal de mise en marche insonorisant Micro Boîtier Echappement d’air Cartouche fi ltre Entrée alimentation électrique Entrée poussières Cône convoyeur Poignée et crochet de fermeture...
  • Page 67 MANUAL DE INSTRUCCIONES • Tipología: aspirador centralizado sector doméstico Linea • Revisión 1.0.0 Aspiración Centralizada ÍNDICE CARACTERÍSTICAS TÉCNICAS USO PREVISTO DE LA CENTRAL ASPIRADORA USO NO PREVISTO DE LA CENTRAL ASPIRADORA CARACTERÍSTICAS DE SEGURIDAD 4.1 Advertencia 4.2 Grado de protección IP 4.3 Nivel de aislamiento eléctrico 4.4 Declaración ausencia sustancias nocivas 4.5 Seguridad de las protecciones de cierre fi...
  • Page 68: Características Técnicas

    Manual de instrucciones 1 - CARACTERÍSTICAS TÉCNICAS Modelo Conexión aspiración/descarga Ø mm Grado de protección Alimentación V ac 220/240 Frecuencia 50/60 Potencia motor Absorción Alimentación toma V dc Caudal máxima aire max Depresión max mbar Superfi cie fi ltrante 3100 Capacidad contenedor de polvo Respiradero Silenciador purgador aire (Ø...
  • Page 69: Uso Previsto De La Central Aspiradora

    2 - USO PREVISTO DE LA CENTRAL ASPIRADORA La central aspiradora ha sido proyectada para aspirar exclusivamente polvo, cuerpos sólidos de dimen- siones minúsculas y materiales secos. El uso previsto es relativo a la utilización en ambiente doméstico y civil de la aspiradora centralizada, conectada con una red de tubos en PVC bajo el muro y alimentada por la común red eléctrica domés- tica.
  • Page 70: Características De Seguridad

    Manual de instrucciones Cualquiera adaptación o modifi cación de la central con el fi n de adaptarla para que pueda aspi- rar un tipo de material particular debe aprobarse en forma escrita por el constructor. Cualquier uso diferente de aquellos para que la central fue construida representa una condición anómala que puede dañar el aparato y constituir un peligro serio para el usuario.
  • Page 71: Grado De Protección Ip

    Finalmente, se recuerda que pictogramas o aviso de peligro y de prohibición se encuentran en las partes del aparato donde, si no se respetan las condiciones indicada por los avisos, seguramente se pueden originar situaciones de riesgo. 4.2 Grado de protección IP IP 44: Aparato con protección contra cuerpos sólidos de dimensiones superiores a 1 mm y IP 44 protegido contra salpicaduras de agua (el agua salpicada encima del envase de todas las...
  • Page 72: Transformación De Versión Derecha (Salida Tubos Derecha) A Versión Izquierda (Salida Tubos Izquierda)

    Manual de instrucciones 4.7 Placa de identifi cación La placa de identifi cación CE está presente en el lado de la conexión hacia la red de tubos. No remover ni dañar la placa. Identifi cación del fabricante Tipo central Grado de aislamien- ........
  • Page 73: Instalación

    6 - INSTALACIÓN - ATENCIÓN - ESTAS OPERACIONES DEBEN SER EFECTUADAS POR PERSONAL CUALIFICADO 6.1 Operaciones preliminares La máquina se entrega completamente montada y embalada. Antes de poner en marcha la máquina es oportuno controlar lo siguiente: • Averiguar que la caja esté íntegra. •...
  • Page 74: Fijación De La Central A La Pared

    Manual de instrucciones 6.3 Fijación de la central a la pared La central aspiradora debe fi jarse de manera fi rme y permanente a una pared de mampostería usando la placa incluida y tarugos apropiados considerando que el peso total a sostener puede llegar hasta a siete/ocho veces el peso de la misma central.
  • Page 75 6,4 Conexión a la red de tubos 1. Utilizando el manguito conectar la conexión de entrada polvo aspiración ciclónica de la central, iden- tifi cada por el letra (A) en la fi gura, al tubo de aspiración que llega de la red de tubos. 2.
  • Page 76: Conexión Eléctrica

    Manual de instrucciones 6.5 Conexión eléctrica ATENCIÓN: La conexión eléctrica se debe realizar SOLAMENTE por personal cualifi cado. Antes de realizar la conexión eléctrica verifi que que el voltaje de alimentación corresponda a lo indicado en la central aspiradora (véase tarjeta de identifi cación). El Constructor no es responsable de los daños a personas y/o cosas que deriven de una conexión a una instalación eléctrica no a norma.
  • Page 77: Mantenimiento

    7 - MANTENIMIENTO ANTES DE REALIZAR CUALQUIER INTERVENCIÓN DE MANTENIMIENTO ES OBLIGATORIO DESCONECTAR EL CABLE DE ALIMENTACIÓN DE LA TOMA DE CORRIENTE Y PONERSE GUANTES Y MÁSCARA DE PROTECCIÓN 7.1 Mantenimiento ordinario Según el tiempo total de utilización de la central es necesario efectuar las intervenciones de mantenimien- to al din de mantenerla siempre efi...
  • Page 78: Vaciado Contenedor Polvo

    Manual de instrucciones 7.3 Vaciado contenedor polvo Apagar la central aspiradora presionando el pulsador ON/OFF. Desmontar el contenedor polvo Quitar el cono separador Vaciar el contenedor de polvo Colocar otra vez el cono separador en su posición Montar el contenedor de polvo en su lugar abajo de la central aspiradora y cerrar los ganchos de cierre. Vuelva a conectar la unidad de control a la tensión de la fuente de alimentación.
  • Page 79: Limpieza Cartucho Fi Ltro

    7.4 Limpieza cartucho fi ltro ATENCIÓN SIEMPRE REVISE EL APRIETE ADECUADO DEL CARTUCHO FILTRO, UNA INSTALACIÓN INCORRECTA PUEDE PROVOCAR DAÑOS AL PRODUCTO. NO UTILIZAR LA CENTRAL SIN EL CARTUCHO FILTRO. ANTES DE REALIZAR ESTA OPERACIÓN ES NECESARIO MONTAR UN CARTUCHO DE REPUESTO EN LA CENTRAL El cartucho fi...
  • Page 80: Piezas De Repuesto Aconsejadas

    Manual de instrucciones 8.2 Piezas de repuesto aconsejadas Es una norma tener un stock de los repuestos que más fácilmente se desgastan. Para garantizar el óptimo y duradero funcionamiento de la central aspiradora se recomienda la utilización exclusivamente de repuestos originales SISTEM-AIR listados a continuación: CÓDIGO DESCRIPCIÓN REPUESTO...
  • Page 81 INCONVENIENTE CAUSA RIMEDIO El cable de alimentación está Conectar el cable de desconectado alimentación El pulsador de puesta en marcha Apretar el pulsador de puesta de la central está apagado en marcha En todas las tomas falta la aspiración El cable de la línea micro está Conecte el cable de micro de aire desconectado...
  • Page 82 Manual de instrucciones 10 - Despiece centrales Cúpula fonoabsorbente Térmica de seguridad Botón de puesta en marcha Grupo motor Disyuntor térmico Revestimiento Entrada señal de activación que absorbe los sonidos Micro Cuerpo de la máquina Salida de aire Cartucho fi ltro Entrada alimentación elettrica Entrada polvo Cono...
  • Page 84 F0920026.04 ASF Vertriebs GMBH Interpark 9 - 76877 Off enbach / Queich Germany Tel. +49 6348-959610 E-Mail info@asf-vertrieb.de...

Table des Matières