Table des Matières

Publicité

Les langues disponibles
  • FR

Les langues disponibles

  • FRANÇAIS, page 42

Liens rapides

WAC 2200
Air conditioning service unit
[MANUK5U.0BW]
ed.3
2188-[MANUK5U.0BW] ed.3
Instructions manual
GB
Manuel d'instructions
FR
Manuale d'uso
IT
Manual de instrucciones
ES
Manual de instruções
PT

Publicité

Table des Matières
loading

Sommaire des Matières pour Wow WAC 2200

  • Page 1 WAC 2200 Air conditioning service unit [MANUK5U.0BW] ed.3 2188-[MANUK5U.0BW] ed.3 Instructions manual Manuel d'instructions Manuale d'uso Manual de instrucciones Manual de instruções...
  • Page 2 INSTRUCTIONS MANUAL pag.2 - 12/11/2015...
  • Page 3: Table Des Matières

    INSTRUCTIONS MANUAL INDEX INDEX ..........................3 INTRODUCTION ......................... 6 CARE OF THE MANUAL ......................6 CONDITIONS OF WARRANTY ................... 6 GENERAL INFORMATION ....................7 END-OF-LIFE ........................7 BATTERY DISPOSAL ......................7 SAFETY RULES ........................8 REFRIGERANT AND LUBRICANT - PERSONAL PROTECTIVE EQUIPMENT AND PRECAUTIONS ........................
  • Page 4 INSTRUCTIONS MANUAL NEW OIL REINTEGRATION ....................22 TRACER REINTEGRATION ....................22 CHARGING THE A/C SYSTEM .....................22 STATIC DIAGNOSIS (optional) ....................24 SYSTEM FLUSHING (optional) ....................24 DATA ..........................25 CONFIGURATION ......................26 LANGUAGE ...........................26 UNIT OF MEASURE ......................26 WEIGHT PRESSURE TEMPERATURE OPTIONS ..........................27 DATE AND TIME ........................28 CONFIGURATION OF SETTING UP AND PRINTING ............28 ENTER OPERATOR N ......................29 RECOVERY PROCEDURE ....................29...
  • Page 5 INSTRUCTIONS MANUAL DELETION ..........................40 CONTRAST ........................41 pag.5 - 12/11/2015...
  • Page 6: Introduction

    INSTRUCTIONS MANUAL INTRODUCTION This machine is a pressure unit as can be seen in the CE declaration of conformity and Data plate. The equipment supplied conforms to the Essential Safety Requirements according to Annexure I of Directive 97/23/CE (PED). Any work involving repairs, modifications, and/or changing pressurised components or parts make safe use of the equipment very risky.
  • Page 7: General Information

    INSTRUCTIONS MANUAL GENERAL INFORMATION Machine model information are printed on the data plate on the rear of the machine (see Figures 1 and 2). Overall machine dimensions: Height: 1070 mm Width: 610 mm Depth: 630 mm Weight: 95 kg Operating temperature 10/50°C Storage temperature -25/50°C Like any equipment with moving parts, the machine inevitably produces noise.
  • Page 8: Safety Rules

    INSTRUCTIONS MANUAL SAFETY RULES This machine is a piece of equipment designed to recover R134a or R1234yf (depending on machine model) from air conditioning systems (A/C) for vehicles. The machine must be used by qualified personnel and can only be used correctly after having read this manual that also contains the basic safety rules listed below: - Wear gloves and safety glasses.
  • Page 9: Refrigerant And Lubricant - Personal Protective Equipment And Precautions

    INSTRUCTIONS MANUAL - Only use the oils recommended by the manufacturer. - Never confuse the vacuum pump oil with the oil for the air-conditioning systems. Failure to comply with any of these safety rules leads to any form of guarantee for the machine being rendered null and void.
  • Page 10: Rules For Working With R1234Yf Fluids

    INSTRUCTIONS MANUAL such vapors can cause loss of consciousness or death. R134a is not flammable, but if the vapor is exposed to open flames or incandescent surfaces it may undergo thermal decomposition and form acid substances. The acrid and pungent odor of these products of decomposition is sufficient to signal their presence.
  • Page 11 INSTRUCTIONS MANUAL The operator tasked with operating, supervising, and maintaining the machine must not: 1. Use the machine if they have not been trained and informed beforehand as called for by the law on safety in the workplace 2. Fail to act as described in the operating instructions. 3.
  • Page 12: Transportation

    INSTRUCTIONS MANUAL TRANSPORTATION If the equipment had to be transported must tighten the security screw for locking the load cell on this service station. For transportation of R134a or R1234yf are specific regulations in force in each state. Therefore require prior information to your dealer or service center. This unit is dedicated to the treatment individually (not simultaneously) the following refrigerants R134a or R1234yf.
  • Page 13: Principles Of Operation

    INSTRUCTIONS MANUAL PRINCIPLES OF OPERATION In a single series of operations, the machine permits recovering and recycling refrigerant fluids (R134a or R1234yf, depending on machine model) with no risk of releasing the fluids into the environment, and also permits purging the A/C system of humidity and deposits contained in the oil.
  • Page 14: The Machine

    INSTRUCTIONS MANUAL THE MACHINE BASIC COMPONENTS Refer to Figures 5, 6, 7 and 8. a) Control consoles b) Taps h) Wheels l) High/Low Pressure threaded connectors m) Used oil tank n) New oil container bi) Oil scale d) Bottle e) Drying filters o) Electronic scale r) Heating resistance ps) Serial port...
  • Page 15: Preliminary Operations

    INSTRUCTIONS MANUAL INSUFFICIENT GAS ALARM: Beeper advise when the charging quantity set exceeds the difference between availability and bottle minimum. PRELIMINARY OPERATIONS Check that the main switch (i) is set to O. Check that all the MACHINE taps are closed. Connect the MACHINE to the electrical supply and switch on.
  • Page 16: Automatic Procedure

    INSTRUCTIONS MANUAL AUTOMATIC PROCEDURE In the automatic mode, all the operations are performed automatically: recovery and recycling, oil discharge, vacuum, new oil reintegration, and charging. The values for the quantity of gas recovered, quantity of oil recovered, vacuum time, quantity of oil reintegrated, and quantity of gas charged into the system are automatically printed at the end of each single operation.
  • Page 17: Edit Tracer Data

    INSTRUCTIONS MANUAL AUTOMATIC PROCEDURE <AUTO.> xx ml 1) Press ENTER and select AUTOMATIC OIL. NOTE: Once the Vacuum operation has been completed the system automatically tops up the same quantity of oil as that extracted during Recovery. 2) Select the second line using , the use keys 0 to 9 to key in the volume of oil that must automatically be refilled after the Vacuum.
  • Page 18 INSTRUCTIONS MANUAL Use the arrow keys () to move to the brand of vehicle you are servicing, press ENTER to confirm, and the display will show the models for that type (for example, if you have chosen FORD): <COUGAR> ESCORT ESCORT D FIESTA Use the arrow keys () to go to the model required, and press ENTER to confirm.
  • Page 19 INSTRUCTIONS MANUAL Press ENTER to continue, the following screen is displayed: EMPTYING HOSES Please wait… The machine will recover the remaining refrigerant from the hoses, then the machine will be back to the MAIN MENU. Turn the main switch (I) to the 0 position. NB –...
  • Page 20: Assisted Procedure

    INSTRUCTIONS MANUAL ASSISTED PROCEDURE In the assisted procedure mode, all the operations can be performed singly to the exception of the recovery/recycling phase, which is automatically followed by used oil discharge. The values for the quantity of gas recovered, quantity of oil recovered, vacuum time, quantity of oil reintegrated, and quantity of gas charged into the system are automatically printed at the end of each single operation.
  • Page 21: Emptying Pipes

    INSTRUCTIONS MANUAL Open high and low pressure then Press START Open the high and low pressure taps on the machine and press START to start the refrigerant recovery/recycle phase. During this phase the display shows the quantity of refrigerant recovered, expressed in grams. When recovery is complete the machine stops and discharges and automatically displays the spent oil extracted by the A/C system during recovery.
  • Page 22: New Oil Reintegration

    INSTRUCTIONS MANUAL NEW OIL REINTEGRATION This operation can be carried out ONLY following a vacuum operation and before charging. Select the assisted procedure by pressing ENTER when the “ASSISTED PROCEDURE” message flashes on the LCD. The following message will be displayed: ATTENTION USING PAG OIL OR TRACER IN HYBRID VEHICLES MAY DAMAGE...
  • Page 23 INSTRUCTIONS MANUAL that is in the vehicle’s engine compartment. If this quantity is not known, look for it in the relavant manuals. 2) If installed, you can use DATABASE BASIC (DBB): Use the arrow to select the second line and press ENTER. The following screen is displayed: ENTER CODE VEHICLE MODEL ...
  • Page 24: Static Diagnosis (Optional)

    INSTRUCTIONS MANUAL Close and disconnect HP and LP coupling from A/C system press ENTER Close and disconnect HP and LP coupling from A/C system, the press ENTER to continue, the following screen is displayed: Are you sure that you have removed couplings from A/C SYSTEM? press ENTER Press ENTER to continue, the following screen is displayed:...
  • Page 25: Data

    INSTRUCTIONS MANUAL DATA This menu shows all the data read by the machine. Switch on the machine. From the MAIN MENU: AUTOMATIC PROCEDURE ASSISTED PROCEDURE <DATA & CONFIGURATION> MAINTENANCE xx.xkg Select DATA & CONFIGURATION. The following screen is displayed: <DATA> CONFIGURATION SERVICES Press ENTER to open the DATA MENU: Gas avail.
  • Page 26: Configuration

    INSTRUCTIONS MANUAL CONFIGURATION This menu is used to edit the machine’s settings. From the MAIN MENU: AUTOMATIC PROCEDURE ASSISTED PROCEDURE <DATA & CONFIGURATION> MANUTENZIONE xx.xKg Select DATA & CONFIGURATION. The following screen is displayed: DATA <CONFIGURATION> SERVICES Select CONFIGURATION and press ENTER. LANGUAGE From the CONFIGURATION MENU: LANGUAGE...
  • Page 27: Weight

    INSTRUCTIONS MANUAL WEIGHT g (Kg) PRESSURE TEMPERATURE °C WEIGHT Select WEIGHT: WEIGHT g (Kg) PRESSURE TEMPERATURE °C press ENTER to swtich from g(Kg) to oz(lb) or from oz(lb) to g(kg). WEIGHT g (Kg) PRESSURE TEMPERATURE °C Press STOP to exit. PRESSURE Select PRESSURE: WEIGHT g (Kg)
  • Page 28: Date And Time

    INSTRUCTIONS MANUAL LANGUAGE UNIT OF MEASURE OPTIONS SET DATE & TIME SET PRINT HEAD. ENTER OPERATOR NR. Select OPTIONS and the following screen is displayed: ..Call the technical service for the code. Once you have entered the code, press ENTER: ENABLE TRACER Select the option required and press ENTER to switch from “on”...
  • Page 29: Enter Operator N

    INSTRUCTIONS MANUAL CONF. PRINT HEAD....Key in the printing set up the  arrows to move within the line. Then press ENTER to confirm and go to the next lines. NOTE: The numerical keys include an alphabet similar to that for text messages, for example: press “2”...
  • Page 30: Services

    INSTRUCTIONS MANUAL SERVICES This menu makes it possible to manage some auxiliary services. From the MAIN MENU: AUTOMATIC PROCEDURE ASSISTED PROCEDURE <DATA & CONFIGURATION> MAINTENANCE xx.xkg Select DATA & CONFIGURATION. The following screen is displayed: DATA CONFIGURATION <SERVICES> Select SERVICES and press ENTER. NOTE: The SERVICES MENU is only available to authorised technicians REFRIGERANT MANAGEMENT The machine keeps track of the operations done on refrigerant fluid: recovery, system refilling,...
  • Page 31: Counters

    INSTRUCTIONS MANUAL ..A four-digit password can be entered to block the machine use. Once the password is entered, it is possible to proceed from the main menu only after entering the code. Entering 0000 as a password, the block is eliminated. COUNTERS This is used to check total COUNTERS of:: recovered gas, service alarm meter, total vacuum minutes, injected gas, gas recovered into the bottle with the bottle refilling function.
  • Page 32: Maintenance

    INSTRUCTIONS MANUAL MAINTENANCE This menu is used for maintenance operations on the machine. From the MAIN MENU: AUTOMATIC PROCEDURE ASSISTED PROCEDURE DATA & CONFIGURATION <MAINTENANCE> xx.x kg Select MAINTENANCE. FILLING THE MACHINE BOTTLE This operation must be performed whenever the available refrigerant fluid in the bottle is less than 3 kg and must in any case be performed when the “empty bottle”...
  • Page 33: Manual Air Purge

    INSTRUCTIONS MANUAL The machine will now fill the machine bottle with the preset quantity  500g. When the quantity minus 500 grams is reached, the machine will stop and display: FILLING BOTTLE Close external bottle tap Press Start Close the bottle tap and press START. The machine will stop automatically after having recovered the residual refrigerant from the hoses.
  • Page 34: Enable A/C System Flushing

    INSTRUCTIONS MANUAL 11) Disconnect the machine from the electrical supply. ENABLE A/C SYSTEM FLUSHING From the MAINTENANCE MENU: BOTTLE FILLING SERVICE ALARM CALIBRATION AIR PURGE GUIDED ENABLE A/C FLUSHING Select ENABLE A/C FLUSHING and the following screen is displayed: A/C SYSTEM FLUSHING Insert activation code: .
  • Page 35: Calibration

    INSTRUCTIONS MANUAL CALIBRATION Perform this operation whenever the values displayed on the LCD do not correspond to real values. WARNING: The operations listed below must be performed with maximum attention and care. In particular, always observe the following precautions. Always place the weights at the centre of the scale plate.
  • Page 36: Bottle Data

    INSTRUCTIONS MANUAL Press the ENTER key. ZERO LEVEL Raise the bottle levels xxxxx press START With the bottle lifted off the scale plate, press START. The following screen will be displayed: REFERENCE VALUE xxxxx g levels xxxxx press START Place the reference weight (28 to 32 kg) at the centre of the scale plate. Use keys 0 through 9 to type in the value of the weight.
  • Page 37: Calibrating The Oil Scale

    INSTRUCTIONS MANUAL CALIBRATING THE OIL SCALE From the CALIBRATION MENU: BOTTLE SCALE OIL SCALE A/C PRESSURE TR. BOTTLE TEMPERATURE Select OIL SCALE and the following screen is displayed: ZERO LEVEL Empty oil containers Levels xxxxx Press START Empty the oil containers. Replace the empty containers in their lodgings, taking care not to exert pressure on the scale, and press START.
  • Page 38: Vacuum Pump

    INSTRUCTIONS MANUAL Switch on the machine. From the CALIBRATION MENU: BOTTLE SCALE OIL SCALE A/C PRESSURE TR. BOTTLE TEMPERATURE Select BOTTLE TEMPERATURE and the following screen is displayed: BOTTLE TEMPERATURE XX.X °C START to change STOP to exit Check that the temperature shown on the display is that also read on the external thermometer.
  • Page 39: Filling The New Oil Container

    INSTRUCTIONS MANUAL 2) Unscrew the filling cap 2 (refer to Fig. 10). 3) Unscrew the drain cap 3. 4) Allow all the oil to run out into a disposal container (with height < 10 cm). 5) Close the drain cap 3. 6) Pour in new oil through the filling hole, opened previously, until the level rises to the midpoint on the indicator 4.
  • Page 40: Customizing The Dba (Database Advanced)

    INSTRUCTIONS MANUAL CUSTOMIZING THE DBA (DATABASE ADVANCED) Select ASSISTED PROCEDURE. Scroll down with the () down arrow key until the vehicle brands in the DBA appear: <ALFA ROMEO> AUDI CHRYSLER/JEEP Press the () up arrow key: TOYOTA VOLKSWAGEN VOLVO <USER DEFINED> Select the USER DEFINED option: <ABCD EDFG>...
  • Page 41 INSTRUCTIONS MANUAL NOTE CONCERNING THE DATABASE: we have taken all due care in gathering and entering the information contained in the database. The database data must nevertheless be considered purely indicative; the manufacturer declines any and all responsibility for incorrect data.
  • Page 42 MANUEL D’INSTRUCTIONS INDEX INDEX ..........................42 INTRODUCTION ....................... 44 CONSERVATION DU MANUEL .....................44 CONDITIONS DE GARANTIE ................... 45 INFORMATIONS GENERALES ..................45 FIN DE VIE ........................45 ÉLIMINATION BATTERIE .....................45 RÈGLES DE SÉCURITÉ ....................46 REFRIGERANT ET LUBRIFIANT - ÉQUIPEMENT DE PROTECTION INDIVIDUEL ET PRÉCAUTIONS ........................47 CONNEXION DES TUYAUX ....................47 PRÉCAUTIONS POUR LA MANIPULATION ET L'UTILISATION DES FLUIDES R134a ..48...
  • Page 43 MANUEL D’INSTRUCTIONS DIAGNOSTIC STATIQUE (option) ..................64 SYSTEME DE RINCAGE (option) ..................64 DONNÉES ......................... 65 CONFIGURATION ......................66 LANGUE ..........................66 UNITÉS DE MESURE ......................67 POIDS PRESSION TEMPÉRATURE OPTIONS ..........................68 DATE ET HEURE ........................68 CONFIGURATION EN-TÊTE ET IMPRESSION ..............69 SAISIR N°...
  • Page 44: Introduction

    MANUEL D’INSTRUCTIONS INTRODUCTION La machine est un ensemble sous pression comme il résulte de la déclaration de conformité CE et de la Plaque d’identification; l’appareil fourni est conforme aux Prescriptions essentielles de sécurité conformément à l’Annexe I de la Directive 97/23/CE (PED).
  • Page 45: Conditions De Garantie

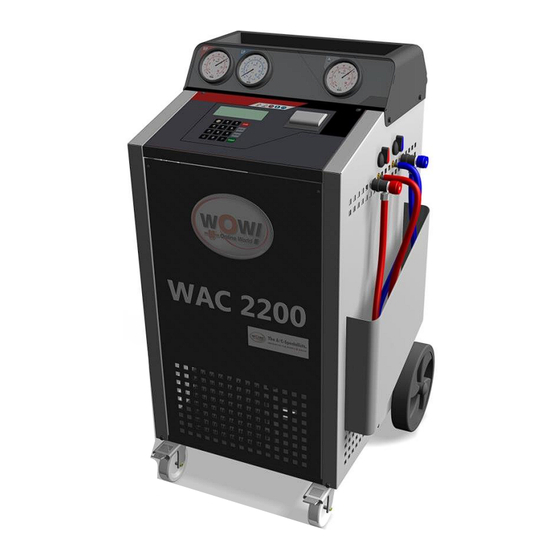
    MANUEL D’INSTRUCTIONS CONDITIONS DE GARANTIE Se référer au livret des CONDITIONS DE GARANTIE fourni avec la machine. INFORMATIONS GENERALES Les données sur le modèle de la machine sont indiquées sur une plaquette située sur la partie arrière de la machine (voir Figures 1 et 2). Les dimensions de la machine sont les suivantes: Hauteur : 1070 mm Largeur:...
  • Page 46: Règles De Sécurité

    MANUEL D’INSTRUCTIONS RÈGLES DE SÉCURITÉ Cette machine fait partie d'un appareil conçu pour récupérer exclusivement du R134a ou R1234yf ( dépendant du modèle de la machine) dans les systèmes de climatisation (A/C) des véhicules. La machine doit être utilisée par du personnel qualifié qui devra avoir lu correctement ce manuel qui contient ci-dessous les règles de sécurité...
  • Page 47: Refrigerant Et Lubrifiant - Équipement De Protection Individuel Et Précautions

    MANUEL D’INSTRUCTIONS - Jeter l'huile retirée du système de climatisation et de la pompe à vide dans les conteneurs pour huiles usagées. - Changer les filtres aux intervalles indiqués, uniquement avec des filtres recommandés par le fabricant. - Utiliser uniquement les huiles recommandées par le fabricant. - Utiliser uniquement les UV recommandés par le fabricant.
  • Page 48: Précautions Pour La Manipulation Et L'utilisation Des Fluides R134A

    MANUEL D’INSTRUCTIONS PRÉCAUTIONS POUR LA MANIPULATION ET L'UTILISATION DES FLUIDES R134a A l'état gazeux les fluides réfrigérants s'étendent dans des conditions environnementales standard. Afin qu'ils puissent être transportés et utilisés, ils doivent être compressés dans des bonbonnes appropriées. Nous recommandons donc d'observer toutes les précautions générales applicables à...
  • Page 49 MANUEL D’INSTRUCTIONS 9. Ajouter d'autres systèmes et/ou appareils non prévus par le fabricant dans le concept de travail. 10. Utiliser la machine sans l'enceinte de protection et/ou avec les barrières mobiles altérées ou retirées. 11. Raccorder la machine sur des sources d'énergie autres que celles prévues par le fabricant.
  • Page 50: Transport

    MANUEL D’INSTRUCTIONS TRANSPORT En cas de transport de l'appareil, il faut serrer la vis de sécurité afin de bloquer la balance montée sur l'appareil. Pour le transport de R134a ou R1234yf, des réglementations spécifiques sont en vigueur dans chaque pays. Il faut donc se renseigner au préalable auprès du revendeur ou centre d'assistance.
  • Page 51: Principes De Fonctionnement

    MANUEL D’INSTRUCTIONS PRINCIPES DE FONCTIONNEMENT La machine permet, avec une unique série d’opérations, de récupérer et recycler les fluides réfrigérants (R134a ou R1234yf en fonction du modèle de la machine) sans dispersion dans l’environnement, en éliminant en plus de l’installation A/C l’humidité et les différents dépôts présents dans l’huile.
  • Page 52: La Machine

    MANUEL D’INSTRUCTIONS LA MACHINE ELEMENTS FONDAMENTAUX Cf. fig. 5,6, 7 et 8: a) Console de commande b) Robinets h) Roues l) Raccords filetés Haute/Basse Pression m) Récipient huile usée n) Récipient huile neuve bi) Balance huile d) Bouteille e) Filtres déshydrateurs o) Balance électronique r) Résistance de chauffage ps) Port série...
  • Page 53: Alarmes

    MANUEL D’INSTRUCTIONS ALARMES ALARME HAUTE PRESSION : émet un signal sonore lorsque la pression du fluide dans le circuit atteint 20 bar. L’opération de récupération s’arrête automatiquement. ALARME BOUTEILLE PLEINE : émet un signal acoustique lorsque la bouteille contient plus de 80% de sa capacité...
  • Page 54: Operations Preliminaires

    MANUEL D’INSTRUCTIONS OPERATIONS PRELIMINAIRES Vérifier que l’interrupteur (i) est en position 0. Vérifier si tous les robinets de la machine sont fermés. Brancher la machine sur le réseau électrique et la mettre en marche. Vérifier que l’indicateur de niveau d’huile de la pompe à vide indique au moins la moitié. Si le niveau est inférieur, il faut ajouter de l’huile en suivant les indications du paragraphe ENTRETIEN.
  • Page 55: Guide Rapide

    MANUEL D’INSTRUCTIONS GUIDE RAPIDE Pour la première utilisation, nous proposons un guide rapide de mise en service de la machine qui permet de guider l’opérateur pour toute une série d’opérations (décrites au début du chapitre OPÉRATIONS PRÉLIMINAIRES): débloquer la balance de la bouteille, presser ENTER vérifier le niveau d’huile de la pompe à...
  • Page 56: Procedure Automatique

    MANUEL D’INSTRUCTIONS PROCEDURE AUTOMATIQUE Avec cette procédure, toutes les opérations sont effectuées en mode automatique: récupération et recyclage, vidange d’huile, vide, rétablissement du niveau d’huile neuve et remplissage. La quantité du gaz récupéré, l’huile récupérée, le temps de vide, l’huile rajoutée et la quantité...
  • Page 57: Modification Données Huiles

    MANUEL D’INSTRUCTIONS Modification données HUILES: utiliser les flèches pour sélectionner HUILE, appuyer sur ENTER, l’écran suivant s’affiche: PROCEDURE AUTOMATIQUE HUILE <AUTO.> HUILE xx ml 1. Appuyer sur ENTER sélectionner l’HUILE AUTOMATIQUE Lorsque l’opération Vide achevée, l’installation rajoute REMARQUE: automatiquement la même quantité d’huile que celle extraite pendant la Récupération. 2.
  • Page 58 MANUEL D’INSTRUCTIONS 3) Si le DATABASE ADVANCED (DBA) est installé, on peut l’utiliser: Sélectionner la deuxième ligne avec  et appuyer sur ENTER, l’écran suivant s’affiche: <ALFA ROMEO> AUDI CHRYSLER/JEEP Utiliser les touches directionnelles () pour se déplacer sur la marque de la voiture sur laquelle on accomplit l'entretien, appuyer sur ENTER pour confirmer, l'afficheur montre les modèles de la marque (par exemple si on choisit FORD): <COUGAR>...
  • Page 59 MANUEL D’INSTRUCTIONS Fermer et débrancher le raccord HP et LP du système A/C Appuyer sur ENTER Fermer et débrancher le raccord HP et LP de l’installation A/C puis appuyer sur ENTER pour continuer, l’écran suivant s’affiche : Etes-vous sûr d’avoir enlevé...
  • Page 60: Procédure Assistée

    MANUEL D’INSTRUCTIONS PROCÉDURE ASSISTÉE Chaque opération de la procédure assistée peut être accomplie séparément mise à part la phase de récupération recyclage que la vidange de l'huile usée accomplit automatiquement. L’impression de la quantité de gaz récupérée, de l’huile récupérée, du temps de vidange, de l’huile rajoutée et de la quantité...
  • Page 61: Vidange Des Tuyaux Vidange

    MANUEL D’INSTRUCTIONS Ouvrir haute et basse Pression, puis Presser START Ouvrir les robinets de haute et basse pression de la machine et appuyer sur START pour commencer la phase de récupération/recyclage du réfrigérant. Pendant cette phase l’afficheur montre la quantité de réfrigérant récupérée, en grammes. A la fin de la récupération, la machine s’arrête et se vide en affichant automatiquement l’huile usée extraite de l'installation A/C pendant la récupération.
  • Page 62 MANUEL D’INSTRUCTIONS RAJOUT HUILE NEUVE Cette opération ne peut être effectuée qu’exclusivement après une opération de vide et avant le remplissage. Choisir la procédure assistée: lorsque les mots PROCÉDURE ASSISTÉE clignotent sur le LCD appuyer sur ENTER. Choisir HUILE: lorsque les mots HUILE XX CC clignotent sur le LCD.
  • Page 63 MANUEL D’INSTRUCTIONS REMPLISSAGE INSTALLATION A/C Choisir la PROCÉDURE ASSISTÉE, lorsque les mots procédure assistée clignotent sur le LCD et appuyer sur ENTER. Choisir remplissage, lorsque les mots REMPLISSAGE XXXX G clignotent sur le LCD. L’écran suivant s’affiche PROCEDURE ASSISTEE REMPLISSAGE <xxxg>...
  • Page 64: Diagnostic Statique (Option)

    MANUEL D’INSTRUCTIONS REMARQUE: les touches numériques comprennent un alphabet semblable aux messages de texte, par exemple: appuyer sur 2 une fois pour afficher A, deux fois pour afficher B trois fois pour afficher C, quatre fois pour 2 L’écran suivant s’affiche : REMPLISSAGE xyz g Presser START...
  • Page 65: Données

    MANUEL D’INSTRUCTIONS DONNÉES Ce menu montre toutes les données lues par la machine. Allumer la machine, A partir du MENU PRINCIPAL : PROCEDURE AUTOMATIQUE PROCEDURE ASSISTEE <DONNEES ET CONFIG.> ENTRETIEN xx.xKg sélectionner DONNÉES CONFIGURATION. L’écran suivant s’affiche : <DONNEES> CONFIGURATION SERVICES Appuyer sur ENTER pour entrer dans le MENU DONNÉES: Gaz disp.
  • Page 66: Configuration

    MANUEL D’INSTRUCTIONS CONFIGURATION Ce menu permet de modifier les configurations de la machine. A partir du menu principal : PROCEDURE AUTOMATIQUE PROCEDURE ASSISTEE <DONNEES ET CONFIG.> ENTRETIEN xx.xKg sélectionner DONNÉES CONFIGURATION. L’écran suivant s’affiche : DONNEES <CONFIGURATIONS> SERVICES Sélectionner CONFIGURATION et appuyer sur ENTER LANGUE A partir du MENU CONFIGURATION : LANGUE...
  • Page 67: Unités De Mesure

    MANUEL D’INSTRUCTIONS UNITÉS DE MESURE A partir du MENU CONFIGURATION : LANGUE UNITES DE MESURE OPTIONS CONFIG DATE ET HEURE CONF. EN TETE IMPRESS SAISIR N OPERATEUR Sélectionner UNITÉS DE MESURE : POIDS g(Kg) PRESSION TEMPERATURE °C POIDS Sélectionner POIDS : <POIDS>...
  • Page 68: Options

    MANUEL D’INSTRUCTIONS OPTIONS A partir du MENU CONFIGURATION : LANGUE UNITES DE MESURE OPTIONS CONFIG DATE ET HEURE CONF. EN TETE IMPRESS SAISIR N OPERATEUR Sélectionner OPTIONS, l’écran suivant s’affiche : ..Appeler le service technique pour le code. Après avoirs saisi le code appuyer sur ENTER. ACTIVAT.TRAC.
  • Page 69: Configuration En-Tête Et Impression

    MANUEL D’INSTRUCTIONS CONFIGURATION EN-TÊTE ET IMPRESSION On peut personnaliser l’impression en saisissant 4 lignes contenant les coordonnées de l’atelier (par exemple: Nom, Adresse, téléphone, e-mail). A partir du MENU CONFIGURATION : LANGUE UNITES DE MESURE OPTIONS CONFIG DATE ET HEURE CONF.
  • Page 70: Procedure De Retablissement

    MANUEL D’INSTRUCTIONS PROCEDURE DE RETABLISSEMENT Il est possible de sélectionner la procédure de rétablissement par défaut A partir du MENU DE CONFIGURATION : LANGUE UNITE DE MESURE OPTIONS CONFIG DATE ET HEURE CONF. IMPRIMANTE ENTRE N° OPERATEUR. PROCEDURE RETABLISSEMENT Sélectionner PROCEDURE RETABLISSEMENT et l’écran suivant s’affiche : PROCEDURE RETABLISSEMENT HAUTE PRECISION STANDARD...
  • Page 71: Services

    MANUEL D’INSTRUCTIONS SERVICES Ce menu permet de gérer des services auxiliaires. A partir du menu principal : PROCEDURE AUTOMATIQUE PROCEDURE ASSISTEE <DONNEES ET CONFIG.> ENTRETIEN xx.xKg sélectionner DONNÉES CONFIGURATION. L’écran suivant s’affiche : DONNEES CONFIGURATION <SERVICES> Sélectionner SERVICES et appuyer sur ENTER REMARQUE: le MENU SERVICES est réservé...
  • Page 72: Mot De Passe

    MANUEL D’INSTRUCTIONS MOT DE PASSE A partir du MENU SERVICES : GESTION REFRIGER. MOT DE PASSE COMPTEURS Sélectionner MOT DE PASSE, l’écran suivant s’affiche : ..On peut saisir un mot de passe de 4 chiffres, qui verrouille l’utilisation de la machine. Une fois le mot de passe saisi sur le menu principal, on ne peut continuer qu'en saisissant le code.
  • Page 73: Entretien

    MANUEL D’INSTRUCTIONS ENTRETIEN Ce menu permet de modifier les opérations d’entretien de la machine. A partir du menu principal : PROCEDURE AUTOMATIQUE PROCEDURE ASSISTEE DONNEES ET CONFIG. <ENTRETIEN> xx.xKg sélectionner ENTRETIEN. REMPLISSAGE BOUTEILLE INTERNE DE LA MACHINE Accomplir cette opération lorsque la bouteille contient moins de 3 kg de réfrigérant disponibles et toujours si l'afficheur montre une bouteille vide.
  • Page 74: Purge Air Manuelle

    MANUEL D’INSTRUCTIONS La machine remplit alors la bouteille interne de la quantité configurée  500g. Lorsqu’il manque 500 grammes à la quantité voulue, la machine s'arrête et le message suivant s'affiche: REMPLISSAGE BOUTEILLE Fermer robinet bouteille externe et Presser Start Fermer le robinet de la bouteille et appuyer sur START, la machine s’arrête automatiquement après avoir récupéré...
  • Page 75: Alarme De Service Et Remplacement Des Filtres

    MANUEL D’INSTRUCTIONS ALARME DE SERVICE ET REMPLACEMENT DES FILTRES Cette opération doit être effectuée quand la machine donne une alarme de service pendant les 10 premières secondes. Avant de commencer toute opération, vérifier que les filtres de rechange sont du même type que ceux montés sur la machine. Les opérations à effectuer sont les suivantes (Voir Figure11): 1) Débrancher la machine du secteur 2) Porter des gants et des lunettes de protection...
  • Page 76: Étalonnage

    MANUEL D’INSTRUCTIONS ÉTALONNAGE Cette opération doit être effectuée quand le LCD n’affiche plus des valeurs cohérentes avec la réalité. ATTENTION: les opérations indiquées ci-dessous doivent être effectuées avec la plus grande attention et en prenant toutes les précautions. En particulier, il faut faire attention aux situations suivantes : placer toujours le poids au centre du plateau de la balance.
  • Page 77: Étalonnage Balance Bouteille

    MANUEL D’INSTRUCTIONS ÉTALONNAGE BALANCE BOUTEILLE Débrancher la machine du secteur. Se procurer un poids connu de référence, de 28 à 32 kg. Démonter le couvercle arrière pour accéder à la bouteille de la machine. Fermer les robinets bleu et rouge de la bouteille. Dévisser l’écrou . Séparer la résistance de chauffage (r) (Fig. 8) de la bouteille (ne pas toucher ni débrancher les câbles électriques de la résistance).
  • Page 78: Données Bouteille

    MANUEL D’INSTRUCTIONS DONNÉES BOUTEILLE N.B. Ce menu est réservé à l’opérateur responsable des essais. Il contient le seuil de sécurité maximum et, par conséquent, les valeurs de la bouteille ne doivent en aucun cas et pour aucune raison être modifiées; en cas de besoin, téléphoner au Service après-vente.
  • Page 79: Ètalonnage Balance Huile

    MANUEL D’INSTRUCTIONS ÈTALONNAGE BALANCE HUILE A partir du MENU ÉTALONNAGE : BALANCE BOUTEILLE BALANCE HUILE PRESSION A/C TEMPERATURES BOUTEILLE Sélectionner BALANCE HUILE, l’écran suivant s’affiche : NIVEAU DE ZERO Vider conteneurs Niveaux xxxxx Presser START Vider les réservoirs huile et les replacer, vides, dans leur logement sans exercer de pression sur la balance et presser la touche START L’écran suivant apparaît.
  • Page 80: Étalonnage De La Pression A/C

    MANUEL D’INSTRUCTIONS ÉTALONNAGE DE LA PRESSION A/C Attention: cette opération doit être effectuée avec les tuyaux de service avant, vides. Avant de commencer l’étalonnage, il est recommandé d’effectuer une RECUPERATION. Dévisser lentement le tuyau de service avant de couleur bleue, ouvrir les robinets avant et vérifier que les deux manomètres soient sur 0 bar.
  • Page 81: Pompe À Vide

    MANUEL D’INSTRUCTIONS POMPE À VIDE Pour garantir le bon fonctionnement de la pompe à vide, les opérations ci-après doivent être effectuées périodiquement: M1) Rajout huile M2) Vidange huile Pour le rajout et/ou la vidange de l’huile de la pompe, utiliser exclusivement l’huile recommandée par le fabricant (Pour le type exact d’huile, s’adresser au revendeur).
  • Page 82: Remplissage Du Réservoir Traceur

    MANUEL D’INSTRUCTIONS REMPLISSAGE DU RÉSERVOIR TRACEUR Lorsque le niveau du traceur descend au-dessous de 50 cc, il convient de remplir le réservoir de manière à avoir une réserve de traceur suffisante pour effectuer les remplissages successifs. Opérations à accomplir : appuyer sur le raccord rapide (réf. 1, Fig. 14) pour enlever le réservoir du traceur (réf.
  • Page 83: Saisie

    MANUEL D’INSTRUCTIONS <ABCD EDFG> HILM NOPQ ???? ???? SAISIE Pour saisir les données personnalisées appuyer sur START, l’écran suivant apparaît: NOM MODELE: ... . . QUANTITE MODELE: ... . . Avec le clavier, saisir le nom du modèle du véhicule, confirmer avec ENTER.
  • Page 84 MANUALE D’USO INDICE INDICE ..........................84 INTRODUZIONE ........................ 87 CONSERVAZIONE DEL MANUALE ..................87 CONDIZIONI DI GARANZIA ....................88 INFORMAZIONI GENERALI ....................88 FINE VITA .......................... 88 SMALTIMENTO BATTERIA ....................88 NORME DI SICUREZZA ....................89 REFRIGERANTI E LUBRIFICANTI - DISPOSITIVI DI PROTEZIONE INDIVIDUALE E PRECAUZIONI:........................90 NORME DI COMPORTAMENTO CON IL REFRIGERANTE R134A ........91 NORME DI COMPORTAMENTO CON IL REFRIGERANTE R1234YF ........91...
  • Page 85 MANUALE D’USO VUOTO ..........................103 REINTEGRO OLIO NUOVO ....................104 REINTEGRO TRACCIANTE ....................104 RIEMPIMENTO IMPIANTO A/C ................... 104 DIAGNOSI STATICA (opzionale) ..................106 LAVAGGIO IMPIANTO A/C (optional) .................. 106 DATI ..........................107 CONFIGURAZIONE ......................108 LINGUA ..........................108 UNITA’ DI MISURA ......................108 PESO PRESSIONE TEMPERATURA...
  • Page 86 MANUALE D’USO CANCELLAZIONE ....................... 123 CONTRASTO ........................124 pag.86 - 12/11/2015...
  • Page 87: Introduzione

    MANUALE D’USO INTRODUZIONE La macchina è un insieme in pressione come si evince dalla dichiarazione di conformità CE e Targa dati; l’attrezzatura fornita è conforme ai Requisiti Essenziali di Sicurezza in Accordo all’ All. I della Direttiva 97/23/CE (PED) qualsiasi intervento di: riparazione, modifica e/o sostituzioni di componenti o parti in pressione mette in serio rischio l’...
  • Page 88: Condizioni Di Garanzia

    MANUALE D’USO CONDIZIONI DI GARANZIA Far riferimento al libretto di garanzia fornito insieme alla macchina. INFORMAZIONI GENERALI Le informazioni sul modello macchina sono indicati su una targhetta situata nella parte posteriore della macchina (vedi fig. 1 e 2). La macchina ha le seguenti caratteristiche dimensionali: Altezza: 1070 mm...
  • Page 89: Norme Di Sicurezza

    MANUALE D’USO NORME DI SICUREZZA La macchina è una apparecchiatura progettata per recuperare R134a o R1234yf (a seconda del modello di macchina) degli impianti di condizionamento e climatizzazione (A/C) degli autoveicoli. La macchina deve essere utilizzata da personale qualificato e può essere usata correttamente solo dopo avere letto il presente manuale contenente anche le basilari regole di sicurezza di seguito enunciate: - Indossare guanti ed occhiali di protezione.
  • Page 90: Refrigeranti E Lubrificanti - Dispositivi Di Protezione Individuale Eprecauzioni

    MANUALE D’USO - Prima di collegare la macchina con la rete elettrica, verificare che il voltaggio e la frequenza della rete di alimentazione siano corrispondenti ai valori indicati nella targhetta CE. La bombola deve essere riempita all’80% della capacità massima per lasciare un polmone di gas per assorbire eventuali aumenti di pressione.
  • Page 91: Norme Di Comportamento Con Il Refrigerante R134A

    MANUALE D’USO NON E 'CONSENTITO NESSUN TIPO DI MANOMISSIONE DEI SUDDETTI DISPOSITIVI DI SICUREZZA ATTENZIONE ! La macchina deve essere collegata ad una presa dotata di efficace collegamento di terra NORME DI COMPORTAMENTO CON IL REFRIGERANTE R134A I fluidi refrigeranti nelle condizioni ambiente sono gassosi. Per poter essere trasportati ed utilizzati devono essere compressi in apposite bombole.
  • Page 92 MANUALE D’USO 1. utilizzare la macchina in una configurazione costruttiva diversa da quella prevista dal costruttore; 2. utilizzare la macchina in luoghi a rischio di esplosione e/o incendio (la macchina è certificata ai sensi della direttiva 94/9/CE ATEX); 3. integrare altri sistemi e/o attrezzature non considerati dal costruttore nel progetto esecutivo;...
  • Page 93: Trasporto

    MANUALE D’USO  Niente fuoco, niente fumo, niente lavoratori, niente automobili nelle vicinanze di questa stazione di ricarica. La stazione di ricarica deve essere completamente testata da tecnici addestrati prima che possa essere usata nuovamente. TRASPORTO Se l’apparecchiatura dovesse essere trasportata bisogna avvitare la vite di sicurezza per il blocco della bilancia presente sull’apparecchiatura.
  • Page 94: Principi Di Funzionamento

    MANUALE D’USO PRINCIPI DI FUNZIONAMENTO La macchina permette, con un’unica serie di operazioni, di recuperare e riciclare senza dispersioni nell’ambiente i fluidi frigorigeni, asportando inoltre dall’impianto A/C l’umidità ed i vari depositi contenuti nell’olio. Infatti all’interno della macchina è presente un evaporatore/separatore mediante il quale si asporta dal fluido frigorigeno recuperato dall’impianto A/C l’olio e le altre impurità...
  • Page 95: La Macchina

    MANUALE D’USO LA MACCHINA ELEMENTI FONDAMENTALI Vedere fig. 5,6, 7 e 8: a) Consolle di comando b) Rubinetti h) Ruote l) Raccordi filettati Alta/Bassa Press. m) Contenitore olio esausto bi) bilancia olio d) Bombola u) porta USB e) Filtri disidratatori o) Bilancia elettronica r) Resistenza di riscaldamento ps) Porta seriale...
  • Page 96: Operazioni Preliminari

    MANUALE D’USO ALLARME SERVIZIO: viene visualizzato ed emette un segnale acustico quando si complessivamente sono stati recuperati 100 kg di refrigerante. Per disattivarlo bisogna sostituire i filtri e l’olio della pompa del vuoto. Insieme ai filtri verrà inviato un codice per eliminare l’allarme.
  • Page 97 MANUALE D’USO premere START per fare 1 min. di vuoto riempire la bombola int (vedi manuale d’uso), premere ENTER START stampa guida, STOP per uscire Seguire le istruzioni visualizzate, al termine premere START per stampare uno scontrino riepilogativo della procedura guidata; premere STOP per uscire. NOTA: se la procedura guidata non viene portata a termine, verrà...
  • Page 98: Procedura Automatica

    MANUALE D’USO PROCEDURA AUTOMATICA Nella procedura automatica tutte le operazioni sono eseguite in modo automatico: recupero e riciclo, scarico olio, vuoto, reintegro olio nuovo e riempimento. La stampa della quantità di gas recuperato, olio recuperato, tempo di vuoto, olio reintegrato e quantità di gas iniettato vengono stampati in modo automatico alla fine di ogni singola operazione.
  • Page 99: Modifica Dati Olio

    MANUALE D’USO Modifica dati OLIO: utilizzare le frecce per selezionare OLIO, premere ENTER, verrà visualizzata la seguente schermata: PROCEDURA AUTOMATICA OLIO <AUTO.> OLIO xx ml 1. Premere ENTER selezionare l’OLIO AUTOMATICO NOTA: Una volta che l'operazione Vuoto è stata completata, l'impianto reintegra automaticamente la stessa quantità...
  • Page 100 MANUALE D’USO confermare. Se si desidera installare il DATABASE BASIC (DBB) contattare il rivenditore della macchina. 3) Se installato, si può utilizzare il DATABASE ADVANCED (DBA): Selezionare la seconda riga con  e premere ENTER, verrà visualizzata la seguente schermata: <ALFA ROMEO>...
  • Page 101 MANUALE D’USO Una volta che l’operazione di riempimento è completata, la macchina visualizza il seguente messaggio: Chiudere e disconnettere I raccordi AP e BP dal sistema A/C Premere ENTER Chiudere e disconenttere gli attacchi rapidi dal sistema A/C, premere ENTER per continuare, la macchina visualizza il seguente messaggio: Sei sicuro di aver disnnessi gli attacchi...
  • Page 102: Procedura Assistita

    MANUALE D’USO PROCEDURA ASSISTITA Nella procedura assistita ogni operazione può essere eseguita singolarmente tranne la fase di recupero riciclo che viene seguita automaticamente dallo scarico olio usato. La stampa della quantità di gas recuperato, olio recuperato, tempo di vuoto, olio reintegrato e quantità di gas iniettato vengono stampati in modo automatico alla fine di ogni singola operazione.
  • Page 103: Svuotamento Tubi

    MANUALE D’USO Aprire alta e bassa Pressione, quindi Premere START Aprire i rubinetti di alta e bassa pressione della macchina e premere START per iniziare la fase di recupero/riciclo del refrigerante. Durante questa fase il display visualizza la quantità di refrigerante recuperato, espressa in grammi.
  • Page 104: Reintegro Olio Nuovo

    MANUALE D’USO Se si riscontrano perdite, la macchina si ferma automaticamente e visualizzerà il sistema A / C PERDITE allarme. Rilevamento di micro-perdite non è garantito. REINTEGRO OLIO NUOVO Questa operazione può essere eseguita solo ed esclusivamente dopo un’operazione di vuoto e prima del riempimento.
  • Page 105 MANUALE D’USO PROCEDURA ASSISTITA RIEMPIMENTO <xxxg> DATABASE 1) Usare i tasti da 0 a 9 per impostare la quantità (in grammi) di refrigerante da caricare nel sistema A/C, e premere ENTER. NOTA: La quantità di fluido da reintegrare è riportata, per la maggioranza degli impianti, su una targhetta che si trova nel vano motore del veicolo.
  • Page 106: Diagnosi Statica (Opzionale)

    MANUALE D’USO Viene visualizzata la schermata seguente: RIEMPIMENTO xyz g Premere START Aprire il rubinetto alta pressione della macchina e premere il tasto START (nel caso di un impianto A/C con un raccordo solo di bassa o alta pressione aprire solo il rubinetto relativo della macchina ).
  • Page 107: Dati

    MANUALE D’USO DATI Questo menu mostra tutti i dati letti dalla macchina. Accendere la macchina. Dal menu principale: PROCEDURA AUTOMATICA PROCEDURA ASSISTITA <DATI E CONFIGURAZ.> MANUTENZIONE xx.xKg selezionare DATI E CONFIGURAZIONE. Viene visualizzata la schermata seguente: <DATI> CONFIGURAZIONE SERVIZI Premere ENTER per entrare dentro il MENU DATI: Gas disp.
  • Page 108: Configurazione

    MANUALE D’USO CONFIGURAZIONE Questo menu serve per modificare le impostazioni della macchina. Dal menu principale: PROCEDURA AUTOMATICA PROCEDURA ASSISTITA <DATI E CONFIGURAZ.> MANUTENZIONE xx.xKg selezionare DATI E CONFIGURAZIONE. Viene visualizzata la schermata seguente: DATI <CONFIGURAZIONE> SERVIZI Selezionare CONFIGURAZIONE e premere ENTER. LINGUA Dal MENU CONFIGURAZIONE: LINGUA...
  • Page 109: Peso Pressione Temperatura

    MANUALE D’USO PESO g(Kg) PRESSIONE TEMPERATURA °C PESO Selezionare PESO: <PESO> g(Kg) PRESSIONE TEMPERATURA °C premere ENTER per cambiare da g(kg) a oz(lb) o da oz(lb) a g(kg). PESO g(Kg) PRESSIONE TEMPERATURA °C premere STOP per uscire. PRESSIONE Selezionare PRESSIONE: PESO g(Kg) <PRESSIONE>...
  • Page 110: Data E Ora

    MANUALE D’USO LINGUA UNITA’ DI MISURA OPZIONI SET DATA E ORA CONF. INTEST. STAMPA INSERIRE N OPERATORE Selezionare OPZIONI, verrà visualizzato la seguente schermata: ..Chiamare il servizio tecnico per il codice. Dopo aver inserito il codice premere ENTER: ABILITAZ.TRAC. Selezionare l’opzione desiderata e premere ENTER per modificarla da “off”...
  • Page 111: Inserire N Operatore

    MANUALE D’USO LINGUA UNITA’ DI MISURA OPZIONI SET DATA E ORA CONF. INTEST. STAMPA INSERIRE N OPERATORE Selezionare CONF. INTEST. STAMPA, verrà visualizzato la seguente schermata: CONF. INTEST. STAMPA ... . . Digitare l’intestazione di stampa usando le frecce ...
  • Page 112 MANUALE D’USO PROCEDURA DI RECUPERO HIGH PRECISION STANDARD HIGH or STANDARD Selezionare "HIGH PRECISION" per eseguire sempre un recupero ad alta precisione, selezionare "STANDARD" per eseguire sempre un recupero più veloce (ma senza conformità SAE J-2788 o SAE J-2843), oppure selezionare "HIGH o STANDARD" per lasciare la scelta all'inizio di ogni procedura.
  • Page 113: Servizi

    MANUALE D’USO SERVIZI Questo menu consente di gestire alcuni servizi ausiliari. Dal menu principale: PROCEDURA AUTOMATICA PROCEDURA ASSISTITA <DATI E CONFIGURAZ.> MANUTENZIONE xx.xKg selezionare DATI E CONFIGURAZIONE. Viene visualizzata la schermata seguente: DATI CONFIGURAZIONE <SERVIZI> Selezionare SERVIZI e premere ENTER. NOTA: il MENU SERVIZI è...
  • Page 114: Contatori

    MANUALE D’USO ..Si può inserire una password a 4 cifre che blocca l’uso della macchina. Una volta inserita la password, dal menù principale si può andare avanti solamente inserendo il codice. Inserendo come password 0000 si disabilita il blocco. CONTATORI Serve per vedere i contatori totali di: gas recuperato, contatore allarme di servizio, minuti totali di vuoto, gas iniettato, gas reintegrato in bombola con la funzione riempimento bombola.
  • Page 115: Manutenzione

    MANUALE D’USO MANUTENZIONE Questo menu serve per le operazioni di manutenzione della macchina. Dal menu principale: PROCEDURA AUTOMATICA PROCEDURA ASSISTITA DATI E CONFIGURAZ. <MANUTENZIONE> xx.xKg selezionare MANUTENZIONE. RIEMPIMENTO BOMBOLA INTERNA ALLA MACCHINA Questa operazione deve essere eseguita quando all’interno della bombola vi siano meno di 3 kg di refrigerante disponibili e comunque deve essere assolutamente eseguita quando viene visualizzato allarme bombola vuota.
  • Page 116: Spurgo Aria Manuale

    MANUALE D’USO A questo punto la macchina riempirà la bombola interna della quantità impostata  500g. Quando mancano 500 grammi al raggiungimento della quantità, la macchina si arresterà e verrà visualizzato il messaggio: RIEMPIMENTO BOMBOLA Chiudere rubinetto bombola esterna e Premer Start Chiudere il rubinetto della bombola e premere START, la macchina si fermerà...
  • Page 117: Abilitazione Lavaggio A/C

    MANUALE D’USO 8) Digitare il codice filtri per cancellare l’allarme; se il codice filtri non è disponibile telefonare al Centro Assistenza. 9) Recuperare una quantità di circa 500g di gas per caricare il circuito della macchina. 10) Spegnere la macchina 11) Sconnettere la macchina dalla rete elettrica ABILITAZIONE LAVAGGIO A/C Dal MENU MANUTENZIONE:...
  • Page 118: Calibrazione

    MANUALE D’USO CALIBRAZIONE Questa operazione deve essere eseguita quando LCD non visualizza più valori coerenti con la realtà. ATTENZIONE: Le operazioni di seguito elencate sono da eseguirsi con la massima attenzione e cautela. In particolare occorre prestare attenzione alle seguenti situazioni: Posizionare sempre i pesi al centro del piatto della bilancia.
  • Page 119: Dati Bombola

    MANUALE D’USO LIVELLO DI ZERO Sollevare la bombola Livelli xxxx Premere START Con la bombola sollevata dal piatto bilancia premere il tasto START, adesso appare la seguente schermata. VALORE RIFERIMENTO xxxxxx g Livelli xxxxx Premere START Posizionare al centro del piatto bilancia il peso di riferimento (28 a 32 kg) , scrivere quest’ultimo usando i tasti 0-1-….- 9 e premere il tasto START.
  • Page 120: Calibrazione Bilancia Olio

    MANUALE D’USO CALIBRAZIONE BILANCIA OLIO Dal MENU CALIBRAZIONE: BILANCIA BOMBOLA BILANCIA OLIO PRESSIONE A/C TEMPERATURE BOMBOLA Selezionare BILANCIA OLIO, verrà visualizzato la seguente schermata: LIVELLO DI ZERO Vuotare contenitori Livelli xxxxx Premere START Svuotare i contenitori olio, rimetterli vuoti nella loro sede senza fare pressione sulla bilancia e premere il tasto START.
  • Page 121: Pompa Del Vuoto

    MANUALE D’USO Accendere la macchina. Dal MENU CALIBRAZIONE: BILANCIA BOMBOLA BILANCIA OLIO PRESSIONE A/C TEMPERATURE BOMBOLA Selezionare TEMPERATURA BOMBOLA, verrà visualizzato la seguente schermata: TEMPERATURA BOMBOLA XX.X °C START per modificare STOP per uscire Verificare la temperatura visualizzata sul display con quella letta sul termometro esterno. Se necessario modificarla premere START TEMPERATURA BOMBOLA XX.X...
  • Page 122: Riempimento Contenitore Olio Nuovo

    MANUALE D’USO 11) Fare defluire completamente l’olio in un contenitore per oli da smaltire (altezza <10cm). 12) Chiudere il tappo di scarico 3. 13) Introdurre l’olio nuovo dal foro di riempimento aperto precedentemente fino a quando il livello raggiunge la metà dell’indicatore 4. 14) Riavvitare il tappo olio 2 e serrarlo.
  • Page 123: Personalizzazione Database Advanced (Dba)

    MANUALE D’USO PERSONALIZZAZIONE DATABASE ADVANCED (DBA) Selezionare PROCEDURA ASSISTITA, scorrere in basso utilizzando il tasto , fintanto non appaiono le marche delle autovetture del DBA: <ALFA ROMEO> AUDI CHRYSLER/JEEP Premere il tasto freccia in alto (): TOYOTA VOLKSWAGEN VOLVO <DEFINIZIONI UTENTE> selezionare l’opzione DEFINIZIONI UTENTE: <ABCD EDFG>...
  • Page 124 MANUALE D’USO CONTRASTO La macchina può regolare il contrasto del display utilizzando i tasti 4 (diminuisce il contrasto) e 5 (aumenta il contrasto). Per agire sul contrasto la macchina deve trovarsi nel menù principale con procedura automatica lampeggiante. pag.124 - 12/11/2015...
  • Page 125 MANUAL DE INSTRUCCIONES SUMARIO SUMARIO ........................125 INTRODUCCIÓN ......................127 CONSERVACIÓN DEL MANUAL ..................127 CONDICIONES DE GARANTÍA ..................128 INFORMACIONES GENERALES ................... 128 FIN DE LA VIDA ÚTIL ..................... 128 ELIMINACIÓN DE LA BATERÍA ..................128 NORMAS DE SEGURIDAD ..................... 129 REFRIGERANTE Y LUBRICANTE - DISPOSITIVO DE PROTECCIÓN INDIVIDUAL Y PRECAUCIONES ........................
  • Page 126 MANUAL DE INSTRUCCIONES VACÍO ..........................145 REPOSICIÓN ACEITE NUEVO ................... 146 REPOSICIÓN DE TRAZADOR .................... 146 LLENADO SISTEMA A/C ..................... 147 DIAGNOSIS ESTÁTICA (opcional) ..................148 LAVADO SISTEMA (opcional) ..................... 148 DATOS ..........................149 CONFIGURACIÓN ......................150 IDIOMA ..........................150 UNIDADES DE MEDIDA ......................
  • Page 127: Introducción

    MANUAL DE INSTRUCCIONES INTRODUCCIÓN La máquina es un sistema bajo presión como se deriva de la declaración de conformidad CE y de la Tarjeta de datos; el equipo suministrado es conforme a los Requisitos Esenciales de Seguridad de Acuerdo al Anexo I de la Directiva 97/23/CE (PED);...
  • Page 128: Condiciones De Garantía

    MANUAL DE INSTRUCCIONES CONDICIONES DE GARANTÍA Consultar las CONDICIONES DE GARANTÍA en el folleto suministrado con la máquina. INFORMACIONES GENERALES La información sobre el modelo de la máquina está en una placa puesta en la parte trasera de la máquina (véase figuras 1 y 2). La máquina tiene las siguientes medidas: Alto: 1070 mm Ancho:...
  • Page 129: Normas De Seguridad

    MANUAL DE INSTRUCCIONES NORMAS DE SEGURIDAD Esta máquina es un equipo diseñado para recuperar exclusivamente R134a o R1234yf (según el modelo de la máquina) de sistemas de aire acondicionado (A/C) para vehículos. La máquina debe ser utilizada por personal cualificado y solo puede ser utilizada correctamente después de haber leído este manual que contiene las reglas de seguridad básicas indicadas abajo: - Usar guantes y gafas de seguridad.
  • Page 130: Refrigerante Y Lubricante - Dispositivo De Protección Individual Yprecauciones

    MANUAL DE INSTRUCCIONES - Arrojar el aceite sacado del sistema A/C y de la bomba de vacío en los contenedores correspondientes para aceites usados. - Cambiar los filtros en los plazos establecidos, utilizando solo filtros recomendados por el fabricante. - Utilizar únicamente los aceites recomendados por el fabricante. - Nunca confundir el aceite de la bomba de vacío con el aceite para los sistemas de aire acondicionado.
  • Page 131: Precaucioes Para La Manipulación Y Uso De Fluidos R134A

    MANUAL DE INSTRUCCIONES NO ESTÁ PERMITIDO NINGÚN TIPO DE ALTERACIÓN DE LOS DISPOSITIVOS DE SEGURIDAD MENCIONADOS ANTERIORMENTE PRECAUCIOES PARA LA MANIPULACIÓN Y USO DE FLUIDOS R134a Los fluidos refrigerantes se expanden en estado gaseoso en condiciones ambientales estándares. Para su envío y uso han de estar comprimidos dentro de bombonas apropiadas. Recomendamos observar las precauciones generales aplicables a la manipulación de contenedores presurizados.
  • Page 132 MANUAL DE INSTRUCCIONES La adición de otros sistemas y/o equipos no considerados por el fabricante en su diseño de trabajo. El uso de la máquina sin la protección del perímetro y/o con los resguardos fijos y móviles alterados o eliminados. La conexión de la máquina a fuentes de energía diferentes a las previstas por el fabricante.
  • Page 133: Transporte

    MANUAL DE INSTRUCCIONES TRANSPORTE Si el equipo se debe transportar, es necesario enroscar el tornillo de seguridad para bloquear la balanza presente en el equipo. Para transportar el R134a o R1234yf rigen las normas específicas de cada país. Por tal motivo, debe solicitar información a su revendedor o centro de asistencia.
  • Page 134: Principios De Funcionamiento

    MANUAL DE INSTRUCCIONES PRINCIPIOS DE FUNCIONAMIENTO Con una única serie de operaciones, esta máquina recupera y recicla fluidos refrigerantes (R134a o R1234yf, dependiendo del modelo de la máquina) sin dispersarlos en el ambiente, eliminando del sistema de A/C también la humedad y los depósitos de aceite. En efecto, en el interior del aparato hay un evaporador/separador que saca del líquido refrigerante recuperado de la instalación de A/C el aceite y demás impurezas, que luego se recogen en un recipiente especial.
  • Page 135: La Máquina

    MANUAL DE INSTRUCCIONES LA MÁQUINA ELEMENTOS FUNDAMENTALES Véanse las figuras 5, 6, 7 y 8: a) Tablero de mandos b) Llaves h) Ruedas l) Racores roscados de alta y baja presión m) Tanque aceite usado n) Tanque aceite nuevo bi) Balanza aceite d) Bombona y) Filtros deshidratadores o) Balanza electrónica...
  • Page 136: Alarmas

    MANUAL DE INSTRUCCIONES ALARMAS ALARMA PRESIÓN ALTA: se emite señal acústica cuando la presión del fluido en el circuito llega a 20 bar. Automáticamente se interrumpe la operación de recuperación. ALARMA BOMBONA LLENA: se emite señal acústica cuando en la bombona hay más del 80% de la capacidad máxima, que es de 18 Kg.
  • Page 137: Operaciones Preliminares

    MANUAL DE INSTRUCCIONES OPERACIONES PRELIMINARES Controlar que el interruptor (i) esté en posición 0. Controlar que todas las llaves de la máquina estén cerradas. Conectar la máquina y encenderla.. Controlar que el indicador de nivel del aceite de la bomba de vacío esté por lo menos en la mitad. Si el nivel es inferior, hay que añadir aceite, procediendo como se indica en el apartado MANTENIMIENTO.
  • Page 138: Guía Rápida

    MANUAL DE INSTRUCCIONES GUÍA RÁPIDA La primera vez que se utiliza la máquina, se presenta una guía rápida de puesta en servicio. El operador será guiado para efectuar una serie de operaciones (que ya se han descrito al comienzo del capítulo OPERACIONES PRELIMINARES): Desbloquear la balanza de la botella, pulsar INTRO Verificar el nivel de aceite en la bomba de vacío, pulsar INTRO Llenar el depósito de aceite nuevo, pulsar INTRO...
  • Page 139: Procedimiento Automático

    MANUAL DE INSTRUCCIONES PROCEDIMIENTO AUTOMÁTICO En el procedimiento automático, todas las operaciones se realizan automáticamente: recuperación y reciclaje, descarga de aceite, vacío, reposición aceite nuevo y llenado. Automáticamente, al concluirse cada operación se imprime la cantidad de gas y de aceite recuperados, el tiempo de vacío, el aceite repuesto y la cantidad de gas inyectado.
  • Page 140: Modificación Datos Vacío

    MANUAL DE INSTRUCCIONES Modificación datos VACÍO: utilizar las flechas para seleccionar VACÍO, escribir el nuevo valor (usar las teclas de 0 a 9) Modificación datos ACEITE: utilizar las flechas para seleccionar ACEITE, presionar ENTER, se visualizará la siguiente pantalla: PROCEDIMIENTO AUTOMÁTICO ACEITE <AUTO.>...
  • Page 141 MANUAL DE INSTRUCCIONES INTRODUCIR CÓDIGO MODELO VEHÍCULO Pulsar ENTER y salir Leer en la relativa “tabla” el código relativo al vehículo. Utilizar el teclado numérico para introducir el código. Al final de la programación presionar la tecla ENTER para confirmar. Si se desea instalar la BASE DE DATOS BASIC (DBB) contactar al revendedor de la máquina.
  • Page 142 MANUAL DE INSTRUCCIONES Una vez terminada la fase de vacío se procede a la reintegración de aceite nuevo automáticamente en base al volumen de aceite descargado o en base al volumen programado por el operador. En el caso de que esté instalado, el trazador se reintegrará automáticamente en la cantidad programada por el operador.
  • Page 143: Procedimiento Asistido

    MANUAL DE INSTRUCCIONES PROCEDIMIENTO ASISTIDO En el procedimiento asistido, cada operación puede ser llevada a cabo individualmente, con la única excepción de la fase de recuperación y reciclaje, que se efectúa automáticamente a partir de la descarga de aceite usado. Al terminar cada operación, se imprime automáticamente la cantidad de gas y aceite recuperados, el tiempo de vacío, aceite repuesto y cantidad de gas inyectado.
  • Page 144: Recuperación Y Reciclaje

    MANUAL DE INSTRUCCIONES RECUPERACIÓN Y RECICLAJE Presionar ENTER para confirmar RECUPERACIÓN / RECICLAJE. Aparece la siguiente pantalla: <RECUPERACIÓN / RECICLAJE> VACIADO TUBOS Presionar ENTER para confirmar RECUPERACIÓN / RECICLAJE. Se visualiza la siguiente pantalla: Introducir la matrícula .... Presionar ENTER Escribir la matrícula del vehículo usando las flechas ...
  • Page 145: Vaciado Tubos

    MANUAL DE INSTRUCCIONES VACIADO TUBOS En el MENÚ RECUPERACIÓN Y RECICLAJE seleccionar VACIADO TUBOS y presionar ENTER para confirmar: RECUPERACIÓN / RECICLAJE <VACIADO TUBOS> Se visualiza la siguiente pantalla: Abrir la alta y baja Presión, luego Presionar START Abrir las llaves de alta y baja presión de la máquina y presionar START. VACÍO Conectar los tubos flexibles a la instalación de A/C mediante los empalmes rápidos, prestando atención en conectar el AZUL en el ramal de baja presión y el ROJO en el ramal de alta...
  • Page 146: Reposición Aceite Nuevo

    MANUAL DE INSTRUCCIONES REPOSICIÓN ACEITE NUEVO Esta operación se puede efectuar única y exclusivamente después del vacío y antes del llenado. Seleccionar el procedimiento asistido: cuando la leyenda "Procedimiento asistido" parpadea en la pantalla, pulsar ENTER. Seleccionar "ACEITE". La leyenda "Aceite xx cc" parpadea en la pantalla.
  • Page 147: Llenado Sistema A/C

    MANUAL DE INSTRUCCIONES LLENADO SISTEMA A/C Seleccionar el procedimiento asistido: cuando la leyenda "Procedimiento asistido" parpadea en la pantalla, pulsar ENTER. Seleccionar "Llenado" cuando la leyenda "Llenado xxxx g" parpadea en la pantalla. Se visualizará la siguiente pantalla: PROCEDIMIENTO ASISTIDO LLENADO <xxxg>...
  • Page 148: Diagnosis Estática (Opcional)

    MANUAL DE INSTRUCCIONES NOTA: las teclas numéricas incluyen un alfabeto similar a los mensajes de texto, por ejemplo: presionar “2” una vez para visualizar "A”, dos veces para visualizar “B”, tres veces para "C”, cuatro veces para “2” Se visualiza la siguiente pantalla: LLENADO xyz g Presionar START...
  • Page 149: Datos

    MANUAL DE INSTRUCCIONES DATOS Este menú muestra todos los datos leídos por la máquina. Encender la máquina. En el MENÚ PRINCIPAL se muestra: USO AUTOMATICO PROCEDIMIENTO MANUAL <DATOS Y CONFIGURAC.> MANTENIMIENTO xx.xKg Seleccionar DATOS Y CONFIGURACIÓN. Se visualiza la siguiente pantalla: <DATOS>...
  • Page 150: Configuración

    MANUAL DE INSTRUCCIONES CONFIGURACIÓN Este menú sirve para modificar las programaciones de la máquina. Desde el menú principal: PROCEDIMIENTO AUTOMÁTICO PROCEDIMIENTO ASISTIDO <DATOS Y CONFIGURACIÓN> MANTENIMIENTO xx.xKg Seleccionando DATOS Y CONFIGURACIÓN se visualiza la siguiente pantalla: DATOS <CONFIGURACIÓN> SERVICIOS Seleccionar CONFIGURACIÓN y presionar ENTER. IDIOMA Desde el menú...
  • Page 151: Unidades De Medida

    MANUAL DE INSTRUCCIONES UNIDADES DE MEDIDA Desde el menú CONFIGURACIÓN: IDIOMA UNIDADES DE MEDIDA OPCIONES SET FECHA Y HORA CONF. ENCABEZ. IMPRESIÓN INTRODUCIR N° OPERADOR Seleccionar UNIDADES DE MEDIDA: PESO g(Kg) PRESIÓN TEMPERATURA °C PESO Seleccionar PESO: <PESO> g(Kg) PRESIÓN TEMPERATURA °C Apretar ENTER para cambiar de g (kg) a oz (lb) o de oz (lb) a g (kg).
  • Page 152: Opciones

    MANUAL DE INSTRUCCIONES TEMPERATURA Seleccionar TEMPERATURA: PESO g(Kg) PRESIÓN <TEMPERATURA> °C Apretar ENTER para cambiar de °C a °F o de °F a °C. PESO g(Kg) PRESIÓN TEMPERATURA °C presionar STOP para salir. OPCIONES Desde el menú CONFIGURACIÓN: IDIOMA UNIDADES DE MEDIDA OPCIONES SET FECHA Y HORA CONF.
  • Page 153: Fecha Y Hora

    MANUAL DE INSTRUCCIONES FECHA Y HORA La máquina sigue indicando la fecha y la hora aunque se quede apagada durante un año. Desde el menú CONFIGURACIÓN: IDIOMA UNIDADES DE MEDIDA OPCIONES SET FECHA Y HORA CONF. ENCABEZ. IMPRESIÓN INTRODUCIR N° OPERADOR Seleccionando FECHA Y HORA se visualizará...
  • Page 154: Introducir N° Operador

    MANUAL DE INSTRUCCIONES INTRODUCIR N° OPERADOR Desde el menú CONFIGURACIÓN: IDIOMA UNIDADES DE MEDIDA OPCIONES SET FECHA Y HORA CONF. ENCABEZ. IMPRESIÓN INTRODUCIR N° OPERADOR Seleccionando INTRODUCIR N° OPERADOR se visualizará la siguiente pantalla: INTRODUCIR N° OPERADOR ..Se puede introducir un código alfanumérico de 10 caracteres que indica el número de habilitación del operador.
  • Page 155: Servicios

    MANUAL DE INSTRUCCIONES SERVICIOS Este menú permite gestionar algunos servicios auxiliares. Desde el menú principal: PROCEDIMIENTO AUTOMÁTICO PROCEDIMIENTO ASISTIDO <DATOS Y CONFIGURACIÓN> MANTENIMIENTO xx.xKg Seleccionando DATOS Y CONFIGURACIÓN se visualiza la siguiente pantalla: DATOS CONFIGURACIÓN <SERVICIOS> Seleccionar SERVICIOS y presionar ENTER. NOTA: el MENÚ...
  • Page 156: Contraseña

    MANUAL DE INSTRUCCIONES CONTRASEÑA Desde el menú SERVICIOS: GESTIÓN REFRIGER. CONTRASEÑA CONTATORI Seleccionar CONTRASEÑA se visualizará la siguiente pantalla: ..Se puede introducir una contraseña de 4 cifras que bloquea el uso de la máquina. Una vez inserida la contraseña, desde el menú...
  • Page 157: Mantenimiento

    MANUAL DE INSTRUCCIONES MANTENIMIENTO Este menú sirve para las operaciones de mantenimiento de la máquina. Desde el menú principal: PROCEDIMIENTO AUTOMÁTICO PROCEDIMIENTO ASISTIDO DATOS Y CONFIGURACIÓN <MANTENIMIENTO> xx.xKg seleccionar MANTENIMIENTO. LLENAR LA BOMBONA INTERNA DE LA MÁQUINA Esta operación se efectúa cuando en la bombona hay menos de 3 kg de refrigerante a disposición;...
  • Page 158: Purga Aire Manual

    MANUAL DE INSTRUCCIONES LLENAR BOMBONA A continuación, la máquina llenará la bombona interna con la cantidad programada  500 g. Cuando falten 500 gramos para llegar a la cantidad total, la máquina se detiene y se visualizará el siguiente mensaje: LLENAR BOMBONA CERRAR llave bombona externa y apretar...
  • Page 159: Habilitación Lavado Sistema A/C

    MANUAL DE INSTRUCCIONES 4) Quitar los viejos filtros y colocar los filtros nuevos, respetando el sentido indicado por las flechas. ADVERTENCIA: la operación de cambio de filtros debe ser lo más rápida posible, para evitar la posibilidad de contaminaciones debidas a la humedad ambiente. NOTA: si es posible, controlar que los nuevos filtros resulten estancos mediante un detector eléctronico de fugas;...
  • Page 160: Regulación

    MANUAL DE INSTRUCCIONES REGULACIÓN Esta operación debe ser efectuada cuando los valores indicados en la pantalla no corresponden a la realidad. ADVERTENCIA: Proceder con suma atención y cautela al efectuar las operaciones que se enumeran a continuación. Prestar especial atención a las siguientes indicaciones: Colocar los pesos siempre en el centro del plato de la balanza.
  • Page 161: Regulación Balanza Bombona

    MANUAL DE INSTRUCCIONES REGULACIÓN BALANZA BOMBONA Desconectar la máquina de la red de suministro eléctrico. Proveerse de un peso de referencia entre 28 y 32 kg. Desmontar la tapa de trasera para acceder a la bombona de la máquina. Cerrar las llaves azul y roja de la bombona. Desenroscar la tuerca de fijación de la bombona. Separar la resistencia de calentamiento (r, figura 8) de la bombona (no tocar ni desconectar los cables eléctricos de la resistencia).
  • Page 162: Datos De La Bombona

    MANUAL DE INSTRUCCIONES DATOS DE LA BOMBONA NOTA: este menú está reservado al técnico de pruebas y contiene el nivel máximo de seguridad; por ningún motivo se deben cambiar los datos de la bombona; si fuera necesario, contactar con el centro de asistencia. Desde el menú...
  • Page 163: Regulación Balanza De Aceite

    MANUAL DE INSTRUCCIONES REGULACIÓN BALANZA DE ACEITE Desde el menú REGULACIÓN: BALANZA BOMBONA <BALANZA ACEITE> Seleccionando BALANZA ACEITE en la pantalla aparece la siguiente pantalla: NIVEL DE CERO Vaciar los envases Niveles xxxx Presionar START Vaciar los tanques de aceite, ponerlos vacíos en su sitio sin ejercer presión sobre la balanza y pulsar START.
  • Page 164: Regulación Temperatura Bombona

    MANUAL DE INSTRUCCIONES REGULACIÓN TEMPERATURA BOMBONA NOTA: para calibrar el sensor de temperatura de la bombona, hay que utilizar un termómetro digital. Controlar que la sonda de temperatura de la bombona esté desconectada de la bombona y pueda leer la temperatura ambiente. Encender la máquina.
  • Page 165: Bomba De Vacío

    MANUAL DE INSTRUCCIONES BOMBA DE VACÍO Para que la bomba de vacío funcione bien, es necesario efectuar periódicamente las siguientes operaciones: M1) Reponer aceite M2) Cambiar el aceite Para reponer o cambiar el aceite de la bomba, utilizar únicamente el tipo de aceite indicado por el fabricante (consulta con el revendedor sobre el tipo exacto de aceite).
  • Page 166: Llenar El Tanque Con Aceite Nuevo

    MANUAL DE INSTRUCCIONES LLENAR EL TANQUE CON ACEITE NUEVO Cuando el nivel del aceite baja de 100 cc, hay que llenar el tanque para tener una reserva de aceite suficiente para los llenados sucesivos. Tipos de aceite: usar únicamente aceites sintéticos (poliéster) o los aceites indicados por el fabricante.
  • Page 167: Vaciar El Tanque De Aceite Usado

    MANUAL DE INSTRUCCIONES VACIAR EL TANQUE DE ACEITE USADO Esta operación se efectúa cada vez que el nivel del aceite supera los 200 ml. Para ello, se quita el tanque de aceite usado (ref. m, Fig. 8). de su sitio con mucho cuidado, sin hacer presión sobre la balanza, manteniendo la tapa fija y girando el tanque (ref Fig.15).
  • Page 168 MANUAL DE INSTRUCCIONES INTRODUCCIÓN Pulse START para introducir datos personalizados; en la pantalla aparecerá: NOMBRE MODELO: ... . CANTIDAD MODELO: ... . . A través del teclado, escriba el nombre del modelo de vehículo y confirme con ENTER.
  • Page 169 MANUAL DE INSTRUÇÕES ÍNDICE ÍNDICE ..........................169 INTRODUÇÃO ........................ 171 CONSERVAÇÃO DO MANUAL ..................172 CONDIÇÕES DE GARANTIA ..................172 INFORMAÇÕES GERAIS ....................172 FINAL DE VIDA DO EQUIPAMENTO ................172 ELIMINAÇÃO DA BATERIA ....................172 MANGUEIRAS DE CONEXÃO .................... 175 PRECAUÇÕES PARA MANUSEIO E USO DE FLUIDOS R134a ........
  • Page 170 MANUAL DE INSTRUÇÕES ADIÇÃO ÓLEO NOVO ......................189 ADIÇÃO TRAÇADOR ......................189 PREENCHIMENTO SISTEMA A/C ..................190 DIAGNÓSTICO ESTÁTICO (opcional) ................. 191 DADOS ..........................192 CONFIGURAÇÃO ......................193 LÍNGUA ..........................193 UNIDADE DE MEDIÇÃO ..................... 193 PESO PRESSÃO TEMPERATURA OPÇÕES..........................194 DATA E HORA ........................
  • Page 171: Introdução

    MANUAL DE INSTRUÇÕES INTRODUÇÃO A máquina é um conjunto sob pressão conforme indicado na declaração de conformidade CE e placa de dados; o equipamento fornecido está em conformidade com os Requisitos Essenciais de Segurança de Acordo com o Anexo I da Directiva 97/23/CE (PED) qualquer intervenção de: reparação, alteração e/ou substituições de componentes ou partes sob pressão compromete seriamente a utilização em segurança do equipamento;...
  • Page 172: Conservação Do Manual

    MANUAL DE INSTRUÇÕES CONSERVAÇÃO DO MANUAL O manual deve ser guardado durante toda a vida do equipamento num lugar ao abrigo da humidade e do calor excessivo. Consultar o manual de modo a não danificar seu conteúdo total ou parcialmente. CONDIÇÕES DE GARANTIA Consulte o folheto das CONDIÇÕES DE GARANTIA fornecido com a máquina.
  • Page 173 MANUAL DE INSTRUÇÕES NORMAS DE SEGURANÇA Esta máquina é um equipamento exclusivamente concebido para recuperar R1234yf de sistemas de ar condicionado (A/C) de veículos. A máquina deve ser utilizada por pessoal qualificado e só pode ser usada corretamente após a leitura deste manual, que também contém as regras básicas de segurança abaixo: Use luvas e óculos de segurança.
  • Page 174 MANUAL DE INSTRUÇÕES Mantenha sempre o óleo na quantidade correta. Antes de ligar a máquina ao sistema elétrico, verifique se a fonte de energia e a frequência têm os mesmos valores indicados na placa CE. O reservatório deve ser preenchido até 80% de sua capacidade máxima para deixar uma câmara de admissão para o gás, a fim de absorver qualquer aumento de pressão.
  • Page 175: Mangueiras De Conexão

    MANUAL DE INSTRUÇÕES MANGUEIRAS DE CONEXÃO As mangueiras podem conter refrigerante sob pressão. Antes de substituir o engate rápido verificar a pressão correspondente nas mangueiras de serviços (manómetro). A máquina está equipada com os seguintes dispositivos de segurança: PRESSÃO DE SEGURANÇA: para o compressor, em caso de pressão excessiva VÁLVULA DE SEGURANÇA: abre quando a pressão no interior do sistema atinge um nível de pressão acima dos limites previstos.
  • Page 176 MANUAL DE INSTRUÇÕES Não há comprovação dos riscos resultantes da absorção de R1234yf pela pele. No entanto, devido ao seu baixo ponto de ebulição, é aconselhável usar roupa protetora para evitar que líquidos espirrados ou vapor atinja a pele e, em particular, os olhos, o que pode causar o congelamento dos fluidos oculares.
  • Page 177 MANUAL DE INSTRUÇÕES AVISO O empregador (ou gerente de segurança) é obrigado a fazer com que o equipamento não seja utilizado de maneira imprópria, colocando a saúde do operador e das pessoas em primeiro lugar. O operador é obrigado a informar ao empregador (ou ao gerente de segurança do sistema) caso haja algum risco de utilização indevida da máquina, uma vez que, como uma pessoa instruída, o operador é...
  • Page 178: Transporte

    MANUAL DE INSTRUÇÕES TRANSPORTE Se o equipamento tiver que ser transportado é necessário apertar o parafuso de segurança para o bloqueio da balança presente no equipamento. Para o transporte do R134a ou R1234yf estão em vigor normas específicas em cada estado. Portanto exija informações prévias para o seu revendedor ou centro de assistência.
  • Page 179: Princípios De Funcionamento

    MANUAL DE INSTRUÇÕES PRINCÍPIOS DE FUNCIONAMENTO A MÁQUINA permite, através de uma única série de operações, a recuperação e a reciclagem dos fluidos refrigerantes (R134a ou R1234yf, dependendo do modelo da máquina), sem dispersões no ambiente, eliminando também, do sistema A/C, a humidade e os vários depósitos contidos no óleo.
  • Page 180: A Máquina

    MANUAL DE INSTRUÇÕES A MÁQUINA ELEMENTOS FUNDAMENTAIS Ver figs. 5, 6, 7 e 8: a) Consola dos comandos b) Torneiras h) Rodas l) Conexões roscadas Alta/Baixa Pressão. m) Recipiente óleo usado n) Recipiente óleo novo colapsável bi) Balança óleo d) Garrafa e) Filtros desidratadores o) Balança electrónica r) Resistência de aquecimento...
  • Page 181: Operações Preliminares

    MANUAL DE INSTRUÇÕES ALARME SERVIÇO: quando forem recuperados 100 kg de líquido refrigerante, um sinal acústico é emitido. Para desactivar este alarme é preciso substituir os filtros e o óleo da bomba de vácuo. Junto com os filtros será enviado um código que permite a interrupção do alarme.
  • Page 182 MANUAL DE INSTRUÇÕES START para imprimir o guia, STOP para sair Seguir as instruções visualizadas, no final, premir START para imprimir um talão com o resumo do procedimento guiado. Premir STOP para sair. OBSERVAÇÃO: se o procedimento guiado não for completado, será visualizado novamente na próxima ligação da máquina.
  • Page 183: Modo Automático

    MANUAL DE INSTRUÇÕES MODO AUTOMÁTICO No modo automático, todas as operações são realizadas automaticamente: recuperação e reciclagem, descarga do óleo, vácuo, adição de óleo novo e preenchimento. No final de cada operação, são impressos automaticamente os seguintes dados: quantidade de gás recuperado, óleo recuperado, tempo de vácuo, óleo adicionado e quantidade de gás injectado.
  • Page 184: Alteração Dados Vácuo

    MANUAL DE INSTRUÇÕES Alteração dados VÁCUO: Utilizar as setas para selecionar VÁCUO, introduzir o novo valor (usar as teclas de 0 a 9) Alteração dados ÓLEO: Utilizar as setas para selecionar ÓLEO, premir ENTER, será apresentado o seguinte ecrã: MODO AUTOMÁTICO ÓLEO <AUTO.>...
  • Page 185 MANUAL DE INSTRUÇÕES Ler na “tabela” apropriada o código relativo ao carro. Usar o pequeno teclado numérico para inserir o código. Quando acabar a configuração, premir a tecla ENTER para confirmar. Se pretende instalar a BASE DE DADOS BASIC (DBB) contactar o revendedor da máquina.
  • Page 186 MANUAL DE INSTRUÇÕES operador. No final, o sistema passa automaticamente para o enchimento da quantidade configurada. Concluída a operação de preenchimento, a máquina apresenta a mensagem: Fechar e desligar as ligações HP e LP do sistema A/C Premir ENTER Fechar e desligar as ligações HP e LP do sistema A/C, premir ENTER para continuar, o seguinte ecrã...
  • Page 187: Modo Assistido

    MANUAL DE INSTRUÇÕES MODO ASSISTIDO No modo assistido, toda operação pode ser efectuada individualmente, menos a fase de recuperação reciclagem que é realizada automaticamente pela descarga óleo usado. A impressão da quantidade de gás recuperado, óleo recuperado, tempo de vácuo adicionado e quantidade de gás injectado é...
  • Page 188: Esvaziamento Tubos

    MANUAL DE INSTRUÇÕES Abrir alta e baixa Pressão, depois Premir START Abrir as torneiras de alta e baixa pressão da máquina e premir START para começar a fase de recuperação/reciclagem do refrigerante. Durante esta fase o visor apresenta a quantidade de refrigerante recuperado, em gramas.
  • Page 189: Adição Óleo Novo

    MANUAL DE INSTRUÇÕES e carregar na tecla START. No final do vácuo, a máquina vai verificar a existência de fugas no sistema A/C. ATENÇÃO! Se o tempo de vácuo < 15 minutos este teste pode não ser fiável. Se forem encontradas fugas, a máquina para automaticamente, e exibe o alarme do SISTEMA DE FUGAS A/C.
  • Page 190: Preenchimento Sistema A/C

    MANUAL DE INSTRUÇÕES PREENCHIMENTO SISTEMA A/C Selecionar o modo assistido, isto é quando “modo assistido” estiver a piscar no LCD, carregar na tecla ENTER. Selecionar preenchimento, isto é quando “Preenchimento XXXX g” estiver a piscar no LCD. Será apresentado o seguinte ecrã: MODO ASSISTIDO PREENCHIMENTO <xxxg>...
  • Page 191: Diagnóstico Estático (Opcional)

    MANUAL DE INSTRUÇÕES NOTA: as teclas numéricas incluem um alfabeto análogo às mensagens de texto, por exemplo: carregar “2” uma vez para visualizar “A”, duas vezes para visualizar “B”, três vezes para “C”; quatro vezes para “2” É apresentado o ecrã seguinte: PREENCHIMENTO Gás xyz g...
  • Page 192: Dados

    MANUAL DE INSTRUÇÕES DADOS Este menu apresenta todos os dados lidos pela máquina. Ligar a máquina. No menu principal: MODO AUTOMÁTICO MODO ASSISTIDO <DATOS E CONFIGURAÇ.> MANUTENÇÃO xx.xKg Selecionar DADOS E CONFIGURAÇÃO. É apresentado o ecrã seguinte: <DADOS> CONFIGURAÇÃO SERVIÇOS Premir ENTER para entrar no MENU DADOS: Gás disp.
  • Page 193: Configuração

    MANUAL DE INSTRUÇÕES CONFIGURAÇÃO Este menu serve para alterar as configurações da máquina. No menu principal: MODO AUTOMÁTICO MODO ASSISTIDO <DATOS E CONFIGURAÇ.> MANUTENÇÃO xx.xKg selecionar DADOS E CONFIGURAÇÃO. É apresentado o ecrã seguinte: DADOS <CONFIGURAÇÃO> SERVIÇOS Selecionar CONFIGURAÇÃO e premir ENTER LÍNGUA No MENU CONFIGURAÇÃO: LÍNGUA...
  • Page 194: Peso

    MANUAL DE INSTRUÇÕES PESO Selecionar PESO: <PESO g(Kg) PRESSÃO TEMPERATURA °C premir ENTER para mudar de g(kg) para oz(lb) ou de oz(lb) par g(kg). PESO g(Kg) PRESSÃO TEMPERATURA °C premir STOP para sair. PRESSÃO Selecionar PRESSÃO: PESO g(Kg) <PRESSÃO> TEMPERATURA °C premir ENTER para mudar de bar para psi ou de psi para bar.
  • Page 195: Data E Hora

    MANUAL DE INSTRUÇÕES Seleciona OPÇÕES, será apresentado o seguinte ecrã: ..Ligar o serviço técnico para obter o código. Inserir o código e premir ENTER: ATIVAÇÃO .TRAC. Selecionar a opção pretendida e premir ENTER para alterá-la de “off” a “on” e ao contrário. Premir STOP para voltar ao MENU PRECEDENTE.
  • Page 196: Inserir N Operador

    MANUAL DE INSTRUÇÕES OBS.: as teclas numéricas incluem um alfabeto análogo às mensagens de texto, por exemplo: carregar “2” uma vez para visualizar “A”, duas vezes para visualizar “B”, três vezes para “C”; quatro vezes para “2” INSERIR N OPERADOR No MENU CONFIGURAÇÃO: LÍNGUA UNIDADE DE MEDIÇÃO...
  • Page 197: Serviços

    MANUAL DE INSTRUÇÕES SERVIÇOS Este menu permite gerir alguns serviços auxiliares. No menu principal: MODO AUTOMÁTICO MODO ASSISTIDO <DATOS E CONFIGUR.> MANUTENÇÃO xx.xKg Selecionar DADOS E CONFIGURAÇÃO. É apresentado o ecrã seguinte: DADOS CONFIGURAÇÃO <SERVIÇOS> Selecionar SERVIÇOS e premir ENTER NOTA: o MENU SERVIÇO está...
  • Page 198: Contadores

    MANUAL DE INSTRUÇÕES GESTÃO REFRIGER. SENHA CONTADORES Selecionar SENHA, será apresentado o seguinte ecrã: ..Pode ser introduzida uma senha de 4 números que bloqueia a utilização da máquina, Uma vez inserida a senha, no menu principal, só é possível após introduzir o código. Se for introduzida a senha 0000, o bloqueio é...
  • Page 199: Manutenção

    MANUAL DE INSTRUÇÕES MANUTENÇÃO Este menu serve para as operações de manutenção da máquina. No menu principal: MODO AUTOMÁTICO MODO ASSISTIDO DATOS E CONFIGURAÇ. <MANUTENÇÃO> xx.xKg selecionar MANUTENÇÃO PREENCHIMENTO DA GARRAFA INTERNA DA MÁQUINA Esta operação deve ser realizada quando houver menos de 3 kg de líquido refrigerante disponíveis dentro da garrafa;...
  • Page 200: Purga Ar Manual

    MANUAL DE INSTRUÇÕES PREENCHIMENTO GARRAFA A máquina irá preencher agora a garrafa interna com a quantidade programada  500g. Quando faltarem 500 gramas para alcançar a quantidade, a máquina pára sendo apresentada a seguinte mensagem: PREENCHIMENTO GARRAFA Fechar torneira Garrafa externa e Premir Start Fechar a torneira da garrafa e premir a tecla START, a máquina pára automaticamente depois de ter recuperado o refrigerante presente nos tubos.
  • Page 201: Guia Rápido

    MANUAL DE INSTRUÇÕES ATENÇÃO: substituir o velho filtro com o novo o mais rápido possível para evitar a possível contaminação por parte da humidade presente no ar do ambiente. OBS.: se possível verificar a vedação das conexões dos novos filtros com o aparelho eletrónico apropriado.
  • Page 202: Calibração

    MANUAL DE INSTRUÇÕES CALIBRAÇÃO Esta operação deve ser executada quando no LCD não forem mais visualizados valores coerentes com a realidade. ATENÇÃO: as operações a seguir deverão ser efectuadas com o máximo cuidado. É preciso cuidar sobretudo nas seguintes situações: posicionar sempre gradualmente os pesos no prato da balança.
  • Page 203: Dados Garrafa

    MANUAL DE INSTRUÇÕES NÍVEL DE ZERO Levantar a garrafa Níveis xxxx Premir START Com a garrafa levantada do prato balança, premir a tecla START, será apresentado o seguinte ecrã. VALOR REFERÊNCIA xxxx g Níveis xxxx Premir START Posicionar no centro do prato da balança o peso de referência (28 a 32 kg), introduzir o peso com as teclas 0-1-….- 9 e para confirmar premir a tecla START.
  • Page 204: Calibração Balança Óleo

    MANUAL DE INSTRUÇÕES CALIBRAÇÃO BALANÇA ÓLEO No MENU CALIBRAÇÃO: BALANÇA GARRAFA BALANÇA ÓLEO TR. PRESSÃO A/C TEMPERATURAS GARRAFA Selecionar BALANÇA ÓLEO, será apresentado o seguinte ecrã: NÍVEL DE ZERO Esvaziar recipientes níveis xxxx Premir START Esvaziar os recipientes do óleo, colocá-los novamente na sede, sem exercer pressão na balança e premir a tecla START.
  • Page 205: Calibração Temperatura Garrafa

    MANUAL DE INSTRUÇÕES CALIBRAÇÃO TEMPERATURA GARRAFA NOTA: para efectuar a calibragem do sensor da temperatura da garrafa, é preciso ter à disposição um termómetro digital. Verificar que a sonda temperatura garrafa esteja desligada da garrafa e que possa ler livremente a temperatura ambiente. Ligar a máquina.
  • Page 206: Bomba De Vácuo

    MANUAL DE INSTRUÇÕES BOMBA DE VÁCUO Para um bom funcionamento da bomba de vácuo é preciso efectuar periodicamente as seguintes operações: M1) Adição de óleo M2) Troca do óleo Para acrescentar o óleo e/ou para a troca do óleo da bomba, utilizar somente o óleo recomendado pelo fabricante (Entrar em contacto com o revendedor para conhecer o tipo exacto de óleo).
  • Page 207: Preenchimento Reservatório Óleo Novo

    MANUAL DE INSTRUÇÕES PREENCHIMENTO RESERVATÓRIO ÓLEO NOVO Quando o nível do óleo descer abaixo dos 100 cc é recomendado encher o reservatório, de modo a ter uma reserva suficiente de óleo para as operações de preenchimento seguintes. Tipos de óleo: utilizar apenas óleos sintéticos (poliéster) ou os óleos aconselhados pelo fabricante do sistema A/C.
  • Page 208: Personalização Database Advanced (Dba)

    MANUAL DE INSTRUÇÕES PERSONALIZAÇÃO DATABASE ADVANCED (DBA) Selecionar MODO ASSISTIDO, percorrer o menu para baixo com a seta velocidades do veículo do DBA: <ALFA ROMEO> AUDI CHRYSLER/JEEP Premir o botão da seta para cima ( TOYOTA VOLKSWAGEN VOLVO <DEFINIÇÕES UTILIZADOR> Selecionar a opção DEFINIÇÕES UTILIZADOR: ABCD EDFG>...
  • Page 209: Contrasto

    MANUAL DE INSTRUÇÕES CANCELAMENTO Para eliminar campos de dados personalizados, com as setas ( pretendido, premir o botão “0” (ZERO), é emitido um sinal de alarme e é apresentado o seguinte ecrã: NOME VEÍCULO xxxx g CANCELAR? START: sim STOP: não Premir STOP para anular, premir START para confirmar o cancelamento.
  • Page 210 LABEL Fig.1 Fig.2 Fig.3...
  • Page 211 Fig.4...
  • Page 212 Fig.5...
  • Page 213 Fig.6...
  • Page 214 Fig.7...
  • Page 215 Fig.8...
  • Page 216 Fig.9...
  • Page 217 Fig.10...
  • Page 218 Fig.11...
  • Page 219 Fig.12...
  • Page 220 Fig.14 Fig.15 Fig.17 Fig.16...
  • Page 221 Fig.18...

Table des Matières