Télécharger Imprimer la page

Publicité

Les langues disponibles

Les langues disponibles

Liens rapides

INSTRUCTION MANUAL
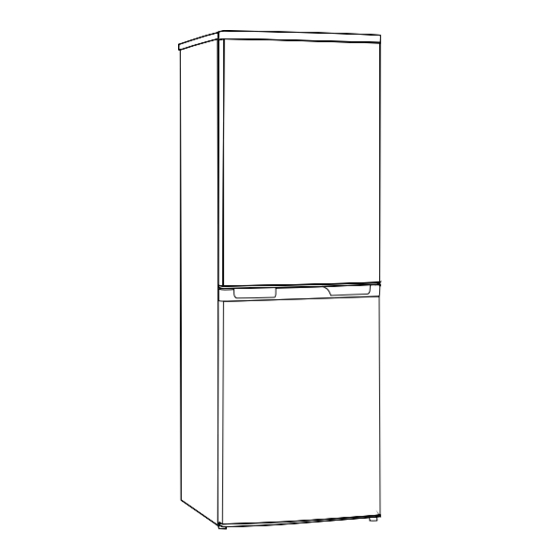
FRIDGE FREEZER
LIDD161

Publicité

loading

Sommaire des Matières pour LIMIT LIDD161

  • Page 1 INSTRUCTION MANUAL FRIDGE FREEZER LIDD161...
  • Page 4 ventilation, follow the instructions relevant Service to the installation. Any electrical work required to do the Wherever possible, the back of the servicing of the appliance should be product should be against a wall to avoid carried out by a qualified electrician or touchin g or catching warm parts authorized person.
  • Page 5 Important! Before changing the light bulb, switch off the High ambient temperatures (e.g. appliance and unplug it, or pull the fuse or on hot summer days) and a cold setting on the circuit breaker. the temperature regulator (position ) can “MAX”...
  • Page 6 Appliances must not be exposed to rain. the floor. You can also adjust the level by Sufficient air must be allowed to circulate unscrewing the appropriate level adjustment in the lower rear section of the appliance, the front (use your fingers or a suitable as poor air circulation can affect perfor- spanner).
  • Page 7 Helpful hints and tips Noises during operation Butter and cheese: these should be Clicks- Whenever the compressor switches placed in aluminum foil or polyethylene on or off, a click can be heard. (plastic) bags while removing as much air Humming- As soon as the compressor is in as possible.
  • Page 8 Cleaning and Care Cleaning and care This is automatically controlled by switching the temperature regulator ON or For hygienic reasons, the appliance interior, OFF so that there is no need to use the including interior accessories, should be defrosting setting .
  • Page 9 What to do if… Important! Warning! Before trouble-shooting, Repairs to the appliance may only be disconnect the power supply. Only a performed by competent service engineers. qualified electrician or other Improper repairs can give rise to significant personnel must carry out the trouble- hazards for the user.
  • Page 10 Reversing the door 3. Remove the upper hinge core, transfer it The side in which the door opens can be to left side and tighten securely, then put it in changed from the right side (as supplied) to a safe place. the left side, if the installation site allows for it.
  • Page 11 7. Unscrew and remove the bottom hinge Warning! pin, turn the bracket over and replace it. When changing the side at which the door Refit the bracket holding the bottom hinge opens, the appliance must not be connected pin. Replace both adjustable feet. Transfer to the main outlet.
  • Page 12 Disposal of the appliance It is prohibited to dispose of this appliance in domestic household waste. Packaging materials Packaging materials with the recycle symbol are recyclable. Dispose of the packaging in a suitable waste collection container to recycle it. Before disposal of the appliance. 1.
  • Page 13 MANUEL D’UTILISATION REFRIGERATEUR LIDD161...
  • Page 17 Important! Les températures ambiantes Avant de changer l’ampoule de la lampe, élevées (ex: pendant les journées chaudes éteignez l’appareil et débranchez-le, ou d’été) associées à un réglage froid ("MAX" enlevez le fusible ou le coupe circuit. ● Propriétés de l’ampoule: 220-240V , peuvent entraîner le fonctionnement en ●...
  • Page 18 ● Ne jamais exposer l’appareil à la pluie. Un mettre à niveau manuellement au moyen espace suffisant doit être laissé à l’arrière d’une cale à l’avant ou à l’arrière (si le sol de l’appareil, afin de faciliter la circulation est incliné). de l’air.
  • Page 19 Astuces et conseils utiles ● Fruits et légumes : ils doivent être bien Bruits pendant le fonctionnement lavés et placés dans le bac approprié fourni. « Clics »: dès que le compresseur passe sur ● Beurre et fromages: enroulez-les dans du Marche ou Arrêt, vous entendrez un «...
  • Page 20 Nettoyage et entretien Nettoyage et entretien rangement des aliments frais ● Il est controlé automatiquement en plaçant Pour des raisons d’hygiène, les composants intérieurs de l’appareil, y compris les accessoires, le thermostat sur ON ou OFF. Il n’est donc doivent être nettoyés régulièrement. pas nécessaire d’utiliser le dégivrage, L’appareil devra être nettoyé...
  • Page 21 Que faire si… Important! Attention! Avant de tenter de réparer Les réparations sur l’appareil doivent l’appareil, coupez l’alimentation électrique. Seul un technicien qualifié ou uniquement être faites par des techniciens de maintenance compétents. Une mauvaise une personne compétente peut se charger réparation peut provoquer des dangers pour de résoudre les problèmes autres ceux l’utilisateur.
  • Page 22 Inversion de la porte Le côtéd'ouverture de la porte peut être inversé, du côté droit (comme fourni) vers le côté gauche, si le site d'installation le permet. Outils nécessaires: 1. Douille 8mm 4. Retirez les deux vis à collerette, puis retirez la charnière du milieu qui maintient en place la porte inférieure.
  • Page 23 7. Dévissez et retirez l’écrou du cache, Avertissement! déplacez le joint et repositionnez-le. Remettez Lors du changement du côté où la porte s'ouvre, en place le pied amovible. Positionnez la l'appareil ne doit pas être branché sur le porte inférieure de la bonne façon. Fixez-la en secteur.
  • Page 24 Disposal of the appliance Mise au rebut de l’appareil Il est strictement interdit de se débarrasser cet appareil électroménager avec les déchets domestiques. Le matériel d’emballage L’emballage contenant le symbole recyclable, sont recyclables un symbole permettant le recyclage de celui-ci. Veuillez dépose son emballage dans les conteneur de produits recyclables.
  • Page 25 GEBRUIKSAANWIJZING KOELKAST LIDD161...
  • Page 28 ● Waar mogelijk dient de achterkant van Onderhoudsbeurt het apparaat tegen een muur te worden ● Alle vereiste elektrische onderhoudswerk- geplaatst om het aanraken of vastgrijpen zaamheden aan het toestel moeten door van warme onderdelen (compressor, een bevoegd elektricien of competent condensor) en brandgevaar te voorkomen.
  • Page 29 gekwalificeerd persoon om gevaren te Belangrijk!Hoge omgevingstemperaturen (bijv. op hete zomerdagen) en een koude voorkomen. Neem contact op met uw lokale instelling (stand MAX) kunnen ervoor zorgen reparatiedienst voor hulp. dat de compressor voortdurend of non-stop Schakel het apparaat uit om het lampje te draait! vervangen, of trek de stekker of zekering uit.
  • Page 30 ● De toestellen mogen niet aan regen worden het niveau bijstellen door aan de voorzijde blootgesteld.Voldoende lucht moet onderin de juiste stelbouten uit te draaien (gebruik in het achtergedeelte van de toestellen uw vingers of een geschikte steeksleutel). kunnen circuleren, slechte luchtcirculatie kan namelijk de prestaties beïnvloeden.
  • Page 31 Nuttige aanwijzingen en tips ● Boter en kaas: deze dienen in aluminiumfolie Geluiden tijdens werking of plastic zakken te worden ingepakt om Klikken - Wanneer de compressor in- of uit zo veel mogelijk lucht buiten te sluiten. wordt geschakeld, kunt u een klik horen. ●...
  • Page 32 Reiniging en zorg Reiniging en zorg schakelen, waardoor het niet nodig is om te ontdooien. Water dat vrijkomt door ontdooiing Omwille van hygiënische redenen dient de wordt automatisch afgevoerd naar een binnenkant van het apparaat, waaronder de interne opvangbakje door een afvoerpijp aan de onderdelen, regelmatig gereinigd te worden.
  • Page 33 Wat te doen als... Waarschuwing! Schakel het apparaat Belangrijk! uit voordat u storingen gaat zoeken. Reparaties aan het apparaat mogen alleen worden uitgevoerd door bevoegde technici. Alleen een bevoegd elektricien of bevoegd Door ondeskundige reparaties kunnen grote persoon dient het zoeken van storingen uit gevaren ontstaan voor de gebruiker.
  • Page 34 De deur omdraaien De kant waar de deur opent, kan veranderd worden van de rechterkant (zoals geleverd) naar de linkerkant, indien dit nodig is voor de plaats van installatie. Benodigde middelen: 1. 8mm schroevendraaier 4. Schroef de twee schroefbouten los en verwijder het middelste scharnier, die de de onderste deur op zijn plek houdt.
  • Page 35 7. Schroef de onderste scharnierpin los en Waarschuwing! haal deze af, draai de beugel om en plaats Bij het veranderen van de openingszijde van deze terug. Bevestig de beugel opnieuw op de de deur, mag het toestel niet op het lichtnet onderste scharnierpin.
  • Page 36 Verwijdering van het apparaat Verwijdering van het apparaat Het is verboden dit apparaat weg te gooien met het algemeen huishoudelijk afval. Verpakkingsmateriaal Verpakkingsmateriaal voorzien van een recyclagesymbool kan gerecycleerd worden. Deponeer de verpakking in een geschikte inzamelcontainer om het te recycleren. Alvorens het apparaat af te danken.