
Sommaire des Matières pour MadCatz Cyborg F.L.Y. 9
- Page 1 USER MANUAL BEDIENUNGSANLEITUNG GUIDE D’UTILISATION MANUALE D’USO MANUAL DEL USUARIO www.cyBORGGAMING.cOM...
- Page 2 Cyborg F.l.y.™ Wireless FligHT sTiCk For XboX 360® Connecting your controller to your Xbox 360 console Up to four controllers, wired and wireless, can be actively connected to an Xbox 360 console at one time. Each connected controller is assigned a quadrant on the Ring of Light. Before you can connect a wireless controller, at least one quadrant must be free (unlit).
- Page 3 Presione y mantenga presionado el botón Guía (Guide) Xbox hasta que se encienda el controlador. Si su consola no está encendida, presione el botón de encendido para activar la consola. Presione y suelte el botón de conexión en la consola. Presione y suelte el botón de conexión en el controlador.
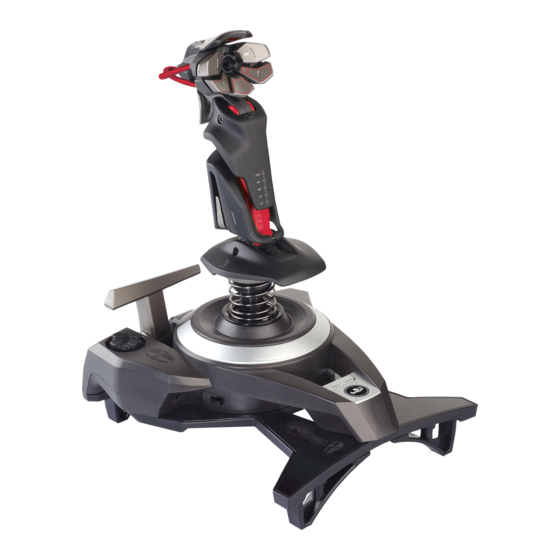
- Page 4 seTTing up your Cyborg sTiCk (franÇais) Configurer la manette Cyborg (esPaÑol) Cómo Configurar su PalanCa Cyborg (DeutsCH) einstellung iHres Cyborg stiCk (italiano) sistemazione Del JoystiCk Cyborg Attach the stick handle to the base by inserting it into the base collar and tightening the securing screw. (FranÇais) Fixez la poignée de la manette à...
- Page 5 Remove the adjustment tool from the compartment on the stick base. (FranÇais) Sortez l’outil de réglage du compartiment de la base de la manette. (EsPaÑOL) Quite la herramienta de ajuste del compartimento en la base de la palanca. (DEUTsCH) Nehmen Sie die Einstellhilfe aus dem Fach an der Unterseite des Sticks. (iTaLianO) Rimuovere lo strumento di regolazione dallo scomparto alla base del joystick.
- Page 6 Press the locking switch (a) and move the stick up or down to adjust the height. (FRANÇAIS) Appuyez sur l’interrupteur de verrouillage (a) et déplacez la manette vers le haut ou vers le bas, pour en régler la hauteur. (ESPAÑOL) Presione el conmutador de bloqueo (a) y mueva la palanca hacia arriba o hacia abajo para ajustar la altura.
- Page 7 Insert the adjustment tool in the locking nut (b) and turn counter-clockwise. Press the locking pin (c) in and move the stick forward or backwards to the required angle. Lock by turning locking nut (b) clockwise. (FRANÇAIS) Insérez l’outil de réglage dans l’écrou de blocage (b) et tournez-le dans le sens contraire des aiguilles d’une montre.
- Page 8 Insert the adjustment tool in the locking nut (d) and turn counter-clockwise to unlock the head mechanism. Move to the required angle and lock by turning the locking nut clockwise. (FRANÇAIS) Insérez l’outil de réglage dans l’écrou de blocage (d) et tournez-le dans le sens contraire des aiguilles d’une montre pour débloquer le mécanisme de tête.
- Page 9 lap-mounT opTions To make it easier to use your cyborg wireless Stick on your lap, we have added 4 lap-mount brackets. To attach the brackets turn the stick over, on each bracket you find and L or R, the L brackets will attach into the left side and the R brackets will attach to right side.
- Page 10 Stelle befinden, schieben Sie die Sperrriegel (b) in Position. opzioni supporTo per gioCare sTanDo seDuTi (iTaliano) Per rendere più semplice l’utilizzo del Joystick cyborg wireless stando seduti, abbiamo aggiunto 4 supporti per le gambe. Per attaccare i supporti capovolgere il joystick: su ogni supporto troverete una L(sinistra) o una R (destra). I supporti con la L si attaccano alla parte sinistra, mentre quelli con la R si attaccano alla parte destra.
- Page 11 ConFiguring your Cyborg sTiCk For DiFFerenT game TiTles Your joystick has two modes which configure controls for specific flying games. You can switch between modes by sliding the switch on the right side of the joystick base to either mode M1 or M2. In mode M1, all controls will have the default labeled function - please see your game manual and in-game prompts for a detailed explanation.
- Page 12 • Im Modus M1 sind die Tasten und Steuerelemente Ihres Joysticks so konfiguriert, dass Sie IL-2 Sturmovik, Tom clancy: HAwX, Ace combat 6 oder zukünftige Flugsimulatoren spielen können. • Im Modus M2 ist er für Blazing Angels 1 und 2 konfiguriert. ConFigurazione Del joysTiCk Cyborg per i Vari gioCHi (iTaliano) Il tuo joystick ha due modalità...
- Page 13 moDe 1: HaWk Head Mini Stick Mini Stick supérieur 8-wege coolie Hat Left Shoulder Button Bouton d’épaule gauche Linker Schulterknopf Right Shoulder Button Bouton d’épaule droit Rechter Schulterknopf y-Button Bouton y y-Knopf X-Button Bouton X Trigger X-Knopf B-button A-Button Bouton B Gâchette de tir B-Knopf Bouton A...
- Page 14 Head Mini Stick moDe 2: blazing angels D-Pad Mini Stick supérieur Pad Directionnel 8-wege coolie Hat D-Pad B-button Bouton B B-Knopf A-Button Bouton A A-Knopf Right Stick Button Left Stick Button Bouton de Stick droit Bouton gauche Right Stick Knopf Left Stick Knopf Left Trigger Trigger...
-
Page 15: Important
ConDiTions oF WarranTy 1. warranty period is 2 years from date of purchase with proof of purchase submitted. 2. Operating instructions must be followed. 3. Specifically excludes any damages associated with leakage of batteries. Note: Batteries can leak when left unused in a product for a period of time, so it is advisable to inspect batteries regularly. - Page 16 Service Après Vente ou un centre de réparation agréé, l’utilisation ou l’installation de pièces de remplacement qui ne soient pas des pièces Mad Catz, ou la modification du produit de quelque manière que ce soit, ou l’introduction de ce produit dans n’importe quel autre produit, ou des dommages causés au produit par un accident, le feu, des inondations, la foudre, les catastrophes naturelles, ou toute utilisation allant à...
- Page 17 4. Die Garantie ist ausgeschlossen bei Verunstaltung des Geräts, unsachgemäßer oder missbräuchlicher Benutzung, mangelnder Sorgfalt, Unfall, Beseitigung oder Änderung der Seriennummer; Anschluss an eine falsche Spannung oder Stromart; Reparatur, Umbau oderwartung des Geräts durch fremde Personen außerhalb unserer Serviceeinrichtung oder eines autorisierten Servicecenters; Verwendung oder Einbau von nicht von Mad catz stammenden Ersatzteilen in das Gerät oder sonstigen Verän- derungen: Einbau in andere Geräte;...
- Page 18 Nell’Unione Europea sono disponibili sistemi per la raccolta separata e il riciclaggio dei rifiuti. Per richiedere ulteriori informazi- oni contattare le autorità locali o il rivenditore dove è stato effettuato l’acquisto del prodotto. TEcHNIcAL SUPPORT Online Support and User Guides: www.madcatz.com cAUTIONS •...
- Page 19 • Um elektrischen Schock zu vermeiden, nehmen Sie das Gerät nicht auseinander. Das Gerät darf nur von qualifiziertem Personal gewartet werden. • Führen Sie, mit Ausnahme der zulässigen Elemente, keine Gegenstände jeglicher Art in das Gerät ein, da sie gefährliche Spannungspunkte berühren oder einen Kurzschluss auslösen können, was zum Ausbruch von Feuer oder elektrischem Schock führen kann.
-
Page 20: Technischer Support
Este produto contém peças pequenas que, se engolidas, podem causar asfixia. Não deve ser utilizado por crianças com idade inferior a 3 anos. TeCHniCal supporT Online Support and User Guides: www.madcatz.com North American Telephone: Available 8 A.M. to 4 P.M. Pacific Standard Time, Monday through Friday (excluding holidays) at 1.800.659.2287 (US only) or 1.619.683.2815 (outside US).