Publicité

Les langues disponibles

Les langues disponibles

Liens rapides

3.5" SATA Tool-less Dual Bay RAID Enclosure
ICYRaid
MB662U3-2S R1
USB 3.0 interface with RAID 0 / RAID 1 / BIG / JBOD mode
User Manual
Gebrauchsanleitung
Manuel d'utilisation
Manual del usuario

Publicité

Table des Matières
loading

Sommaire des Matières pour Icy Dock ICYRaid

  • Page 1 3.5" SATA Tool-less Dual Bay RAID Enclosure ICYRaid MB662U3-2S R1 USB 3.0 interface with RAID 0 / RAID 1 / BIG / JBOD mode User Manual Gebrauchsanleitung Manuel d'utilisation Manual del usuario...
  • Page 2 English Page 1~8 Deutsch Page 9~16 Français Page 17~24 Español Page 25~32 Page 33~40 Page 41~48 Page 49~56...
  • Page 3: Package Contents

    English Package Contents Device User Manual USB 3.0 Cable Power Adapter Power Cord Front View of the Device Drive eject buttons Drive activity LED indicators Front door panel Aluminum shell Support pads...
  • Page 4: Back Panel Information

    English Back Panel Information RAID Mode Selections JBOD JBOD RAID 0 JBOD RAID 0 Fan Speed Control RAID 1 RAID 1 RAID 0 RAID 1 Rebuild LED (FAST) (SAFE) Indicator Rebuild JBOD RAID 0 RAID 0 RAID 0 JBOD JBOD RAID 1 RAID 1 RAID 1...
  • Page 5 English 3. Insert the hard drive in the correct position, insert the drive by slowly pushing the drive in and closing the front door panel at the same time. SATA 7 + 15 PIN connector 4. Push to close the front panel until a 5.
  • Page 6: Led Status Indicators

    English Using the RAID Mode The device is factory preset to JBOD mode (system will recognize the two drives as two individual volumes). If you wish to only change the RAID mode, please skip step 1 and go directly to step 2. Verify the device is powered on while changing the RAID mode.
  • Page 7 English About RAID Mode JBOD JBOD RAID 0 RAID 1 JBOD : The two physical disks are read as two independent hard drives (Non-Raid) in a single housing. Therefore, the computer will show two separate drives. Note: Due to the chipset designs, removing or inserting any hard drives in JBOD mode the unit will be refreshed.
  • Page 8 English RAID 1 JBOD RAID 0 RAID 1 RAID 1 : The two physical drives are “mirrored” so that one single logical (Safe) volume mounts on the desktop. All of the data on one drive will be recoverable from the other drive (the available capacity of one drive cannot exceed the available capacity of the other drive) Note: In case both drives fail at the same time, it is recommended to backup any stored...
  • Page 9 Support & Download section. a. Please verify that the software is installed correctly, then double click to launch. ICY DOCK HW RAID Manager b. Different RAID modes will display differently (See below): RAID 0...
  • Page 10 English Important Info 1. While creating or changing RAID mode, the chipset will automatically erase any data previously stored in the drives. Please be sure to backup any data before setting up RAID modes to prevent data loss. It is recommended to use identical brand new hard drives for any RAID array, if you are using hard drives that have been used in a RAID before, you must first remove the previous data and restore the hard drive to factory settings in order to prevent any RAID mode failure.
  • Page 11 Deutsch Packungsinhalt HDD-Gehäuse Anleitung USB 3.0 Kabel l i e Frontansicht Auswurftasten LED-Anzeige Frontklappen Aluminiumgehäuse Standfüße...
  • Page 12 Deutsch Rückansicht Auswahl des RAID-Modus JBOD JBOD RAID 0 JBOD RAID 0 Lüftersteuerung RAID 1 RAID 1 RAID 0 RAID 1 Neuaufbaulichtanzeige (FAST) (SAFE) (LED) Rebuild JBOD RAID 0 RAID 0 RAID 0 JBOD JBOD RAID 1 RAID 1 RAID 1 Reset-Knopf USB 3.0 Kabel Öffnung für...
  • Page 13 Deutsch 3. Setzen Sie die Laufwerke in der korrekten Position ein und schließen Sie die Klappen. 7-Pin SATA + 15-Pin SATA Stromanschluss 5. Verbinden Sie das Netzteil mit dem 4. Drücken sie die Frontklappen Gerät und schließen Sie das bis Sie ein“Klick”-Geräusch Datenkabel an das Gehäuse vernehmen.
  • Page 14: Led-Statusanzeige

    Deutsch Verwendung der RAID-Modi Das Gerät ist von Werk aus auf den JBOD-Modus (System erkennt zwei individuelle Volumen) eingestellt. Wenn Sie nur den RAID-Modus ändern möchten überspringen Sie Schritt 1 und gehen direkt zu Schritt 2. Stellen Sie sicher, dass das Gerät eingeschaltet während Sie den RAID-Modus wechseln.
  • Page 15 Deutsch RAID-Modi JBOD JBOD RAID 0 RAID 1 JBOD : Zwei physische Laufwerke werden als zwei unabhängige (Non-Raid) Laufwerke erkannt. Der Computer zeigt zwei getrennte Laufwerke an. Hinweis: Aufgrund des Chipsatzdesigns aktualisiert sich das Gerät, wenn Festplatten im JBOD-Modus entfernt oder eingefügt werden. Achten Sie bitte darauf, dass Datenübertragungen abgeschlossen sind, bevor Sie eine Festplatte während des Betriebs austauschen, damit keine Daten verloren gehen.
  • Page 16 Deutsch RAID 1 RAID 0 JBOD RAID 1 RAID 1 : Die zwei physischen Laufwerke werden “gespiegelt”, sodass ein (Safe) logisches Volumen auf dem Desktop angezeigt wird. Alle Daten eines Laufwerks können von dem anderen Laufwerk wiederhergestellt werden. (Die verfügbare Kapazität eines Laufwerks kann die Kapazität des anderen Laufwerks nicht übersteigen) Hinweis: Für den Fall, dass beide Laufwerke gleichzeitig ausfallen, wird zwecks zusätzlicher Sicherheit empfohlen, gespeicherte Daten in regelmäßigen Abständen auf einer anderen Festplatte zu sichern.
  • Page 17 Produktseite im Abschnitt Support & Download herunter. a. Vergewissern Sie sich bitte, dass die Software richtig installiert ist und doppelklicken Sie zu ihrer Ausführung auf ICY DOCK HW RAID Manager b. Unterschiedliche RAID-Modi werden unterschiedlich angezeigt (Siehe unten): RAID 0...
  • Page 18 Deutsch Wichtige Informationen 1. Während der Erstellung oder Änderung des RAID-Modus löscht der Chipsatz automatisch alle zuvor auf den Laufwerken gespeicherten Daten. Sichern Sie bitte unbedingt alle Daten, bevor Sie den RAID-Modus einrichten, um einen Datenverlust zu vermeiden. 2. Es wird empfohlen neue, identische Festplatten in einem RAID-Verbund zu verwenden.
  • Page 19 Français Contenu s i l Câble USB 3.0 Adaptateur d'alimentaiton Câble d'alimentaiton Vue de face du produit Bouton d'ejection du disque Indicateur LED Porte avant Coque en aluminium Pieds...
  • Page 20: Vue Arrière Du Produit

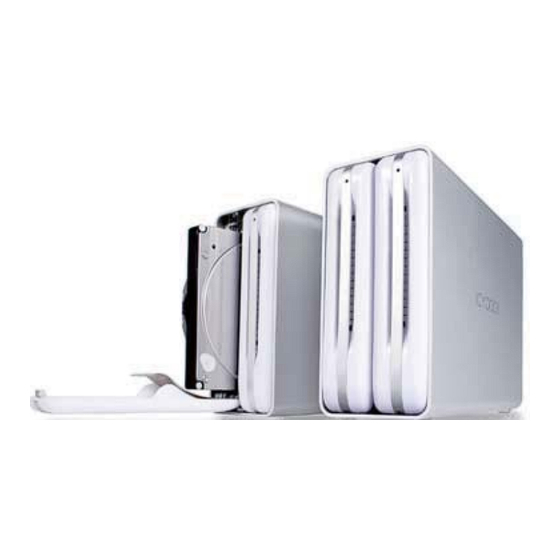
    Français Vue arrière du produit Selection mode RAID JBOD JBOD RAID 0 JBOD RAID 0 Contrôleur de vitesse RAID 1 RAID 1 du ventilateur Voyant LED de RAID 0 RAID 1 (FAST) (SAFE) reconstruction Rebuild JBOD RAID 0 JBOD RAID 0 JBOD RAID 0 RAID 1...
  • Page 21 Français 3. Insérer le disque dur dans la position indiquée, puis fermer le tiroir. SATA 7 + 15 Pin Connecteur 4. Pousser la porte du tiroir jusqu'au 5. Connecter l'alimentation à 'click' indiquant que le disque dur l'appareil et brancher le cable est sécurisé.
  • Page 22: Led D'indicateur De Statut

    Français Utilisation du Mode RAID L'appareil est réglé par défaut sur le mode JBOD (les disques seront reconnus comme deux volumes individuels). Si vous souhaitez uniquement modifier le mode RAID, veuillez sauter l'étape 1 et passez directement à l'étape 2. Vérifiez que le périphérique est sous tension lors du changement de mode RAID.
  • Page 23: Présentation Du Mode Raid

    Français Présentation du mode RAID JBOD JBOD RAID 0 RAID 1 JBOD : Les deux disques physiques sont lus indépendamment dans le (Non-Raid) boîtier, ils apparaitront séparément sur le bureau Remarque: En raison de la conception des chipsets, la réinitialisation du système est nécessaire lors du retrait ou de l'insertion de disques durs en mode JBOD.
  • Page 24 Français RAID 1 JBOD RAID 0 RAID 1 RAID 1 : Les deux disques physiques sont «en miroir» pour qu'un seul volume (Safe) soit monté sur le bureau. Toutes les données sur un disque seront recouvrables sur l'autre disque. Il est recommandé d'utiliser les disques identiques pour le RAID 1. Lors de l'utilisation de disques de capacités différente, la capacité...
  • Page 25 Aide et téléchargements. a. Veuillez vérifier que le logiciel est bien installé, puis double-cliquez sur ICY DOCK HW RAID Manager pour le lancer. b. Différents modes RAID s'afficheront différemment (voir ci-dessous):...
  • Page 26 Français Informations importantes 1. Lors de la création ou du changement de mode RAID, le chipset efface automatiquement les données précédemment stockées dans les lecteurs. Veillez à sauvegarder toutes les données avant de configurer les modes RAID pour éviter toute perte de données. 2.
  • Page 27: Contenido Del Paquete

    Español Contenido del paquete Dispositivo Manual del usuario Cable USB 3.0 Adaptador de alimentación Cable de alimentación Vista frontal del dispositivo Botón de expulsión de la unidad Indicador LED Panel frontal Carcasa de aluminio Taco de apoyo...
  • Page 28: Instalación De La Unidad

    Español Información del panel trasero Selecciones de modo RAID JBOD JBOD RAID 0 JBOD RAID 0 Control de velocidad RAID 1 RAID 1 del ventilador RAID 0 RAID 1 Indicador LED de (RÁPIDO) (SEGURO) reconstrucción Rebuild JBOD RAID 0 JBOD RAID 0 JBOD RAID 0...
  • Page 29 Español 3. Inserte el disco duro en la posición correcta y, a continuación, cierre el panel frontal. Conector de 7 + 15 contactos para unidades SATA 5. Conecte el adaptador de alimentación 4. Cierre el panel frontal presionando a la unidad y enchufe un extremo del hasta que escuche un “clic”...
  • Page 30: Indicadores Led De Estado

    Español Uso del modo RAID El dispositivo está configurado de fábrica en el modo JBOD (el sistema reconocerá dos volúmenes individuales). Si desea simplemente cambiar el modo RAID, sáltese el paso 1 y vaya directamente al paso 2. Verifique que el dispositivo esté encendido antes de comenzar el proceso de cambio del modo RAID.
  • Page 31 Español Acerca del modo RAID JBOD JBOD RAID 0 RAID 1 JBOD : los dos discos físicos se leen como dos unidades de disco duro (No Raid) independientes en una única carcasa. Por lo tanto, el equipo mostrará dos unidades distintas. Nota: Debido a los diseños de los conjuntos de chips, cuando extraiga o inserte cualquier disco duro en el modo JBOD la unidad se actualizará.
  • Page 32 Español RAID 1 JBOD RAID 0 RAID 1 RAID 1 : las dos unidades físicas se “duplican” permitiendo montar un (Seguro) volumen lógico aún más grande en el escritorio. Todos los datos de una unidad podrán recuperarse de la otra unidad (la capacidad disponible de una unidad no puede superar la capacidad disponible de la otra unidad) Nota: Si fallan ambas unidades al mismo tiempo, le recomendamos que realice una...
  • Page 33 Soporte y Descargas. a. Asegúrese de que el software se ha instalado correctamente y, a continuación, haga doble clic en para iniciarlo. ICY DOCK HW RAID Manager b. Aparecerán los modos del RAID de forma distinta (Vea más abajo): RAID 0...
  • Page 34 Español Información importante 1. Cuando se cree o se cambie el modo del RAID, el conjunto de chips eliminará automáticamente todos los datos guardados previamente en las unidades. Asegúrese de que realiza una copia de seguridad de todos los datos antes de establecer los modos del RAID para evitar la pérdida de datos.
  • Page 36 JBOD JBOD RAID 0 JBOD RAID 0 RAID 1 RAID 1 RAID 0 RAID 1 (FAST) (SAFE) Rebuild JBOD RAID 0 JBOD RAID 0 JBOD RAID 0 RAID 1 RAID 1 RAID 1 USB 3.0 INDICATOR ON / OFF Default ON (...
  • Page 37 USB 3.0...
  • Page 38 RAID...
  • Page 39 RAID JBOD JBOD RAID 0 RAID 1 JBOD RAID 0 RAID 1 RAID 0 JBOD RAID 0 RAID 1...
  • Page 40 RAID 1 JBOD RAID 0 RAID 1 HDD 1 HDD 2...
  • Page 41 RAID ICY DOCK HW RAID Manager RAID RAID 0 RAID 1 JBOD UASP UASP UASP Windows 8 / Mac OS 8 Windows 8 USB AttachedSCSI UAS Mass Storage Device...
  • Page 42 1. RAID RAID 4. RAID 0 / RAID 1 RAID Enterprise edition...
  • Page 44 RAID JBOD JBOD RAID 0 JBOD RAID 0 RAID 1 RAID 1 RAID 0 RAID 1 Rebuild (FAST) (SAFE) Rebuild RAID 0 JBOD JBOD RAID 0 JBOD RAID 0 RAID 1 RAID 1 RAID 1 USB 3.0 INDICATOR ON / OFF ON (...
  • Page 45 SATA 7 + 15 PIN USB 3.0...
  • Page 46 RAID RAID RAID Rebuild Rebuild RAID Rebuild...
  • Page 47 RAID JBOD JBOD RAID 0 RAID 1 JBOD (Non-RAID) JBOD RAID 0 RAID 1 (Concatenation) RAID 0 JBOD RAID 0 RAID 1 RAID 0 (Fast)
  • Page 48 RAID 1 JBOD RAID 0 RAID 1 RAID 1 (Safe) HDD 2 HDD 1...
  • Page 49 RAID Windows / MAC RAID http://icydock.com ICY DOCK HW RAID Manager ICY DOCK HW RAID Manager RAID RAID 0 RAID 1 JBOD UASP UASP UASP Windows 8 / Mac OS 8 Windows 8 USB Attached SCSI(UAS) Mass Storage Device UASP...
  • Page 50 RAID RAID RAID RAID RAID RAID ( Enterprise edition ) RAID 0 / RAID 1 RAID http://www.icydock.com...
  • Page 52 RAID JBOD JBOD RAID 0 JBOD RAID 0 RAID 1 RAID 1 RAID 0 RAID 1 Rebuild (FAST) (SAFE) Rebuild JBOD RAID 0 JBOD RAID 0 JBOD RAID 0 RAID 1 RAID 1 RAID 1 USB 3.0 INDICATOR ON / OFF ON (...
  • Page 53 SATA 7 + 15 PIN USB 3.0...
  • Page 54 RAID RAID RAID Rebuild Rebuild RAID Rebuild...
  • Page 55 RAID JBOD JBOD RAID 0 RAID 1 JBOD (Non-RAID) JBOD RAID 0 RAID 1 (Concatenation) RAID 0 JBOD RAID 0 RAID 1 RAID 0 (Fast)
  • Page 56 RAID 1 JBOD RAID 0 RAID 1 HDD 2 HDD 1...
  • Page 57 RAID Windows / MAC RAID http://icydock.com ICY DOCK HW RAID Manager ICY DOCK HW RAID Manager RAID RAID 0 RAID 1 JBOD UASP UASP UASP Windows 8 / Mac OS 8 Windows 8 USB Attached SCSI (UAS) UASP。...
  • Page 58 RAID RAID RAID RAID RAID RAID ( Enterprise edition ) RAID 0 / RAID 1 RAID http://www.icydock.com...
  • Page 59 MB662U3-2S R1...
  • Page 60 Bringing Innovation & Difference 650223 VER 1.0...

Ce manuel est également adapté pour:

Mb662u3-2s

Table des Matières