Table des Matières
Publicité
Les langues disponibles
Les langues disponibles
Liens rapides
WASHER
USER INSTRUCTIONS
Para una versión de estas instrucciones en español, visite www.Whirlpool.com
Table of Contents
WASHER SAFETY .........................................................1
CONTROL PANEL AND FEATURES ............................3
.......................................................................
....................................................................
.........................................................
WARRANTY ...................................................................9
ACCESSORIES ............................................................18
ASSISTANCE OR SERVICE
W10330949A
W10331734A-SP
............................. Back Cover
WASHER SAFETY
INSTRUCTIONS
D'UTILISATION
DE LA LAVEUSE
Table des matières
SÉCURITÉ DE LA LAVEUSE ......................................10
5
ET CARACTÉRISTIQUES ...........................................11
6
7
......................................................................
GARANTIE ...................................................................17
ACCESSOIRES ............................................................18
......................................
........................................
13
14
15
Publicité
Table des Matières
Dépannage

Sommaire des Matières pour Estate ETW4400WQ
-
Page 1: Table Des Matières
INSTRUCTIONS WASHER USER INSTRUCTIONS D’UTILISATION DE LA LAVEUSE Para una versión de estas instrucciones en español, visite www.Whirlpool.com Table of Contents Table des matières WASHER SAFETY ............1 SÉCURITÉ DE LA LAVEUSE ........10 CONTROL PANEL AND FEATURES ......3 TABLEAU DE COMMANDE WASHER USE ............... -
Page 10: Sécurité De La Laveuse
SÉCURITÉ DE LA LAVEUSE... -
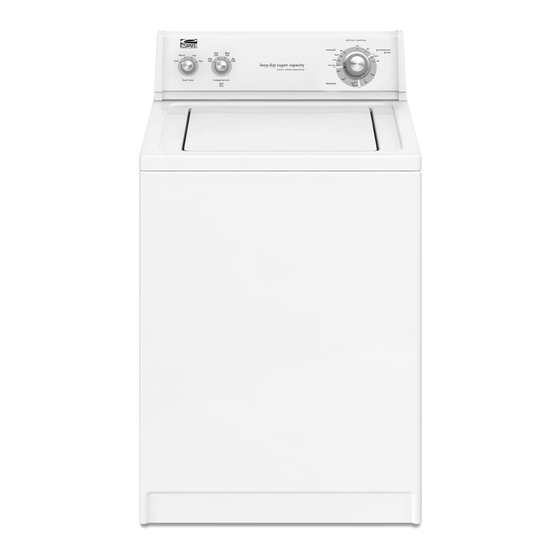
Page 11: Tableau De Commande Et Caractéristiques
TABLEAU DE COMMANDE ET CARACTÉRISTIQUES Certains programmes et options ne sont pas disponibles sur certains modèles. L’apparence des appareils peut varier. Load Size Control (Contrôle du volume de la charge) End of Cycle Signal (signal de fin de programme) Utiliser cette option pour ajuster la quantité d’eau utilisée Le signal de fin de programme retentit à... -
Page 12: Guide De Programme
GUIDE DE PROGRAMME Types de tissus Niveau Vitesse d’essorage et durée Programme Détails du programme : de saleté de lavage* 4 combinaisons 2 combinaisons de vitesse de vitesse Très sale Tissus robustes, High/High Super Wash/ Utiliser ce programme pour les articles High/High en coton très sales ou les tissus robustes articles grand-teint... -
Page 13: Utilisation De La Laveuse
UTILISATION DE LA LAVEUSE MISE EN MARCHE DE LA LAVEUSE AVERTISSEMENT : Pour réduire le risque d’incendie, de choc Style 1 : Sans distributeur d’eau de Javel (sur certains électrique ou de blessures corporelles, lire les IMPORTANTES modèles). INSTRUCTIONS DE SÉCURITÉ avant de faire fonctionner cet Laisser la laveuse se remplir et commencer l’agitation ■... -
Page 14: Entretien De La Laveuse
4. Verser de l’assouplissant pour tissu liquide dans le 9. Démarrer la laveuse en tirant le bouton de commande de distributeur. L’assouplissant pour tissu est automatiquement programme vers l’extérieur. ajouté au cours du programme de rinçage final. Style 1 : Avec distributeur d’assouplissant pour tissu liquide (sur certains modèles). -
Page 15: Dépannage
3. Faire faire un programme Normal complet à la laveuse avec Réutilisation de la laveuse 1 tasse (250 mL) de détergent pour enlever les restes 1. Vidanger les canalisations d’eau et les tuyaux. Reconnecter d’antigel. les tuyaux d’arrivée d’eau. Ouvrir les deux robinets d’eau. Entretien en cas d’entreposage, de non-utilisation ou en période de vacances On ne doit faire fonctionner la laveuse que lorsqu’on est présent. - Page 16 La laveuse n’effectue ni vidange, ni essorage; le linge est mouillé? Le tuyau de vidange est-il obstrué, ou l’extrémité du tuyau ■ de vidange se trouve-t-elle à plus de 96" (2,4 m) au-dessus du plancher? Voir “Instructions d’installation” pour une installation correcte du tuyau de vidange. Le couvercle est-il ouvert? Le couvercle doit être fermé...
- Page 17 GARANTIE DES APPAREILS DE BUANDERIE DE WHIRLPOOL CORPORATION GARANTIE LIMITÉE Pendant un an à compter de la date d'achat, lorsque ce gros appareil ménager est utilisé et entretenu conformément aux instructions jointes à ou fournies avec le produit, Whirlpool Corporation ou Whirlpool Canada LP (ci-après désignées “Whirlpool”) paiera pour les pièces spécifiées par l'usine et la main-d'œuvre pour corriger les vices de matériaux ou de fabrication qui existaient déjà...
-
Page 18: Accessories
ACCESSORIES Enhance your washer with these premium accessories. For more high-quality items or to order, call 1-800-901-2042, or visit us at www.whirlpool.com/accessories. In Canada, call 1-800-807-6777 or visit us at www.whirlpoolparts.ca. Part Number Accessory Part Number Accessory 8212656RP 10 ft (3.0 m) Black EPDM (2 pack) 8212641RP 5 ft (1.5 m) Black EPDM (2 pack) 8212638RP... - Page 19 NOTES...
-
Page 20: Assistance Ou Service
AssistAnce or service Before calling for assistance or service, please check “Troubleshooting” or visit www.whirlpool.com/help. It may save you the cost of a service call. If you still need help, follow the instructions below. When calling, please know the purchase date and the complete model and serial number of your appliance. This information will help us to better respond to your request.