Phonocar 4/070 Instructions De Montage
Liens rapides
ATTENZIONE: I collegamenti e l'installazione devono essere effettuati da personale formato e informato. •
Sistemare i cavi in modo che non vengano piegati o compressi da parti metalliche taglienti. • Non instal-
IMPORTANT: Installation and Connections need to be carried out by trained and well-informed personnel.
lare in luoghi umidi o polverosi.
• Place the cables in such a way to avoid that they get folded or compressed by sharp metal pieces. • Do
IMPORTANT: L'Installation et les Connexions doivent être effectuées par du personnel spécialisé et bien
not install in humid or dusty locations.
informé sur le produit. • Placer les câbles de manière à éviter leur plissement ou tranchement par des par-
WICHTIG: Installation und Verbindungen müssen vom gut informierten Fachmann vorgenommen werden.
ties métalliques. • Ne pas installer dans des endroits humides ou poussiéreux.
• Kabel fernhalten von scharfkantigen Metall-Teilen, um ihr Verknicken oder Abtrennen zu vermeiden. •
ATENCION: Las instalaciones y las conexiones tienen que ser efectuadas por personal especializado y
Nicht an feuchten oder staubigen Montagestellen installieren.
formado. Colocar los cables con especial cuidado evitando de doblarlos, o comprimirlos.
AVVERTIMENTI: Non smontare o modificare l'apparecchio. • Utilizzare il prodotto in veicoli con batteria
da 12V. • Usare fusibili di ricambio dell'amperaggio corretto. • Eseguire correttamente i collegamenti. • Evi-
ATTENTION: Do NOT open or modify the appliance. • Use the product only on vehicles having a 12V-bat-
tare che i cavi si impiglino agli oggetti circostanti.
tery. • Make sure replacement fuses have the correct Amp.-value. • Make sure the connections are carried
AVERTISSEMENTS: Ne pas ouvrir ou modifier l'appareil. • Utiliser le produit exclusivement sur des véhi-
out correctly. • Avoid that the cables get imprisoned by nearby objects.
cules avec une batterie à 12V. • Utiliser des fusibles de rechange avec les Ampères corrects. • Effectuer
BESONDERE HINWEISE: Das Gerät niemals auseinander nehmen oder Änderungen vornehmen. • Das
les connexions de manière correcte. • Eviter que les câbles puissent s'accrocher aux object voisins.
Produkt nur auf Fahrzeugen verwenden, die über eine 12V-Batterie verfügen. • Beim Austauschen der Si-
cherungen immer auf den korrekten Ampere-Wert achten. • Elektro-Verbindungen korrekt vornehmen und
kontrollieren. • Sicherstellen, dass sich die Kabel nicht an naheliegenden Gegenständen verhängen kön-
SE ADVIERTE DE: No desmontar o modificar el aparato. • Utilizar este aparato en vehículos con batería
nen.
de 12 Voltios. • Usar fusibles de recambios con el amperaje correcto. • Ejecutar correctamente las cone-
xiones. • Evitar que los cables se enganchen con los objetos cercanos.
www.phonocar.com • e-mail:info@phonocar.it
Via F.lli Cervi, 167/C - 42100 REGGIO EMILIA (RE) - Tel. 0522.941.621 - Fax 0522.942.452

Manuels Connexes pour Phonocar 4/070


Sommaire des Matières pour Phonocar 4/070
- Page 1 12 Voltios. • Usar fusibles de recambios con el amperaje correcto. • Ejecutar correctamente las cone- xiones. • Evitar que los cables se enganchen con los objetos cercanos. www.phonocar.com • e-mail:info@phonocar.it Via F.lli Cervi, 167/C - 42100 REGGIO EMILIA (RE) - Tel. 0522.941.621 - Fax 0522.942.452...
-
Page 2: Reset Dispositivo
MINI ‘07> Blaupunkt pulsar 8 veces Vol+ Led verde 9 impulsos pulsar SEEK+ CHRYSLER/JEEP GRAND CHEROKEE ‘05> Phonocar VM020 • VM021 300 C ‘06> pulsar 9 veces Vol+ Led verde 10 impulsos pulsar SEEK+ COMPASS ‘06> Phonocar VM016 pulsar 12 veces Vol+... - Page 3 Grünes Led blinkt 7 mal SEEK+ drücken ‘06> Blaupunkt 8 Mal Vol+ drücken. Grünes Led blinkt 9 mal SEEK+ drücken ‘06> Phonocar VM020 • VM021 ‘06> 9 Mal Vol+ drücken. Grünes Led blinkt 10 mal SEEK+ drücken ‘06> Phonocar VM016 12 Mal Vol+ drücken.
- Page 4 8 fois VOLUME+ Led vert clignote 9 fois appuyer SEEK+ Phonocar VM020 • VM021 appuyer 12 fois VOLUME+ Aus dieser Aufzeichnung geht klar hervor, dass eine bestimmte Taste nicht durchgehend immer dieselbe appuyer 9 fois VOLUME+ Led vert clignote 10 fois appuyer SEEK+ Funktion ausübt, sondern sich die Funktion je nach Radiomodell ändert.
- Page 5 Green Led blinks 7 times press SEEK+ Blaupunkt press Vol.+ 8 times. Green Led blinks 9 times press SEEK+ Phonocar VM020 • VM021 press Vol.+ 9 times. Green Led blinks 10 times press SEEK+ Phonocar VM016 press Vol.+ 12 times.
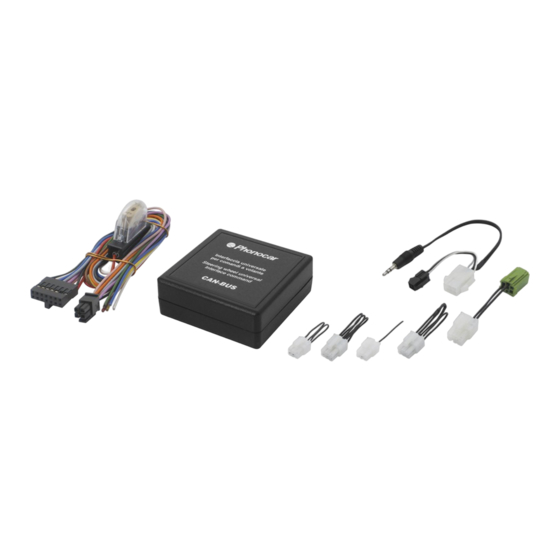
- Page 6 Positiv Ruckwartsgang Positivo marcia atras I - Il dispositivo 4/070 è un adattatore universale, per comandi al volante originali, con protocollo CAN-BUS e WOOD-JVC-ALPINE-PIONEER-SONY-PANASONIC-BLAUPUNKT-PHONOCAR purchè abbiano lʼingresso K-BUS. La sua caratteristica principale è la compatibilità con diversi tipi di autoradio quali: CLARION-KEN- del controllo remote con cavo.
- Page 7 Le câble bleu peut effectuer 2 fonctions: Positif (+12V) ou Négatif REVERSE-GEAR E - El dispositivo 4/070 es un adaptador universal, para mandos de volante original, con señal CAN-BUS y K- Das blaue Kabel kann zweierlei Funktionen ausüben: Positiv +12V Bzw. Negativ MARCHE ARRIERE RÜCKWÄRTSGANG...
- Page 8 COLLEGAMENTI AI CONNETTORI ORIGINALI • CONNECTION TO THE ORIGINAL CONNECTORS • BRANCHEMENTS AUX CONNECTEURS ORIGINAUX • ANSCHLUSS AN ORIGINAL-VERBINDER • CONEXION PARA CONECTORES ORIGINALES I - (1) Collegare l’interfaccia ai cavi del segnale CAN-BUS presenti nel vano autoradio. (2) Verificare che ai cavi CAN- E - (1) El interfaz se conecta a los cables de la señal de CAN –BUS presentes en el hueco detrás del autoradio.