Publicité

Les langues disponibles

Les langues disponibles

Liens rapides

QUICK GUIDE / GUÍA RÁPIDA / GUIDE RAPIDE
TENA SmartCare Change Indicator
TM
FOR PROFESSIONAL CAREGIVERS / PARA CUIDADORES PROFESIONALES / POUR LES PROFESSIONNELS
Version NA : 2021-08-17
www.tena.com

Publicité

Table des Matières
loading

Sommaire des Matières pour Essity TENA SmartCare Change Indicator

  • Page 1 QUICK GUIDE / GUÍA RÁPIDA / GUIDE RAPIDE TENA SmartCare Change Indicator FOR PROFESSIONAL CAREGIVERS / PARA CUIDADORES PROFESIONALES / POUR LES PROFESSIONNELS Version NA : 2021-08-17 www.tena.com...
  • Page 2 A digital solution for individualized and efficient care The Change Indicator is designed to support caregivers by helping them decide when it is best to change absorbent products without frequent manual checks. However, it should never replace the caregiver’s own professional judgement.
  • Page 3 Important information The Change Indicator is intended for use with TENA incontinence products. Clean the Change Indicator when fully assembled to prevent water from entering the device. Do not submerge in water or clean in a washing machine. Do not attempt to repair or modify the Change Indicator or a gateway by yourself.
  • Page 4 Components GATEWAY SENSOR STRIP Comes in three lengths – LED light choose according to the absorbent product Button (see the instruction for use) TRANSMITTER POWER ADAPTER Buttons LED light ADHESIVE STRIP BATTERY, CR2032...
  • Page 5: Set Up The System

    Set up the system The Change Indicator transmits information to the TENA SmartCare Professional Care app and dashboard via gateways installed in residents’ rooms and common areas. To start use the Change Indicator, the system should be set up in the TENA SmartCare Dashboard. 1.1 Set up the dashboard 1.2 Install the app QR-code to App Store...
  • Page 6 Assemble the Change Indicator INSERT THE TRANSMITTER BATTERY Press down until you hear a click Click! Inset battery under black tab Light blinks 5 times = OK...
  • Page 7 ATTACH THE TRANSMITTER TO THE SENSOR STRIP OF THE SENSOR Click! start at top, press down to attach Steady light for a few seconds = OK...
  • Page 8 Attach the Change Indicator to product FIND THE FRONT KEEP FOLDED TENA Slip TENA Slip / NA Slip / TENA Slip / TENA Slip / TENA Stretch Brief / NA Stretch Brief / TENA Stretch Brief / TENA Stretch Brief / TENA Brief NA Brief TENA Brief...
  • Page 9 ALIGN WITH THE TOP OF PLACE TIGHTLY THE THICKER ABSORBENT AREA Press firmly! Tight fit all the way TENA Flex TENA Slip / rief / TENA Stretch Brief / TENA Brief Press firmly! Tight fit all the way TENA Pants/ TENA Underwear...
  • Page 10 Attach the Change Indicator cont. UNFOLD TO REFOLD WITH THE FRONT OUTWARDS FIND THE FRONT BEFORE ATTACHING TENA Flex TENA Flex A Flex A Flex TENA Flex TENA Flex...
  • Page 11 ALIGN WITH THE TOP OF THE PLACE TIGHTLY THICKER ABSORBENT AREA Press firmly! Tight fit all the way TENA Flex...
  • Page 12: Use The Change Indicator

    Use the Change Indicator PRESS BUTTONS APPLY THE TENA PRODUCT Press both buttons for 2 seconds Apply on the resident. Steady light for a few seconds = OK If the user is very mobile, Apply TENA product consider applying a fixation pant or on the resident ordinary underwear on top of the Change Indicator.
  • Page 13 FOLLOW NOTIFICATIONS CONSIDER CHANGE SOME URINE CONSIDER CHANGE – no action needed – no action needed – consider change Some urine is detected, The absorbent More urine is detected but the surface of the product is dry and it is time to consider product is still dry change.
  • Page 14: Remove The Change Indicator

    Remove and clean REMOVE THE CHANGE INDICATOR CLEAN WHEN ASSEMBLED Remove the Change Indicator before Only clean when assembled. removing the TENA product. Clean once a week or as required. Grip the tab then gently peel straight downwards. Use an alcohol-based disinfectant when needed.
  • Page 16 Una solución digital para prestar un cuidado personalizado y eficiente El Change Indicator ha sido diseñado para ayudar a los cuidadores a decidir cuándo es el mejor momento de cambiar los productos absorbentes sin tener que comprobarlo manualmente cada cierto tiempo, pero no está pensado para sustituir el criterio profesional del cuidador.
  • Page 17 Información importante El Change Indicator está destinado para usarse con los productos para la incontinencia TENA. El Change Indicator debe limpiarse cuando está totalmente montado para evitar que entre agua en el dispositivo. No debe sumergirse en agua ni lavarse en la lavadora.
  • Page 18 Componentes RECEPTOR TIRA SENSORA Está disponible en tres Luz LED longitudes: elige la más adecuada para el producto Botón absorbente (consulta las instrucciones de uso) ADAPTADOR TRANSMISOR DE CORRIENTE Botones LUZ LED TIRA ADHESIVA PILA, CR2032...
  • Page 19: Configuración Del Sistema

    Configuración del sistema El Change Indicator transmite la información a la aplicación TENA SmartCare Professional Care y el panel a través de los receptores instalados en las habitaciones y espacios compartidos de los residentes. Para empezar a usar el Change Indicator, es necesario configurar el sistema en el TENA SmartCare Dashboard.
  • Page 20 Montaje del Change Indicator INSERTAR LA PILA EN EL TRANSMISOR Presiona hasta que escuches un clic ¡Clic! Inserta la pila debajo de la pestaña negra La luz parpadea 5 veces = correcto...
  • Page 21 ACOPLA EL TRANSMISOR A LA TIRA SENSORA EXTREMO SUPERIOR DEL SENSOR ¡Clic! PARTE SUPERIOR Empieza por arriba, presionando para adherirla Luz fija durante unos segundos = correcto...
  • Page 22 Adherir el Change Indicator al producto BUSCAR LA PARTE MANTENER DELANTERA PLEGADO TENA Slip TENA Slip / NA Slip / TENA Slip / TENA Slip / TENA Stretch Brief / NA Stretch Brief / TENA Stretch Brief / TENA Stretch Brief / TENA Brief NA Brief TENA Brief...
  • Page 23 ALINEAR CON LA PARTE SUPERIOR DE COLOCAR PRESIONANDO LA ZONA ABSORBENTE MÁS GRUESA Presiona con fuerza y aprieta bien hasta el final TENA Flex TENA Slip / rief / TENA Stretch Brief / TENA Brief Presiona con fuerza y aprieta bien hasta el final TENA Pants/ TENA Underwear...
  • Page 24 Acoplar el Change Indicator (continuación) DESPLEGAR EL PRODUCTO PARA VER LA VOLVER A PLEGARLO CON LA PARTE PARTE DELANTERA DE DELANTE HACIA AFUERA ANTES DE ACOPLAR EL INDICADOR TENA Flex TENA Flex A Flex A Flex TENA Flex TENA Flex...
  • Page 25 ALINEAR CON LA PARTE SUPERIOR DE COLOCAR PRESIONANDO LA ZONA ABSORBENTE MÁS GRUESA Presiona con fuerza y aprieta bien hasta el final TENA Flex...
  • Page 26 Utilizar el Change Indicator APRETAR BOTONES COLOCAR EL PRODUCTO TENA Presiona ambos botones durante 2 segundos Luz fija durante Colócaselo al residente. unos segundos = correcto En caso de que el usuario tenga Apply TENA product movilidad, es una buena opción on the resident usar unas medias de fijación o ropa interior normal encima del Change...
  • Page 27 SEGUIR LOS AVISOS PODRÍA SER NECESARIO CAMBIAR ALGO DE ORINA: no Correcto: no es PODRÍA SER NECESARIO es necesario realizar necesario realizar CAMBIAR: quizá haya que ninguna acción ninguna acción cambiar el producto Se detecta algo de orina, El producto Se detecta más orina y pero la superficie absorbente...
  • Page 28 Retirada y limpieza RETIRAR EL CHANGE INDICATOR LIMPIAR CUANDO ESTÉ MONTADO Antes de quitar el producto TENA, Solo se puede limpiar cuando retira el indicador de cambio. esté montado. Tira con cuidado del extremo hacia abajo Límpialo una vez a la semana o para despegar el producto.
  • Page 31: Une Solution Numérique Pour Des Soins Personnalisés Et Efficaces

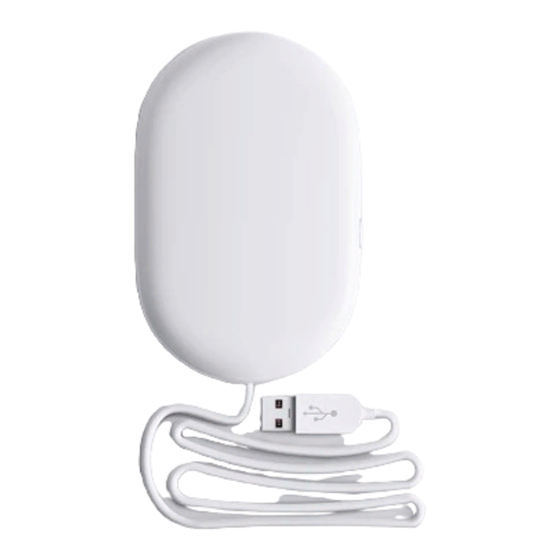
    Une solution numérique pour des soins personnalisés et efficaces TENA SmartCare Change Indicator™ est une solution de santé numérique novatrice conçue pour suivre les niveaux de saturation d’urine des produits absorbants sans la nécessité de contrôles manuels fréquents. Dans le cas où de l’urine est détectée, et qu’il est temps d’envisager le changement du produit, les soignants sont notifiés via...
  • Page 32 Composants DÉTECTEUR D’URINE CAPTEUR Disponible en trois Voyant LED longueurs – choisissez la taille en fonction du Bouton produit absorbant (voir la notice d’utilisation) ÉMETTEUR ADAPTATEUR Boutons VOYANT LED PILE, CR2032 BANDE ADHÉSIVE...
  • Page 33: Configurer Le Système

    Configurer le système L’Indicateur de Change transmet l’information à l’application et au tableau de bord TENA SmartCare Professional Care via les capteurs installés dans les chambres des résidents et les parties communes. Votre représentant TENA vous aidera à configurer l’application, le tableau de bord et les capteurs. Configurer le système 10 m Le capteur...
  • Page 34: Assemblez L'indicateur De Change

    Assemblez l’Indicateur de Change INTRODUISEZ LA PILE DE L’ÉMETTEUR Cliquez ! Le voyant clignote 5 fois = OK...
  • Page 35 FIXEZ L’ÉMETTEUR SUR LE DÉTECTEUR D’URINE HAUT Cliquez ! HAUT Commencez par l’extrémité supérieure, encliquetez vers le bas Voyant fixe pendant quelques secondes = OK...
  • Page 36: Fixer L'indicateur De Change

    Fixer l’Indicateur de Change TROUVEZ L’AVANT MAINTENEZ PLIÉ TENA Slip TENA Slip / NA Slip / TENA Slip / TENA Slip / TENA Stretch Brief / NA Stretch Brief / TENA Stretch Brief / TENA Stretch Brief / TENA Brief NA Brief TENA Brief TENA Brief...
  • Page 37 ALIGNEZ L’EMETTEUR PLACEZ EN SERRANT BIEN SUR LE HAUT DE LA PROTECTION ABSORBANTE, ZONE PLUS ÉPAISSE. Appuyez fermement ! Alignez au TENA Flex centre de la protection TENA Slip / rief / TENA Stretch Brief / TENA Brief Appuyez fermement ! Alignez au centre de la TENA Pants/...
  • Page 38: Fixer L'indicateur De Change (Suite)

    Fixer l’Indicateur de Change (suite) DÉPLIEZ POUR REPLIEZ AVEC L’AVANT VERS TROUVER L’AVANT L’EXTÉRIEUR AVANT DE FIXER TENA Flex TENA Flex A Flex A Flex TENA Flex TENA Flex...
  • Page 39 ALIGNEZ L’EMETTEUR PLACEZ EN SERRANT BIEN SUR LE HAUT DE LA PROTECTION ABSORBANTE, ZONE PLUS ÉPAISSE. Appuyez fermement ! Alignez au TENA Flex centre de la protection...
  • Page 40: Utiliser L'indicateur De Change

    Utiliser l’Indicateur de Change APPUYER SUR LES APPLIQUER LE PRODUIT TENA BOUTONS Appuyez sur les deux boutons pendant deux secondes Voyant fixe pendant quelques Appliquez sur le résident secondes = OK Apply TENA product on the resident Appuyez sur les deux boutons simultanément pendant deux secondes avant ou après chaque changement de protection.
  • Page 41 SUIVEZ LES NOTIFICATIONS ENVISAGEZ DE CHANGER PRÉSENCE D’URINE ENVISAGER DE CHANGER – aucune action – aucune action n’est – envisagez de changer n’est requise requise le produit Le produit absorbant De l’urine est détectée, Le produit absorbant est sec mais la surface du produit approche la saturation.
  • Page 42: Retirer Et Nettoyer

    Retirer et nettoyer RETIRER L’INDICATEUR DE CHANGE NETTOYER LORSQUE LES ÉLÉMENTS SONT ASSEMBLÉS Enlevez l’Indicateur de Change Nettoyez uniquement lorsqu’il avant d’enlever le produit TENA. est assemblé. Commencez par le haut, enlevez Nettoyez une fois par semaine doucement. ou selon les besoins. Placez l’Indicateur de Change sur une Utilisez un désinfectant à...
  • Page 44 Ensure that you have read and understood the instructions for use before using the www.tena.com TENA SmartCare Change Indicator system. The instructions for use are available through the TENA Professional app (Help > Instruction for use) or www.tena.com Antes de utilizar el sistema de TENA SmartCare Change IndicatorTM, asegúrate de haber leído y comprendido las instrucciones de uso.

Table des Matières