Publicité
Liens rapides
TFA Anl. No. 38.2020_10_14
29.10.2014
TFA Dostmann GmbH & Co.KG, Zum Ottersberg 12, D-97877 Wertheim.
Diese Anleitung oder Auszüge daraus dürfen nur mit Zustimmung von TFA Dostmann ver-
öffentlicht werden. Die technischen Daten entsprechen dem Stand bei Drucklegung und
können ohne vorherige Benachrichtigung geändert werden. Die neuesten technischen
Daten und Informationen zu Ihrem Produkt finden Sie unter Eingabe der Artikel-Nummer
auf unserer Homepage.
No part of this manual may be reproduced without written consent of TFA Dostmann. The
technical data are correct at the time of going to print and may change without prior
notice. The latest technical data and information about your product can be found by
entering your product number on our homepage.
La reproduction, même partielle de la présente mode d'emploi est strictement interdite
avec accord explicite de TFA Dostmann. Les spécifications techniques de ce produit ont
été actualisées au moment de l'impression et peuvent être modifiées, sans avis préalable.
Les dernières données techniques et des informations concernant votre produit peuvent
être trouvées en entrant le numéro de l'article sur notre site.
www.tfa-dostmann.de
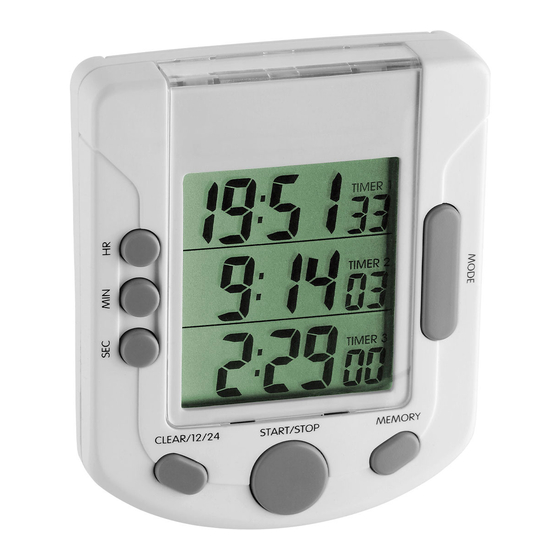
TRIPLE TIME
Digitaler 3-fach Timer
1. Zu Ihrer Sicherheit
• Bewahren Sie das Gerät und die Batterie außerhalb der Reichweite von
Kindern auf.
• Batterien nicht ins Feuer werfen, kurzschließen, auseinander nehmen
oder aufladen. Explosionsgefahr!
• Batterien enthalten gesundheitsschädliche Säuren. Um ein Auslaufen
der Batterien zu vermeiden, sollten schwache Batterien möglichst
schnell ausgetauscht werden. Beim Hantieren mit ausgelaufenen Batte-
rien chemikalienbeständige Schutzhandschuhe und Schutzbrille tragen!
• Vor Feuchtigkeit, extremen Temperaturen, Vibrationen und Erschütte-
rungen schützen.
2. Inbetriebnahme / Bedienung
• Öffnen Sie das Batteriefach und legen Sie die Batterie ein. Achten Sie
auf die richtige Polarität. Das Gerät ist jetzt betriebsbereit.
• Drücken Sie die MODE-Taste zur Auswahl zwischen TIMER 1, TIMER
2, TIMER 3, CLOCK & COUNT UP
2.1 Count Down Timer
• Drücken Sie die MODE-Taste zur Auswahl von TIMER 1, TIMER 2 oder
TIMER 3. Der ausgewählte Timer blinkt.
• Halten Sie die MEMORY-Taste gedrückt. MEM erscheint auf dem Dis-
play und die Anzeige blinkt.
• Drücken Sie die HR-Taste zum Einstellen der Stunden, die MIN-Taste
zum Einstellen der Minuten und die SEC-Taste zum Einstellen der
Sekunden. Bestätigen Sie mit der MEMORY-Taste.
• Drücken Sie die START/STOP-Taste, und die Zählung beginnt.
• Mit der START/STOP-Taste können Sie die Zählung anhalten und neu
starten.
• Durch Drücken der CLEAR-Taste wird die Anzeige gelöscht.
• Wenn der Timer bis 00.00.00 gezählt hat, ertönt ein Alarmsignal für 1
Minute und ein Pfeil nach oben erscheint im Display. Der Timer zählt nun
die verstrichene Zeit bis zum Beenden der Zählung mit der
START/STOP-Taste.
• Zur gleichzeitigen Bedienung aller 3 Timer stellen Sie die gewünschte
Zeit bei TIMER 1, TIMER 2 und TIMER 3 ein.
• Durch gleichzeitiges Drücken der MODE und START/STOP-Taste kön-
nen Sie die Zählung aller Timer anhalten und neu starten.
2.2 Uhrzeit
• Drücken Sie die MODE-Taste zur Auswahl von CLOCK & COUNT UP.
• Halten Sie die MEMORY-Taste gedrückt. Die Anzeige blinkt.
• Drücken Sie die HR-Taste zum Einstellen der Stunden und die MIN-
Taste zum Einstellen der Minuten.
• Mit der 12/24-Taste können Sie das 12 oder 24 Stundensystem ein-
stellen. Bestätigen Sie mit der MEMORY-Taste.
2.3 Stoppuhr
• Drücken Sie die MODE-Taste zur Auswahl von CLOCK & COUNT UP.
• Zum Einsatz als Stoppuhr drücken Sie die START/STOP-Taste.
• Mit der START/STOP-Taste können Sie die Zählung anhalten und neu starten.
• Durch Drücken der CLEAR-Taste wird die Anzeige gelöscht.
3. Fehlerbeseitigung
Problem
Lösung
➜ Batterie polrichtig einlegen
Keine Anzeige /
➜ Batterie wechseln (1 x 1,5 V AAA)
Unkorrekte Anzeige
4. Entsorgung
Batterien und Akkus dürfen keinesfalls in den Hausmüll!
Die Bezeichnungen für enthaltene Schwermetalle sind:
Cd=Cadmium, Hg=Quecksilber, Pb=Blei
Dieses Produkt darf nicht mit dem Hausmüll entsorgt werden.
Der Nutzer ist verpflichtet, das Altgerät bei einer ausgewiese-
nen Annahmestelle abzugeben.
09:33 Uhr
Seite 1
TRIPLE TIME
Digital Triple Timer
1. For your safety
• Keep this instrument and the battery out of the reach of children.
• Batteries must not be thrown into a fire, short-circuited, taken apart or
recharged. Risk of explosion!
• Batteries contain harmful acids. Low batteries should be changed as
soon as possible to prevent damage caused by leaking. Wear chemi-
cal-resistant protective gloves and safety glasses when handling leak-
ing batteries.
• Protect it from moisture, extreme temperatures, vibration or shock.
2. Getting started / Operation
• Open the battery compartment and insert the battery, polarity as illus-
trated. The unit is now ready to use.
• Press the MODE button to select between TIMER 1, TIMER 2, TIMER
3, CLOCK & COUNT UP
2.1 Count Down Timer
• Press the MODE button to select between TIMER 1, TIMER 2, TIMER 3
• Press and hold the MEMORY button. The "MEM" icon appears on the
display and the indication is flashing.
• Use the HR button to set hours, MIN button to set minutes and SEC
button to set seconds. Press the MEMORY button to confirm.
• Press the START/STOP button to start the countdown.
• Use the START/STOP button to stop and restart the countdown.
• To clear the countdown reading use the CLEAR button.
• When the countdown reaches 00.00.00, an alarm will sound for 1
minute and an upward flash appears on the display. Now the timer will
start to count up over time until it is stopped using the START/STOP
button.
• For simultaneous operation of all three timers set the desired time for
TIMER 1, TIMER 2, TIMER 3.
• Press the MODE and START/STOP button at the same time to stop and
restart the countdown of all timers.
2.2 Time
• Press the MODE button to select CLOCK & COUNT UP
• Press and hold the MEMORY button. The indication is flashing.
• Use the HR button to set hours and MIN button to set minutes.
• Use the 12/24 button to select 12 or 24 hours time system. Press
MEMORY button to confirm.
2.3 Stopwatch
• Press the MODE button to select CLOCK & COUNT UP
• Press the START/STOP button to start the count up
• Use the START/STOP button to stop and restart
• To clear the reading use the CLEAR button.
3. Troubleshooting
Problems
No display /
Incorrect display
4. Waste disposal
Never dispose of empty batteries and rechargeable batteries in
household waste, take them to your retail store or to appro-
priate collection sites.
The symbols for the heavy metals contained are:
Cd=cadmium, Hg=mercury, Pb=lead.
Please do not dispose of this instrument in household waste.
The user is obligated to take end-of-life devices to a designa-
ted collection point for the disposal of electrical and electronic
equipment.
10/14
Kat. Nr. 38.2020
Solutions
➜ Ensure that the battery polarity is correct
➜ Change the battery (1 x 1,5 V AAA)
10/14
RoHS
Bedienungsanleitung
Operating Instructions
Gebruiksaanwijzing
Instrucciones para el manejo
Mode d'emploi
Istruzioni
TRIPLE TIME
Minuterie digitale triple
1. Pour votre sécurité
• Gardez l'appareil et la pile hors de la portée des enfants.
• Ne jetez jamais les piles dans le feu, ne les court-circuitez pas, ne les
démontez pas et ne les rechargez pas. Risques d'explosion!
• Les piles contiennent des acides nocifs pour la santé. Une pile faible
doit être remplacée le plus rapidement possible, afin d'éviter une fuite.
Pour manipuler des piles qui ont coulé, utilisez des gants de protection
chimique spécialement adaptés et portez des lunettes de protection !
• Protégez-le contre l'humidité, des températures extrêmes, vibrations
ou chocs.
2. Mise en service / Opération
• Ouvrir le compartiment de la pile et insérer la pila, polarité +/- comme
illustré. L´instrument est maintenant prêt à fonctionner.
• Appuyez sur la touche MODE pour la sélection des minuteries TIMER
1, TIMER 2, TIMER 3, CLOCK & COUNT UP
2.1 Minuterie de compte à rebours
• Appuyez sur la touche MODE pour la sélection des minuteries TIMER
1, TIMER 2 ou TIMER 3. La minuterie sélectionnée clignote.
• Mainteniz la touche MEMORY appuyée. MEM apparaît à l'écran et l'af-
fichage clignote.
• Appuyez sur la touche HR pour le réglage des heures, la touche MIN
pour le réglage des minutes et la touche SEC pour le réglage des
secondes. Confirmer à l'aide de la touche MEMORY.
• Appuyez sur la touche START/STOP pour débuter le comptage.
• La touche START/STOP permet d'arrêter le décompte et de le redémarrer.
• En appuyant la touche CLEAR l'affichage s'effacera.
• Lorsque la minuterie est arrivée à 00.00.00, un signal sonore retentit
pendant une minute et une flèche vers le haut apparaît à l'écran. La
minuterie compte maintenant le temps écoulé jusqu'à l'arrêt du comp-
tage à l'aide de la touche START/STOP.
• Pour une commande simultanée des trois minuteries régler le temps
désiré sur les trois TIMER 1, TIMER 2 et TIMER 3.
• En appuyant simultanément sur les touches MODE et START/STOP
vous pouvez arrêter ou démarrer à nouveau toutes les minuteries.
2.2 Heure
• Appuyez sur la touche MODE pour sélectionner CLOCK & COUNT UP.
• Mainteniz la touche MEMORY appuyée.. L'affichage clignote.
• Appuyez sur la touche HR pour le réglage des heures, la touche MIN
pour le réglage des minutes.
• A l'aide de la touche 12/24 on peut sélectionner le système à 12 ou à
24 heures. Confirmer à l'aide de la touche MEMORY.
2.3 Chronomètre
• Appuyez sur la touche MODE pour sélectionner CLOCK & COUNT UP.
• Appuyez sur la touche START/STOP pour débuter le comptage.
• La touche START/STOP permet d'arrêter le décompte et de le redémar-
rer.
• En appuyant la touche CLEAR l'affichage s'effacera.
3. Dépannage
Problème
Solution
Affichage manquant / ➜ Contrôlez la bonne polarité de la pile
Indication incorrecte ➜ Echangez la pile (1 x 1,5 V AAA)
4. Traitement des déchets
Les piles et accus usagés ne peuvent en aucun cas être jetés
dans les ordures ménagères !
Les métaux lourds sont désignés comme suit:
Cd=cadmium, Hg=mercure, Pb=plomb.
L'appareil usagé ne doit pas être jeté dans les ordures ména-
gères. L'utilisateur s'engage, à déposer l'appareil usagé dans
un centre de traitement agréé pour les déchets électriques et
électroniques.
Kat. Nr. 38.2020
10/14
Publicité

Manuels Connexes pour TFA TRIPLE TIME


Sommaire des Matières pour TFA TRIPLE TIME
- Page 1 Instrucciones para el manejo auf unserer Homepage. Mode d’emploi No part of this manual may be reproduced without written consent of TFA Dostmann. The technical data are correct at the time of going to print and may change without prior Istruzioni notice.
- Page 2 Estas instrucciones o extractos de las mismas no pueden ser publicados sin la autori- zación de la TFA Dostmann. Los datos técnicos de este producto corresponden al estado en el momento de la impresión y pueden ser modificados sin previo aviso. Los actuales datos técnicos e informaciones sobre su producto los puede encontrar bajo el número de...