Publicité
Liens rapides
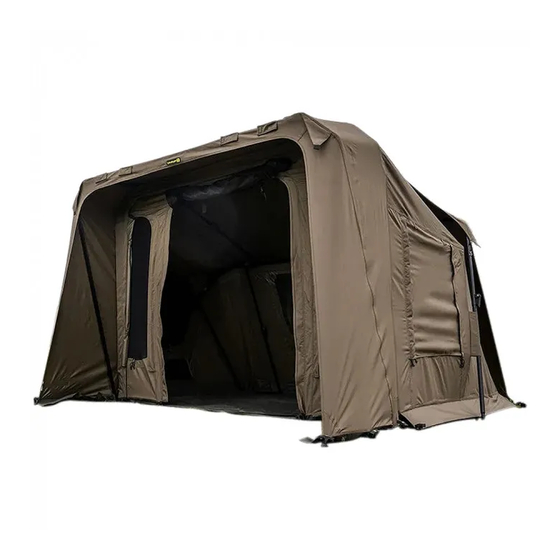
XF1 Compact / Standard instructions
Instructions de montage bivvies XF1 Compact/Standard
XF1 Assembly:
Montage du bivvy XF1 :
1: Remove the Escape XF1 from the carry bag and with the door facing upwards, lay the it in the required
position and peg the two rear corners into place. Carefully open the outer arms.
1 – sortez le bivvy Escape XF1 de son sac de transport avec la porte vers le haut, installez-le à
l'emplacement souhaité et enfoncez les sardines des coins arrières gauche et droit. Ouvrez doucement les
bras extérieurs.
2: Standing in front of the doorway and holding the front crossbar, pull the Escape XF1 upwards and
towards you to raise the bivvy into position. Stand inside the bivvy and lock the two internal X-Frame
bosses into place by sliding them upwards along the internal side bars until firmly seated in the location
point.
2 – Positionnez-vous devant l'entrée, et tout en tenant la barre transversale avant, tirez l'armature X-
Frame du bivvy Escape XF1 vers le haut pour déployer le bivvy. De l'intérieur du bivvy, verrouillez les deux
systèmes de fermeture latéraux en position en les faisant coulisser vers le haut le long des barres, jusqu'à
ce qu'ils s'enclenchent à leur emplacement.
3: Clip the two short non-adjustable tension bars into their corresponding position to extend the front
peak. Clip the long curved non-adjustable tension bar across the two shorter bars to ensure no rainwater
can pool in the peak area.
3 – Clipsez les deux petites barres de tension fixes dans leurs emplacements pour déplier l'avant de la
casquette. Clipsez la barre de tension incurvée fixe plus longue en position sur les deux barres plus courtes,
pour assurer une étanchéité parfaite de la casquette.
4: Peg the perimeter of the bivvy to the ground and zip on the flysheet if required (see fitting instructions
below).
4 – fixez les sardines autour du bivvy en incluant la surtoile si vous souhaitez installer celle-ci. (voir
instructions ci-dessous)
5: Unfold the groundsheet inside the Escape XF1 and affix to the skirt using the velcro fixing points. Note
that the small RidgeMonkey logo indicates the front of the groundsheet and should be placed in the door
area.
5 – Dépliez le tapis de sol à l'intérieur de l'Escape XF1 et fixez la jupe sur le pourtour à l'aide des points
d'attache à velcro. Le petit logo RidgeMonkey indique l'avant du tapis de sol et doit se trouver du côté de
la porte.
6: Clip the four adjustable tension bars between the rear bars of the inner X-Frame. These only require
light pressure to operate effectively, DO NOT over-extend.
6 – Clipsez les 4 barres de tension réglables entre les barres arrières de l'armature interne X-Frame, à l'aide
d'une pression légère. Ne forcez pas.
XF1 Disassembly:
Démontage du bivvy XF1 :
1: Remove flysheet, all perimeter pegs except the two rear corners and groundsheet. Remove all tension
bars.
1 – Enlevez la surtoile, toutes les sardines sauf celles des coins arrières gauche et droit, enlevez toutes les
barres de tension.
Publicité

Sommaire des Matières pour RidgeMonkey Escape XF1 Compact
- Page 1 5 – Dépliez le tapis de sol à l’intérieur de l’Escape XF1 et fixez la jupe sur le pourtour à l’aide des points d’attache à velcro. Le petit logo RidgeMonkey indique l’avant du tapis de sol et doit se trouver du côté de la porte.
- Page 2 2: Firmly depress the two X-Frame locking bosses downward along the side bars to unseat them and release tension from the canopy. Holding the front crossbar of the Escape XF1, carefully lower the bivvy to the floor ensuring all material is folded neatly between the crossbars. 2 –...
- Page 3 before being repacked dry. If stored when damp or wet mildew and rust will be able to form, both of which can severely damage the product and its accessories. Un rangement et un stockage appropriés sont les deux éléments essentiels de l’entretien de votre bivvy Escape XF1.
- Page 4 This warranty is provided in addition to your statutory consumer rights in the country of purchase. La garantie RidgeMonkey est valable 2 ans à compter de la date d’achat. Conservez votre justificatif d’achat, il vous sera demandé en cas de demande de prise en charge. Votre garantie couvre le remplacement ou la réparation de votre bivvy, selon le défaut constaté...