Publicité

Les langues disponibles
  • FR

Les langues disponibles

  • FRANÇAIS, page 21

Liens rapides

Quick Installation Guide
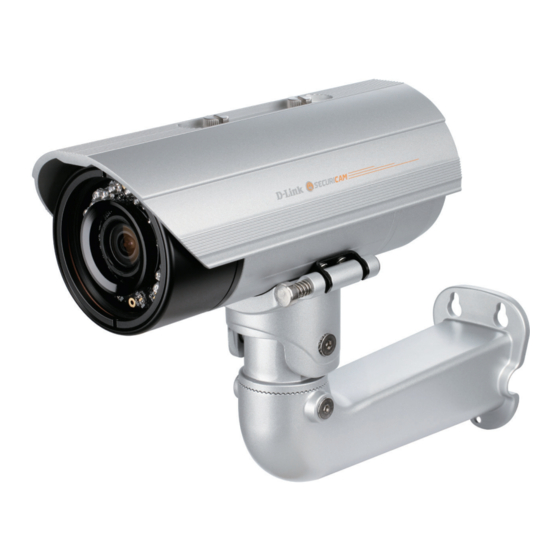
5 megapixel H.265 Outdoor Network Camera
This document will guide you through the
basic installation process for your new
D-Link Network Camera.
DCS-7517
Quick Installation Guide
Installationsanleitung
Guide d'installation
Guía de instalación
Guida di Installazione
Краткое руководство по установке
Guia de Instalação Rápida
快速安裝指南
Petunjuk Pemasangan Cepat
Documentation also available on
CD and via the D-Link Website

Publicité

Table des Matières
loading

Sommaire des Matières pour D-Link DCS-7517

  • Page 1 D-Link Network Camera. DCS-7517 Quick Installation Guide Installationsanleitung Guide d’installation Guía de instalación Guida di Installazione Краткое руководство по установке Guia de Instalação Rápida 快速安裝指南 Petunjuk Pemasangan Cepat Documentation also available on CD and via the D-Link Website...
  • Page 3: Package Contents

    Quick Installation Guide This installation guide provides basic instructions for installing the DCS-7517. For additional information about how to use the camera, please see the User Manual which is available on the CD included in this package or from the D-Link support website.
  • Page 4: Hardware Overview

    Allows the camera to be swiveled into position for easy maintenance. Camera Shoe Adjustable mounting seat for the camera. Connects to an RJ45 Ethernet port. Can be used Ethernet Jack with PoE to provide power to the camera. D-Link DCS-7517 Quick Installation Guide...
  • Page 5 Optional Cable Harness (not included) Camera Connects to the DCS-7517. For more details on Connector connecting the A/V cable, refer to the User Manual. DI/DO I/O connectors for external devices. Connector Press and hold the button for 10 seconds to reset the Reset Button camera back to the factory default settings.
  • Page 6 3. AUD IN 8. RESET 4. AUD GND 9. DI 5. AUD OUT 10. DO Press and hold the button for 10 seconds to reset the Reset Button camera back to the factory default settings. D-Link DCS-7517 Quick Installation Guide...
  • Page 7 Make sure the plug is inserted properly to ensure a good seal. Connect the camera connector to the camera. Reattach the back camera cover by turning it clockwise. D-Link DCS-7517 Quick Installation Guide...
  • Page 8: Sd Card Installation

    Make sure that the weatherproof seals are secured firmly in place. Mounting Instructions Please refer to the User Manual for detailed instructions on how to install and mount the camera. D-Link DCS-7517 Quick Installation Guide...
  • Page 9: Connecting The Camera

    General Connection Using 12 V DC Power Adapter (not included) ƒ Connect the Ethernet cable to your network. ƒ Connect your power adapter to the camera's power connector, then plug in the power adapter. D-Link DCS-7517 Quick Installation Guide...
  • Page 10: Configuring The Camera

    Configuring the Camera Insert the DCS-7517 CD into your computer's CD-ROM drive to begin the installation. If Autorun is disabled, or if the D-Link Launcher fails to start automatically, click the Start button and type D:\autorun.exe (where D: represents the drive letter of your CD-ROM drive) and press Enter.
  • Page 11: Additional Information

    Take a moment to confirm your settings and click Restart. Viewing Your Camera via Web Browser Click on the D-Link Setup Wizard SE icon that was created in your Windows Start menu (Start > D-Link > Setup Wizard SE). Select the camera and click Link to access the web configuration.
  • Page 12 Diese Installationsanleitung bietet Ihnen grundlegende Anleitungen zur Installation der DCS-7517 in Ihrem Netzwerk. Zusätzliche Informationen zur Verwendung der Kamera finden Sie im Benutzerhandbuch, das Ihnen auf der CD, die diesem Paket beiliegt, oder über die D-Link Support-Website zur Verfügung steht. Packungsinhalt ƒ...
  • Page 13 Ermöglicht das Schwenken der Kamera in die Schnellentriegelungsstift richtige Position zur einfachen Wartung. Kameraschuh Einstellbare Montagehalterung für die Kamera. Wird mit einem RJ45 Ethernet-Anschluss Ethernet-Anschluss verbunden. Kann mit PoE für die Stromversorgung der Kamera verwendet werden. D-Link DCS-7517 Quick Installation Guide...
  • Page 14 Optionaler Kabelbaum (nicht im Lieferumfang) Wird mit dem Modell DCS-7517 verbunden. Weitere Kameraanschluss Informationen zum Anschluss des A/V-Kabels finden Sie im Benutzerhandbuch. Steckverbinder für digitalen Ein- E/A-Anschlüsse für externe Geräte. und Ausgang Drücken und halten Sie den Knopf 10 Sekunden lang, Rücksetzknopf...
  • Page 15 2. GND (Masse) 8. RESET 3. AUD IN (RÜCKSETZEN) 4. AUD GND 9. DI 5. AUD OUT 10. DO Drücken und halten Sie den Knopf 10 Sekunden lang, um die Kameraeinstellungen Rücksetztaste auf die werkseitigen Standardeinstellungen zurückzusetzen. D-Link DCS-7517 Quick Installation Guide...
  • Page 16 Kabels ein. Achten Sie darauf, dass der Stopfen festsitzt und die Öffnung gut abdichtet. Schließen Sie den Kamerastecker an der Kamera Bringen Sie die hintere Abdeckung der Kamera wieder an, indem Sie sie im Uhrzeigersinn drehen. D-Link DCS-7517 Quick Installation Guide...
  • Page 17 Sie die hintere Abdeckung wieder an. Achten Sie darauf, dass die wetterfesten Gummidichtungen ordnungsgemäß und sicher angebracht sind. Montageanleitung Im Benutzerhandbuch finden Sie detaillierte Anweisungen zur Installation und Befestigung der Kamera. D-Link DCS-7517 Quick Installation Guide...
  • Page 18: Anschluss Der Kamera

    Sie die folgende Anschlussmethode verwenden: Allgemeiner Anschluss mit 12 V DC-Netzteil (nicht im Lieferumfang) ƒ Verbinden Sie das Ethernet-Kabel mit Ihrem Netzwerk. ƒ Verbinden Sie Ihr Netzteil mit dem Stromanschluss der Kamera, dann stecken Sie das Netzteil ein. D-Link DCS-7517 Quick Installation Guide...
  • Page 19: Konfiguration Der Kamera

    Konfiguration der Kamera Legen Sie die DCS-7517 CD in das CD-ROM-Laufwerk Ihres Computers, um die Installation zu beginnen. Sollte die CD auf Ihrem Computer nicht automatisch ausgeführt werden oder der D-Link Launcher nicht automatisch starten, klicken Sie auf die Startschaltfläche und geben Sie D:\autorun.exe ein (wobei D: für den Laufwerkbuchstaben Ihres CD-ROM-Laufwerks steht) und drücken Sie die...
  • Page 20: Weitere Informationen

    Prüfen Sie Ihre Einstellungen und klicken Sie dann auf Restart (Neustart). Anzeige Ihrer Kamera über einen Webbrowser Klicken Sie auf das Symbol für den D-Link Setup- Wizard SE, der in Ihrem Windows-Startmenü (Start > D-Link > Setup Wizard SE) erstellt wurde.
  • Page 21: Contenu De La Boîte

    à installer la DCS-7517. Pour obtenir des informations complémentaires sur l'utilisation de la caméra, consultez le Manuel d'utilisation, disponible sur le CD joint à ce coffret, ou sur le site Web d'assistance D-Link. Contenu de la boîte ƒ DCS-7517 Caméra réseau extérieure H.265 5 mégapixels ƒ...
  • Page 22: Description Du Matériel

    Permet de faire pivoter la caméra en position de dégagement maintenance aisée. rapide Sabot de Support de montage réglable pour la caméra. caméra Connecteur Permet la connexion à un port Ethernet RJ45. Peut être Ethernet utilisé avec du PoE pour alimenter la caméra. D-Link DCS-7517 Quick Installation Guide...
  • Page 23: Faisceau De Câbles Optionnel (Non Fourni)

    Faisceau de câbles optionnel (non fourni) Permet la connexion à la DCS-7517. Pour plus de détails Connecteur de sur le raccordement du câble A/V, reportez-vous au caméra manuel de l'utilisateur. Connecteur Connecteurs E/S pour périphériques externes DI/DO Appuyez dessus et maintenez-le enfoncé pendant 10 Bouton de secondes pour réinitialiser la caméra à...
  • Page 24 3. AUD IN 8. astre tête RESET 4. AUD GND 9. DI 5. AUD OUT 10. DO Appuyez dessus et maintenez-le enfoncé pendant 10 Bouton de secondes pour réinitialiser la caméra à ses paramètres réinitialisation d'usine D-Link DCS-7517 Quick Installation Guide...
  • Page 25: Raccordement Au Faisceau De Câbles Optionnel

    Assurez-vous que la fiche est correctement insérée pour assurer une bonne étanchéité. Raccordez le connecteur de la caméra sur celle-ci. Rebranchez le capot arrière de la caméra en le tournant dans le sens des aiguilles d'une montre. D-Link DCS-7517 Quick Installation Guide...
  • Page 26: Installation De La Carte Sd

    Assurez-vous que les joints étanches sont fermement en place. Instructions de montage Reportez-vous au manuel d'utilisation pour des instructions détaillées sur la méthode d'installation et de montage de la caméra. D-Link DCS-7517 Quick Installation Guide...
  • Page 27: Connexion De La Caméra

    électrique 12 V cc (non fourni) ƒ Connectez le câble Ethernet à votre réseau. ƒ Connectez une extrémité de l'adaptateur secteur sur le connecteur d'alimentation situé sur votre caméra et l'autre sur une prise murale. D-Link DCS-7517 Quick Installation Guide...
  • Page 28: Configuration De La Caméra

    Configuration de la caméra Insérez le CD de la DCS-7517 dans le lecteur de CD-ROM de l'ordinateur pour lancer l'installation. Si l'exécution automatique est désactivée ou si le dispositif de lancement D-Link ne parvient pas à démarrer automatiquement, cliquez sur le bouton Démarrer et saisissez D:\autorun.exe (où...
  • Page 29: Affichage De Votre Caméra Via Un Navigateur Web

    Redémarrer. Affichage de votre caméra via un navigateur Web Cliquez sur l'icône Assistant de configuration D-Link SE créée dans votre menu Démarrer de Windows (Démarrer > D-Link > Assistant de configuration SE). Sélectionnez la caméra, puis cliquez sur Connexion pour accéder à...
  • Page 30: Qué Contiene La Caja

    Guía de instalación rápida Esta guía de instalación proporciona instrucciones básicas para la instalación de la cámara DCS-7517. Para obtener información adicional acerca de cómo utilizar la cámara, consulte el Manual del usuario disponible en el CD incluido en el paquete o en el sitio web de asistencia de D-Link.
  • Page 31 Permite girar la cámara para facilitar su mantenimiento. liberación rápida Zapata de la Asiento de montura ajustable para la cámara. cámara Se conecta a un puerto Ethernet RJ45. Se puede usar Clavija Ethernet con PoE para proporcionar alimentación a la cámara. D-Link DCS-7517 Quick Installation Guide...
  • Page 32 Arnés para cables opcional (no incluido) Se conecta a la cámara DCS-7517. Para obtener más Conector de información sobre la conexión del cable A/V, consulte el cámara Manual del usuario. Conector de Conectores de E/S para dispositivos externos. DI/DO Mantenga pulsado el botón durante 10 segundos para Botón de...
  • Page 33 3. ENTRADA AUD 8. REINICIO 4. TIERRA AUD 9. DI 5. SALIDA AUD 10. DO Pulse y mantenga pulsado el botón durante 10 Botón de segundos para reiniciar la cámara en los parámetros reinicio predeterminados de fábrica D-Link DCS-7517 Quick Installation Guide...
  • Page 34 Asegúrese de que el tapón está correctamente insertado para que el cierre quede hermético. Conecte el conector de la cámara a esta. Vuelva a colocar la cubierta trasera de la cámara girándola hacia la derecha. D-Link DCS-7517 Quick Installation Guide...
  • Page 35 Asegúrese de que los cierres herméticos quedan fijados firmemente. Instrucciones de montaje Consulte el Manual del usuario para obtener instrucciones detalladas sobre el modo de instalar y montar la cámara. D-Link DCS-7517 Quick Installation Guide...
  • Page 36: Conexión De La Cámara

    Conexión general mediante adaptador de alimentación de 12 V CC (no incluido) ƒ Conecte el cable Ethernet a su red. ƒ Conecte el adaptador de alimentación al conector de la cámara y, a continuación, enchufe el adaptador de alimentación. D-Link DCS-7517 Quick Installation Guide...
  • Page 37: Configuración De La Cámara

    Configuración de la cámara Inserte el CD de la DCS-7517 en la unidad de CD-ROM del ordenador para comenzar la instalación. Si la ejecución automática está desactivada o si el iniciador de D-Link no se inicia automáticamente, haga clic en el botón Start (Inicio) y escriba D:\autorun.exe (donde D: representa la letra de unidad de la...
  • Page 38 Visualización de su cámara a través del explorador de web Haga clic en el icono Asistente de configuración SE D-Link que se creó en el menú de inicio de Windows (Inicio > D-Link > Asistente de configuración SE). Seleccione la cámara y haga clic en Link (Vincular) para acceder a la configuración web.
  • Page 39: Guida Di Installazione Rapida

    CD incluso nella confezione o scaricabile dal sito Web di supporto di D-Link. Contenuto della confezione ƒ DCS-7517 Videocamera di rete da esterni H.265 da 5 Megapixel ƒ Cavo Ethernet ƒ Adattatore prolunga ƒ...
  • Page 40 Consente alla videocamera di essere posizionata in modo rapido ottimale per la manutenzione. Slitta videocamera Sede di montaggio regolabile per la videocamera. Si connette a una porta Ethernet RJ45. Può essere usato Spinotto Ethernet con PoE per fornire alimentazione alla videocamera. D-Link DCS-7517 Quick Installation Guide...
  • Page 41 Cablaggio opzionale (non incluso) Connettore Si connette a DCS-7517. Per maggiori dettagli sulla videocamera connessione con il cavo A/V, consultare il Manuale utente. Connettore DI/ Connettori I/O per dispositivi esterni. Pulsante di Tenere premuto il pulsante per 10 secondi per ripristinare...
  • Page 42 7. GND connettore 3. IN AUD 8. REIMPOSTA 4. GND AUD 9. DI 5. USC AUD 10. DO Pulsante di Tenerlo premuto il pulsante per 10 secondi per reset ripristinare le impostazioni predefinite della telecamera D-Link DCS-7517 Quick Installation Guide...
  • Page 43 Verificare che la presa sia inserita correttamente per garantire un corretto isolamento. Collegare il connettore della videocamera alla videocamera. Ricollegare la copertura della videocamera posteriore ruotandola in senso orario. D-Link DCS-7517 Quick Installation Guide...
  • Page 44: Installazione Della Scheda Sd

    Inserire la scheda microSD con i contatti rivolti in basso, quindi ricollegare la copertura posteriore. Verificare che le guarnizioni impermeabili siano fissate fermamente in posizione. Istruzioni per il montaggio Per istruzioni dettagliate sull'installazione e il montaggio della videocamera, consultare il Manuale utente. D-Link DCS-7517 Quick Installation Guide...
  • Page 45: Collegamento Della Videocamera

    Collegamento generale tramite adattatore di alimentazione da 12 V CC (non incluso) ƒ Collegare il cavo Ethernet alla rete. ƒ Collegare l'adattatore di alimentazione al connettore di alimentazione della videocamera, quindi collegarlo all'adattatore di alimentazione. D-Link DCS-7517 Quick Installation Guide...
  • Page 46 Configurazione della videocamera Inserire il CD DCS-7517 CD nell'unità CD-ROM del computer per avviare l'installazione. Se Autorun è disabilitato oppure se il D-Link Launcher non si avvia automaticamente, fare clic sul pulsante Start e digitare D:\autorun.exe (dove D: rappresenta la lettera dell'unità CD-ROM), quindi premere Invio.
  • Page 47: Ulteriori Informazioni

    Riavvia. Visualizzazione della telecamera tramite il browser Web Fare clic sull'icona D-Link Setup Wizard SE creata nel menu Start di Windows (Start > D-Link > Setup Wizard SE). Selezionare la telecamera e fare clic su Collegamento per accedere alla configurazione Web.
  • Page 48: Комплект Поставки

    DCS-7517. Для получения дополнительной информации по настройке камеры, пожалуйста, обратитесь к руководству пользователя на CD-диске из комплекта поставки или через Web-сайт D-Link. Комплект поставки ƒ 5 Мп внешняя сетевая камера с поддержкой PoE DCS-7517 ƒ Ethernet-кабель ƒ Соединитель Ethernet-кабеля ƒ Комплект для монтажа...
  • Page 49 Используется для определения условий датчик освещения. Используется для быстрой регулировки положения Регулировочный винт камеры. Кронштейн Регулируемый кронштейн для крепления камеры. Разъем RJ-45 для подключения Ethernet-кабеля, Ethernet-разъем а также для подачи питания по технологии Power over Ethernet (PoE). D-Link DCS-7517 Quick Installation Guide...
  • Page 50 Дополнительный жгут проводов (не входит в комплект поставки) Коннектор Используется для подключения к DCS-7517. для Для получения дополнительной информации о подключения подключении кабеля A/V обратитесь к руководству к камере пользователя. Разъемы DI/ Разъемы для подключения внешних устройств. Нажмите и удерживайте эту кнопку в течение 10 секунд...
  • Page 51 жгута проводов 3. AUD IN 8. RESET 4. AUD GND 9. DI 5. AUD OUT 10. DO Нажмите и удерживайте эту кнопку в течение Кнопка Reset 10 секунд для сброса настроек камеры к заводским установкам. D-Link DCS-7517 Quick Installation Guide...
  • Page 52 Снимите с камеры водонепроницаемую заглушку. Протяните коннектор для подключения к камере через отверстие, затем установите водонепроницаемую заглушку. Убедитесь, что водонепроницаемая заглушка надежно зафиксирована. Подключите коннектор к камере. Соедините заднюю панель с камерой, повернув ее по часовой стрелке. D-Link DCS-7517 Quick Installation Guide...
  • Page 53: Инструкции По Установке

    Установите microSD-карту в слот для карты контактами вниз, затем установите заднюю панель камеры. Убедитесь, что элементы, защищающие камеру, надежно зафиксированы. Инструкции по установке За подробной информацией относительно установки и монтажа камеры, пожалуйста, обратитесь к руководству пользователя. D-Link DCS-7517 Quick Installation Guide...
  • Page 54: Подключение Камеры

    Основное подключение с помощью адаптера питания 12 В постоянного тока (не входит в комплект поставки) ƒ Подключите камеру к коммутатору или маршрутизатору через Ethernet-кабель. ƒ Подключите кабель питания от камеры к адаптеру питания, затем подключите адаптер питания к розетке. D-Link DCS-7517 Quick Installation Guide...
  • Page 55 Настройка камеры Вставьте диск с программным обеспечением для DCS-7517 в привод CD-ROM для начала установки. Если на компьютере отключена функция автоматического запуска, или D-Link Launcher не запускается автоматически, нажмите Пуск > Выполнить. Введите D:\autorun.exe, где D: – имя привода CD-ROM, и нажмите...
  • Page 56: Дополнительная Информация

    Проверьте настройки и нажмите Restart (Перезапустить). Просмотр изображения камеры через Web браузер Выберите ярлык D-Link Setup Wizard SE в стартовом меню Windows (Пуск > D-Link > Setup Wizard SE). Выберите камеру и нажмите кнопку Link для доступа к настройкам сети.
  • Page 57: Технические Характеристики

    • DDNS-клиент (D-Link) • Bonjour • SMTP-клиент • 802.1x • FTP-клиент • SNMP • HTTP/HTTPS • Соответствие ONVIF Безопасность • Защита учетной записи администратора и • Аутентификация HTTP и RTSP группы пользователей • Аутентификация по паролю D-Link DCS-7517 Quick Installation Guide...
  • Page 58 • Хранения: от -20 до 70 °С Влажность • При эксплуатации: от 20% до 80% (без конденсата) • При хранении: от 5% до 95% (без конденсата) Прочее Сертификаты • CE • FCC • CE LVD • C-Tick D-Link DCS-7517 Quick Installation Guide...
  • Page 59 Мінск, пр-т Незалежнасці, 169 Eesti Тэл.: +375 (17) 218-13-65 E-mail: info@dlink.ee E-mail: support@dlink.by Türkiye Қазақстан Uphill Towers Residence A/99 Алматы, Құрманғазы к-cі,143 үй Ataşehir /ISTANBUL Тел.: +7 (727) 378-55-90 Tel: +90 (216) 492-99-99 E-mail: almaty@dlink.ru Email: info.tr@dlink.com.tr D-Link DCS-7517 Quick Installation Guide...
  • Page 60 G - 2016, H - 2017. Месяц: 1 - январь, 2 - февраль, ..., 9 - сентябрь, A - октябрь, B - ноябрь, С - декабрь. * Комплект поставки может отличаться в зависимости от региона. D-Link DCS-7517 Quick Installation Guide...
  • Page 61: Conteúdo Do Pacote

    Guia de Instalação Rápida Este guia de instalação irá fornecer instruções básicas para instalar o DCS-7517. Para informações adicionais sobre como utilizar a câmera, por favor, verifique o Manual de Usuário que está disponível no CD incluso com o pacote ou no site de suporte D-Link.
  • Page 62 Permite que a câmera seja desacoplada facilmente em Rápida posição para fácil manutenção. Suporte da Câmera Suporte ajustável para a câmera. Conecte a uma porta Ethernet RJ45. Pode ser utilizada Porta Ethernet com PoE para fornecer energia à câmera. D-Link DCS-7517 Quick Installation Guide...
  • Page 63 Conector de Conector de energia para adaptador de 12 V DC (não Energia incluso). Audio Out Conecta a um alto falante. (Verde) Audio In Conecta a um microfone. (Vermelho) Conector BNC Não suportada pelo DCS-7517. D-Link DCS-7517 Quick Installation Guide...
  • Page 64: Parte Interna

    3. AUD IN 8. RESET 4. AUD GND 9. DI 5. AUD OUT 10. DO Pressione e segure o botão por 10 segundos para Botão Reset redefinir a câmera de volta às configurações do padrão de fábrica D-Link DCS-7517 Quick Installation Guide...
  • Page 65 Verifique se o plugue foi inserido corretamente para garantir um bom lacre. Conecte o conector da câmera com a câmera. Coloque novamente a proteção de trás da câmera e gire no sentido horário. D-Link DCS-7517 Quick Installation Guide...
  • Page 66: Instruções De Montagem

    Verifique se as vedações impermeáveis estão seguras e no lugar certo. Instruções de Montagem Por favor, verifique o Manual de Usuário para instruções detalhadas em como instalar e montar a câmera. D-Link DCS-7517 Quick Installation Guide...
  • Page 67 Conexão Geral utilizando um Adaptador de Energia 12 V DC (não incluso) ƒ Conecte o cabo Ethernet a sua conexão ƒ Conecte o seu adaptador de energia ao conector de energia na câmera e então plugue no adaptador de energia. D-Link DCS-7517 Quick Installation Guide...
  • Page 68 Configurando a Câmera Insira o CD do DCS-7517 na porta de CD-ROM no seu computador e comece com a instalação. Se o Autorun está desligado ou o Launcher da D-Link falhar para começar automaticamente, clique no botão de Start e escreva D:\autorun.
  • Page 69: Informações Adicionais

    Visualizando a Sua Câmera via Navegador Web Clique no ícone Assistente de Configuração SE que foi criado no menu de início do Windows (Start > D-Link > Assistente de Configuração SE). Selecione a câmera e clique em Link para acessar as configurações web.
  • Page 70 快速安裝手冊 此安裝指南提供安裝DCS-7517網路攝影機的基本操作。若要取得更多關於使用 此攝影機的方式,請參考光碟內附的使用手冊,或至D-Link技術支援網站下載 產品使用手冊。 包裝內容 ƒ DCS-7517 5百萬H.265 戶外型網路攝影機 ƒ ƒ 乙太網路線 ƒ ƒ 延伸器 ƒ ƒ 安裝支架及螺絲 ƒ ƒ 光碟(內涵使用手冊及安裝程式) ƒ ƒ 快速安裝手冊 若包裝內缺少以上任何項目,請聯絡您的經銷商。 安全須知 : 此產品應該由具備相關證照的技術人員安裝,以符合當地的法規及避免產品保 固失效。 中 文 D-Link DCS-7517 Quick Installation Guide...
  • Page 71 硬體概觀 紅外線LED燈 在低光源的環境下提供照明。 可調式上罩 避免鏡頭直接照射陽光。 調整螺絲 旋轉鬆緊以調整上罩位置。 攝影機鏡頭 可變焦鏡頭。 電源/狀態指示燈 指示攝影機當前狀態。 中 感光元件 依據環境光源自動切換日夜模式。 文 快速拆卸鈕 可快速將攝影機從支架上拆下以方便維修。 調整螺絲 旋轉鬆緊以調整攝影機底座角度。 可連接RJ-45乙太網路線提供攝影機網路,或是透過PoE方 乙太網路線接頭 式供電至攝影機。 D-Link DCS-7517 Quick Installation Guide...
  • Page 72 配線組(請另購) 連接至DCS-7517,請參考使用手冊以取得更多關於連接 攝影機接頭 A/V 纜線的詳細。 DI/DO 接頭 I/O 接點,連接至裝置。 重置按鈕 按壓約10秒不放,將攝影機回復至出廠預設值。 24 V 電源接頭 不支援提供攝影機電源 DCS-7517。 電源接頭 連接12 V DC 電源變壓器。(請另購) 中 聲音輸出 (綠) 連接喇叭。 文 聲音輸入 (紅) 連接麥克風。 BNC 接頭 DCS-7517並不支援。 D-Link DCS-7517 Quick Installation Guide...
  • Page 73 SD卡插槽 插入microSD記憶卡用於儲存螢幕快照或是紀錄影像。 乙太網路埠 連接至乙太網路線。 連接至額外配線(標準包裝內不包含)。 1. 12V IN 6. 12V OUT 2. GND 7. GND 配線連接埠 3. AUD IN 8. RESET 4. AUD GND 9. DI 中 5. AUD OUT 10. DO 文 Reset按鈕 按壓約10秒不放,將攝影機回復至出廠預設值。 D-Link DCS-7517 Quick Installation Guide...
  • Page 74 連接配線組 逆時針方向旋轉取下攝影機後方外殼。 取下攝影機下方防水栓。 將攝影機接頭及配線穿過孔洞,接著固定防水栓。 請務必確保防水栓有正確安裝,以確保攝影機的防 水功能正常運作。 將攝影機接頭連接至攝影機。 中 文 順時針方向旋轉鎖回攝影機後方外殼。 D-Link DCS-7517 Quick Installation Guide...
  • Page 75 SD卡安裝 逆時針方向旋轉取下攝影機外殼。 插入microSD記憶卡,將攝影機外殼鎖回。請務必確 保防水密封零件有固定在正確位置。 壁掛安裝 壁掛安裝設定,請參考包裝內附的光碟或D-Link網站上的使用手冊。 中 文 D-Link DCS-7517 Quick Installation Guide...
  • Page 76 連接攝影機 連接至PoE交換器 ƒ ƒ 將乙太網路線連接至PoE交換器或電源供應 器。此時乙太網路線可以同時提供電源及網 路連線。 若您有「連接配線組」,請依下方引導完成連線。 連接12 V DC 電源變壓器(請另購) ƒ ƒ 將乙太網路線連接至您的網路。 ƒ ƒ 將電源變壓器連接至攝影機電源接頭,接著 將電源變壓器接上電源。 中 文 D-Link DCS-7517 Quick Installation Guide...
  • Page 77 攝影機設定 請將包裝內附的光碟放入您電腦的光碟機並開始執行安裝。若您電腦的自動執 行功能已被停用,或D-Link Launcher無法自動執行時,請點選開始>執行後輸入 「D:\autorun.exe」(D代表您光碟機的代號)。 請點選SetupƒWizard開始安裝。 請點選Windows開始選單中的D-Link Setup Wizard SE 圖示(開始> D-Link > Setup Wizard SE)。 設定精靈中將會顯示您攝影機的MAC位址及IP位址。 若您的網路中有DHCP伺服器時,將會顯示由DHCP派 發的有效IP位址。若您的網路中沒有DHCP伺服器, 則將會顯示攝影機的預設IP位址192.168.0.20。請選 擇您的攝影機,再點選「Wizard」的按鈕來繼續。 請輸入管理者(Admin)的名稱和密碼。在首次登入 時,預設的管理者名稱為「admin」無密碼。 若您要更改攝影機的管理者(admin)名稱和密碼時請 勾選核取方塊,並輸入您要設定的新名稱及密碼。 請點選「Next」來繼續。 中 文 若您要讓攝影機在開機後自動由DHCP伺服器(例如路 由器)取得IP位址時請選擇「DHCP」。 若您要讓攝影機每次皆使用相同的IP時請選擇 「Static IP」並輸入您要使用的IP位址。 請點選「Next」來繼續。 D-Link DCS-7517 Quick Installation Guide...
  • Page 78 請確認您的設定是否正確並點選「Restart」來重新啟 動攝影機。 透過網頁瀏覽器檢視您的攝影機 點擊開始選單中的「D-Link Setup Wizard SE」圖示。( 開始> D-Link > Setup Wizard SE)。 請選擇攝影機並點選「Link」的按鈕來連結網頁設定 介面。 設定精靈將會自動以攝影機的IP位址來開啟設定網 頁。 當您第一次連接至攝影機時,系統將會要求您設置管理 者帳號及密碼。輸入帳號及密碼後請點選「Save」。 畫面中會顯示您攝影機的即時影像,您可以選擇影像 設定檔來觀看或調整設定。若要取得更多關於設定網 頁的資訊,請參考包裝內附的光碟或D-Link網站上的 中 使用手冊。 文 其他資訊 請造訪官方網站http://www.dlink.com來取得更多產品的相關資訊與協助。 保固資訊 請造訪網站http://warranty.dlink.com/來查看在您地區的保固資訊。 D-Link DCS-7517 Quick Installation Guide...
  • Page 79 Panduan Instalasi Cepat Panduan instalasi ini memberikan petunjuk dasar untuk meng-Install DCS-7517. Untuk informasi tambahan tentang cara menggunakan kamera, silakan lihat Panduan Pengguna yang tersedia di CD yang disertakan dalam paket ini atau dari situs web dukungan D-Link. Isi Dalam Kemasan ƒ...
  • Page 80 Memungkinkan kamera untuk diputar ke posisi tertentu Pin Pelepas Cepat untuk memudahkan perawatan. Kaki Kamera Pemasangan kaki kamera yang dapat di sesuaikan Hubungkan dengan port Ethernet RJ45. Dapat gunakan Ethernet Jack PoE untuk memberikan power pada kamera. D-Link DCS-7517 Quick Installation Guide...
  • Page 81 Opsional Kabel Harness (tidak termasuk) Hubungkan ke DCS-7517. Untuk rincian lebih lanjut Konektor tentang menghubungkan kabel A / V,silahkan lihat pada Kamera User Manual. Konektor Konektor I/O untuk menghubungkan ke perangkat ekternal. DI/DO Tekan dan tahan tombol selama 10 detik untuk me-reset Tombol Reset kamera kembali ke pengaturan asal pabrik.
  • Page 82 2. GND 7. GND Harness 3. AUD IN 8. RESET 4. AUD GND 9. DI 5. AUD OUT 10. DO Tekan dan tahan tombol reset selama 10 detik untuk Tombol Reset mengembalikan kamera ke settingan awal/pabrik. D-Link DCS-7517 Quick Installation Guide...
  • Page 83 Dorong konektor kamera dan kabel melalui lubang, dan masukkan pembungkus anti air pada kabel.. Pastikan pembungkus kabel anti air dimasukkan dengan benar dan tersegel dengan baik. Hubungkan konektor kamera ke kamera. Pasang kembali penutup kamera belakang dengan memutar searah jarum jam. D-Link DCS-7517 Quick Installation Guide...
  • Page 84 Masukkan kartu microSD dengan kontak menghadap ke bawah, kemudian pasang kembali penutup belakang. Pastikan bahwa segel tahan air terpasang dengan benar ditempatnya. Petunjuk Pemasangan Silakan merujuk ke user manual untuk petunjuk rinci tentang cara menginstal dan memasang kamera. D-Link DCS-7517 Quick Installation Guide...
  • Page 85 Koneksi dengan Menggunakan Power Adapter 12V DC (tidak termasuk dalam kemasan) ƒ Hubungkan kabel Ethernet ke jaringan Anda. ƒ Hubungkan adaptor daya ke konektor daya pada kamera, kemudian pasang power adapter ke terminal listrik. D-Link DCS-7517 Quick Installation Guide...
  • Page 86 Konfigurasi pada Kamera Masukkan CD DCS-7517 ke dalam CD-ROM komputer Anda untuk memulai instalasi. Jika Autorun tidak aktif, atau jika D-Link Launcher gagal untuk memulai secara otomatis, klik tombol Start dan ketik D: \ autorun.exe (di mana D: mewakili huruf drive dari CD-ROM drive) dan tekan Enter.
  • Page 87 Luangkan waktu sejenak untuk mengkonfirmasi pengaturan Anda dan klik Restart. Melihat Camera Anda melalui Web Browser Klik pada D-Link Setup Wizard SE ikon yang diciptakan pada menu Start Windows Anda (Start> D-Link> Setup Wizard SE). Pilih kamera dan klik Link untuk mengakses konfigurasi web.
  • Page 88 Cet appareil numérique de la classe A est conforme à la norme NMB-003 du Canada. 警告使用者: 此為甲類的資訊技術設備,在居住環境中使用時,可能會造成射頻擾動,在這種情況下, 使用者會被要求採取某些適當的對策。 CE EMI Class A Warning This equipment is compliant with Class A of CISPR 32. In a residential environment this equipment may cause radio interference. D-Link DCS-7517 Quick Installation Guide...
  • Page 89 Innovation, Science and Economic Development Canada (ISED) Statement: This Class B digital apparatus complies with Canadian ICES-003. Cet appareil numérique de la classe B est conforme à la norme NMB-003 du Canada. D-Link DCS-7517 Quick Installation Guide...
  • Page 90: Safety Instructions

    été spécifiquement conçu pour une application extérieure. • Éloignez le produit des radiateurs et autres sources de chaleur. • Débranchez toujours le produit de l’alimentation avant de le nettoyer et utilisez uniquement un chiffon sec non pelucheux. D-Link DCS-7517 Quick Installation Guide...
  • Page 91: Instrucciones De Seguridad

    • Houd het product uit de buurt van radiators en andere warmtebronnen. • U dient het product steeds los te koppelen van de stroom voordat u het reinigt en gebruik uitsluitend een droge pluisvrije doek D-Link DCS-7517 Quick Installation Guide...
  • Page 92 D-Link recommends that you always switch off or unplug your D-Link products when they are not in use. By doing so you will help to save energy and reduce CO2 emissions.
  • Page 93 D-Link cerca da sempre di ridurre l'impatto ambientale dei propri stabilimenti e dei propri prodotti. Allo scopo di ridurre al minimo tale impatto, D-Link progetta e realizza i propri prodotti in modo che rispettino il più possibile l'ambiente, utilizzando materiali riciclabili a basso tasso di tossicità...
  • Page 94 D-Link a životní prostředí Ve společnosti D-Link jsme si vědomi vlivu našich provozů a výrobků na životní prostředí a snažíme se o minimalizaci těchto vlivů. Proto své výrobky navrhujeme a vyrábíme tak, aby byly co nejekologičtější, a ve výrobcích i obalech používáme recyklovatelné a nízkotoxické materiály.
  • Page 95 å verne miljøet og beskytte folks helse. D-Link og miljøet Hos D-Link forstår vi oss på og er forpliktet til å minske innvirkningen som vår drift og våre produkter kan ha på miljøet. For å minimalisere denne innvirkningen designer og lager D-Link produkter som er så...
  • Page 96 D-Link och miljön På D-Link förstår vi och är fast beslutna att minska den påverkan våra verksamheter och produkter kan ha på miljön. För att minska denna påverkan utformar och bygger D-Link sina produkter för att de ska vara så miljövänliga som möjligt, genom att använda återvinningsbara material med låg gifthalt i både produkter och förpackningar.
  • Page 97 WRITTEN OFFER FOR GPL AND LGPL SOURCE CODE Where such specific license terms entitle you to the source code of such software, D-Link will provide upon written request via email and/or traditional paper mail the applicable GPL and LGPL source code files via CD-ROM for a nominal cost to cover shipping and media charges as allowed under the GPL and LGPL.
  • Page 98 License. (Exception: if the Program itself is interactive but does not normally print such an announcement, your work based on the Program is not required to print an announcement.) D-Link DCS-7517 Quick Installation Guide...
  • Page 99 Our decision will be guided by the two goals of preserving the free status of all derivatives of our free software and of promoting the sharing and reuse of software generally. D-Link DCS-7517 Quick Installation Guide...
  • Page 100 If this is what you want to do, use the GNU Library General Public License instead of this License. D-Link DCS-7517 Quick Installation Guide...
  • Page 101 Notes D-Link DCS-7517 Quick Installation Guide...
  • Page 102 Notes D-Link DCS-7517 Quick Installation Guide...
  • Page 104 Ver. 2.00(WW)_130x183 2017/06/13 0420122-DL...

Table des Matières