Table des Matières
Publicité
Les langues disponibles
Les langues disponibles
Liens rapides
Publicité
Chapitres
Table des Matières

Manuels Connexes pour Phonocar VM 018


Sommaire des Matières pour Phonocar VM 018
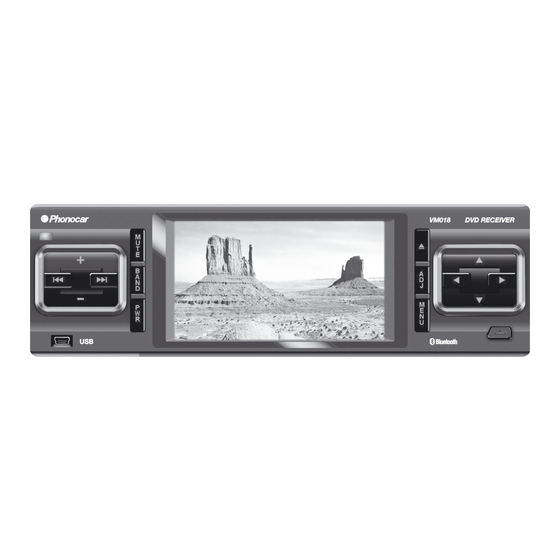
- Page 1 DVD PLAYER TOUCH SCREEN 1-DIN 3.5" TFT-LCD ITALIANO ENGLISH FRANÇAIS DEUTSCH ESPAÑOL MANUALE ISTRUZIONI MANUAL INSTRUCTIONS NOTICE DE MONTAGE ET D’EMPLOI GEBRAUCHSANWEISUNGEN MANUAL DE INSTRUCIONES VM 018...
-
Page 2: Table Des Matières
Indice Precauzioni sicurezza ............................2 Schema connessioni elettriche ........................3 Installazione ..............................4 Sistemazione display e Inserimento disco ......................5 Funzioni Frontalino ............................6 Funzioni Telecomando .............................7 Setup DVD / VCD / CD / CD-MP3 ........................8 Istruzioni utilizzo CD / MP3 / USB / SD-CARD ....................8 Istruzioni utilizzo DVD / VCD / CD ........................9 Istruzioni utilizzo AUDIO / VIDEO ........................10 Istruzioni utilizzo RADIO ..........................11... -
Page 3: Schema Connessioni Elettriche
Schema connessioni elettriche... -
Page 4: Installazione
Installazione Procedure d’Installazione 1. Usare le due chiavi per rimuovere la staffa dall’unità, Figura 1. 2. Inserire la staffa nello spazio dell’installazione. 3. Piegare le linguette per assicurare la staffa, Figura 2. 4. Inserire l’unità nello spazio preposto tramite le staffe fino ad un’idonea installazione, Figura 3 Installazione staffa Figura 1 Figura 2... - Page 5 Sistemazione posizione display • Accendere l'unità con il tasto PWR. • Premere il bottone ADJ per poter regolare l’inclinazione dello schermo. • L’unità ha 3 angolazioni, ogni volta che si preme il tasto,aumenta l'angolo di inclinazione. L’angolo dello schermo si muoverà nella direzione opposta se si opera di nuovo.
-
Page 6: Funzioni Frontalino
Funzioni Frontalino 11 10 9 8 15 3 12 13 Menu Espulsione pannello Selezione sopra/sotto/sinistra/destra. Regolazione dell'angolo di visione Espulsione del disco Display “MUTE” Avanti / avanti veloce Aumento volume 10. Indietro / indietro veloce 11. Sensore telecomando 12. Porta USB 13. -
Page 7: Funzioni Telecomando
Funzioni Telecomando 1 - [PWR] Accensione 2 - [REC/Sub-T] Trasferimento di chiamata / Cambia lingua 3 - [MUTE] Mute Mute 4 - [SRC] Cambio di sorgente 5 - [BAND] Cambio di banda Band 6 - [APS] Scansione 7 - [ST/RPT] Stereo switch/Repeat : Stop : SU/GIÚ/SINISTRA/DESTRA [ENTER] Conferma... -
Page 8: Setup Dvd / Vcd / Cd / Cd-Mp3
Setup DVD / VCD / CD / CD-MP3 Durante la riproduzione del DVD, selezionando l’icona IND nel menu OSD sul display, verrà visualizzato il seguente menù. Selezionando sul menu Disc setup si possono effettuare i seguenti settaggi: • NTSC • Modif.: nitidezza, contrasto, colore, saturazione, luminosità •... -
Page 9: Istruzioni Utilizzo Dvd/Vcd/Cd
Istruzioni utilizzo DVD/VCD/CD Dopo aver inserito un DVD/VCD/CD, il touchscreen apparirà così: DVD-V TITLE 00:33:11/01:45:44 BACK MENU' TITOLI Durante la riproduzione per tornare al menù principale premere TITLE sul telecomando o sullo schermo. Durante la riproduzione premendo il tasto REP è possibile ripetere un Capitolo o un Titolo. SELEZIONE REPERTORIO In modalità... -
Page 10: Istruzioni Utilizzo Audio / Video
Istruzioni utilizzo Audio / Video Selezionare il [SETUP] sullo schermo in basso a sinistra nel menu' principale per accedere ai menu come segue: Premere le frecce per scegliere uno dei menu (Basic - Audio - Video). BASIC • Usare le frecce laterali posizionate a sinistra per selezionare i parametri BASIC e i tasti + e –... -
Page 11: Istruzioni Utilizzo Radio
Istruzioni utilizzo Radio BANDA Una banda è un gruppo di 6 stazioni radio pre-configurate. L’unità ha 3 bande FM, e 2 bande AM. Seleziona la banda desiderata sul display secondo la sequenza sottostante. CAMBIO DELLE FREQUENZE Sintonizzazione automatica Selezionare o la sua funzione sul touch per sintonizzare automaticamente la stazione successiva. Selezionare per sintonizzare automaticamente la stazione precedente. -
Page 12: Istruzioni Utilizzo Bluetooth
Istruzioni utilizzo Bluetooth software 2.0 Nota: essendoci più versioni dello standard Bluetooth, non tutti i cellulari sono compatibili. MODALITA BLUETOOTH • Premere Menù per tornare al menu principale. • Selezionare l’icona Bluetooth. ACCOPPIAMENTO BLUETOOTH • • •• • • • Per accoppiare il modulo bluetooth al cellulare procedere nel modo seguente: •... - Page 13 Istruzioni utilizzo del TV Tuner Analogico FUNZIONI TV Per usare le funzioni TV selezionare l’icona nel menu principale. RICERCA E REGISTRAZIONE AUTOMATICA DEI CANALI Premere AMS per scansionare e memorizzzare automaticamente lo spettro TV. SELEZIONE DEI CANALI MEMORIZZATI Premere sul telecomando o [CH-]/[CH+] sullo schermo per scegliere i canali.
-
Page 14: Risoluzione Problemi
Risoluzione dei problemi Errori più comuni e loro spiegazione Messaggio di errore Cause Soluzione Il disco è troppo sporco Pulire o cambiare il disco No Disc Bad Disc Il disco è inserito al contrario Inserire il disco correttamente Assicurarsi che il cd sia pulito così da essere Il disco non è... - Page 15 Risoluzione dei problemi Sintomi Cause Soluzione Il disco non viene Il disco è graffiato Sostituire il disco riprodotto Il disco è troppo sporco o bagnato Pulire il disco Interruzione durante la Il disco è inserito al contrario Inserire il disco correttamente riproduzione Il nome della traccia MP3 non viene visua-...
-
Page 16: Specifiche
Specifiche Le specifiche sono soggette a cambiamenti senza preavviso Monitor sector TFT dimensioni schermo .......................... 3.5 Distanza Punti ........................0.107*0.370mm Risoluzione ..........................1440*234 dots Retro-illuminazione ..........................LED DVD sector D/A convert ............................24 Bit Decode ..................... linearity PCM/Dolby digital/MP3/WMA Effetto frequenza (frequenza campione;96k ......................20~44.000Hz (frequenza campione;48k ......................20~22.000Hz (frequenza campione;44.1k ......................20~20.000Hz... -
Page 17: Important Notices
Index Important Notices & Warnings ........................17 Electrical Connection Scheme ........................18 Installation ..............................19 Display lay-out and CD-introduction ......................20 Front-panel Functions ...........................21 Remote-Control Functions ..........................22 Set-up DVD / VCD / CD / CD-MP3 .......................23 Instructions for DVD / VCD / CD ........................24 Instructions for AUDIO / VIDEO ........................25 Instructions for RADIO ..........................26 Instructions for Bluetooth ..........................27... -
Page 18: Electrical Connection Scheme
Electrical Connection Scheme... -
Page 19: Installation
Installation Procedures of Installation 1. Use the two keys laterally, to lift the adapter from the Unit (Fig. 1). 2. Insert the adapter into the installation-hole 3. Turn the small tongues, in order to fix the adapter (Fig. 2) 4. Insert the Unit into the installation-hole and the adapter and put into the correct position (Fig. 3). Adapter-Installation Figura 1 Figura 2... - Page 20 Display-Positioning • Use PWR-key to switch-on the Unit. • Press ADJ-key to regulate the Display-inclination. • The Unit offers 3 viewing-angles: each time you press the key, the viewing-angle increases. The viewing-angles will come the other way round when the positioning-operation starts from the beginning. The viewing-angle will be maintained when the Unit is switched OFF and ON again.
-
Page 21: Front-Panel Functions
Front-Panel Functions 11 10 9 8 15 3 12 13 Menu Front-Panel Expulsion-key Select up/down/left/right Select Viewing-Angle CD Expulsion-key Display MUTE Fast forward/forward Volume increase 10. Fast backward/backward 11. Remote-Control Sensor 12. USB-port 13. Volume reduction 14. Microphone 15. Select BAND 16. -
Page 22: Remote-Control Functions
Remote Control Functions 1 – Switch-ON 2 – Forward Call / Change Language 3 – MUTE 4 – Change Source Mute 5 – Change Band 6 – Scrolling Band 7 – Stereo switch / Repeat 8 – : Stop 9 – UP / DOWN / LEFT / RIGHT CONFIRM 10 –... -
Page 23: Set-Up Dvd / Vcd / Cd / Cd-Mp3
Set-up DVD / VCD / CD / CD-MP3 While reproducing a DVD, you can press the IND-icon of the OSD-Menu on the display, to obtain the following Menu : Within the “Disc Setup”-Menu, you can effect the following settings: • NTSC •... -
Page 24: Instructions For Dvd / Vcd / Cd
Instructions for Dvd / Vcd / Cd After having introduced a DVD / VCD / CD, the touch-Screen will show the following: TITLE DVD-V 00:33:11/01:45:44 BACK TITLE-MENU During reproduction, press TITLE on the Remote-Control or on the Screen, to return to the Main Menu. During reproduction, press REP, to repeat a certain Chapter or Title. -
Page 25: Instructions For Audio / Video
Instructions for Audio / Video Select (SETUP) on the left bottom of the Main Menu. Now use the arrow-keys to choose and enter the following Menus: BASIC – AUDIO – VIDEO. BASIC • Use the lateral arrow-keys on the LEFT, to select the parameters; use BASIC the +/-keys on the RIGHT, to change the parameters. -
Page 26: Instructions For Radio
Instructions for Radio FREQUENCY-BAND The frequency-band is a group of 6 pre-determined radio-stations. This Unit disposes of 3 FM-bands and 2 AM-bands. Please select the requested Frequency-Band on the display, according to the following sequence: CHANGING THE FREQUENCIES Automatic Tuning To automatically tune on the subsequent Radio-Station, select or the corresponding function on the Touch-Screen. -
Page 27: Instructions For Bluetooth
Instructions for Bluetooth Software 2.0 Note: The Bluetooth-Standard is offered in various executions, so that NOT all mobile-phones can be compatible. BLUETOOT-MODE • Press Menu, to return to the Main menu. • Select the Bluetooth-icon. BLUETOOTH-PAIRING To pair the Bluetooth-Module with the Mobile-phone, proceed as follows: •... -
Page 28: Instructions For Tv-Tuner
Instructions for Analogic Tv-Tuner TV-Functions In order to get the TV-functions, select the corresponding icon from the Main Menu. RESEARCH AND AUTOMATIC MEMORIZATIONG of CHANNELS Press AMS to scroll and automatically memorize the TV-line. SELECTING the MEMORIZED CHANNELS Press on the remote-control, or press CH-/CH+ on the Screen, to choose the requested Channel. -
Page 29: Risoluzione Dei Problemi
Risoluzione dei problemi Please consult the following troubleshooting table before contacting a service center. Familiar characters and their meanings Error message Causes Remedies Disc is too dirty. Clean the disc or change the disc. No Disc Bad Disc Disc is inserted upside down. Insert the disc correctly. - Page 30 Risoluzione dei problemi MP3 playback Error message Causes Solutions Disc cannot be played Disc is scratched. Change disc back. Disc is too dirty or wet. Clean the disc. Interruption occurred Disc is inserted upside down. Insert the disc correctly. during playback. MP3's name cannot The name of MP3 is not regular.
- Page 31 Specifications Specifications subject to change without notice. Monitor sector TFT screen size ............................3.5 Dot distance 0.107* ........................0.370mm Analysis ..........................1440*234 dots Background illuminatio ..........................LED DVD sector D/A convert ............................24 Bit Decode ..................... linearity PCM/Dolby digital/MP3/WMA Frequency effect (sample frequency;96k ......................20~44.000Hz (sample frequency;48k ......................20~22.000Hz (sample frequency;44.1k ......................20~20.000Hz...
-
Page 32: Précautions
Index Conseils et précautions ..........................32 Schéma des connexions électriques ......................33 Installation ..............................34 Règlement position display ...........................35 Fonctions de la façade ..........................36 Fonctions de la télécommande ........................37 Setup DVD / VCD / CD / CD-MP3 .........................38 Instruction pour l’utilisation des CD / MP3 ....................38 Instruction pour l’usage des DVD / VCD / CD ....................39 Instructions pour l’usage de l’Audio / Vidéo ....................40 Instructions pour l’usage de la Radio ......................41... -
Page 33: Schéma Des Connexions Électriques
Schéma des connexions électriques... -
Page 34: Installation
Installation Procédure d’installation 1. Utiliser les deux clés pour enlever l’étrier de l’appareil, Figure 1. 2. Insérer l’étrier dans l’espace d’installation 3. Plier les clavettes pour bloquer l’étrier, Figure 2. 4. Insérer l’appareil à travers l’étrier dans l’espace prédisposé jusqu’au correct fixage, Figure 3. Installation étrier Figura 1 Figure 2... -
Page 35: Règlement Position Display
Règlement position display • Allumer l’appareil à travers la touche PWR • Appuyer le bouton ADJ pour régler l’inclination de l’écran. • L’appareil a 3 angles de prise de vu; toutes les fois qu’on appuie la touche, l’angle d’inclination augmente. L’angle de l’écran rotera dans le sens opposée si on agit de nouveau. -
Page 36: Fonctions De La Façade
Fonctions de la façade 11 10 9 8 15 3 12 13 Menu Expulsion du panneau Sélection dessus/dessous/Gauche/Droite Réglage de l’angle de vision Expulsion du CD Display « Mute » Avance/Avance rapide Augmentation volume 10. Revient/Revient rapide 11. Capteur télécommande 12. -
Page 37: Fonctions De La Télécommande
Fonctions de la télécommande [PWR] Allumage [REC/Sub-T] Transfert d’appel / changement de langue [MUTE] Mute Mute [SRC] Changement de source [BAND] Changement de bande Band [APS] Scansion [ST/RPT] Stéréo switch/Repeat : Stop : Haut/Bas/Gauche/Droite [ENTER] Confirme 10. [Title]: Menu titres 11. -
Page 38: Setup Dvd / Vcd / Cd / Cd-Mp3
Setup DVD / VCD / CD / CD-MP3 En sélectionnant l’icône IND dans le menu OSD du display pendant la reproduction du DVD, le menu suivant est visualisé. En cliquant sur le menu Disc setup, les réglages suivants peu- vent être effectués: •... -
Page 39: Instruction Pour L'usage Des Dvd / Vcd / Cd
Instruction pour l’usage des DVD / VCD / CD Après avoir introduit un DVD/VCD/CD, le touch screen apparaîtra ainsi: DVD-V TITLE 00:33:11/01:45:44 BACK MENU TITRE Pour retourner au menu principal pendant la reproduction, appuyer TITLE sur la télécommande ou sur l’écran. -
Page 40: Instructions Pour L'usage De L'audio / Vidéo
Instructions pour l’usage de l’Audio / Vidéo Sélectionner [SETUP] en bas et à gauche de l’écran dans le menu principal pour accéder au menu suivant: Appuyer sur les flèches pour choisir un des menu (Basic – Audio – Vidéo). BASIC •... -
Page 41: Instructions Pour L'usage De La Radio
Instructions pour l’usage de la Radio BANDE Une bande est un groupe de 6 stations radio pré configurées. L’appareil a 3 bandes FM, et 2 bandes AM. Sélectionne la bande désirée sur le display selon la séquence ci-dessous. CHANGEMENT DES FREQUENCES Syntonisation automatique Sélectionner ou sa fonction sur le touch screen pour syntoniser automatiquement la station succes-... -
Page 42: Instruction Pour L'usage Du Bluetooth Software 2.0
Instruction pour l’usage du Bluetooth software 2.0 Note: à cause de l’existence de plusieurs versions du standard Bluetooth, tous les portables ne sont pas compatibles. MODALITE BLUETOOTH • Appuyer Menu pour retourner au menu principal • Sélectionner l’icône Bluetooth COUPLAGE BLUETOOTH •... -
Page 43: Instruction Pour L'usage Du Tv Tuner Analogique
Instruction pour l’usage du TV Tuner Analogique FONCTIONS TV Pour l’usage des fonctions TV, sélectionner l’icône dans le menu principal. RECHERCHE ET ENREGISTREMENT AUTOMATIQUE DES CHAINES Appuyer AMS pour la scansion et la mémorisation automati- quement du spectre TV. SELECTION DES CHAINES MEMORISEES Appuyer sur la télécommande ou [CH-]/[CH+] sur l’écran pour choisir les chaînes. -
Page 44: Résolution Des Problèmes
Résolution des problèmes Résolution des problèmes Message d’erreur Causes Solutions Le CD est trop sale Nettoyer ou changer le CD No Disc Bad Disc Le CD est inséré à l’envers Insérer correctement le CD S’assurer que le CD soit propre de façon à être Le CD n’est pas compatible avec régulièrement lu. - Page 45 Résolution des problèmes Problèmes Causes Solutions Le CD n’est pas re- Présence d’égratignures sur le CD Remplacer le CD produit Le CD est trop sale ou mouillé Nettoyer le CD Interruption pendant la Le CD est inséré à l’envers Insérer correctement le CD reproduction Le nom de la trace MP3 n’est pas correc-...
-
Page 46: Spécificités
Spécificités Les spécificités sont soumises à des changements sans préavis Monitor sector TFT dimensions écrans ..........................3.5 Distance points ........................0.107*0.370mm Résolution ..........................1440*234 dots Rétro - illumination ..........................LED DVD sector D/A convert ............................24 Bit Decode ..................... linearity PCM/Dolby digital/MP3/WMA Effet fréquence (fréquence essaie;96k ...................... -
Page 47: Wichtige Hinweise
Inhaltsverzeichnis Sicherheitsmaßnahmen und wichtige Hinweise ....................47 Schema der Elektroanschlüsse ........................48 Installation ..............................49 Display-Ausrichtung und CD-Eingabe ......................50 Bedienteil-Funktionen ...........................51 Fernbedienungs-Funktionen .........................52 Einstellung auf DVD / VCD / CD / CD-MP3 ....................53 Anweisungen zur Anwendung CD / MP3 ......................53 Anweisungen zur Anwendung DVD / VCD / CD ....................54 Anweisungen zur Anwendung AUDIO / VIDEO .....................55 Anweisungen zur Anwendung RADIO ......................56 Anweisungen zur Anwendung Bluetooth ......................57... -
Page 48: Schema Der Elektroanschlüsse
Schema Der Elektroanschlüsse... -
Page 49: Installation
Installation Procedure d’Installazione 1. Die beiden Werkzeugteile seitlich ansetzen, um die Halterung vom Gerät zu trennen (Abb. 1). 2. Halterung in die Einbau-Öffnung geben. 3. Die vorgesehenen Einrast-Teilchen knicken, um die Halterung gut zu verankern (Abb. 2) 4. Das Gerät in die Halterung und Einbau-Öffnung schieben und in die endgültige Stellung geben (Fig. 3). Installation der Halterung Figura 1 Fig. -
Page 50: Abnehmen Des Bedienteils
Display-Ausrichtung • Gerät mittels PWR-Taste einschalten. • ADJ-Taste drücken, um die gewünschte Display-Neigung einzustellen. • Das Gerät verfügt über insgesamt 3Sichtwinkel: bei jedem Tastendruck erhöht sich der Display-Nei gungsgrad. Bei jeder nochmaligen Einstellung bewegt sich der Neigungsgrad in die andere Richtung. Trotz Aus- und Wiedereinschalten bleibt der letzthin eingestellte Sichtwinkel bestehen. -
Page 51: Bedienteil-Funktionen
Bedienteil-Funktionen 11 10 9 8 15 3 12 13 1. Menü 2. Bedienteil-Auswurftaste 3. Wahl Oben/Unten/Links/Rechts 4. Sichtwinkel-Einstellung 5. CD-Auswurftaste 6. Display 7. MUTE 8. Schnell Vorwärts/Vorwärts 9. Lautstärke erhöhen 10. Schnell Rückwärts/Rückwärts 11. Fernbedienungs-Sensor 12. USB-Öffnung 13. Lautstärke reduzieren 14. -
Page 52: Fernbedienungs-Funktionen
Fernbedienungs-Funktionen (PWR) Einschalten Anruf weiterleiten / Sprache wechseln MUTE Mute Quelle wechseln Frequenzband wechseln Scrolling (Druchsuchen) Band Stereo / RPT (Wiederholung) Stop : OBEN / UNTEN LINKS / RECHTS / (ENTER) Bestätigung 10 - Titel-Menü 11 - Taste Anruf starten 12 - Infos zur Wiedergabe Touch-Bedienung... -
Page 53: Einstellung Auf Dvd / Vcd / Cd / Cd-Mp3
Einstellung Auf DVD / VCD / CD / CD-MP3 Wenn man, während der DVD-Wiedergabe, aus dem OSD-Menü, die IND-Ikone auf dem Display anwählt, erscheint folgendes Menü: Unter der Funktion “Disc Setup” lassen sich folgende Einstellungen vornehmen: • NTSC • Modif: Schärfe, Kontrast, Farbe, Sättigung, Helligkeit. •... -
Page 54: Anweisungen Zur Anwendung Dvd / Vcd / Cd
Anweisungen Zur Anwendung Von DVD / VCD / CD Nach Eingabe einer DVD / VCD / CD, erscheint folgende Touch-Screen-Situation: TITLE DVD-V 00:33:11/01:45:44 BACK TITEL-MENÜ Will man, während der Wiedergabe, zurück zum Haupt-Menü, TITLE-Taste auf der Fernbedienung, oder auf dem Display, drücken. Während der Wiedergabe kann man die Taste REP drücken und somit ein Kapitel oder einen Titel wieder- holen. -
Page 55: Anweisungen Zur Anwendung Audio / Video
Anweisungen Zur Anwendung Von Audio / Video Aus dem Hauptmenü, links unten auf dem Display, die (SETUP)-Funktion wählen, um zu den weiteren Menüs zu gelangen. Nun, mit Hilfe der Richtungstasten, unter folgenden Menüs wählen: BASIC – AUDIO – VIDEO. BASIC •... - Page 56 Anweisungen Zur Anwendung Des Radios FREQUENZ-BAND Unter Frequenzband versteht man eine Gruppe von 6 vorbestimmten Radiosendern. Das Gerät verfügt über 3 FM- und 2 AM-Bänder. Das gewünschte Frequenzband, in der unten stehenden Reihenfolge, wählen: FREQUENZ-ÄNDERUNG Automatische Sendersuche Taste drücken, oder diesbezügliche Funktion auf dem Touch-Screen wählen, um automatisch auf den nachfolgenden Sender überzugehen.
- Page 57 Anweisungen Zur Anwendung Des Bluetooth Software 2.0 Hinweis: es gibt mehrere Ausführungen des sog. Bluetooth-Standards. Von daher können nicht alle Mobil-Telefone einheitlich kompatibel sein. BLUETOOT-MODUS Menü-Taste drücken, um zum Haupt-Menü zurückzugehen. Bluetooth-Ikone drücken. BLUETOOTH-KOPPELUNG • • •• • • • Um Bluetooth-Modul und Mobiltelefon miteinander zu koppeln, wie folgt vorgehen: •...
- Page 58 Anweisungen Zur Anwendung Des Analog-Tv-Tuners TV-FUNKTIONEN Um von den TV-Funktionen Gebrauch zu machen, die betreffende Ikone auf dem Haupt-Menü anwählen. SENDER-SUCHE und AUTOMATISCHE EINSPEICHERUNG AMS-Taste drücken, um das TV-Spektrum aufzulisten und automatisch einzuspeichern. WAHL der EINGESPEICHERTEN SENDER Taste auf der Fernbedienung drücken, (oder CH- / CH+ auf dem Display), um den gewünschten Sender zu wählen.
- Page 59 Abhilfe bei kleinen Problemen Zusammenfassung der herkömmlichsten Probleme mit jeweiligem Lösungsvorschlag. Fehler-Anzeige Ursprung Abhilfen CD verschmutzt CD reinigen oder neue CD einlegen No Disc Bad Disc CD liegt verdreht CD korrekt einlegen Kontrollieren, ob CD sauber und theoretisch CD ist nicht kompatibel mit dem Unkown Disc lesbar ist.
- Page 60 Abhilfe bei kleinen Problemen MP3-Wiedergabe Fehler-Anzeige Ursprung Abhilfen CD mit entsprechendem Reparatur-Kit in CD wird nicht CD ist verkratzt Ordnung bringen abgespielt CD ist verschmutzt oder nass CD reinigen Wiedergabe wird unterbrochen CD ist verdreht CD korrekt einlegen Name des MP3-Stücks wird nicht korrekt MP3-Name ist nicht regulär Nur zugelassene Buchstaben verwenden...
-
Page 61: Technische Daten
Technische Daten Etwaige Änderungen könnten auch ohne vorherige Mitteilung in Kraft treten. Bildschirm TFT-Bildschirm-Größe ..........................3,5 Punkte-Abstand ........................0.107*0.370mm Analyse ........................... 1440*234 dots Rückwärtige Beleuchtung ........................LED DVD-Teil D/A-Umstellung ............................ 24 Bit De-Codifizierunglinearity ................PCM/Dolby digital/MP3/WMA Frequenz-Effekt Muster-Frequenz 96k .......................20~44.000Hz Muster-Frequenz 48k ......................20~22.000Hz Muster-Frequenz 44,1k ......................20~20.000Hz Radio-Signal………... - Page 62 Índice Precauciones de seguridad ...........................62 Esquema conexiones eléctricas ........................63 Instalaciones ..............................64 Ajuste display e introducción disco......................65 Funciones carátula ............................66 Funciones Mando a distancia ........................67 Setup DVD / VCD / CD / CD-MP3 .........................68 Instrucciones de utilización CD / MP3 ......................68 Instrucciones de utilización DVD / VCD / CD ....................69 Instrucciones de utilización AUDIO / VIDEO ....................70 Instrucciones de utilización RADIO ......................71...
-
Page 63: Esquema Conexiones Eléctricas
Esquema conexiones eléctricas... -
Page 64: Instalaciones
Instalación Procedimiento de Instalación 1. Usar la herramienta especifica para sacar la unidad de su ubicación Figura 1. 2. Insertar la jaula metálica. 3. Doblar las patillas para asegurar la jaula metálica, Figura 2. 4. Insertar la unidad en la jaula metálica hasta su completa fijación, Figura 3 Instalación jaula Figura 1 Figura 2... - Page 65 Posición display • Encender la unidad con la tecla PWR. • Presionar la tecla ADJ para poder ajustar la’inclinacion de la pantalla. • La unidad tiene 3 posiciones de ajuste cada vez que se presiona la tecla aumenta el ángulo de inclinación. El Angulo de la pantalla va a moverse en la posición contraria se vuelve a presionar la tecla.
- Page 66 Funciones de la carátula frontal 11 10 9 8 15 3 12 13 Menú Expulsión Carátula Selección arriba/abajo/izquierda/derecha. Ajuste Angulo de visión Expulsión del disco Display “MUTE” Avance / avance rápido Aumento volumen 10. Retroceder/ Retroceder rápido 11. Sensor mando a distancia 12.
-
Page 67: Funciones Mando A Distancia
Funciones Mando a distancia 1 - [PWR] Encendido/Apagado 2 - [REC/Sub-T] Transferencia llamada / Cambio idioma 3 - [MUTE] Mute Mute 4 - [SRC] Cambio de fuente 5 - [BAND] Cambio de banda Band 6 - [APS] Escansión 7 - [ST/RPT] Stereo switch/Repeat Repeticion 8 - : Stop 9 - : ARRIBA/ABAJO/IZQUIERDA/ DERECHA [ENTER] Aceptar... -
Page 68: Setup Dvd / Vcd / Cd / Cd-Mp3
Setup DVD / VCD / CD / CD-MP3 Durante la reproducción del DVD, seleccionando el icono IND en el menú OSD en el display se visualizará el siguiente menú. Seleccionando en el menú Disc setup se pueden efectuar los siguientes ajustes: •... -
Page 69: Instrucciones De Utilización Dvd / Vcd / Cd
Instrucciones de utilización con DVD/VCD/CD Después de haber introducido un DVD/VCD/CD, en la pantalla aparecerán: TITLE DVD-V 00:33:11/01:45:44 BACK MENU’ TITULOS Durante la reproducción para volver al menú principal presionar TITLE en el mando a distancia o en la pantalla. Durante la reproducción presionando la tecla REP es posible repetir un Capitulo o un Titulo. -
Page 70: Instrucciones De Utilización Audio / Video
Instrucciones de utilización Audio / Video Seleccionar el [SETUP] en la pantalla en la parte baja a la izquierda en el menú’ principal para ac- ceder a los menús como sigue: Presionar las flechas para elegir un menú (Basic – Audio - Video) BASIC •... -
Page 71: Instrucciones De Utilización Radio
Instrucciones de utilización Radio BANDA Una banda es un grupo de 6 emisoras de radio PRE-configuradas. La unidad tiene 3 bandas FM, y 2 bandas AM. Selecciona la banda deseada en el display según la secuencia que se muestra. CAMBIO DE LAS FRECUENCIAS Sintonización automática Seleccionar su función en el display para sintonizar automáticamente la emisora siguiente. -
Page 72: Modo Bluetooth
Instrucciones de utilización del Bluetooth software 2.0 E Nota: teniendo en cuenta que existen más versiones en el estándar del Bluetooth, no todos los teléfonos móviles son compatibles. MODO BLUETOOTH • Presionar Menú para volver al menú principal. • Seleccionar el icono Bluetooth. EMPAREJAR BLUETOOTH •... - Page 73 Instrucciones de utilización del TV Tuner Analógico ES FUNCIONES TV Para usar las funciones TV seleccionar el icono en el menú principal. BUSQUEDA Y MEMORIZACION AUTOMATICA DE LOS CANALES Presionar AMS para hacer una escansión y memorizar automáticamente el espectro TV. SELECION DE LOS CANALES MEMORIZADOS Presionar en el mando a distancia o [CH-]/[CH+] en la pantalla para elegir los canales.
-
Page 74: Resolución De Los Problemas
Resolución de los problemas Errores más comunes y su explicación Mensaje de error Causas Solución El disco es demasiado sucio Limpiar o cambiar de disco No Disc Bad Disc El disco ha sido introducido al revés Introducir el disco correctamente Asegurarse de que el CD sea limpio con el fin de El disco no es compatible con la que sea reproducido sin problemas. - Page 75 Resolución de los problemas Sintomas Causas Solución El disco está rayado Sustituir el disco El disco no se reproduce El disco está demasiado sucio o Limpiar el disco Interrupción durante la mojado reproducción El disco se ha introducido al revés Introducir el disco correctamente El nombre de la pista MP3 no se visualiza...
-
Page 76: Características Técnicas
Caracteristicas Tecnicas Las características están sujetas a cambios sin preavisos Monitor sector TFT dimensiones pantalla ........................3.5 Distancia Puntos ........................0.107*0.370mm Resolución ..........................1440*234 dots Retro-iluminación ............................LED DVD sector D/A convert ............................24 Bit Decode .................... linearity PCM/Dolby digital/MP3/WMA Efecto frecuencia (frecuencia de muestra 96k ......................20~44.000Hz (frecuencia de muestra;48k ......................20~22.000Hz (frecuencia de muestra;44.1k ....................20~20.000Hz... - Page 77 Notes...
- Page 78 Notes...
- Page 80 S.p.A. - Via F.lli Cervi, 167/C - 42124 Reggio Emilia (Italy) - Tel. ++39 0522 941621 - Fax ++39 0522 942452 www.phonocar.com - e-mail:info@phonocar.it FRANCE Vente et Assistance assurées par le Fabricant italien Tél/Fax N° Vert 0800.90.43.99 www.phonocar.fr • e-mail:info@phonocar.fr DEUTSCHLAND 71711 - MURR - Rudolf Diesel Strasse, 13 - Tel.