Table des Matières

Publicité

Les langues disponibles

Les langues disponibles

Liens rapides

ST_CIBOX_D_161026
MANUEL D'UTILISATION CIBOX
Care-in
BOX Module vision par smartphone à distance pour kit Care-in
®
CIBOX USER MANUAL
Care-in
BOX Remote control module by smartphone for Care-in
®
CIBOX BEDIENUNGSANLEITUNG
Care-in
BOX Fernvisualisierungsmodul über Smartphone für Care-in
®
lmprimé-printed-gedruckt: 2016
SEWOSY 13b rue Saint-Exupéry – CS20152 – F-67503 HAGUENAU CEDEX Tél. : +33 (0)3 90 59 02 20 - Fax : +33 (0)3 90 59 02 19
FRANÇAIS
p. 3 - 16
®
ENGLISH
p. 17 - 30
kit
®
DEUTSCH
S. 31 - 44
Kit
®

Publicité

Table des Matières
loading

Sommaire des Matières pour Sewosy Care-in BOX

  • Page 1 S. 31 - 44 Care-in BOX Fernvisualisierungsmodul über Smartphone für Care-in ® ® lmprimé-printed-gedruckt: 2016 SEWOSY 13b rue Saint-Exupéry – CS20152 – F-67503 HAGUENAU CEDEX Tél. : +33 (0)3 90 59 02 20 - Fax : +33 (0)3 90 59 02 19...
  • Page 3: Table Des Matières

    IV.3. Utilisation de l’appareil ......................15 IV.4. Suppression de l’appareil ......................16 SEWOSY 13b rue Saint-Exupéry – CS20152 – F-67503 HAGUENAU CEDEX Tél. : +33 (0)3 90 59 02 20 - Fax : +33 (0)3 90 59 02 19 Sous réserve de modifications techniques !
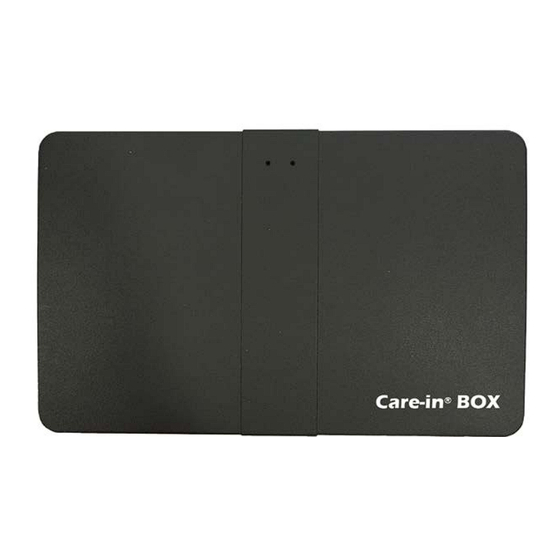
  • Page 4: Présentation Du Produit

    - Dimensions (H x l x P) : 94 x 46,50 x 34 mm Alimentation type RAIL DIN (18 V DC / 1,5 A) disponible sur demande • 1 Care-in BOX Caractéristiques techniques Care-in BOX - Tension d’alimentation (V IN) : 18 V DC - 1 port Ethernet - 2 sorties écran LCD...
  • Page 5: I.3. Montage

    I.3. Montage : Pose de la Care-in BOX Mise en place des vis de fixation de la Care-in BOX S’assurer que la Care-in BOX soit correctement enfichée I.4. Description du matériel (connexions) : Fiche de raccordement de l’alimentation Ports de raccordement Le port Ethernet permet la Connexions des périphériques...
  • Page 6: I.5. Schéma De Raccordement

    I.5. Schéma de raccordement : Mobile Wi-Fi Verrouillage à rupture Verrouillage à émission Alimentation...
  • Page 7: Installation

    L’application "ControlCam" est disponible gratuitement sur les plateformes de téléchargement Google Play et App Store. II.1.2. Réseau Pour l’enregistrement sur le réseau local de votre CARE-IN BOX assurez-vous que votre téléphone (ou tablette) soit connecté au réseau Wi-Fi approprié (Voir Schéma de câblage page 4). III.
  • Page 8: Renommez Votre Appareil Si Vous Le Souhaitez

    - Renommez votre appareil si vous le souhaitez - Entrez le GID de votre appareil (Le numéro Care-in BOX est visible à l’arrière de votre Care-in Box) - Entrez les informations de connexion (par défaut "admin" "1234") - Appuyez sur la touche "Done" en haut à...
  • Page 9: Iii.2. Paramétrage De L'appareil

    Voyant d’état de l’appareil : Ce voyant indique que le périphérique est connecté et accessible Care-in BOX Ce voyant indique que le périphérique est en train de se connecter Ce voyant indique que le périphérique n’est pas/plus connecté au réseau et inaccessible Cliquez sur "...
  • Page 10: Appuyez Pour L'activation Et La Désactivation Des Appels À Distance

    Permet de déverouiller à distance Mot de passe par défaut "1234" Cliquez sur " " pour accéder à l’historique des appels, des enregistrements d’images et vidéos et des captures d’écran Care-in BOX fonction "Unlock Delay" n’est fonctionnelle avec notre matériel...
  • Page 11: L'écoute Et Le Microphone S'activent

    Lors d’un appel reçu depuis l’extérieur. Il vous suffit d’ouvrir l’application "ControlCam" en cliquant sur la notification affichée sur votre écran d’accueil Care-in BOX 2016-03-11 Rappel : Penser à activer l’option "Outdoor call-in" pour recevoir les appels L’application s’ouvre. 1. L’écoute et le microphone s’activent automatiquement.
  • Page 12: Installation Pour Android

    Installation pour Android IV.1. Enregistrement de l’appareil Rendez-vous sur le Play Store de votre mobile ou tablette et dans l’onglet "Rechercher" tapez "ControlCam". Une fois l’application sélectionnée appuyez sur "Installer". Ou cliquez sur le lien ci-dessous https://play.google.com/store/apps/details?id=com.anycam.skykey Ouvrez l’application "ControlCam" située dans les applications de votre téléphone Appuyez sur "Enter Now"...
  • Page 13 - Entrez le GID de votre appareil (Le numéro Care-in BOX est visible à l’arrière de votre Care-in Box) - Entrez les informations de connexion (par défaut "admin" "1234") - Appuyez sur la touche "OK" en haut à droite...
  • Page 14: Iv.2. Paramétrage De L'appareil

    Voyant d’état de l’appareil : Ce voyant indique que le périphérique est connecté et accessible Care-in BOX Ce voyant indique que le périphérique est en train de se connecter Ce voyant indique que le périphérique n’est pas/plus connecté au réseau et inaccessible Cliquez sur "...
  • Page 15: Iv.3. Utilisation De L'appareil

    Permet de vous connecter et de vous déconnecter Permet de déverouiller à distance. Mot de passe par défaut (1234) Cliquez sur " " pour accéder à l’historique des appels, des enregistrements d’images et Care-in BOX vidéos et des captures d’écran...
  • Page 16: Iv.4. Suppression De L'appareil

    "ControlCam" en cliquant sur la notification affichée sur votre écran d’accueil Rappel : Penser à activer l’option "Outdoor Care-in BOX call-in" pour recevoir les appels L’application s’ouvre. 1. L’écoute et le microphone s’activent automatiquement. Pour parler il vous suffit de rester appuyé...
  • Page 17 IV.3. User guide ..........................29 IV.4. How to delete the device ......................30 SEWOSY 13b rue Saint-Exupéry – CS20152 – F-67503 HAGUENAU CEDEX Tel. : +33 (0)3 90 59 02 20 - Fax : +33 (0)3 90 59 02 19 Technical changes reserved!
  • Page 18: Product Description

    Power supply on DIN RAIL (18 V DC / 1,5 A) available on request • 1 Care-in BOX Technical features for the Care-in BOX - Supply voltage input (V IN): 18 V DC - 1 Ethernet port - 2 outputs for LCD monitor...
  • Page 19: I.3. Mounting

    To connect indoor and outdoor connection between the Care-in units such as LCD monitors or BOX and the ADSL BOX through door intercommunication systems the RJ45 Ethernet cable Warning: Please use only the dedicated power supply provided with the Care-in BOX...
  • Page 20: I.5. Connection Diagram

    I.5. Connection diagram : Mobile Wi-Fi Fail safe locking system Fail secure locking system Power supply...
  • Page 21: Installation

    * (Please keep your App be the latest version. App herein subject to change without prior notice). II.1.2. Network To register your Care-in BOX on local network, make sure that your smartphone or tablet will be connected to correct WI-FI network. (See connection diagram on page 4).
  • Page 22 By using the LOCAL Search  Select your device in the list (the number is visible from the rear of your Care-in BOX) - Rename your device if you want - Check that the GID number matches the number of your device...
  • Page 23: Iii.2. Setting Of The Device

    The status LED of the device indicates: that the peripheral is logged and can be accessed Care-in BOX that the peripheral is currently logging on that the peripheral is not or no longer logged to the network and is not accessible Click “...
  • Page 24: Iii.3. User Guide

    These icons enable to connect or disconnect you Enables remote unlocking Default password is “1234” Click “ ” to access call records, image records, video, capture files Care-in BOX The “Unlock Delay” function is not functional with our equipment...
  • Page 25: Iii.4. How To Delete The Device

    Incoming call: You just have to open the “ControlCam” application by clicking on the notification message displayed on your screen Care-in BOX 2016-03-11 Note: Don’t forget to activate the “Outdoor call-in” option to receive the calls The application opens 1. Hearing function and microphone activate automatically.
  • Page 26: Setting Instructions For Android

    Setting instructions for Android IV.1. How to register the device Go to the Play Store on your mobile or tablet. In the [search] tab, enter “ControlCam“. Once the application is selected, click on “SET UP” or click on following link: https://play.google.com/store/apps/details?id=com.anycam.skykey Open the “ControlCam”...
  • Page 27 By using the LAN Search  Select your device in the list (the number is visible from the rear of your Care-in BOX) - Rename your device if you want - Check that the GID number matches the number of your device...
  • Page 28: Iv.2. Setting Of The Device

    Once registered, the device is visible on the main interface of the application The status LED of the device indicates: that the peripheral is logged and can be Care-in BOX accessed that the peripheral is currently logging on that the peripheral is not or no longer logged to the network and is not accessible Click “...
  • Page 29: Iv.3. User Guide

    Click the icon to enable or disable the microphone of the device These icons enable to connect or disconnect you Enables remote unlocking Default password is “1234” Click “ ” to access call records, image records, video, capture files Care-in BOX...
  • Page 30: Iv.4. How To Delete The Device

    Incoming call: You just have to open the “ControlCam” application by clicking on the notification message displayed on your screen Note: Don’t forget to activate the “Outdoor Care-in BOX call-in” option to receive the calls The application opens 1. Hearing function and microphone activate automatically.
  • Page 31 IV.3. Bedienung des Gerätes ......................43 IV.4. Um das Gerät zu löschen......................44 SEWOSY 13b rue Saint-Exupéry – CS20152 – F-67503 HAGUENAU CEDEX Tel. : +33 (0)3 90 59 02 20 - Fax : +33 (0)3 90 59 02 19 Änderungen vorbehalten!
  • Page 32: Produktbeschreibung

    - Abmessungen (H x B x T): 94 x 46,50 x 34 mm Stromversorgung für DIN Hutschienenmontage (18V DC / 1,5A) auf Anfrage verfügbar! • 1 Care-in BOX Technische Daten für die Care-in BOX - Eingangsspannung (Betriebsspanung) (V IN): 18 V DC - 1 Ethernet Anschluss - 2 Ausgänge für LCD Monitor - 2 Ausgänge für Außeneinheit (Türstation)
  • Page 33: I.3. Montage

    Anschließen der Außen- und die Verbindung zwischen der Care-in Inneneinheiten sowie die LCD BOX und der ADSL BOX durch ein Monitore oder die Türstationen RJ45 Ethernet Kabel Bitte beachten Sie: Benutzen Sie nur die in der Care-in BOX mitgelieferte Stromversorgung...
  • Page 34: I.5. Anschlussplan

    I.5. Anschlussplan Mobiltelefon Wi-Fi Ruhestrom Verriegelungssystem Arbeitsstrom Verriegelungssystem Stromversorgung...
  • Page 35: Installation

    Store herunterladen. Beachten Sie bitte den neuesten Stand der App zu laden. II.1.2. Netzwerk Um die Registrierung Ihrer Care-in BOX an Ihr Lokales Netzwerk zu unternehmen, stellen Sie sicher daß Ihr Smartphone oder Ihr Tablet an den korrekten WI-FI Netzwerk angeschlossen ist. (Siehe Anschlussplan Seite 4).
  • Page 36 Ecke des Displays Über die QR Code Scan Funktion  Scannen Sie den QR-Code auf der Rückseite Ihrer Care-in BOX Die Anwendung integriert bereits den QR- Code Leser, Sie brauchen nur den Zugang zu erlauben - Falls gewünscht können Sie Ihr Gerät umbenennen - Überprüfen Sie daß...
  • Page 37: Iii.2. Parametrierung Des Gerätes

    Ist das Gerät registriert, so ist es auf der Startseite der Applikation sichtbar Die Statusleuchten des Geräts geben folgendes an: Das Peripheriegerät ist angeschlossen und Care-in BOX erreichbar Das Peripheriegerät muss die Verbindung fertig herstellen Das Peripheriegerät ist nicht oder nicht mehr angeschlossen und ist nicht erreichbar Klicken Sie auf “...
  • Page 38: Iii.3. Bedienung Des Gerätes

    Ermöglicht die abgesetzte Entriegelungsfunktion Default-Passwort ist “1234” Auf “ ” zu klicken ermöglicht an die Anrufliste zu gelangen, sowie an die Bilder und Video Aufnahmen, oder an die Screenshots Care-in BOX Die “Unlock Delay” Funktion ist mit unserem Material nicht funktionell...
  • Page 39: Iii.4. Um Das Gerät Zu Löschen

    Bei Erhalten eines eingehenden Anrufs, einfach die “ControlCam” Applikation öffnen. Klicken Sie dafür auf die Meldung die auf dem Care-in BOX 2016-03-11 Display angezeigt wird Achtung: Um Anrufe zu empfangen muss die “Outdoor call-in” Funktion aktiviert sein Die Anwendung öffnet sich Hörfunktion...
  • Page 40: Installationsanweisungen Android

    Installationsanweisungen Android IV.1. Um ihr Gerät zu registrieren Gehen Sie bitte zur Play Store auf Ihrem Mobil oder Tablet. Geben Sie “ControlCam“ in dem [search] Tab ein. Wenn Sie diese Applikation ausgewählt haben, klicken Sie auf “ERHALTEN” oder klicken Sie auf den unteren Link: https://play.google.com/store/apps/details?id=com.anycam.skykey Öffnen Sie die “ControlCam”...
  • Page 41 Ecke des Displays Über die QR Code Scan Funktion  Scannen Sie den QR-Code auf der Rückseite Ihrer Care-in BOX Die Anwendung integriert bereits den QR- Code Leser, Sie brauchen nur den Zugang zu erlauben - Falls gewünscht können Sie Ihr Gerät umbenennen - Überprüfen Sie daß...
  • Page 42: Iv.2. Parametrierung Des Gerätes

    IV.2. Parametrierung des Gerätes Ist das Gerät registriert, so ist es auf der Startseite der Applikation sichtbar Die Statusleuchten des Geräts geben folgendes an: Care-in BOX Das Peripheriegerät ist angeschlossen und erreichbar Das Peripheriegerät muss die Verbindung fertig herstellen Das Peripheriegerät ist nicht oder nicht mehr angeschlossen und ist nicht erreichbar Klicken Sie auf “...
  • Page 43: Iv.3. Bedienung Des Gerätes

    - Eine individuelle Geräte-Kennnummer ist jedem Gerät zugewiesen - Geht der Entriegelungscode verloren, klicken Sie auf “RESET” auf der Rückseite Ihres Gerätes. Default-Passwort ist “1234” Die “Unlock Delay” Funktion ist mit unserem Material nicht funktionell Drücken Sie auf “outdoor call-in” um die Fernannahme von Anrufen zu aktivieren oder deaktivieren Um die Benachrichtigungen zu aktivieren,...
  • Page 44: Iv.4. Um Das Gerät Zu Löschen

    Auf “ ” zu klicken ermöglicht an die Anrufliste zu gelangen, sowie an die Bilder Care-in BOX und Video Aufnahmen, oder an die Screenshots Bei Erhalten eines eingehenden Anrufs, einfach die “ControlCam” Applikation öffnen. Klicken Sie dafür auf die Meldung die auf dem...

Table des Matières