Dandy DWM17WDB Guide D'utilisation Et Soins De Propriètaire
Table des Matières
Les langues disponibles
Les langues disponibles
•
•
•
Danby Products Limited, Ontario, Canada N1H 6Z9
Danby Products Inc., Findlay, Ohio, USA 45840
Owner's Use and Care Guide
Guide d'utilisation et soin de Propriètaire
Guía a utilizar y a cuidar del Proprietario
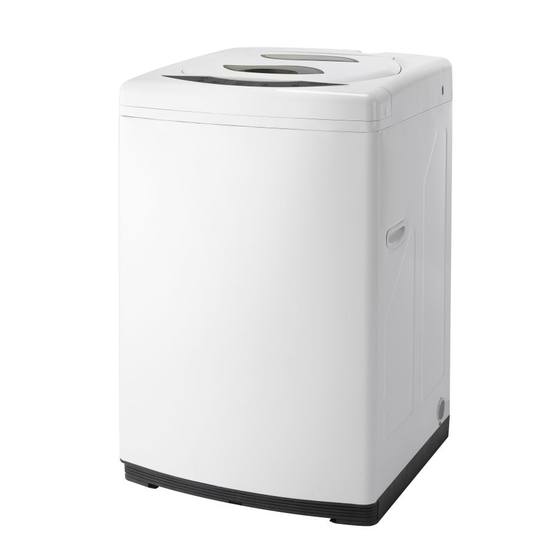
PORTABLE WASHING MACHINE
LAVEUSE À CHARGEMENT SUPERIEUR
LAVADORA DE CARGA SUPERIOR
Model • Modèle • Modelo
DWM17WDB
V1.03.11 DM
Table des Matières
Dépannage

Sommaire des Matières pour Dandy DWM17WDB
-
Page 16: Bienvenue
Bienvenue Bienvenue dans la famille Danby. Nous sommes fiers de nos produits de qualité et croyons au bien fondé de fournir une assistance fiable à nos clients. Vous le découvrirez grâce à ce guide facile d’utilisation et vous pourrez l’entendre en provenance des voix amicales de notre service d’assistance à... -
Page 17: Renseignements Importants Relatifs À La Sécurité
Renseignements importants relatifs à la sécurité LISEZ ET RESPECTEZ TOUTES LES CONSIGNES RELATIVES À LA SÉCURITÉ POUR VOTRE SÉCURITÉ : Veuillez lire ces consignes attentivement avant de faire fonctionner l’appareil. MESURES DE • Veuillez lire toutes ces consignes avant d’utiliser la laveuse portative. •... -
Page 18: Caractéristiques Et Pièces
Caractéristiques et pièces 1. COMPARTIMENT DU DÉTERGENT 2. DISTRIBUTEUR DE PRODUITS ASSOUPLISSANTS 3. CUVE INTÉRIEURE 4. PANNEAU DE COMMANDE 5. BASE 6. PLAQUE INSONORISÉE 7. PIED RÉGLABLE 8. BOUTON DE RÉGLAGE DE NIVEAU 9. TUYAU D’ÉVACUATION (1 PIÈCE) 10. CORDON D’ALIMENTATION 11. -
Page 19: Pieds De Nivellement
Notice d’installation • Mettez votre linge à laver dans la laveuse en répartissant la charge de manière AVANT D’UTILISER uniforme. Une charge mal répartie peut occasionner du bruit ou des vibrations. VOTRE LAVEUSE • N’utilisez pas de l’eau chaude à l’excès (température égale ou supérieure à 50 °C). Les pièces en plastique peuvent se déformer ou s’abîmer. -
Page 20: Installation D'une Plaque Insonorisée
Notice d’installation INSTALLATION D’UNE PLAQUE INSONORISÉE Posez la laveuse à la Insérez la plaque L’ouverture pour Retirez la plaque renverse sur le sol et fixez insonorisée dans la insérer la plaque insonorisée de la plaque insonorisée à base de la laveuse. insonorisée est l’emballage. - Page 21 Notice d’installation RACCORDEMENT DU TUYAU D’ALIMENTATION EN EAU Branchez le tuyau d’admission au raccord en tournant Ne dévissez pas le capuchon du raccord d’eau chaude situé sur l’écrou de raccordement. la soupape de mélange d’eau, mais raccordez l’autre extrémité Assurez-vous qu’une bague des tuyaux d’admission au raccord d’eau froide de la soupape de caoutchouc se trouve à...
-
Page 22: Positionnement Du Tuyau D'évacuation
Notice d’installation Branchez le tuyau d’évacuation à la sortie d’eau de la laveuse, puis fixez-le à POSITIONNEMENT DU l’aide d’une pince pression. L’évacuation tant horizontale que verticale étant TUYAU D’ÉVACUATION disponible, le tuyau d’évacuation peut être déposé sur le sol, dans une cuve ou dans la baignoire, aussi longtemps que la hauteur à... -
Page 23: Mode D'emploi
Mode d’emploi PANNEAU DE COMMANDE CO LD ST AR T/ PA USE HO T SO AK FU LLY AU TO MA TI C W ASH IN G M ACHINE WA TER NO RM AL HIGH FUNC TI ON WA SH MEDIUM POWER WA TER... -
Page 24: Avant Le Lavage
Mode d’emploi Préparez la brassée. Mélangez les articles de petite et de grande taille dans une AVANT LE LAVAGE même brassée pour obtenir des résultats optimaux. Déposez les articles dans la cuve interne sans les tasser. Ne condensez pas les articles et ne les enroulez pas. Les articles devraient pouvoir se déplacer librement dans l’eau de lavage afin d’obtenir des résultats optimaux. - Page 25 Mode d’emploi FONCTIONS Chaque lavage est préprogrammé; voir les détails figurant sur le tableau du programme de lavage. SO AK LAVAGE WA SH RINÇAGE RINSE ESSORAGE SPIN TREMPAGE 2 cycles Normal 20 min. 12 min. 5 min. Normal 20 Minutes 12 Minutes 2 Cycle s M inutes...
-
Page 26: Entretien
Entretien • Nettoyez régulièrement la surface de votre laveuse portative avec un chiffon NETTOYAGE doux. • Nettoyez régulièrement la cuve intérieure, surtout après y avoir versé de l’amidon ou de l’eau de Javel. • Nettoyez régulièrement le filtre situé dans la vanne d’admission ou dans le tuyau d’admission afin de prévenir le colmatage. -
Page 27: Dépannage
Dépannage Il peut arriver qu’un problème mineur se produise qui ne nécessite pas d’appel de service. Consultez ce guide de dépannage pour trouver une solution possible. Si l’appareil continue de mal fonctionner, appelez un atelier de réparation autorisé ou le numéro sans frais de Danby, au 1-800-263-2629, pour obtenir de l’assistance. -
Page 28: Garantie
GARANTIE LIMITÉE SUR APPAREIL ÉLECTROMÉNAGER À DOMICILE Cet appareil de qualité est garantie exempt de tout vice de matière première et de fabrication, s’il est utilisé dans les conditions normales recommandées par le fabricant. Cette garantie n’est offerte qu’à l’acheteur initial de l’appareil vendu par Danby Products Limited (Canada) ou Danby Products Inc. (E.- U. d’A) (ci-après “Danby”) ou par l’un des ses distributeurs agréés et elle ne peut être transférée. -
Page 42: Laveuse À Chargement Superieur
(1-800-263-2629) • Descripción de la Parte Model • Modèle Model • Modèle • Modelo DWM17WDB Danby Products Limited, Ontario, Canada N1H 6Z9 Danby Products Limited, Guelph Ontario Canada N1H 6Z9 Danby Products Inc., Findlay, Ohio, USA 45840 Danby Products Inc., Findlay, Ohio USA 45839-0669...