DELTA DORE PACK TYXIA 541 Notice D'installation

DELTA DORE PACK TYXIA 541 Notice D'installation

Masquer les pouces Voir aussi pour PACK TYXIA 541:

Publicité

Les langues disponibles

Les langues disponibles

PACK TYXIA 541 - 546
Centralisation de volets roulants
FR
Notice d'installation
Roller shutter centralisation
EN
Installation instructions
Scentralizowane sterowanie roletami
PL
Centralisatie van rolluiken
NL
Installatiegids

Publicité

Table des Matières
loading

Sommaire des Matières pour DELTA DORE PACK TYXIA 541

  • Page 1 PACK TYXIA 541 - 546 Centralisation de volets roulants Notice d’installation Roller shutter centralisation Installation instructions Scentralizowane sterowanie roletami Centralisatie van rolluiken Installatiegids...
  • Page 2: Composition Des Packs

    Composition des packs Pack TYXIA 541 TYXIA 5630 TYXIA 1712 Pack TYXIA 546 A 546 TYXIA 5730 TYXIA 1712...
  • Page 3: Table Des Matières

    Sommaire 1/ Installation de la télécommande 1.1 Fixé au mur 1.2 Posé sur une surface plane 2/ Installation des récepteurs 2.1 Instructions de connexion des bornes 1 2 3 4 2.2 Instructions de connexion des bornes IN1 - COM - IN2 2.3 Raccordement 3/ Association radio 4/ Apprentissage des temps...
  • Page 4: 1/ Installation De La Télécommande

    1/ Installation de la télécommande 1.1 Fixé au mur 1.2 Posé sur une surface plane...
  • Page 5: 2/ Installation Des Récepteurs

    2/ Installation des récepteurs Recommandations isolés du secteur. Tout matériel raccordé doit être marqué CE et satisfaire aux exigences des appareils basse tension ainsi qu’aux prescriptions de montage. commande locale (à séparer du 230V). Les butées haute et basse du volet doivent être réglées avant l’installation du récepteur.
  • Page 6 2/ Installation des récepteurs Installation 230V~ Coupez l’alimentation de l’installation. Vous pouvez installer le récepteur pour volet roulant dans une boîte d’encastrement derrière un interrupteur ou un bouton poussoir de commande ou dans une boîte étanche à l’intérieur du coffre du volet roulant, à...
  • Page 7: Instructions De Connexion Des Bornes 1 2

    2.1 Instructions de connexion des bornes 1 2 3 4 Ø 0,75 - 1,5 mm la longueur de dénudage indiquée sur le produit. • • Fils rigides Fils souples A l’aide de l’outil fourni ou jusqu’au fond d’un tournevis de 2,5 mm, de la borne.
  • Page 8: Instructions De Connexion Des Bornes In1 - Com - In2

    2/ Installation des récepteurs 2.2 Instructions de connexion des bornes IN1 - COM - IN2 230V fond de la borne. 0,5 mm KY31A02 connectés sur le produit au risque d’endommager le connecteur interne. Préconisations de démontage...
  • Page 9: Raccordement

    2.3 Raccordement Raccordez l’interrupteur aux bornes IN1 - COM - IN2. Raccordez l’alimentation 230 V aux bornes 1 et 2. procéder à l’association. Interrupteur TYXIA maintenu Double bouton poussoir 230 V~ Bouton poussoir 2 3 4...
  • Page 10: 3/ Association Radio

    3/ Association radio Mettez tous les récepteurs en attente d’association, en appuyant 3 secondes sur leur touche jusqu’à ce que le voyant clignote. Appuyez sur Sur la télécommande, appuyez simultanément pendant 3 secondes, jusqu’à ce que le voyant clignote, relâchez. Les volets s’actionnent brièvement dès qu’ils sont associés.
  • Page 11 ..> 3s TYXIA TYXIA >...
  • Page 12: 4/ Apprentissage Des Temps De Courses Du Volet

    4/ Apprentissage des temps de courses du volet Effectuez un cycle complet de butée à butée : Descendez ou montez complètement le volet jusqu’à la butée. Effectuez une manœuvre inverse jusqu’à la butée opposée. Ne pas interrompre la course du volet. Remarque L’apprentissage des temps de courses du volet, s’ajuste automatiquement à...
  • Page 13: Tyxia 5630 Ou 5730

    TYXIA 5630 ou 5730 d’interrupteur raccordé Mode 1 (par défaut) : Interrupteur maintenu Montée / Stop / Descente Mode 2 : Double bouton poussoir Montée / Descente Mode 3 : Bouton poussoir Montée / Stop / Descente / Stop...
  • Page 14 TYXIA 5630 ou 5730 Appuyez 6 secondes sur la touche du récepteur. Le voyant clignote puis > 6 s TYXIA voyant correspond au mode en cours. Appuyez brièvement sur la touche du récepteur pour sélectionner le mode. Mode 1 Mode 2 Mode 3 TYXIA TYXIA...
  • Page 15: 6/ Créer Un Groupe

    6/ Créer un groupe La création d’un groupe permet le pilotage simultané de plusieurs récepteurs. Appuyez 3 secondes sur , jusqu’à ce que le symbole clignote, relâchez. Par appuis successifs sur , sélectionnez le numéro du groupe à créer (ex : 9). Sélectionnez le récepteur (ou moteur) par appuis successifs sur .
  • Page 16 6/ Créer un groupe > 3s Vous pouvez créer jusqu’à 16 groupes. Un même récepteur peut être associé à plusieurs groupes. Pour sortir du mode, appuyez 3 secondes sur...
  • Page 17: 7/ Utilisation

    7/ Utilisation Appuyez brièvement sur Par appuis successifs sur , sélectionnez le numéro du groupe à piloter : : Groupe 1 à 16 : Groupe Total Appuyez sur pour commander le(s) volet(s) roulant(s). Le voyant indique que les récepteurs ont bien reçu l’information.
  • Page 18: 8/ Aide

    8/ Aide La pile est usée. Changez la pile. Effacer une association - Enlevez la face avant de la télécommande. CR 2430 - Appuyez sur la touche A. - Appuyez successivement sur pour actionner le récepteur à effacer. - Appuyez sur la touche - Appuyez sur la touche A pour sortir.
  • Page 19 Le récepteur se bloque en arrêt Sur détection de surcharge, le produit se bloque en arrêt pendant 30 secondes avant d’autoriser une nouvelle mise en marche. de cette phase : - Pour les récepteurs TYXIA 5630 : Remplacez votre récepteur par un TYXIA 5730. - Pour les récepteurs TYXIA 5730 : Contactez notre service clients.
  • Page 20: 9/ Caractéristiques Techniques

    9/ Caractéristiques techniques TYXIA 1712 • Alimentation par pile Lithium 3 V, CR2430 • Isolement classe III • Puissance radio max. < 10 mW, récepteur catégorie 2 • Dispositif télécommande radio, fréquence d’émis- sion X3D : 868,7 MHz à 869,2 MHz •...
  • Page 21 TYXIA 5630 et TYXIA 5730 • Alimentation : 230 V ~ 0,6 VA • 2 sorties contacts alimentés : TYXIA 5630 (1 A) - TYXIA 5730 (2 A) • Consommation en veille : 0,06 W • Nombre d’émetteurs associés : 16 maximum •...
  • Page 22 Pack composition TYXIA 541 pack pack TYXIA 5630 TYXIA 1712 TYXIA 546 pack pack...
  • Page 23 Contents 1/ Remote control installation 1.1 Mounted on the wall 2/ Receiver installation 2.1 Connection instructions for terminals 1 2 3 4 2.2 Connection instructions for IN1 - COM - IN2 terminals 2.3 Connection 3/ Wireless association 4/ Learning for the shutter travel time 5730 receivers 6/ Create a group...
  • Page 24: 1/ Remote Control Installation

    1/ Remote control installation 1.1 Mounted on the wall 1.2 Placed on a flat surface...
  • Page 25: 2/ Receiver Installation

    2/ Receiver installation Recommendations IMPORTANT: the control wires are not insulat- ed from the mains power supply. All connected equipment must be marked CE and meet the requirements of the low voltage devices as well as assembly recommendations. Local control wires can be extended up to 10 m (separate from the 230 V).
  • Page 26 2/ Receiver installation Installation 230V~ Switch off the You can install the receiver for roller shutter in push-button or in a sealed box inside the roller shutter, a safe distance from metal parts. IPx4...
  • Page 27: Connection Instructionsfor Terminals 1 2

    2.1 Connection instructionsfor terminals 1 2 3 4 Strip the wires while respecting Ø 0,75 - 1,5 mm product. • • Solid wires Stranded wires Push the wire Using the tool supplied or a fully into 2.5 mm screwdriver, press the the terminal.
  • Page 28: Connection Instructions For In1 - Com - In2 Terminals

    2/ Receiver installation 2.2 Connection instructions for IN1 - COM - IN2 terminals 230V Use the wires supplied. Push the wire fully into the terminal. 0,5 mm KY31A02 Do not strip the wires when they are con- nected to the product as you could damage the internal connector.
  • Page 29: Connection

    2.3 Connection Connect the motor control wires to terminals 3 and 4 (motor lowering control wire to terminal 3, raising control wire to terminal 4). Connect the switch to the IN1 - COM - IN2 termi- nals. Connect the 230 V power supply to terminals 1 and 2.
  • Page 30: 3/ Wireless Association

    3/ Wireless association Set all the receivers to association standby mode by pressing their button for 3 seconds until the Press On the remote control press at the same time and hold for 3 seconds until the LED association is completed. The number of associated items is displayed on the screen ( You can associate up to 16 receivers (or motors).
  • Page 31 ..> 3s TYXIA TYXIA >...
  • Page 32: 4/ Learning For The Shutter Travel Time

    4/ Learning for the shutter travel time Perform a complete cycle from stop to stop: Lower or raise the roller shutter completely to the stop. Do the reverse action until the opposite stop is reached. Do not interrupt the roller shutter travel. Note The learning for the shutter travel time adjusts itself automatically for each complete cycle from stop to...
  • Page 33: 5730 Receivers

    5730 receivers Mode 1 (by default): Hold switch Raise/Stop/Lower Mode 2: Raise/Lower double push-button Mode 3: Raise/Stop Lower/Stop push-button...
  • Page 34 5730 receivers Press the receiver's button for 6 seconds. comes steady, release. > 6 s TYXIA corresponds to the current mode. Mode 1 Mode 2 Mode 3 TYXIA TYXIA TYXIA for 3 seconds until the LED switches on.
  • Page 35: 6/ Create A Group

    6/ Create a group Creating a group allows the simultaneous control of multiple receivers. Press for 3 seconds until the symbol Press as many times as required to select the number of the group to create (e.g. 9). Select the receiver (or motor) by pressing on as many times as required.
  • Page 36 6/ Create a group > 3s You can create up to 16 groups. A single receiver can be associated with multiple groups. To exit the mode press for 3 seconds.
  • Page 37: 7/ Use

    7/ Use Press as many times as required to select the number of the group to control: : Group 1 to 16 : Group Total Press to control the roller shutter(s). The LED indicates that the receivers have correctly received the information.
  • Page 38: 8/ Troubleshooting

    8/ Troubleshooting The screen Change the battery. Remove an association - Remove the front face of the remote control. CR 2430 - Press button A. - Press as many times as required to select the receiver to remove. - Press - Press button A to exit.
  • Page 39 The receiver locks in off mode When an overload is detected, the product locks in off mode for 30 seconds before authorising a new activation. this phase: - For TYXIA 5630 receivers: - Replace your receiver with a TYXIA 5730. - For TYXIA 5730 receivers: Contact our customer service.
  • Page 40: 9/ Technical Characteristics

    9/ Technical characteristics TYXIA 1712 • Power supplied by 3 V lithium battery, CR2430 • Class III insulation • Maximum wireless power < 10 mW category 2 receiver • Wireless remote control device, X3D Transmission frequency: 868.7 MHz to 869.2 MHz •...
  • Page 41 TYXIA 5630 and TYXIA 5730 • Power supply: 230 V ~ 0.6 VA • 2 powered contact outputs: TYXIA 5630 (1 A) - TYXIA 5730 (2 A) • Stand-by consumption: 0.06 W • Number of associated transmitters: 16 maximum • Storage temperature: -10 °C / +70 °C •...
  • Page 42 Elementy zestawów Zestaw TYXIA 541 IA 541 TYXIA 5630 TYXIA 1712 Zestaw TYXIA 546 XIA 546 TYXIA 5730 TYXIA 1712...
  • Page 43 1/ Instalacja pilota zdalnego sterowania 1, 2, 3 i 4 zacisków IN1, COM, IN2 3/ Przypisanie radiowe 4/ Uczenie czasów ruchu rolety TYXIA 5630 lub 5730 6/ Tworzenie grupy 8/ Pomoc 9/ Dane techniczne...
  • Page 44: 1/ Instalacja Pilota Zdalnego Sterowania

    1/ Instalacja pilota zdalnego sterowania powierzchni...
  • Page 45 Zalecenia TYXIA...
  • Page 46 230V~ rolety, w oddaleniu od elementów metalowych. IPx4...
  • Page 47 Ø 0,75 - 1,5 mm • • zacisków do oporu. przedni przycisk zacisku, a...
  • Page 48 230V zestawu. sków do oporu. 0,5 mm KY31A02 Zalecenia za przewód.
  • Page 49 zacisków 3 i 4 (przewód opuszczania do zacisku 3, a przewód podnoszenia do zacisku 4). TYXIA samopowrotny Przycisk pod- wójny 230 V~ Przycisk 2 3 4...
  • Page 50: 3/ Przypisanie Radiowe

    3/ Przypisanie radiowe...
  • Page 51 ..> 3s TYXIA TYXIA >...
  • Page 52: 4/ Uczenie Czasów Ruchu Rolety

    4/ Uczenie czasów ruchu rolety ogranicznika: przeciwstawnego. Uwaga ogranicznika do ogranicznika.
  • Page 53: Tyxia 5630 Lub 5730

    TYXIA 5630 lub 5730 podnoszenie/stop/ opuszczanie Typ 2: Przycisk podwójny podnoszenie/opuszczanie Typ 3: Przycisk podnoszenie/stop/ opuszczanie/stop...
  • Page 54 TYXIA 5630 lub 5730 Lampka sygnalizacyjna miga, a > 6 s TYXIA odbiornika. Tryb 1 Tryb 2 Tryb 3 TYXIA TYXIA TYXIA sygnalizacyjna.
  • Page 55: 6/ Tworzenie Grupy

    6/ Tworzenie grupy sterowanie kilkoma odbiornikami. grupy, która zostanie utworzona (np. 9). z grupy.
  • Page 56 6/ Tworzenie grupy > 3s grup.
  • Page 57 : Grupa 1 do 16 : Grupa Wszystko...
  • Page 58: 8/ Pomoc

    8/ Pomoc zdalnego sterowania. CR 2430 sygnalizacyjna. kolejno przycisk...
  • Page 59 stanie zatrzymania na 30 sekund przed zezwole- niem na ponowne uruchomienie. Podczas tej fazy lampka sygnalizacyjna miga krótki-...
  • Page 60: 9/ Dane Techniczne

    9/ Dane techniczne TYXIA 1712 • Izolacja klasy III • Maksymalna moc radia < 10 mW, odbiornik kategorii 2 nadawania X3D: od 868,7 MHz do 869,2 MHz czne) • Mocowanie na wsporniku • Wymiary: 46 x 121 x 10,7 mm •...
  • Page 61 TYXIA 5630 i TYXIA 5730 • Zasilanie: 230 V~, 0,6 VA TYXIA 5730 (2 A) • Pobór mocy w trybie czuwania: 0,06 W • Temperatura przechowywania: od –10°C do +70°C • Temperatura robocza: od 0°C do +55°C • IP 40 w puszce podtynkowej •...
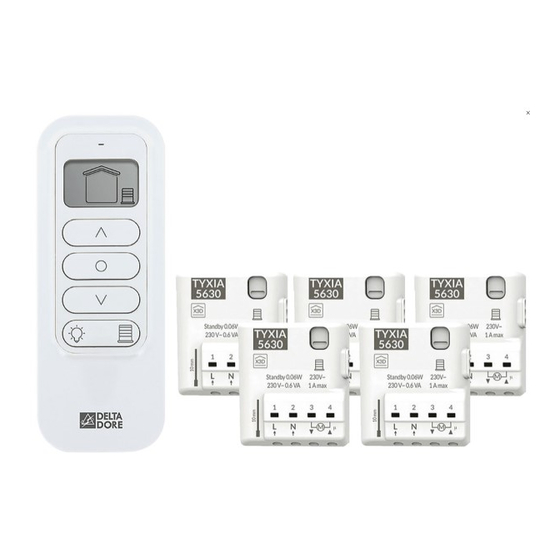
  • Page 62 Inhoud van packs Set TYXIA 541 TYXIA 5630 TYXIA 1712 Set TYXIA 546 TYXIA 5730 TYXIA 1712...
  • Page 63 Inhoudsopgave 1/ Installatie van de afstandsbediening 1.1 Wandmontage 1.2 Op een vlakke ondergrond 2/ Installatie van de ontvangers 2.1 Instructies voor aansluiting van de aansluitklemmen 1 2 3 4 2.2 Instructies voor aansluiting van de kabels IN1 - COM - IN2 2.3 Aansluiting 3/ Radioverbinding 4/ Leren van looptijd van luik...
  • Page 64: 1/ Installatie Van De Afstandsbediening

    1/ Installatie van de afstandsbediening 1.1 Wandmontage 1.2 Op een vlakke ondergrond...
  • Page 65: 2/ Installatie Van De Ontvangers

    2/ Installatie van de ontvangers Aanbevelingen OPGELET, de kabels van de besturing zijn niet geïsoleerd van het lichtnet. Alle apparatuur die is aangesloten, moet Ce-gemarkeerd zijn en voldoen aan de eisen voor laagspanning en volgens de instructies worden gemonteerd. De kabels van de lokale bediening kunnen 10 m worden verlengd (te scheiden van 230V).
  • Page 66 2/ Installatie van de ontvangers Installatie 230V~ Verbreek de voeding. U kunt de ontvanger voor een rolluik installeren in een behuizing achter een schakelaar of een druk- knop, of in een behuizing in het rolluik, uit de buurt van metalen onderdelen. IPx4...
  • Page 67: Instructies Voor Aansluiting Van De Aansluitklemmen 1 2

    2.1 Instructies voor aansluiting van de aansluitklemmen 1 2 3 4 Strip de kabel, met inachtne- Ø 0,75 - 1,5 mm ming van de striplengte die op het product wordt aangegeven. • • Flexibele kabels Druk de kabel tot Gebruik het meegeleverde op het einde van gereedschap of een schroevendraaier de terminal.
  • Page 68: Instructies Voor Aansluiting Van De Kabels In1 - Com - In2

    2/ Installatie van de ontvangers 2.2 Instructies voor aansluiting van de kabels IN1 - COM - IN2 230V Gebruik de meegeleverde kabels. Druk de kabel tot op het einde van de terminal. 0,5 mm KY31A02 Strip de kabels niet wanneer deze zijn aangesloten op het product om de interne connector niet te beschadigen.
  • Page 69: Aansluiting

    2.3 Aansluiting Sluit de besturingskabels van de motor op de aansl- uitklemmen 3 en 4 aan (de klem onderstrooms van de motor op klem 3, de bovenstroomse kabel op klem 4). Sluit de schakelaar op de klemmen IN1 - COM - IN2 aan.
  • Page 70: 3/ Radioverbinding

    3/ Radioverbinding Plaats alle ontvangers in afwachting door 3 seconden op de knop te drukken totdat het lampje knippert, laat ons. Druk op Op de afstandsbediening druk gedurende 3 seconden gelijktijdig op tot het lampje knippert, laat los. De rolluiken worden kortstondig ingeschakeld wanneer ze verbonden zijn.
  • Page 71 ..> 3s TYXIA TYXIA >...
  • Page 72: 4/ Leren Van Looptijd Van Luik

    4/ Leren van looptijd van luik Voer een volledige cyclus uit, van uiteinde tot uiteinde: Laat het luik vollledig omhoog/omlaag gaan, tot het uiteinde. Voer een tegengesteld manoeuvre uit tot het andere uiteinde. Onderbreek de werking van het rolluik niet. Opmerking Het leren van de looptijd van luik wordt auto- matisch na elke volledige cyclus van uiteinde tot...
  • Page 73: 5630 Of 5730

    TYXIA 5630 of 5730 breker dat is aangesloten Modus 1 (standaard): Schakelaar, gehandhaafd Omhoog / Stop / Omlaag Modus 2: Dubbele drukknop Omhoog/omlaag Modus 3: Drukknop Omhoog / Stop / Omlaag / Stop...
  • Page 74 TYXIA 5630 of 5730 Druk 6 seconden op de knop van de ontvanger. Het lampje knippert en gaat vervolgens branden, laat de > 6 s knop los. TYXIA lampje komt overeen met de huidige modus. Druk kort op de knop van de ontvanger om de modus te selecteren.
  • Page 75: 6/ Een Groep Maken

    6/ Een groep maken Door een groep te maken, kunnen gelijktijdige meerdere ontvangers worden verbonden. Druk 3 seconden op , totdat het symbool knippert, laat los. Door herhaaldelijk op of te drukken, selecteert u het nummer van de groep die u wilt maken (bijv: 9).
  • Page 76 6/ Een groep maken > 3s U kunt tot 16 groepen maken. Een zelfde ontvanger kan met verschillende groepen worden verbonden. Om de modus te verlaten moet u 3 seconden op drukken.
  • Page 77: 7/ Gebruik

    7/ Gebruik Druk kort op Door herhaaldelijk op te drukken, selecteert u het nummer van de groep die u wilt besturen: : Groep 1 tot 16 : Volledige groep Druk op om de rolluik(en) aan te sturen. Het lampje geeft aan of de ontvangers de informatie hebben ontvangen.
  • Page 78: 8/ Ondersteuning

    8/ Ondersteuning Op het scherm Vervang de batterij. Een koppeling Verwijder de voorzijde van de afstandsbediening. CR 2430 Druk op de knop A. Druk achtereenvolgens op om de ontvanger in te schakelen die u wilt verwijderen. Druk op de toets Druk op A om te verlaten.
  • Page 79 De zender blokkeert in de volgende gevallen Detectie van overbelasting, het product blokkeert gedurende 30 seconden voordat een nieuwe start wordt geautoriseerd. Het lampje knippert snel tijdens deze fase: - Voor de TYXIA 5630-ontvangers: Vervang uw ontvanger door een TYXIA 5730. - Voor de TYXIA 5730-ontvangers: Neem contact op met de klantendienst.
  • Page 80: 9/ Technische Kenmerken

    9/ Technische kenmerken TYXIA 1712 • Voeding door lithiumbatterij - CR2430 - 3 V • Klasse III isolatie • Maximaal vermogen < 10 mW, ontvanger categorie 2 • Draadloze afstandsbediening, zendfrequentie X3D: 868,7 MHz tot 869,2 MHz • Zendbereik van 100 tot 300 meter in open veld, afhankelijk van de aangesloten toestellen (het bereik kan variëren in functie van de plaatsingsomstandigheden en de...
  • Page 81 TYXIA 5630 en TYXIA 5730 • Voeding: 230 V ~ 0,6 VA • 2 Uitgangen contact onder spanning: TYXIA 5630 (1 A) - TYXIA 5730 (2 A) • Verbruik in stand-by: 0,06 W • Aantal gekoppelde zenders: maximaal 16 • Opslagtemperatuur: -10 °C / +70 °C •...
  • Page 84 www.deltadore.com...

Ce manuel est également adapté pour:

Pack tyxia 546Tyxia 5630Tyxia 1712Tyxia 5730

Table des Matières