
Manuels Connexes pour Vissani U5H300A15

Sommaire des Matières pour Vissani U5H300A15
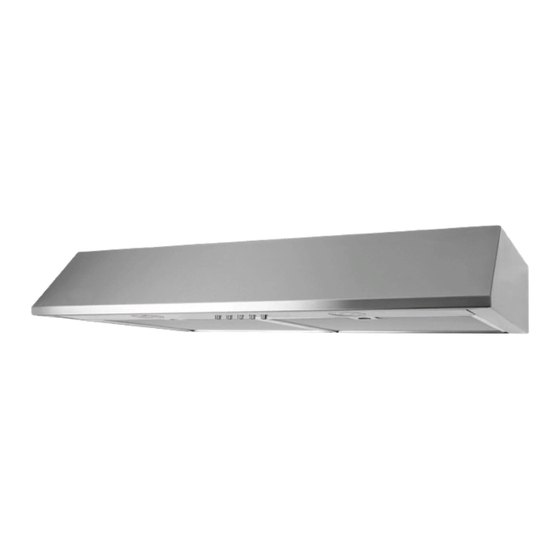
- Page 1 Under Cabinet Range Hood Hotte de cuisinière pour dessous d’armoire # U5H300A15 / QR052 Owner’s Manual Manuel de l’utilisateur...
-
Page 2: Table Des Matières
Table of Contents Table of Contents . . . . . . . . . . . . . . . . . . . . . . . . . . . . 2 Maintenance Safety Information . - Page 3 Safety Information (continued) COOKING SAFETY INFORMATION WARNING: To reduce the risk of fire, use only metal duct work . Never use plastic duct work . 1 . Never leave the range hood unattended when in use . 2 . Never cook over open flames under the range hood. WARNING: To reduce the risk of fire or electric shock, do 3 .
-
Page 4: Warranty
Warranty ONE YEAR LIMITED WARRANTY A thorough inspection must be made before installation and any damage must be promptly reported . We will not be liable for failures or damage that could have been discovered or avoided by proper inspection and testing prior to installation . We warrant this product to be free from defects in materials or workmanship for one (1) year from the date of purchase . -
Page 5: Pre-Installation
Pre-Installation TOOLS/MATERIALS REQUIRED (NOT SUPPLIED) Measuring tape Level Utility knife Adjustable Pencil Tape wrench Flathead Needle nose Phillips screwdriver screwdriver pliers Hammer Electric drill Safety goggles Safety gloves HOMEDEPOT .COM Please contact 1-800-514-6729 for further assistance. -
Page 6: Package Contents
Pre-Installation (continued) PACKAGE CONTENTS Part Description Quantity Range hood Charcoal filter (located inside the hood) Transition (located inside the hood) LED light bulbs (installed) HARDWARE INCLUDED NOTE: Parts not shown to actual size (located inside the hood). Part Description Quantity Long tapping screw - (M5 mm x 12 mm) Short tapping screw - (M4 mm x 8 mm) -
Page 7: Planning Installation
Pre-Installation (continued) PLANNING INSTALLATION Number of people required: 2 WARNING: Always wear safety goggles and gloves during Carefully check the range hood for damage and for missing parts installation . prior to installation . If there is any damage or if you are missing parts, do not proceed with the installation . - Page 8 Pre-Installation (continued) FOLLOW THESE GUIDELINES WHEN INSTALLING DUCT WORK: - Your venting system must vent to the outdoors either horizontally through the back wall (13) or vertically through the roof (14) (refer to Fig . 5/Fig . 6/Fig . 7) . - Use round metal duct work with a uniform diameter of 152 mm (6 in) .
- Page 9 Pre-Installation (continued) WIRING CONNECTION REQUIREMENTS DANGER: Risk of electrical shock . This range hood must Installation work and electrical wiring must be done by a qualified be properly grounded . person(s) in accordance with all applicable codes and standards, including fire-rated construction. DANGER: Turn off the power circuit breaker or the power switch on the junction box before installing this...
-
Page 10: Installation
Installation WARNING: FUEL (GAS) BURNING RANGES MUST BE VENTED OUTDOORS USING, AT MINIMUM, METAL DUCTWORK AND RANGE HOODS OF SUFFICIENT CAPACITY . Follow your fuel burning equipment manufacturer’s guidelines, as well as, all applicable safety standards published by the National Fire Protection Association (NFPA), and the American Society for Heating, Refrigeration and Air Conditioning Engineers (ASHRAE), and your local code authorities . - Page 11 Installation Installation (continued) INSTALLING THE CHARCOAL FILTER (SKIP THIS STEP IF YOU ARE USING EXTERIOR VENTING) NOTE: The charcoal filter should only be installed if you are not using an external venting system. - Turn over the range hood (A) and place its top on a protective surface . - Unhook the charcoal filter support (2) from the support hook (3) and pull the charcoal filter support up.
-
Page 12: Installing The Range Hood
Installation (continued) INSTALLING THE RANGE HOOD DANGER: Turn off the power circuit breaker or the power switch on the junction box before installing this unit . Touching circuitry inside the range hood while it is energized will result in death or serious injury . DANGER: If installing this unit over a gas range, turn off the gas at the source before installing or servicing this unit . -
Page 13: Operation
Operation NOTE: The fan and lights operate independently of each other. TURNING ON/OFF THE UNIT TURNING ON/OFF THE LIGHTS - To turn on the fan, press the appropriate speed control - Press the light switch (5) to turn on and off the lights . switch [Low Speed (2), Medium Speed (3), High Speed (4)] to select the desired level of power . -
Page 14: Maintenance
Maintenance REPLACING FILTERS DANGER: Turn off the power circuit breaker or the power switch on the junction box before performing maintenance . When filters need replacing, exchange with similar. Also replace Touching circuitry inside the range hood while it is energized will result in death or serious injury . -
Page 15: Care And Cleaning
Care and Cleaning RANGE HOOD WARNING: Failure to maintain basic standards of care and cleaning of the range hood will increase the risk of fire. The range hood should be cleaned (regularly internally and externally) to preserve its appearance and performance . Do Not: - Always clean in the direction of the grain (original - Do not use corrosive or abrasive detergents, steel... -
Page 16: Troubleshooting
Troubleshooting DANGER: Turn off the power circuit breaker or the power switch on the junction box before performing maintenance . Touching circuitry inside the range hood while it is energized may result in serious injury or death . Problem Solution - Check that the power supply cable and all electrical wiring are properly The range hood will not operate . -
Page 17: Specifications
Specifications Model Dimensions Rating Control Type Fan CFM Speeds Light Bulb Wattage Venting Options 756 mm (29.8 in) W High LED or Halogen JDR16, Top venting 120~60Hz GU10 twist and lock Back venting 457 mm (18 in) D Medium QR052 280 ±... -
Page 18: External Range Hood Diagram
Specifications (continued) EXTERNAL DIAGRAM OF RANGE HOOD 705 mm (27.75 in) 250 mm (9.81 in) 22 mm 28 mm (0.88 in) D (1.1 in) 38 mm 80 mm (1.5 in) (3.13 in) 193.5 mm (7.62 in) 18 mm (0.69 in) 280 mm (11 in) 50 mm 35 mm... -
Page 19: Service Parts
Service Parts If you are missing parts or if you require replacement parts, please contact our customer service team at 1-800-514-6729 (8 am – 6 pm, EST, Monday–Friday) . Identify the required part(s) and have the part number(s) ready . Part Description Code Quantity... -
Page 20: Consignes De Sécurité
Table des matières OWNER’S MANUAL . . . . . . . . . . . . . . . . . . . . . . . . . . . 2 Fonctionnement . -
Page 21: Consignes De Sécurité (Suite)
Consignes de sécurité (suite) INFORMATION SUR LA SÉCURITÉ LORS DE LA CUISSON AVERTISSEMENT : Pour réduire le risque d’incendie, n’utiliser que des conduits de métal . Ne jamais utiliser des 1 . Ne jamais laisser sans surveillance lorsqu’en service . conduits en plastique . -
Page 22: Garantie
Garantie GARANTIE LIMITÉE D’UN AN Inspecter minutieusement le produit avant l’installation et signaler tout dommage sans délai . Nous ne serons pas responsables des défaillances ou des dommages qui auraient dû être découverts ou évités par une inspection adéquate et des essais avant l’installation . Nous garantissons ce produit contre tout défaut dans les matériaux ou la fabrication, pour une période d’un (1) an à... -
Page 23: Préinstallation
Préinstallation OUTILS/MATÉRIAUX REQUIS (NON INCLUS) Couteau tout Ruban à mesurer Niveau usage Crayon Ruban adhésif Clé à molette Pinces à bec Tournevis Phillips Tournevis plat effilé Tournevis Lunettes de Marteau électrique sécurité Gants de sécurité HOMEDEPOT .COM Veuillez contacter 1-800-514-6729 pour toute assistance supplémentaire . -
Page 24: Préinstallation (Suite)
Préinstallation (suite) CONTENU DE L’EMBALLAGE Pièce Description Quantité Hotte de cuisine Filtre à charbon (à l’intérieur de la hotte) Transition (à l’intérieur de la hotte) Ampoules DEL (installées) QUINCAILLERIE INCLUSE REMARQUE : La quincaillerie montrée n’est pas de taille réelle (à l’intérieur de la hotte). Pièce Description Quantité... -
Page 25: Planification De L'installation
Préinstallation (suite) PLANIFICATION DE L’INSTALLATION Nombre de personnes requises : 2 AVERTISSEMENT : Toujours porter des lunettes et des Vérifier soigneusement la hotte de cuisine pour tout dommage et pour gants de sécurité pendant l’installation . toutes pièces manquantes avant l’installation. S’il y a des dommages ou des pièces manquantes, ne pas procéder à... -
Page 26: Suivre Ces Lignes Directrices Lors De L'installation De Conduits
Préinstallation (suite) SUIVRE CES LIGNES DIRECTRICES LORS DE L’INSTALLATION DE CONDUITS : - Votre système de ventilation doit évacuer à l’extérieur, soit horizontalement à travers le mur arrière (13) ou verticalement à travers le toit (14) (Voir la Fig . 5/Fig . 6/Fig . 7); - Utiliser des conduits ronds en métal d’un diamètre uniforme de 6 po. -
Page 27: Exigences Pour Connexions Du Câblage
Préinstallation (suite) EXIGENCES POUR CONNEXIONS DU CÂBLAGE DANGER : Risque de choc électrique . La hotte doit être Les travaux d’installation et le câblage électrique doivent être effectués mise en terre adéquatement . par une personne qualifiée et en conformité avec tous les codes et normes applicables, y compris la résistance au feu . -
Page 28: Installation
Installation AVERTISSEMENT : L’ÉVACUATION DES GAZ D’UN APPAREIL DE CUISSON ALIMENTÉ PAR UN COMBUSTIBLE (GAZ) DOIT ÊTRE FAITE VERS L’EXTÉRIEUR EN UTILISANT AU MOINS UN CONDUIT MÉTALLIQUE ET UNE HOTTE D’UNE CAPACITÉ SUFFISANTE . Respectez les directives du fabricant de votre appareil de cuisson, de même que toutes les normes de sécurité... -
Page 29: Installation Du Filtre À Charbon
Installation Installation (suite) INSTALLATION DU FILTRE À CHARBON (SAUTER CETTE ÉTAPE SI VOUS AVEZ CHOISI L’OPTION DE VENTILATION PAR L’EXTÉRIEUR) REMARQUE : Le filtre de charbon devrait être utilisé seulement si vous n’utilisez pas la ventilation extérieure. - Tourner la hotte (A) à l’envers et la placer sur un revêtement protecteur . - Décrocher le support de filtre à... -
Page 30: Installation (Suite)
Installation (suite) INSTALLATION DE LA HOTTE DE CUISINE DANGER: Éteignez le disjoncteur électrique ou l’interrupteur d’alimentation sur la boîte de jonction avant d’installer cet appareil . Toucher un circuit intérieur de la hotte alors qu’il est sous tension peut entraîner des blessures graves, voir mortelles . DANGER: Pour l’installation au-dessus d’une cuisinière à... -
Page 31: Fonctionnement
Fonctionnement REMARQUE : Le ventilateur et les lumières sont gérés indépendamment les uns des autres. MISE EN MARCHE/ARRÊT DE L’UNITÉ ALLUMER/FERMER LA LUMIÈRE - Pour mettre le ventilateur en fonction, appuyer sur le - Appuyer sur le bouton d’éclairage (5) pour éteindre les lumières. -
Page 32: Entretien
Entretien REMPLACEMENT DES FILTRES DANGER: Éteignez le disjoncteur électrique ou l’interrupteur d’alimentation sur la boîte de jonction avant Lorsque les filtres doivent être remplacés, changez les par d’installer cet appareil . Toucher un circuit intérieur de la hotte alors qu’il est sous tension peut entraîner des des filtres similaires qui ont des clips en acier inoxydable. -
Page 33: Soin Et Nettoyage
Soin et nettoyage HOTTE DE CUISINE AVERTISSEMENT : Le fait de ne pas faire les tâches de soin et de nettoyage de la hotte de cuisine peut accroître le risque d’incendie . La hotte de cuisine doit être nettoyée régulièrement (à l’intérieur et à l’extérieur) afin de préserver son apparence et son fonctionnement. À... -
Page 34: Dépannage
Dépannage DANGER: Éteignez le disjoncteur électrique ou l’interrupteur d’alimentation sur la boîte de jonction avant de réparer cet appareil . Toucher un circuit intérieur de la hotte alors qu’il est sous tension peut entraîner des blessures graves, voire mortelles . Problème Solution - Vérifier que le câble d’alimentation et tout le câblage électrique soient... -
Page 35: Caractéristiques
Caractéristiques Type de Puissance d’ampoule Modèle Dimensions Puissance Vitesses Option de ventilation contrôle électrique 29,8 po (756 mm) L Haute DEL ou JDR16, GU10 Ventilation par le haut 120~60Hz Bouton- halogène avec base à Ventilation par l’arrière QR052 18 po (457 mm) P 280 ±... -
Page 36: Caractéristiques (Suite)
Caractéristiques (suite) SCHÉMA EXTERNE DE LA HOTTE DE CUISINE HAUT 27,75 po. (705 mm) 9,81 po. (250 mm) 0,88 po. 1,1 po. (28 mm) (22 mm) D 1,5 po. (38 mm) 3,13 po. (80 mm) 7,62 po. (193,5 mm) 0,69 po. (18 mm) 11 po. -
Page 37: Pièces De Rechange
Pièces de rechange Si des pièces sont manquantes ou si vous avez besoin de pièces de rechange, veuillez nous contacter au 1-800-514-6729 (lundi au vendredi, 8h00 à 18h, HNE). Veuillez identifier les pièces nécessaires et ayez les codes à portée de main. Pièce Description Code Quantité... - Page 38 Questions, problems, missing pieces? Before returning to the store, please contact Customer Service from 8 am - 6 pm, EST, Monday - Friday Questions, problèmes, pièces manquantes? Avant de retourner au magasin, appelez le service à la clientèle Lundi au vendredi, 8h00 à 18h, H.N.E. 1-800-514-6729 HOMEDEPOT.COM Retain this manual for future use.