
Manuels Connexes pour Cameo Light EVOS W7

Sommaire des Matières pour Cameo Light EVOS W7
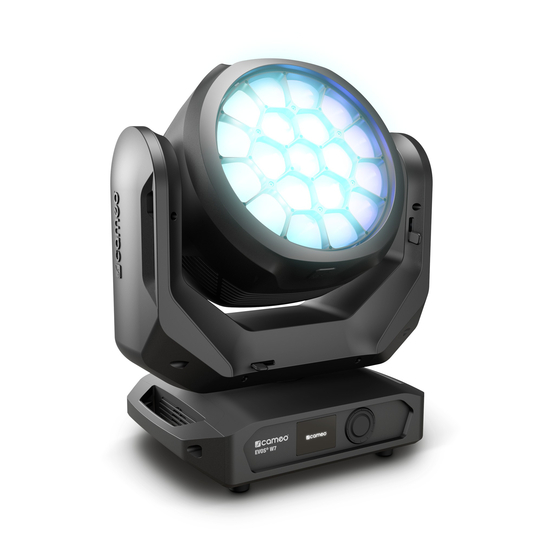
- Page 1 USER´S MANUAL BEDIENUNGSANLEITUNG MANUEL D´UTILISATION MANUAL DE USUARIO INSTRUKCJA OBSŁUGI MANUALE D´USO EVOS ® LED WASH-BEAM MOVING HEAD WITH SINGLE PIXEL CONTROL CLEW7...
-
Page 2: Table Des Matières
CONTENTS / INHALTSVERZEICHNIS / CONTENU / CONTENIDO / TREŚĆ / CONTENUTO ENGLISH ESPAÑOL SAFETY INFORMATION MEDIDAS DE SEGURIDAD INTRODUCTION INTRODUCCIÓN CONNECTIONS, OPERATING AND DISPLAY ELEMENTS CONEXIONES, ELEMENTOS DE MANDO Y VISUALIZACIÓN OPERATION FUNCIONAMIENTO W-DMX™ W-DMX™ W-DMX™ STATUS ESTADO W-DMX™ CONTROL MENU (CONTROL) MENÚ... -
Page 3: English
This device was developed and produced under the highest standards of quality in order to ensure smooth operation for many years. Please read these operating instructions carefully so that you can use your new Cameo Light product quickly and optimally. You can find more information on Cameo Light on our website WWW.CAMEOLIGHT.COM. -
Page 4: Introduction
36. The appliance is not to be used by persons (including children) with reduced physical, sensory or mental capabilities, or lack of experience and knowledge. 37. Children must be instructed not to play with the device. 38. If the power cord of the device is damaged, do not use the device. The power cord must be replaced by an adequate cable or assembly from an authorized service center. -
Page 5: Connections, Operating And Display Elements
CONNECTIONS, OPERATING AND DISPLAY ELEMENTS POWER IN: 100-240 V AC 50-60 Hz POWER CONSUMPTION: 900 W · WEIGHT: 19 KG FUSE T10AL / 250 V POWER IN DMX IN / OUT DMX IN / OUT POWER IN Neutrik powerCON TRUE1 mains input socket. Operating voltage 100–240 V AC/50–60Hz. A suitable mains cable with powerCON TRUE1 plug is included. -
Page 6: Operation
PAN LOCK Mechanical locking device used to prevent the rotation of the head in the horizontal direction during transport. Disconnect the unit from the mains, move the head parallel to the base (4 possible positions) and push the locking lever in the direction of the pan rotation axis to lock it in position. -
Page 7: W-Dmx
Mode Mode 87CH Slave Slave (Scene x) (Scene x) Operating mode Kling-Net + DMX Operating mode Art-Net / sACN + DMX W-DMX status Temperature of the LED unit W-DMX status Temperature of the LED unit 030°C 030°C 030°C 030°C 030°C Operating mode Operating mode 87CH... -
Page 8: Control Menu (Control)
030°C 030°C 030°C Mode: Art-Net (sACN) 87CH Mode: Art-Net (sACN)+DMX Mode: Klin CONTROL MENU (Control) Universe: Universe: Main Address: The control menu enables selection of the various operating modes and their setting options in the relevant sub-menus. DMX address, DMX 192.168.000.150 192.168.000.150 operating mode, universe, IP address and subnet mask are set in each operating mode for all operating modes, where relevant. - Page 9 Universe: Universe: Universe: Main Address: Main Address: 192.168.000.150 192.168.000.150 192.168.000.150 DMX Address: Main Address: Main Address: DMX OPERATION VIA W-DMX Pixel Address: Pixel Address: Starting from the main display, press the rotary-push encoder to enter the main menu. Select the Control menu by turning the encoder and 030°C 030°C pressing the encoder.
- Page 10 Art-Net Select by turning the encoder, confirm by pressing, change value or status by turning, confirm by pressing. Return with Address Setting the DMX start address 001–512 Channel mode Selecting the DMX mode 16CH / 18CH / 23CH / 33CH / 43CH / 87CH Network Network settings:...
- Page 11 Universe: Universe: Main Address: Settings Art-Net Art-Net sACN sACN 192.168.000.150 192.168.000.150 Info Art-Net+DMX Art-Net+DMX DMX Address: Main Address: sACN+DMX sACN+DMX OPERATION VIA SACN Service Kling-Net+DMX Kling-Net+DMX Pixel Address: Starting from the main display, press the rotary-push encoder to enter the main menu. Select the Control menu by turning the encoder and Slave Slave pressing the encoder.
- Page 12 Send to DMX The sACN control signal can be forwarded in the defined Disable universe to DMX OUT (sACN Current Universe to DMX), to W-DMX (sACN to (alternative to “User W-DMX) or to both (sACN to sACN to DMX Universe”) DMX and W-DMX).
- Page 13 Mode: Art-Net (sACN) 87CH Mode: Art-Net (sACN)+DMX Mode: Klin W-DMX W-DMX Universe: Universe: Main Address: Art-Net Art-Net sACN sACN 192.168.000.150 192.168.000.150 OPERATION VIA ART-NET AND DMX Art-Net+DMX Art-Net+DMX The operating mode Art-Net+DMX offers the possibility of controlling the LEDs and the head movement separately via Art-Net and DMX. DMX Address: Main Address: Here it is possible to select whether the LEDs are controlled via Art-Net and the head movement is controlled via DMX, or vice versa.
- Page 14 Mode: Art-Net (sACN) 87CH Mode: Art-Net (sACN)+DMX Mode: Klin W-DMX W-DMX Universe: Universe: Main Address: Art-Net Art-Net sACN sACN 192.168.000.150 192.168.000.150 OPERATION VIA SACN AND DMX Art-Net+DMX Art-Net+DMX The operating mode sACN+DMX offers the possibility of controlling the LEDs and the head movement separately via sACN and DMX. Here DMX Address: Main Address: it is possible to select whether the LEDs are controlled via sACN and the head movement is controlled via DMX, or vice versa.
- Page 15 Mode: Art-Net (sACN) 87CH Mode: Art-Net (sACN)+DMX Mode: Klin W-DMX W-DMX W-DMX Universe: Universe: Main Address: Art-Net Art-Net Art-Net sACN sACN sACN 192.168.000.150 192.168.000.150 Art-Net+DMX Art-Net+DMX Art-Net+DMX OPERATION VIA KLING-NET AND DMX DMX Address: Main Address: The operating mode Kling-Net+DMX offers the possibility of controlling the LEDs via Kling-Net and the head movement separately via DMX. sACN+DMX sACN+DMX sACN+DMX...
- Page 16 Mode: Art-Net (sACN) 87CH Mode: Art-Net (sACN)+DMX Mode: Klin W-DMX W-DMX Universe: Universe: Main Address: Art-Net Art-Net sACN sACN 192.168.000.150 192.168.000.150 Art-Net+DMX Art-Net+DMX SLAVE MODE (Slave) DMX Address: Main Address: Starting from the main display, press the rotary-push encoder to enter the main menu. Select the Control menu by turning the encoder and sACN+DMX sACN+DMX pressing the encoder.
- Page 17 W-DMX W-DMX Universe: Universe: Main Address: Art-Net Art-Net sACN sACN 192.168.000.150 192.168.000.150 Art-Net+DMX Art-Net+DMX STANDALONE OPERATION (Scenes) DMX Address: Main Address: sACN+DMX sACN+DMX Similar to when using a DMX control unit, the standalone operating mode Scenes makes it possible to set pan, tilt, dimmer, RGBW, zoom, Kling-Net+DMX Kling-Net+DMX Pixel Address:...
- Page 18 Edit Scene – 0% -> 100% Tilt – 0% -> 100% Dimmer – Master dimmer 0% -> 100% – 0% -> 100% Green – 0% -> 100% Blue – 0% -> 100% White – 0% -> 100% Zoom – Narrow ->...
-
Page 19: System Settings (Settings)
SYSTEM SETTINGS (settings) Starting from the main display, press the rotary-push encoder to enter the main menu. Turn the encoder to select the System Settings menu and press the encoder. Main Menu Settings Control Display Signal Fail Settings Dimmer Color Calibration Info Pan/Tilt Motors Fan Settings... - Page 20 Dimmer Selection of dimmer curve, Curve dimming behaviour and Linear Light intensity increases linearly with DMX value PWM frequency Exponential Light intensity can be finely adjusted at lower DMX values and broadly adjusted at higher DMX values Logarithmic Light intensity can be broadly adjusted at lower DMX values and finely adjusted at higher DMX values...
- Page 21 Main Menu Settings Auto Lock Automatic Control Display locking of the Signal Fail No Lock Deactivates automatic locking rotary-push Settings Dimmer encoder 60 Seconds Automatic locking of the rotary-push encoder after 60 seconds without input. Unlock: Keep encoder pressed for approx. 5 seconds Color Calibration Info Pan/Tilt Motors...
-
Page 22: Device Information (Info)
Temperature Settings Fan Speed Runtime Info RDM UID, MAC, NET SERVICE MENU (Service) DMX Values Service Starting from the main display, press the rotary-push encoder to enter the main menu. Select the Service menu by turning the encoder and Error Info pressing the encoder. -
Page 23: Quick-Light
Main Menu Settings Default Restore factory Control Display settings/save Recall and restore user Signal Fail settings Settings Factory Reset Dimmer Cancel restore factory settings Color Calibration Info Restore factory settings Pan/Tilt Motors Default 1 Fan Settings Service Auto Lock Cancel restore user settings 1... -
Page 24: Beam Shaper
Tilt Tilt adjustment 000–255 Dimmer Master dimmer 000–255 000–255 Saturation Saturation 000–255 Color Temperature Color temperature 000–255 Zoom Zoom setting 000–255 BEAM SHAPER The Beam Shaper is included in delivery and can optionally be screwed onto the lens unit to give the light cone an elliptical character. Place the Beam Shaper on the lens unit at one of six useful angles of rotation and screw it in place using a suitable tool and the four screws supplied. -
Page 25: Installation And Mountng
INSTALLATION AND MOUNTING Thanks to its integrated rubber feet, the lamp can be positioned in a suitable location on a level surface. Traverse installation can be achieved with the help of two Omega brackets, which are attached to the base of the device (A). 2 x Omega brackets are included. Suitable beam clamps are available as an option. -
Page 26: Technical Data
The Adam Hall 3 STAR, 4 STAR, and 5 STAR product ranges include an extensive selection of suitable cables. DMX CABLES When fabricating your own cables, always observe the illustrations on this page. Never connect the shielding of the cable to the ground contact of the plug, and always make certain that the shielding does not come into contact with the housing of the XLR plug. -
Page 27: Manufacturer´s Declarations
DMX functions: Pan/tilt, pan/tilt fine, dimmer, dimmer fine, strobe 0–20 Hz, zoom, zoom fine, single pixel control, pixel pattern, color presets (LEE filter) and motion macros, device settings Standalone functions: Scenes 1–8, Quick-Light Control: DMX512, RDM, Art-Net4, sACN, Kling-Net, W-DMX Pan angle: 540°... - Page 28 FCC STATEMENT This device complies with Part 15 of the FCC Rules. Operation is subject to the following two conditions: (1) This device may not cause harmful interference, and (2) This device must accept any interference received, including interference that may cause undesired operation CE Compliance Adam Hall GmbH states that this product meets the following guidelines (where applicable): R&TTE (1999/5/EC) or RED (2014/53/EU) from June 2017...
-
Page 29: Deutsch
Dieses Gerät wurde unter hohen Qualitätsanforderungen entwickelt und gefertigt, um viele Jahre einen reibungslosen Betrieb zu gewähr- leisten. Bitte lesen Sie diese Bedienungsanleitung sorgfältig, damit Sie Ihr neues Produkt von Cameo Light schnell und optimal einsetzen können. Weitere Informationen über Cameo Light erhalten Sie auf unserer Website WWW.CAMEOLIGHT.COM. - Page 30 (Staub, Nikotin, Nebel etc.) regelmäßig von qualifiziertem Fachpersonal gewartet bzw. gesäubert werden (keine Garantieleistung), um Überhitzung und Fehlfunktionen zu vermeiden. 34. Der Abstand zu brennbaren Materialien muss mindestens 0,5 m betragen. 35. Netzleitungen zur Spannungsversorgung mehrerer Geräte müssen mindestens 1,5 mm² Aderquerschnitt aufweisen. In der EU müssen die Leitungen H05VV-F, oder gleichartig, entsprechen.
-
Page 31: Einführung
EINFÜHRUNG MOVING HEAD EVOS® W7 CLEW7 STEUERUNGSFUNKTIONEN 16-Kanal, 18-Kanal, 23-Kanal, 33-Kanal, 43-Kanal und 87-Kanal DMX-Steuerung Art-Net4 sACN Kling-Net W-DMX™ RDM enabled Master / Slave Betrieb Standalone Funktionen EIGENSCHAFTEN 19 x 40 W RGBW LEDs. Zoomfunktion. Stroboskop. Pan und Tilt Motoren mit 16-Bit Auflösung. Automatische Positionskorrektur. Temperatur- gesteuerte Lüfter. - Page 32 EVOS ® LC-DISPLAY Das beleuchtete LC-Display zeigt die aktuell aktivierte Betriebsart (Hauptanzeige), die Menüpunkte im Auswahl-Menü und den Zahlenwert bzw. Betriebszustand in bestimmten Menüpunkten an. Erfolgt innerhalb circa einer Minute keine Eingabe, wechselt die Anzeige im Display automatisch zur Hauptanzeige. Hinweis zur Hauptanzeige in den Betriebsarten mit externer Steuerung: Sobald das Steuer-Signal unterbro- chen wird, beginnen die Zeichen im Display zu blinken, liegt das Steuer-Signal wieder an, stoppt das Blinken.
-
Page 33: Bedienung
BEDIENUNG ANMERKUNGEN 030°C 030°C Sobald der Scheinwerfer korrekt am Stromnetz angeschlossen ist, wird während des Startvorgangs nacheinander „Welcome to Cameo“, die Modellbezeichnung und die Softwareversion im Display angezeigt. Nach diesem Vorgang ist der Scheinwerfer betriebsbereit und startet in der Betriebsart, die zuvor aktiviert war. DISPLAY HAUPTANZEIGE 87CH Die Display Hauptanzeige zeigt in den verschiedenen Betriebsarten unterschiedliche, Betriebsart relevante Informationen an. -
Page 34: W-Dmx
W-DMX™ Zum Koppeln eines W-DMX Receivers (Empfänger) mit einem W-DMX kompatiblen Transmitter (Sender) muss im Menü des Receivers unter Connect der Befehl Reset augeführt werden (Reset auswählen und bestätigen). Der Receiver befindet sich nun in Koppelbereitschaft und wartet auf die Kopplungsanfrage eines Transmitters. Starten Sie die Kopplung, indem Sie im Menü des Transmitters Link auswählen und bestätigen, die Kopplung erfolgt nun automatisch. - Page 35 87CH Slave Slave (Scene x) (Scene x) Wireless Weiterleiten des DMX-Signals via W-DMX aktivieren (auswählen von G3 bzw. G4s) bzw. deaktivieren (Disable), einstellen des W-DMX Standards Send Mode (G3/G4s) und eine Verbindung mit einem weiteren W-DMX Gerät herstellen (Link) bzw. lösen (Unlink). 030°C 030°C 030°C...
- Page 36 Universe: Universe: Main Address: Settings Art-Net sACN 192.168.000.150 192.168.000.150 Info Art-Net+DMX DMX Address: Main Address: sACN+DMX BETRIEB VIA ART-NET Service Kling-Net+DM Pixel Address: Ausgehend von der Hauptanzeige gelangen Sie durch Drücken auf den Dreh-Drück-Encoder in das Hauptmenü. Wählen Sie durch Drehen Slave des Encoders das Kontrollmenü...
- Page 37 87CH Slave (Scene x) Das Art-Net Steuersignal kann User Universe in einem beliebigen Universum (alternativ zu Select Universe 000 – 254 von 000 bis 254 (Select „Current Universe“) 030°C 030°C 030°C 030°C 030°C Universe) an DMX OUT (Art-Net Sending Options ...
- Page 38 Send to DMX Das sACN Steuersignal kann im definierten Universum an DMX Disable OUT (sACN to DMX), an W-DMX (sACN to W-DMX) oder an beides Current Universe weitergeleitet werden (sACN to (alternativ zu sACN to DMX DMX and W-DMX). Die Funktion „User Universe“) wird mit „Disable"...
- Page 39 Mode: Art-Net (sACN) 87CH Mode: Art-Net (sACN)+DMX Mode: Klin W-DMX W-DMX Universe: Universe: Main Address: Art-Net Art-Net sACN sACN 192.168.000.150 192.168.000.150 BETRIEB VIA ART-NET UND DMX Art-Net+DMX Art-Net+DMX Die Betriebsart Art-Net+DMX bietet die Möglichkeit, die LEDs und die Kopfbewegung separat über Art-Net und DMX zu steuern. Hierbei kann DMX Address: Main Address: ausgewählt werden, ob die Steuerung der LEDs über Art-Net und die Steuerung der Kopfbewegung über DMX geschieht, oder umgekehrt.
- Page 40 Mode: Art-Net (sACN) 87CH Mode: Art-Net (sACN)+DMX Mode: Klin W-DMX W-DMX Universe: Universe: Main Address: Art-Net Art-Net sACN sACN 192.168.000.150 192.168.000.150 BETRIEB VIA SACN UND DMX Art-Net+DMX Art-Net+DMX Die Betriebsart sACN+DMX bietet die Möglichkeit, die LEDs und die Kopfbewegung separat über sACN und DMX zu steuern. Hierbei kann DMX Address: Main Address: ausgewählt werden, ob die Steuerung der LEDs über sACN und die Steuerung der Kopfbewegung über DMX geschieht, oder umgekehrt.
- Page 41 Mode: Art-Net (sACN) 87CH Mode: Art-Net (sACN)+DMX Mode: Klin W-DMX W-DMX W-DMX Universe: Universe: Main Address: Art-Net Art-Net Art-Net sACN sACN sACN 192.168.000.150 192.168.000.150 Art-Net+DMX Art-Net+DMX Art-Net+DMX BETRIEB VIA KLING-NET UND DMX DMX Address: Main Address: Die Betriebsart Kling-Net+DMX bietet die Möglichkeit, die LEDs über Kling-Net und die Kopfbewegung separat über DMX zu steuern. Beim sACN+DMX sACN+DMX sACN+DMX...
- Page 42 Mode: Art-Net (sACN) 87CH Mode: Art-Net (sACN)+DMX Mode: Klin W-DMX W-DMX Universe: Universe: Main Address: Art-Net Art-Net sACN sACN 192.168.000.150 192.168.000.150 Art-Net+DMX Art-Net+DMX SLAVE-BETRIEB (Slave) DMX Address: Main Address: Ausgehend von der Hauptanzeige gelangen Sie durch Drücken auf den Dreh-Drück-Encoder in das Hauptmenü. Wählen Sie durch Drehen sACN+DMX sACN+DMX des Encoders das Kontrollmenü...
- Page 43 Mode: Art-Net (sACN) 87CH Mode: Art-Net (sACN)+DMX Mode: Klin W-DMX W-DMX Universe: Universe: Main Address: Art-Net Art-Net sACN sACN 192.168.000.150 192.168.000.150 STAND-ALONE-BETRIEB (Scenes) Art-Net+DMX Art-Net+DMX Der Stand-Alone-Betrieb Scenes ermöglicht es, ähnlich wie mit einem DMX-Steuergerät, Pan, Tilt, Dimmer, RGBW, Zoom, Pan/Tilt Makros DMX Address: Main Address: usw.
- Page 44 Copy to Slave Szene 1 bis 8 via XLR-Kabel an eine oder mehrere Slave-Einheiten übertragen (gleiches Modell, gleicher Softwarestand). Vorgang durchführen mit Yes. Der Szenen-Speicher der Slave-Einheiten wird dabei über- schrieben. Vorgang abbrechen mit No. Edit Scene 0 % -> 100 % Tilt 0 % ->...
-
Page 45: Systemeinstellungen (Einstellungen)
SYSTEMEINSTELLUNGEN (Settings) Ausgehend von der Hauptanzeige gelangen Sie durch Drücken auf den Dreh-Drück-Encoder in das Hauptmenü. Wählen Sie durch Drehen des Encoders das Menü für die Systemeinstellungen Settings aus und drücken auf den Encoder. Main Menu Settings Control Display Signal Fail Settings Dimmer Color Calibration... - Page 46 Dimmer Auswählen von Dimmerkurve, Curve Dimmverhalten und PWM-Fre- Linear Die Lichtintensität steigt linear mit dem DMX- quenz Wert an Exponential Die Lichtintensität lässt sich im unteren DMX-Wertbereich fein und im oberen DMX-Wert- bereich grob einstellen Logarithmic Die Lichtintensität lässt sich im unteren DMX-Wertbereich grob und im oberen DMX-Wertbereich fein einstellen S-Curve...
-
Page 47: Gerätsinformationen (Info)
Fan Set- Lüftersteuerung tings Automatic Die Lüfterdrehzahl wird der Temperatur im Gerätekopf automatisch angepasst Normal Reduzierte Maximaldrehzahl der Lüfter, dadurch leicht reduzierte Helligkeit, falls erforderlich Main Menu Silent Gleichbleibend niedrige Lüfterdrehzahl bei reduzierter Helligkeit, falls erfor- Settings derlich Auto Lock Automatische ... -
Page 48: Servicemenü (Service)
Temperature Settings Fan Speed Runtime Info RDM UID, MAC, NET SERVICEMENÜ (Service) DMX Values Service Ausgehend von der Hauptanzeige gelangen Sie durch Drücken auf den Dreh-Drück-Encoder in das Hauptmenü. Wählen Sie durch Drehen Error Info des Encoders das Servicemenü Service aus und drücken auf den Encoder. Wählen Sie den gewünschten Untermenüpunkt durch Drehen Quick-Light DMX Tables des Encoders aus und bestätigen durch Drücken auf den Encoder. - Page 49 Default Werkseinstellun- gen wiederher- Recall stellen / Benut- zereinstellungen Factory Reset speichern und wiederherstellen Werkseinstellungen wiederherstellen abbrechen Werkseinstellungen wiederherstellen Default 1 Benutzereinstellungen 1 wiederher- stellen abbrechen Benutzereinstellungen 1 wiederher- stellen Default 2 Benutzereinstellungen 2 wiederher- stellen abbrechen Benutzereinstellungen 2 wiederher- stellen...
-
Page 50: Quick Light
Test Settings Password Info QUICK-LIGHT Service Um schnell und unkompliziert eine statische Szene einzustellen, nutzen Sie die Funktion Quick-Light. Ausgehend von der Hauptanzeige gelangen Sie durch Drücken auf den Dreh-Drück-Encoder in das Hauptmenü. Wählen Sie durch Drehen des Encoders das Quick Light-Menü Quick-Light Quick-Light aus und drücken abermals auf den Encoder. -
Page 51: Aufstellung Und Montage
AUFSTELLUNG UND MONTAGE Dank der integrierten Gummifüße kann der Scheinwerfer an einer geeigneten Stelle auf eine ebene Fläche gestellt werden. Die Montage an einer Traverse erfolgt mit Hilfe zweier Omega-Bügel, die an der Gerätebasis befestigt werden (A). Zwei Omega-Bügel sind im Lieferumfang enthalten, geeignete Traversenklemmen sind optional erhältlich. -
Page 52: Technische Daten
Eine umfangreiche Auswahl geeigneter DMX-Kabel finden Sie in den Adam Hall Produktlinien 3 STAR, 4 STAR und 5 STAR. DMX-KABEL: Beachten Sie bei der Anfertigung eigener Kabel unbedingt die Abbildungen auf dieser Seite. Verbinden Sie auf keinen Fall die Abschirmung des Kabels mit dem Massekontakt des Steckers, und achten Sie darauf, dass die Abschirmung nicht mit dem XLR-Steckergehäuse in Kontakt kommt. - Page 53 DMX Funktionen: Pan/Tilt, Pan/Tilt fein, Dimmer, Dimmer fein, Stroboskop 0 – 20 Hz, Zoom, Zoom fein, Einzel pixel Ansteuerung, Pixel Pattern, Farbpresets (LEE Filter) und Bewegungsmakro, Geräteeinstellungen Stand-Alone Funktionen: Szenen 1 – 8, Quick-Light Steuerung: DMX512, RDM, Art-Net4, sACN, Kling-Net, W-DMX Pan Winkel: 540°...
-
Page 54: Herstellererklärungen
HERSTELLERERKLÄRUNGEN HERSTELLERGARANTIE & HAFTUNGSBESCHRÄNKUNG Unsere aktuellen Garantiebedingungen und Haftungsbeschränkung finden Sie unter: https://cdn-shop.adamhall.com/media/pdf/ MANUFACTURERS-DECLARATIONS_CAMEO.pdf. Im Service Fall wenden Sie sich bitte an Adam Hall GmbH, Adam-Hall-Str. 1, 61267 Neu Anspach / E-Mail Info@adamhall.com / +49 (0)6081 / 9419-0. KORREKTE ENTSORGUNG DIESES PRODUKTS (Gültig in der Europäischen Union und anderen europäischen Ländern mit Mülltrennung) Dieses Symbol auf dem Produkt oder dazugehörigen Dokumenten weist darauf hin, dass das Gerät am Ende der Produktlebenszeit nicht zusammen mit dem normalen Hausmüll entsorgt werden darf, um Umwelt- oder Personenschäden durch unkontrollierte Abfallentsorgung zu vermeiden. -
Page 55: Francais
Cet appareil a été développé et fabriqué en appliquant des exigences de qualité très élevées: il garantit des années de fonctionnement sans problème.Veuillez lire attentivement ce Manuel Utilisateur : vous apprendrez rapidement à utiliser votre appareil Cameo Light de façon optimale. - Page 56 34. Respectez une distance minimale de 0,5m par rapport à des matériaux inflammables. 35. Si vous désirez alimenter plusieurs projecteurs simultanément, les conducteurs du câble secteur doivent posséder une section minimale de 1,5 mm². Dans l’Union Européenne, les câbles électriques doivent être de type H05VV-F ou équivalent. Adam Hall propose des câbles secteur adaptés.
-
Page 57: Introduction
INTRODUCTION LYRE EVOS® W7 CLEW7 FONCTIONS DE PILOTAGE Pilotage DMX sur 16 canaux, 18 canaux, 23 canaux, 33 canaux, 43 canaux et 87 canaux Art-Net4 sACN Kling-Net W-DMX™ Compatible RDM Mode Master/Slave Fonctions Standalone CARACTÉRISTIQUES 19 LED RGBW 40 W. Fonction zoom. Stroboscope. Moteurs des axes Pan et Tilt dotés d’une résolution de 16 bits. Correction automatique de la position. - Page 58 EVOS ® ÉCRAN LCD L’écran LCD rétroéclairé affiche le mode de fonctionnement actuellement activé (affichage principal), les options du menu de sélection et la valeur numérique ou l’état de fonctionnement dans certaines options de menu. Au bout d’environ une minute d’inactivité, l’écran principal s’affiche automatiquement.
-
Page 59: Utilisation
UTILISATION REMARQUES 030°C 030°C Dès que le projecteur est correctement raccordé à l’alimentation secteur, un message de bienvenue (« Welcome to Cameo »), la désignation du modèle et la version du logiciel s’affichent successivement à l’écran pendant la phase de démarrage. À l’issue de cette phase, le project- eur est opérationnel et passe au mode précédemment activé. -
Page 60: W-Dmx
W-DMX™ Pour coupler un récepteur W-DMX à un émetteur compatible W-DMX, il est nécessaire d’exécuter la commande Reset dans le menu du récepteur sous Connect (sélectionner Reset et valider). Le récepteur est maintenant prêt pour le couplage et attend la demande de couplage d’un émetteur. - Page 61 (Scene x) (Scene x) Wireless Activer (sélection de G3 ou G4s) ou désactiver (Disable) le renvoi du signal DMX via W-DMX, régler la norme W-DMX (G3 / G4s) et établir Send Mode 030°C 030°C 030°C 030°C 030°C (Link) ou couper (Unlink) une liaison avec un autre appareil W-DMX. Mode: Art-Net Mode: Art-Net (sACN)+DMX...
- Page 62 Universe: Universe: Main Address: Settings Art-Net sACN 192.168.000.150 192.168.000.150 Info Art-Net+DMX DMX Address: Main Address: sACN+DMX FONCTIONNEMENT VIA ART-NET Service Kling-Net+DM Pixel Address: À partir de l’affichage principal, appuyer sur l’encodeur rotatif à bouton poussoir pour accéder au menu principal. Tourner l’encodeur pour Slave sélectionner le panneau de commande Control, puis appuyer sur l’encodeur.
- Page 63 87CH Slave (Scene x) Le signal de pilotage Art-Net User Universe peut être renvoyé à DMX OUT (alternative à Select Universe 000 - 254 (Art-Net to DMX), à W-DMX « Current Universe ») 030°C 030°C 030°C 030°C 030°C (Art-Net to W-DMX) ou aux deux Sending Options ...
- Page 64 Send to DMX Le signal de pilotage sACN peut être renvoyé à DMX OUT Disable (sACN to DMX), à W-DMX (sACN Current Universe to W-DMX) ou aux deux (sACN (alternative à « User to DMX and W-DMX) dans sACN to DMX Universe ») l’univers défini.
- Page 65 Mode: Art-Net (sACN) 87CH Mode: Art-Net (sACN)+DMX Mode: Kling W-DMX W-DMX Universe: Universe: Main Address: Art-Net Art-Net sACN sACN 192.168.000.150 192.168.000.150 FONCTIONNEMENT VIA ART-NET ET DMX Art-Net+DMX Art-Net+DMX Le mode de fonctionnement Art-Net+DMX offre la possibilité de piloter séparément les LED et le mouvement de la tête via Art-Net et DMX. DMX Address: Main Address: Il est alors possible de choisir de piloter les LED par Art-Net et le mouvement de la tête par DMX, ou inversement.
- Page 66 Mode: Art-Net (sACN) 87CH Mode: Art-Net (sACN)+DMX Mode: Klin W-DMX W-DMX Universe: Universe: Main Address: Art-Net Art-Net sACN sACN 192.168.000.150 192.168.000.150 FONCTIONNEMENT VIA SACN ET DMX Art-Net+DMX Art-Net+DMX Le mode de fonctionnement sACN+DMX offre la possibilité de piloter séparément les LED et le mouvement de la tête via sACN et DMX. Il est DMX Address: Main Address: alors possible de choisir de piloter les LED par sACN et le mouvement de la tête par DMX, ou inversement.
- Page 67 Pixel Address: Main Menu Control Network Settings Réglages réseau : 030°C 030°C Adresse IP : régler le 1er bloc, valider, régler le 2e bloc, valider... IP Address xxx.xxx.xxx.xxx Masque de sous-réseau : régler le 1er bloc, valider, régler le 2e bloc, Control valider...
- Page 68 Mode Art-Net Art-Net sACN 87CH sACN Slave Art-Net+DMX Art-Net+DMX (Scene x) sACN+DMX sACN+DMX Kling-Net+DMX Kling-Net+DMX DMX Settings Pilotage DMX via un câble (XLR Only) ou W-DMX (Wireless Only). En cas de Slave Slave sélection de « XLR First », W-DMX sert de solution de secours ; en cas de Receive Mode ...
- Page 69 Mode: Art-Net (sACN) 87CH Mode: Art-Net (sACN)+DMX Mode: Klin W-DMX W-DMX Universe: Universe: Main Address: Art-Net Art-Net sACN sACN 192.168.000.150 192.168.000.150 FONCTIONNEMENT STANDALONE (Scenes) Art-Net+DMX Art-Net+DMX De façon similaire à un dispositif de pilotage DMX, le fonctionnement Standalone permet de régler directement sur l’appareil les fonctions DMX Address: Main Address: Pan, Tilt, Dimmer, RGBW, Zoom, les macros Pan/Tilt, etc., avec des valeurs comprises entre 000 et 255.
- Page 70 Envoyer la scène en tant que signal de pilotage (Stand Stand Alone Alone No) Ne pas envoyer la scène en tant que signal de pilotage (Stand Alone Yes) Copy to Slave Transmettre la scène 1 à 8 via un câble XLR à une ou ...
-
Page 71: Paramètres Du Système (Settings)
Pan/Tilt Macro (starts from current Pan/Tilt position) Pan, small -> large Tilt, small -> large Pan / Tilt, small -> large Pan / Tilt, invers small -> large Circle, small -> large Circle, invers small -> large Random, small -> large Pan/Tilt Speed Pan movement speed, fast ->... - Page 72 Dimmer Sélection de la courbe de dimmer, Curve du comportement de variateur et de la Linear L’intensité lumineuse augmente de façon linéaire fréquence du signal avec la valeur DMX Exponential L’intensité lumineuse peut être réglée de façon précise dans la plage de valeurs DMX inférieure et de façon approximative dans la plage de valeurs DMX supérieure Logarithmic...
-
Page 73: Informations Sur L'appareil (Info)
Pan/Tilt Réglages de la tête Motors de l’appareil Pan/Tilt Speed 000 - 255 Pan Reverse Normal Pas d’inversion de la direction du mouvement de l’axe Pan Reversed Inversion de la direction du mouvement de l’axe Pan Tilt Reverse ... -
Page 74: Menu De Service (Service)
Main Menu Settings Info Control Display Tourner l’encodeur pour sélectionner, appuyer pour valider, revenir en arrière avec Signal Fail Settings Dimmer Color Calibration Firmware Info Affichage du firmware des composants de l’appareil Pan/Tilt Motors Temperature Affichage de la température de l’unité à LED (LED), de la tête de l’appareil (Head) et de la base de Fan Settings Service l’appareil (Base) en degrés Celsius et Fahrenheit... -
Page 75: Quick Light
Default Restaurer les réglag- es d’usine / enregis- Recall trer et restaurer les réglages utilisateur Factory Reset Main Menu Settings Annuler la restauration des réglages d’usine Control Display Restaurer les réglages d’usine Signal Fail Default 1 Settings Dimmer Annuler la restauration des réglages... -
Page 76: Beam Shaper
Quick-Light Tourner l’encodeur pour sélectionner, appuyer pour valider, revenir en arrière avec Réglage Pan 000 - 255 Tilt Réglage Tilt 000 - 255 Dimmer Master Dimmer 000 - 255 Teinte 000 - 255 Saturation Saturation 000 - 255 Color Temperature Température chromatique 000 - 255... -
Page 77: Installation Et Montage
INSTALLATION ET MONTAGE Grâce aux pieds en caoutchouc intégrés, le projecteur peut être placé à un endroit approprié sur une surface plane. Le montage sur traverse s’effectue à l’aide de deux omégas de fixation à installer sur la base de l’appareil (A). Deux omégas de fixation sont fournis, des pinces de serrage sur traverse adaptées sont disponibles en option. -
Page 78: Caractéristiques Techniques
Vous trouverez un choix complet de câbles compatibles DMX dans les gammes Adam Hall 3 STAR, 4 STAR et 5 STAR. Si vous fabriquez vous-mêmes vos câbles, respectez les modalités de câblage DMX. En particulier : Ne reliez jamais le blindage du câble à... -
Page 79: Déclarations
Pilotage : DMX512, RDM, Art-Net4, sACN, Kling-Net, W-DMX Angle Pan : 540° Angle Tilt : 270° Éléments de commande : Encodeur rotatif à bouton poussoir Éléments d’affichage : Écran LCD rétroéclairé, alimentation par batterie pour un paramétrage du système indépendant du réseau électrique (batterie à recharge automatique) Tension de fonctionnement : 100 - 240 V CA / 50 - 60 Hz Puissance absorbée :... - Page 80 Conformité CE La société Adam Hall GmbH déclare par la présente que ce produit est compatible avec les régulations suivantes (le cas échéant) : R&TTE (1999/5/EG) et RED (2014/53/EU) à partir de juin 2017 Directive basse tension (2014/35/EU) Directive CEM (2014/30/EU) RoHS (2011/65/EU) La Déclaration de Conformité...
-
Page 81: Español
Este equipo está diseñado y fabricado con los estándares de calidad más exigentes, para garantizar un correcto funcionamiento durante muchos años.Lea atentamente este manual de usuario para poder aprovechar rápidamente toda la funcionalidad de su nuevo producto de Cameo Light. Más información sobre Cameo Light en la web WWW.CAMEOLIGHT.COM. MEDIDAS DE SEGURIDAD 1. - Page 82 (polvo, nicotina, niebla, etc.), deberá realizarse periódicamente el mantenimiento o la limpieza del equipo por personal especializado, para evitar cualquier sobrecalentamiento o fallo de funcionamiento (mantenimiento y limpieza no cubiertos por la garantía). 34. Asimismo, deberá dejarse una distancia mínima de 0,5 metros con cualquier material inflamable. 35.
-
Page 83: Introducción
INTRODUCCIÓN CABEZA MÓVIL EVOS® W7 CLEW7 MODOS DE CONTROL Control DMX de 16 canales, 18 canales, 23 canales, 33 canales, 43 canales y 87 canales Art-Net4 sACN Kling-Net W-DMX™ Habilitado para RDM Modo maestro/esclavo Funciones autónomas CARACTERÍSTICAS 19 LED RGBW de 40 W. Función de zoom. Estrobo. Motores de giro horizontal y vertical con resolución de 16 bits. Corrección automática de la posición. - Page 84 EVOS ® PANTALLA LCD La pantalla LCD retroiluminada muestra el modo operativo activado actualmente (pantalla principal), las opciones del menú de selección y el valor numérico o el estado operativo en determinadas opciones del menú. Si durante aproximadamente un minuto no se detecta ninguna actividad, la indicación en pantalla cambia automáticamente a la pantalla principal.
-
Page 85: Funcionamiento
FUNCIONAMIENTO OBSERVACIONES 030°C 030°C En cuanto el foco esté correctamente conectado a la red eléctrica, durante el proceso de arranque se mostrarán de forma consecutiva en pantalla el mensaje «Welcome to Cameo» (Bienvenidos a Cameo), así como la denominación de modelo y la versión del software. Tras este procedimiento, el foco estará... -
Page 86: W-Dmx
W-DMX™ Para emparejar un receptor W-DMX a un transmisor W-DMX compatible, es necesario ejecutar el comando Reset en la opción Connect del menú del receptor (seleccione Reset y confirme). Ahora el receptor está listo para el emparejamiento y a la espera de la solicitud de emparejamiento de un transmisor. - Page 87 (Scene x) (Scene x) Wireless Activar la transmisión de la señal DMX a través de W-DMX (selección de G3 o G4s) o desactivarla (Disable), ajuste del estándar W-DMX (G3/ Send Mode 030°C 030°C 030°C 030°C 030°C G4s) y establecer (Link) o interrumpir (Unlink) una conexión con otro equipo W-DMX.
- Page 88 Universe: Universe: Main Address: Settings Art-Net sACN 192.168.000.150 192.168.000.150 Info Art-Net+DMX DMX Address: Main Address: sACN+DMX FUNCIONAMIENTO MEDIANTE ART-NET Service Kling-Net+DM Pixel Address: Partiendo de la pantalla principal, si pulsa el mando giratorio y pulsable accederá al menú principal. Gire el mando giratorio para seleccionar Slave el menú...
- Page 89 87CH Slave (Scene x) La señal de control de Art-Net User Universe se puede transmitir en el (alternativa a Select Universe 000 - 254 universo deseado entre 000 y "Current Universe") 030°C 030°C 030°C 030°C 030°C 254 (Select Universe) a DMX Sending Options ...
- Page 90 Send to DMX La señal de control de sACN se puede transmitir en el universo Disable definido a DMX OUT (sACN Current Universe to DMX), a W-DMX (sACN to (alternativa a "User W-DMX) o a ambos (sACN to sACN to DMX Universe") DMX and W-DMX).
- Page 91 Mode: Art-Net (sACN) 87CH Mode: Art-Net (sACN)+DMX Mode: Klin W-DMX W-DMX Universe: Universe: Main Address: Art-Net Art-Net sACN sACN 192.168.000.150 192.168.000.150 FUNCIONAMIENTO MEDIANTE ART-NET Y DMX Art-Net+DMX Art-Net+DMX El modo operativo Art-Net+DMX ofrece la posibilidad de controlar los LED y el movimiento de la cabeza por separado a través de Art-Net DMX Address: Main Address: y DMX.
- Page 92 Control W-DMX Mode Settings Art-Net 87CH Slave sACN Info Art-Net+DMX DMX Settings Control DMX mediante cable XLR (XLR Only) o W-DMX (Wireless Only). Si se (Scene x) selecciona "XLR First", se utiliza W-DMX como respaldo; si se selecciona sACN+DMX "Wireless First", se utiliza el control por cable XLR como respaldo.
- Page 93 Main Menu Control 030°C 030°C Control Network Settings Ajustes de red: W-DMX W-DMX Mode Dirección IP: 1. Ajustar bloque, confirmar, 2. Ajustar bloque, confirmar… Settings Art-Net Art-Net IP Address xxx.xxx.xxx.xxx Máscara de subred: 1. Ajustar bloque, confirmar, 2. Ajustar bloque, sACN sACN 87CH...
- Page 94 Mode: Art-Net (sACN) 87CH Mode: Art-Net (sACN)+DMX Mode: Klin W-DMX W-DMX Universe: Universe: Main Address: Art-Net Art-Net sACN sACN 192.168.000.150 192.168.000.150 Art-Net+DMX Art-Net+DMX MODO ESCLAVO (Slave) DMX Address: Main Address: Partiendo de la pantalla principal, si pulsa el mando giratorio y pulsable accederá al menú principal. Gire el mando giratorio para seleccionar sACN+DMX sACN+DMX el menú...
- Page 95 Mode: Art-Net (sACN) 87CH Mode: Art-Net (sACN)+DMX Mode: Klin W-DMX W-DMX Universe: Universe: Main Address: Art-Net Art-Net sACN sACN 192.168.000.150 192.168.000.150 MODO AUTÓNOMO (Scenes) Art-Net+DMX Art-Net+DMX De forma similar a la configuración con un equipo de control DMX, el modo operativo autónomo permite ajustar las funciones de giro DMX Address: Main Address: horizontal, giro vertical, atenuador, RGBW, zoom, macros de giro horizontal y vertical, etc., directamente en el dispositivo, seleccionando...
- Page 96 Transmitir escena como señal de control (Stand Alone No) Stand Alone No transmitir escena como señal de control (Stand Alone Yes) Copy to Slave Transferir las escenas 1 a 8 por cable XLR a una o varias unidades esclavas (del mismo modelo y con la misma versión de software).
-
Page 97: Configuración Del Sistema (Settings)
CONFIGURACIÓN DEL SISTEMA (Settings) Partiendo de la pantalla principal, si pulsa el mando giratorio y pulsable accederá al menú principal. Gire el mando giratorio para seleccionar el menú de ajustes de sistema Settings y púlselo. Main Menu Settings Control Display Signal Fail Settings Dimmer... - Page 98 Dimmer Selección de la cur- va de atenuación, la Curve respuesta de atenu- ación y la frecuencia Linear La intensidad luminosa aumentará de forma lineal de modulación por con el valor DMX ancho de pulsos Exponential La intensidad luminosa permite un ajuste fino en el rango inferior de valores DMX y un ajuste aproximado en el rango superior de valores DMX Logarithmic...
-
Page 99: Información Del Equipo (Info)
Control de los Settings ventiladores Automatic La velocidad de los ventiladores se adapta automáticamente a la temperatura de la cabeza del equipo Normal Velocidad máxima reducida de los ventiladores, lo que reduce ligeramente el brillo, en caso necesario Main Menu Silent Se mantiene una velocidad baja de los ventiladores cuando el brillo es reduci- Settings... -
Page 100: Menú De Servicio (Servicio)
Temperature Settings Fan Speed Runtime Info RDM UID, MAC, NET MENÚ DE SERVICIO (Service) DMX Values Service Partiendo de la pantalla principal, si pulsa el mando giratorio y pulsable accederá al menú principal. Gire el mando giratorio para seleccionar Error Info el menú... -
Page 101: Quick-Light
Default Restablecer ajustes de fábrica / Guardar Recall y restablecer ajustes de usuario Factory Reset Interrumpir el restablecimiento de los Main Menu Settings ajustes de fábrica Restablecer los ajustes de fábrica Control Display Default 1 Signal Fail Settings Interrumpir el restablecimiento de los Dimmer... -
Page 102: Beam Shaper
Quick-Light Girar el mando giratorio para seleccionar, pulsar para confirmar, volver con Ajuste de giro horizontal 000 - 255 Tilt Ajuste de giro vertical 000 - 255 Dimmer Atenuador maestro 000 - 255 Color 000 - 255 Saturation Saturación 000 - 255 Color Temperature... -
Page 103: Instalación Y Montaje
INSTALACIÓN Y MONTAJE Gracias a los pies de goma integrados, el foco puede instalarse en un lugar adecuado sobre una superficie nivelada. El montaje en trave- saño se realiza fijando dos soportes de montaje Omega en la base del equipo (A). El volumen de suministro incluye dos soportes de montaje Omega;... -
Page 104: Datos Técnicos
CABLE DMX: Si fabrica sus propios cables, tenga en cuenta las figuras de esta página. No conecte la malla del cable al contacto de masa del conector ni permita que la malla entre en contacto con la carcasa del conector XLR. Si se produce un contacto de la malla con la masa, puede producir un funcionamiento inestable del equipo. -
Page 105: Declaraciones Del Fabricante
Control: DMX512, RDM, Art-Net4, sACN, Kling-Net, W-DMX Ángulo de giro horizontal: ±540° Ángulo de giro vertical: ±270° Elementos de manejo: Mando giratorio y pulsable Elementos de visualización: Pantalla LCD retroiluminada, alimentación con batería para poder configurar el sistema independientemente de la red eléctrica (recarga automática de la batería) Tensión operativa: 100-240 V CA / 50-60 Hz Consumo de potencia:... - Page 106 Conformidad CE Adam Hall GmbH declara por la presente que este producto es conforme con las siguientes directivas (según sea aplicable): R&TTE (1999/5/CE) o RED (2014/53/UE) a partir de junio de 2017 Directiva de baja tensión (2014/35/UE) Directiva EMC (2014/30/UE) RoHS (2011/65/UE) Puede consultar la declaración de conformidad completa en www.adamhall.com.
-
Page 107: Polski
To urządzenie zostało zaprojektowane i wyprodukowane przy zastosowaniu najwyższych kryteriów jakościowych w celu zapewnienia wieloletniej bezawaryjnej eksploatacji. Proszę starannie przeczytać niniejszą instrukcję obsługi, aby móc jak najszybciej zacząć użytkować ten produkt marki Cameo Light. Więcej informacji na temat Cameo Light znajdą Państwo na naszej stronie internetowej pod adresem WWW.CAMEOLIGHT.COM. - Page 108 32. Instalacja urządzenia powinna odbywać się, gdy urządzenie nie jest podłączone do źródła zasilania (należy wyjąć wtyczkę z gniazda). 33. Kurz i inne osady wewnątrz urządzenia mogą je uszkodzić. W zależności od warunków otoczenia (kurz, nikotyna, opary itp.) urządzenie powinno być konserwowane lub czyszczone przez wykwalifikowanego specjalistę (usługa nieobjęta gwarancją), aby zapobiec przegrzaniu i nieprawidłowemu działaniu.
-
Page 109: Wprowadzenie
WPROWADZENIE MOVING HEAD EVOS® W7 CLEW7 FUNKCJE STEROWANIA Sterowanie DMX 16-kanałowe, 18-kanałowe, 23-kanałowe, 33-kanałowe, 43-kanałowe i 87-kanałowe Art-Net4 sACN KlingNet W-DMX™ Możliwość pracy w standardzie RDM Tryb pracy master / slave Funkcje standalone CHARAKTERYSTYKA 19 diod LED RGBW, każda o mocy 40 W. Funkcja zoom. Stroboskop. Silniki do napędu obrotu w poziomie i pionie, rozdzielczość 16-bitowa. Automatyczna korekta pozycji. - Page 110 EVOS ® WYŚWIETLACZ LCD Podświetlany wyświetlacz LCD pokazuje bieżący tryb pracy (widok główny), pozycje z menu wyboru oraz wartość liczbową lub tryb pracy w poszczególnych pozycjach menu. Po ok. 1 minucie bezczynności wyświetlacz automatycznie wraca do widoku głównego. Wskazówka w widoku głównym w trybach pracy z zewnętrznym sterowaniem: Gdy sygnał...
-
Page 111: Obsługa
OBSŁUGA UWAGI 030°C 030°C Po prawidłowym podłączeniu reflektora do sieci zasilania podczas procesu uruchamiania jest wyświetlana następująca sekwencja komu- nikatów: „Welcome to Cameo”, nazwa modelu oraz wersja oprogramowania. Następnie reflektor jest gotowy do pracy i przełącza się na ostatnio wybrany tryb. WIDOK GŁÓWNY WYŚWIETLACZA 87CH Na głównym widoku wyświetlacza są... -
Page 112: W-Dmx
W-DMX™ Aby sparować odbiornik W-DMX z nadajnikiem zgodnym ze standardem W-DMX, należy w menu odbiornika w polu Connect wykonać polecenie Reset (wybrać opcję resetowania i potwierdzić). Odbiornik jest teraz w stanie gotowości do sparowania i czeka na żądanie z nadajnika. Rozpocząć parowanie, wybierając łącze w menu nadajnika i potwierdzić. Parowanie nastąpi teraz automatycznie. W ten sam sposób można sparować... - Page 113 (Scene x) (Scene x) Wireless Aktywowanie (wybór G3 lub G4s) lub dezaktywowanie (Disable) prze- kierowania sygnału DMX przez W-DMX, ustawianie standardu W-DMX Send Mode (G3/G4s) i nawiązywanie połączenia (Link) z innym urządzeniem 030°C 030°C 030°C 030°C 030°C W-DMX lub przerywanie go (Unlink). Mode: Art-Net Mode: Art-Net (sACN)+DMX...
- Page 114 Universe: Universe: Main Address: Settings Art-Net sACN 192.168.000.150 192.168.000.150 Info Art-Net+DMX DMX Address: Main Address: sACN+DMX TRYB PRACY PRZEZ ART-NET Service Kling-Net+DM Pixel Address: Jeśli wyświetlany jest ekran główny i naciśnięte zostanie pokrętło enkodera, nastąpi przejście do menu głównego. Wybrać menu sterowania, Slave obracając pokrętło enkodera Control, i nacisnąć...
- Page 115 87CH Slave (Scene x) Sygnał sterujący Art-Net User Universe może być przekazywany w (jako alternatywa Select Universe 000 - 254 zdefiniowanym środowisku od „Current Universe”) 030°C 030°C 030°C 030°C 030°C 000 do 254 (Select Universe) Sending Options do wyjścia DMX OUT (Art-Net Art-Net to DMX to DMX), do złącza W-DMX Mode: Art-Net...
- Page 116 Send to DMX Sygnał sterujący sACN może być przekazywany w Disable zdefiniowanym środowisku Current Universe do wyjścia DMX OUT (sACN to (jako alternatywa DMX), do złącza W-DMX (sACN sACN to DMX „User Universe”) to W-DMX) lub do obu (sACN sACN to DMX and ...
- Page 117 Mode: Art-Net (sACN) 87CH Mode: Art-Net (sACN)+DMX Mode: Klin W-DMX W-DMX Universe: Universe: Main Address: Art-Net Art-Net sACN sACN 192.168.000.150 192.168.000.150 TRYB PRACY PRZEZ ART-NET I DMX Art-Net+DMX Art-Net+DMX Tryb Art-Net+DMX oferuje możliwość sterowania diodami LED i ruchem głowicy oddzielnie przez Art-Net i DMX. Można wybrać, czy DMX Address: Main Address: diody LED mają...
- Page 118 Mode: Art-Net (sACN) 87CH Mode: Art-Net (sACN)+DMX Mode: Kling W-DMX W-DMX Universe: Universe: Main Address: Art-Net Art-Net sACN sACN 192.168.000.150 192.168.000.150 TRYB PRACY PRZEZ SACN I DMX Art-Net+DMX Art-Net+DMX Tryb sACN+DMX oferuje możliwość sterowania diodami LED i ruchem głowicy oddzielnie przez sACN i DMX. Można wybrać, czy diody LED DMX Address: Main Address: mają...
- Page 119 Mode: Art-Net (sACN) 87CH Mode: Art-Net (sACN)+DMX Mode: Klin W-DMX W-DMX W-DMX Universe: Universe: Main Address: Art-Net Art-Net Art-Net sACN sACN sACN 192.168.000.150 192.168.000.150 Art-Net+DMX Art-Net+DMX Art-Net+DMX TRYB PRACY PRZEZ KLINGNET I DMX DMX Address: Main Address: Tryb KlingNet+DMX oferuje możliwość sterowania diodami LED i ruchem głowicy oddzielnie przez KlingNet i DMX. Wybranie tego trybu sACN+DMX sACN+DMX sACN+DMX...
- Page 120 Mode: Art-Net (sACN) 87CH Mode: Art-Net (sACN)+DMX Mode: Klin Universe: Universe: W-DMX W-DMX Universe: Universe: Main Address: 192.168.000.150 Art-Net Art-Net sACN sACN 192.168.000.150 192.168.000.150 DMX Address: Main Address: Art-Net+DMX Art-Net+DMX TRYB SLAVE (Slave) DMX Address: Main Address: Jeśli wyświetlany jest ekran główny i naciśnięte zostanie pokrętło enkodera, nastąpi przejście do menu głównego. Wybrać menu sterowania, Pixel Address: sACN+DMX sACN+DMX...
- Page 121 Scenes Wybrać opcję przez obrócenie enkodera, potwierdzić przez naciśnięcie, zmienić wartość lub stan przez obrócenie oraz potwierdzić przez naciśnięcie. Powrót za pomocą Run Scene Uruchomienie sceny Scene 1–8 Record Scene Nagrywanie sceny z zewnętrznego sterownika. Scene 1–8 Edit Scene Edytowanie sceny (patrz tabela Edit Scene) ...
- Page 122 Pixel Pattern Pattern 1 (4 Dots CW ) Pattern 2 (Circle 2Step in > out) Pattern 3 (Circle 2Step Color Change in > out) Pattern 4 (Clock hand - CW) Pattern 5 (Ventilator - CW) Pattern 6 (Bow runs left > ) Pattern 7 (Bow runs down >) Pattern 8 (3-line to 2-line) Pattern 9 (diamond change)
-
Page 123: Ustawienia Systemu (Ustawienia)
USTAWIENIA SYSTEMU (Settings) Jeśli wyświetlany jest ekran główny i naciśnięte zostanie pokrętło enkodera, nastąpi przejście do menu głównego. Obrócić pokrętło enkode- ra, aby wybrać menu ustawień systemowych Settings, a następnie nacisnąć pokrętło. Main Menu Settings Control Display Signal Fail Settings Dimmer Color Calibration Info Pan/Tilt Motors... - Page 124 Dimmer Wybór krzywej ściemniania, Curve symulacji ściemni- ania i częstotliwości Linear Natężenie światła wzrasta liniowo wraz ze modulacji PWM wzrostem wartości DMX Exponential Natężenie światła można ustawić precyzyjnie w dolnym zakresie wartości DMX oraz ogólnie w górnym zakresie wartości DMX Logarithmic Natężenie światła można ustawić...
-
Page 125: Informacje Dotyczące Rozwoju (Info)
Sterowanie wentyl- Settings atorem Automatic Prędkość obrotowa wentylatora jest automatycznie dostosowywana do tem- peratury w głowicy urządzenia Normal Zredukowana maksymalna prędkość obrotowa wentylatora, co w razie potrze- by nieznacznie zmniejsza jasność Silent Stała mała prędkość obrotowa wentylatora przy obniżonej jasności, w razie Main Menu Settings potrzeby... -
Page 126: Menu Serwisowe (Service)
Temperature Settings Fan Speed Runtime Info RDM UID, MAC, NET MENU SERWISOWE (Service) DMX Values Service Jeśli wyświetlany jest ekran główny i naciśnięte zostanie pokrętło enkodera, nastąpi przejście do menu głównego. Wybrać menu serwisowe, Error Info obracając pokrętło enkodera Service, i nacisnąć enkoder. Wybrać żądaną pozycję menu podrzędnego, obracając pokrętło enkodera, i Quick-Light DMX Tables potwierdzić, naciskając je. -
Page 127: Quick-Light
Default Przywracanie ust- awień fabrycznych / Recall Zapisywanie i przy- wracanie ustawień Factory Reset użytkownika Anulowanie przywracania ustawień Main Menu Settings fabrycznych Przywracanie ustawień fabrycznych Control Display Default 1 Signal Fail Settings Anulowanie przywracania ustawień Dimmer użytkownika 1 Color Calibration Info... -
Page 128: Beam Shaper
Quick-Light Wybrać, obracając pokrętło enkodera, potwierdzić, naciskając je, a następnie wrócić za pomocą przycisku Ustawienie funkcji Pan 000 - 255 Tilt Ustawienie funkcji Tilt 000 - 255 Dimmer Master Dimmer 000 - 255 Ton barwny 000 - 255 Saturation Nasycenie 000 - 255... -
Page 129: Ustawianie I Montaż
USTAWIANIE I MONTAŻ Gumowe nóżki służą do ustawienia reflektora w odpowiednim miejscu na płaskiej powierzchni. Do montażu reflektora na trawersie służą dwa uchwyty Omega, które należy przymocować do podstawy urządzenia (A). Uchwyty Omega są zawarte w zestawie, natomiast zaciski do trawersu są... -
Page 130: Dane Techniczne
Obszerny wybór odpowiednich kabli DMX oferują linie produktów Adam Hall 3 STAR, 4 STAR i 5 STAR. KABEL DMX: W przypadku stosowania własnych kabli należy bezwzględnie przestrzegać informacji podanych na ilustracjach na tej stronie. W żadnym wypadku nie wolno łączyć osłony kabla z końcówką uziemiającą wtyczki. Należy także pamiętać, aby osłona nie miała kontaktu z obudową wtyczki XLR. -
Page 131: Deklaracje Producenta
Funkcje standalone: Sceny 1–8, Quick-Light Sterowanie: DMX512, RDM, Art-Net4, sACN, KlingNet, W-DMX Kąt obrotu w poziomie: 540° Kąt obrotu w pionie: 270° Elementy obsługowe: Pokrętło enkodera Wskaźniki: podświetlany kolorowy wyświetlacz LCD, akumulator umożliwiający zmianę ustawień niezależnie od zasilania sieciowego (akumulator ładuje się automatycznie) Napięcie robocze: 100–240 V AC / 50–60 Hz Pobór mocy:... - Page 132 Deklaracja zgodności CE Firma Adam Hall GmbH niniejszym oświadcza, że produkt ten jest zgodny z następującymi dyrektywami (o ile mają zastosowanie): dyrektywa w sprawie urządzeń radiowych i końcowych urządzeń telekomunikacyjnych (1999/5/WE) lub dyrektywa w sprawie urządzeń radiowych (2014/53/UE) od czerwca 2017 r. dyrektywa niskonapięciowa (2014/35/UE) dyrektywa w sprawie kompatybilności elektromagnetycznej (2014/30/UE) dyrektywa w sprawie ograniczenia stosowania niektórych niebezpiecznych substancji w sprzęcie elektrycznym i elektronicznym (2011/65/UE)
-
Page 133: Italiano
Questo dispositivo è stato sviluppato e prodotto in conformità con elevati standard qualitativi che ne garantiscono il regolare funzionamento per molti anni. Leggete attentamente questo manuale d‘uso per utilizzare al meglio il vostro nuovo prodotto Cameo Light. Per maggiori informazioni su Cameo Light consultare la nostra pagina Web WWW.CAMEOLIGHT.COM. - Page 134 34. La distanza dai materiali infiammabili deve essere di almeno 0,5 m. 35. I cavi di rete utilizzati per l’alimentazione elettrica di più dispositivi devono avere una sezione di almeno 1,5 mm². I cavi impiegati nell’Unione Europea devono essere di tipo H05VV-F o simile. Adam Hall offre cavi idonei. Tali cavi consentono di collegare più dispositivi dalla presa di uscita POWER OUT di un apparecchio alla presa POWER IN di un altro dispositivo.
-
Page 135: Introduzione
INTRODUZIONE TESTA MOBILE EVOS® W7 CLEW7 FUNZIONI DI CONTROLLO Controller DMX a 16 canali, 18 canali, 23 canali, 33 canali, 43 canali e 87 canali Art-Net4 sACN Kling-Net W-DMX™ Compatibile con RDM Funzionamento master/slave Funzioni stand-alone CARATTERISTICHE 19 LED RGBW da 400 W. Funzione di zoom. Stroboscopio. Motori pan e tilt con risoluzione a 16 bit. Correzione automatica della posizione. Ventole termoregolate. - Page 136 EVOS ® SCHERMO A CRISTALLI LIQUIDI Il display LCD retroilluminato mostra la modalità di funzionamento attualmente attivata (schermata principale), le voci di menu nel menu di selezione e il valore numerico o lo stato di funzionamento in alcune voci di menu. Se, entro un minuto circa, non avviene alcuna immissione, il display passa automaticamente alla schermata principale.
-
Page 137: Utilizzo
UTILIZZO OSSERVAZIONI 030°C 030°C Non appena il proiettore è correttamente allacciato alla rete elettrica, durante il processo di avvio sul display appaiono in successione il messaggio "Welcome to Cameo", la denominazione del modello e la versione del software. Dopo questo processo il proiettore sarà pronto per l’uso e si avvierà... -
Page 138: W-Dmx
W-DMX™ Per accoppiare un ricevitore W-DMX (ricevitore) con un trasmettitore W-DMX compatibile (trasmettitore) richiamare il comando Reset (selezionare "Reset" e confermare) dal menu del ricevitore, alla voce "Connect". Il ricevitore è ora pronto per essere accoppiato e aspetta la relativa richiesta di un trasmettitore. Avviare l'accoppiamento selezionando e confermando Link dal menu del trasmettitore. L'accoppiamen- to verrà... - Page 139 (Scene x) (Scene x) Wireless Attivazione (selezionare G3 o G4s) oppure disattivazione (Disable) dell'inoltro del segnale DMX tramite W-DMX, impostazione dello stan- Send Mode dard W-DMX (G3 / G4s) e creazione o interruzione di un collegamento 030°C 030°C 030°C 030°C 030°C...
- Page 140 Universe: Universe: Main Address: Settings Art-Net sACN 192.168.000.150 192.168.000.150 Info Art-Net+DMX DMX Address: Main Address: sACN+DMX FUNZIONAMENTO TRAMITE ART-NET Service Kling-Net+DM Pixel Address: Premere il codificatore rotativo/a pressione per accedere al menu principale dalla schermata principale. Selezionare il menu di controllo Slave Control ruotando e successivamente premendo il codificatore.
- Page 141 87CH Slave (Scene x) In un universo a piacere da User Universe 000 a 254 (Select Universe), (in alternativa a Select Universe 000 - 254 il segnale di controllo Art-Net "Current Universe") 030°C 030°C 030°C 030°C 030°C può essere inoltrato a DMX Sending Options ...
- Page 142 Send to DMX Nell'universo definito, il segnale di controllo sACN può essere Disable inoltrato a DMX OUT (sACN Current Universe to DMX), a W-DMX (sACN to (in alternativa "User W-DMX) o a entrambi (sACN to sACN to DMX Universe") DMX and W-DMX).
- Page 143 Mode: Art-Net (sACN) 87CH Mode: Art-Net (sACN)+DMX Mode: Kling W-DMX W-DMX Universe: Universe: Main Address: Art-Net Art-Net sACN sACN 192.168.000.150 192.168.000.150 FUNZIONAMENTO TRAMITE ART-NET E DMX Art-Net+DMX Art-Net+DMX La modalità di funzionamento Art-Net+DMX consente di controllare i LED e il movimento della testa separatamente, tramite Art-Net e DMX. DMX Address: Main Address: È...
- Page 144 Mode: Art-Net (sACN) 87CH Mode: Art-Net (sACN)+DMX Mode: Klin W-DMX W-DMX Universe: Universe: Main Address: Art-Net Art-Net sACN sACN 192.168.000.150 192.168.000.150 FUNZIONAMENTO TRAMITE SACN E DMX Art-Net+DMX Art-Net+DMX La modalità di funzionamento sACN+DMX consente di controllare i LED e il movimento della testa separatamente, tramite sACN e DMX. DMX Address: Main Address: È...
- Page 145 Mode: Art-Net (sACN) 87CH Mode: Art-Net (sACN)+DMX Mode: Klin W-DMX W-DMX W-DMX Universe: Universe: Main Address: Art-Net Art-Net Art-Net sACN sACN sACN 192.168.000.150 192.168.000.150 Art-Net+DMX Art-Net+DMX Art-Net+DMX FUNZIONAMENTO TRAMITE KLING-NET E DMX DMX Address: Main Address: La modalità di funzionamento Kling-Net+DMX consente di controllare i LED tramite Kling-Net e il movimento della testa separatamente, sACN+DMX sACN+DMX sACN+DMX...
- Page 146 Mode: Art-Net (sACN) 87CH Mode: Art-Net (sACN)+DMX Mode: Klin W-DMX W-DMX Universe: Universe: Main Address: Art-Net Art-Net sACN sACN 192.168.000.150 192.168.000.150 Art-Net+DMX Art-Net+DMX MODALITÀ DI FUNZIONAMENTO SLAVE (Slave) DMX Address: Main Address: Premere il codificatore rotativo/a pressione per accedere al menu principale dalla schermata principale. Selezionare il menu di controllo sACN+DMX sACN+DMX Control ruotando e successivamente premendo il codificatore.
- Page 147 Mode: Art-Net (sACN) 87CH Mode: Art-Net (sACN)+DMX Mode: Klin W-DMX W-DMX Universe: Universe: Main Address: Art-Net Art-Net sACN sACN 192.168.000.150 192.168.000.150 FUNZIONAMENTO STAND-ALONE (Scenes) Art-Net+DMX Art-Net+DMX Analogamente a quanto avviene in un dispositivo di comando DMX, la modalità di funzionamento stand-alone Scenes consente di impostare DMX Address: Main Address: direttamente sul dispositivo le funzioni pan, tilt, dimmer, RGBW, zoom, macro pan/tilt, ecc., con valori da 000 a 255.
- Page 148 Copy to Slave Trasferire la scena da 1 a 8 tramite cavo XLR a una o più unità slave (stesso modello, stessa versione del software). Avviare il processo con Yes. Verrà così sovrascritta la memoria scene delle unità slave. Interrompere il processo con No.
-
Page 149: Impostazioni Di Sistema (Impostazioni)
IMPOSTAZIONI DI SISTEMA (Settings) Premere il codificatore rotativo/a pressione per accedere al menu principale dalla schermata principale. Ruotando il codificatore selezionare il menu delle impostazioni di sistema, quindi premere il codificatore. Main Menu Settings Control Display Signal Fail Settings Dimmer Color Calibration Info Pan/Tilt Motors... - Page 150 Dimmer Selezione delle curve dimmer, del Curve comportamento dimmer e della Linear L'intensità della luce cresce in maniera lineare frequenza PWM con il valore DMX Exponential L'intensità della luce può essere impostata in maniera più precisa nell'intervallo di valori DMX inferiore e grossolanamente in quello superiore Logarithmic L'intensità...
-
Page 151: Informazioni Sul Dispositivo (Info)
Controllo ventola Settings Automatic La velocità della ventola viene regolata automaticamente in base alla tempera- tura della testa del dispositivo Normal Velocità massima della ventola ridotta, luminosità lievemente ridotta, se necessario Main Menu Settings Silent Velocità della ventola sempre bassa con luminosità ridotta, ove necessario Auto Blocco automatico ... - Page 152 Temperature Settings Fan Speed Runtime Info RDM UID, MAC, NET MENU ASSISTENZA (Service) DMX Values Service Premere il codificatore rotativo/a pressione per accedere al menu principale dalla schermata principale. Selezionare il menu di assistenza Error Info Service ruotando il codificatore, quindi premere il codificatore. Selezionare la voce di menu desiderata ruotando il codificatore, quindi Quick-Light DMX Tables premere il codificatore.
-
Page 153: Quick Light
Default Ripristinare le impostazioni di Recall fabbrica / Salvare le impostazioni utente Factory Reset e ripristinarle Interrompere il ripristino delle im- Main Menu Settings postazioni di fabbrica Ripristinare le impostazioni di fabbrica Control Display Default 1 Signal Fail Settings Interrompere il ripristino delle im-... - Page 154 Quick-Light Selezione ruotando il codificatore, conferma premendo, indietro con Impostazione pan 000 - 255 Tilt Impostazione tilt 000 - 255 Dimmer Master dimmer 000 - 255 Tonalità: 000 - 255 Saturation Saturazione 000 - 255 Color Temperature Temperatura colore 000 - 255 Zoom Impostazione zoom...
-
Page 155: Installazione E Montaggio
INSTALLAZIONE E MONTAGGIO Grazie ai piedini in gomma integrati, il proiettore può essere collocato in un punto adatto su una superficie piana. Il montaggio a una traver- sa viene effettuato tramite due staffe a omega, fissate alla base del dispositivo (A). Due staffe a omega sono fornite in dotazione; appositi morsetti per traverse sono disponibili come optional. -
Page 156: Dati Tecnici
CAVO DMX: In caso di cavi di propria realizzazione, procedere secondo le figure di questa pagina. Non collegare mai la schermatura dei cavi con il contatto di massa del connettore e assicurarsi che la schermatura non entri in contatto con l'involucro del connettore XLR. Il contatto di massa della schermatura può... -
Page 157: Dichiarazioni Del Produttore
Angolo del giro verticale (Tilt): 270° Elementi di comando: Codificatore rotativo/a pressione Elementi di visualizzazione: display LCD retroilluminato, alimentazione a batteria per impostazioni di sistema non dipendenti dalla rete elettrica (batteria a ricarica automatica) Tensione di esercizio: 100 - 240 V AC / 50 - 60 Hz Potenza assorbita: 900 W Intensità... -
Page 158: Controllo Dmx
DMX CONTROL / DMX STEUERUNG / PILOTAGE DMX / CONTROL DMX / STEROWANIE DMX / CONTROLLO DMX 87-CH RGB(W) Pixel Mode DMX, W-DMX, Art-Net + Kling-Net + Art-Net, sACN DMX, sACN + 0 % to 100 % DMX Address Main Address Main Address 001 –... - Page 159 LED PWM frequency 2000 Hz (hold 3 s) LED PWM frequency 3600 Hz (hold 3 s) LED PWM frequency 12 kHz (hold 3 s) LED PWM frequency 25 kHz (hold 3 s) Spare Display on (hold 3 s) Display off (hold 3 s) Spare Dimmer curve linear (hold 3 s) Dimmer curve exponential (hold 3 s)
- Page 160 CH25 CH14 CH11 Green 4 0 % to 100 % Pixel Address Kling-Net CH26 CH15 CH12 Blue 4 0 % to 100 % RGBW Pixel Mode CH27 CH16 White 4 0 % to 100 % 001-437 CH28 CH17 CH13 Red 5 0 % to 100 % CH29 CH18...
- Page 161 CH66 CH55 CH42 Blue 14 0 % to 100 % Pixel Address Kling-Net CH67 CH56 White 14 0 % to 100 % RGBW Pixel Mode CH68 CH57 CH43 Red 15 0 % to 100 % 001-437 CH69 CH58 CH44 Green 15 0 % to 100 % CH70 CH59...
- Page 162 CH10 Green 0 % to 100 % CH11 Green fine 0 % to 100 % CH12 Blue 0 % to 100 % CH13 Blue fine 0 % to 100 % CH14 White 0 % to 100 % CH15 White fine 0 % to 100 % Bulb white (2700 K) Halogen white (3200 K)
- Page 163 121 LEE Green 738 Jas Green 89 Moss Green 139 Primary Green 124 Dark Green 323 Jade 354 Special Steel Blue 116 Medium Blue-Green 183 Moonlight Blue 132 Medium Blue 119 Dark Blue 716 Mikkel Blue 71 Tokyo Blue 181 Congo Blue Color Macros CH18 (override RGBW)
- Page 164 Off ("washlight mode") CH23 Pattern 2 No. 51 – 100 CH23 Pattern 1 No. 1 – 50 25-49...
- Page 165 Effect 1 (4 Dots CW) Effect 2 (Circle 2 Step in > out) Effect 3 (Circle 2 Step Color Change in > out) Effect 4 (Clock hand – CW) Effect 5 (Ventilator – CW) Effect 6 (Bow runs left >) Effect 7 (Bow runs down >) Effect 8 (3-line to 2-line) Effect 9 (diamond change)
- Page 166 CH30 Background Red 0 % to 100 % CH31 Background Red Fine 0 % to 100 % CH32 Background Green 0 % to 100 % CH33 Background Green Fine 0 % to 100 % CH34 Background Blue 0 % to 100 % CH35 Background Blue Fine 0 % to 100 %...
- Page 167 100 Spring Yellow 88 Lime Green 121 LEE Green 738 Jas Green 89 Moss Green 139 Primary Green 124 Dark Green 323 Jade 354 Special Steel Blue 116 Medium Blue-Green 183 Moonlight Blue 132 Medium Blue 119 Dark Blue 716 Mikkel Blue 71 Tokyo Blue Background Color Macros CH40...
- Page 168 Invert Pan off (hold 5 s) Invert Tilt on (hold 3 s) Invert Tilt off (hold 5 s) Spare Dimmer response LED (hold 3 s) Dimmer response halogen (hold 3 s) Spare Silent Fan (hold 3 s) Auto Fan (hold 3 s) Normal Fan (hold 3 s) Spare LED PWM frequency 800 Hz (hold 3 s)
- Page 169 33-CH Mode HSI Pattern Mode (Calibrated) 0 % to 100 % Pan fine 0 % to 100 % Tilt 0 % to 100 % Tilt fine 0 % to 100 % Dimmer Master Dimmer 0-100 % Dimmer fine Master Dimmer fine 0-100 % Strobe open Strobe closed Pulse random, slow ->...
- Page 170 109 Light Salmon 35 Light Pink 134 Golden Amber 17 Surprise Peach 746 Brown 105 Orange 20 Medium Amber 768 Egg Yolk Yellow 15 Deep Straw 767 Nectarine 101 Yellow 100 Spring Yellow 88 Lime Green 121 LEE Green 738 Jas Green 89 Moss Green 139 Primary Green 124 Dark Green...
- Page 171 0,1 s – 10 s (0,1 s Steps) Color Macro Crossfade (Transition Time CH14 11 s – 119 s (1 s Steps) between Color Macros) 2 m – 4m 50 s (10 s Steps) 5 m – 15 m (1 m Steps) CH15 Zoom narrow -wide...
- Page 172 Effect 1 (4 Dots CW ) Effect 2 (Circle 2Step in > out) Effect 3 (Circle 2Step Color Change in > out) Effect 4 (Clock hand – CW) Effect 5 (Ventilator – CW) Effect 6 (Bow runs left > ) Effect 7 (Bow runs down >) Effect 8 (3-line to 2-line) Effect 9 (diamond change)
- Page 173 CH26 Background Hue fine fine steps Ch27 Background Saturation 100 % saturation -> 0 % saturation (white) Bulb White (2700 K) Halogen White (3200 K) Background Color Temperature CH28 (override Background HS and Neutral White (4000 K) Back ground Color Macros) Studio-White (5600 K) Daylight White (6500 K) 1.800 K –...
- Page 174 124 Dark Green 323 Jade 354 Special Steel Blue 116 Medium Blue-Green 183 Moonlight Blue 132 Medium Blue 119 Dark Blue 716 Mikkel Blue 71 Tokyo Blue 181 Congo Blue 799 Special KH Lavender 707 Ultimate Violet Background Color Macro CH30 (override Background HS) 343 Special Medium Lavender...
- Page 175 Spare Silent Fan (hold 3 s) Auto Fan (hold 3 s) Normal Fan (hold 3 s) Spare LED PWM frequency 800 Hz (hold 3 s) LED PWM frequency 1200 Hz (hold 3 s) LED PWM frequency 2000 Hz (hold 3 s) LED PWM frequency 3600 Hz (hold 3 s) LED PWM frequency 12 kHz (hold 3 s) LED PWM frequency 25 kHz (hold 3 s)
- Page 176 23-CH Wash Light RBGW Mode 0% to 100 % Pan fine 0 % to 100 % Tilt 0 % to 100 % Tilt fine 0 % to 100 % Dimmer Master Dimmer 0-100 % Dimmer fine Master Dimmer fine 0-100 % Strobe open Strobe closed Pulse random, slow ->...
- Page 177 no function 46 Dark Magenta 29 Plasa Red 26 Bright Red Color Macros CH18 (override RGBW) 127 Smokey Pink 36 Medium Pink 19 Fire 135 Deep Golden Amber...
- Page 178 778 Millennium Gold 21 Gold Amber 157 Pink 110 Middle Rose 109 Light Salmon 35 Light Pink 134 Golden Amber 17 Surprise Peach 746 Brown 105 Orange 20 Medium Amber 768 Egg Yolk Yellow 15 Deep Straw 767 Nectarine 101 Yellow 100 Spring Yellow 88 Lime Green 121 LEE Green...
- Page 179 2 Rose Pink Color Jumping stop Color Macros CH18 (override RGBW) Color Jumping speed slow -> fast Color Fading speed slow -> fast 0,1 s – 10 s (0,1 s Steps) Color Macro Crossfade CH19 11 s – 119 s (1 s Steps) (Transition Time between Color Macros) 2 m –...
- Page 180 Dimmer Curve s-curve Spare Raw (color calibration off) (hold 3 s) Calibrated (color calibration on) (hold 3 s) User color calibration on (hold 3 s) Spare Device settings CH23 Reset Pan/Tilt (hold 3 s) (please read remark 1*) Spare Reset Zoom (hold 3 s) Spare Reset All Functions (hold 3 s) Spare...
- Page 181 Linear tint from magenta to neutral Tint CH12 Neutral (relates to Color Temperature) Linear tint from neutral to green no function 46 Dark Magenta 29 Plasa Red 26 Bright Red 127 Smokey Pink 36 Medium Pink 19 Fire 135 Deep Golden Amber 778 Millennium Gold 21 Gold Amber 157 Pink...
- Page 182 181 Congo Blue 799 Special KH Lavender 707 Ultimate Violet 343 Special Medium Lavender 798 Chrysalis Pink 701 Provence 797 Deep Purple Color Macros CH13 48 Rose Purple (override HS) 345 Fuchsia Pink 795 Magical Magenta 128 Bright Pink 2 Rose Pink Color Jumping stop Color Jumping speed slow ->...
- Page 183 LED PWM frequency 2000 Hz (hold 3 s) LED PWM frequency 3600 Hz (hold 3 s) LED PWM frequency 12 kHz (hold 3 s) LED PWM frequency 25 kHz (hold 3 s) Spare Display on (hold 3 s) Display off (hold 3 s) Spare Dimmer Curve linear (hold 3 s) Dimmer Curve exponential (hold 3 s)
- Page 184 Effect 4 (Clock hand – CW) Effect 5 (Ventilator – CW) Effect 6 (Bow runs left >) Effect 7 (Bow runs down >) Effect 8 (3-line to 2-line) Effect 9 (diamond change) Effect 10 (Small circle 2 Dots run) Effect 11 (Circle 3 step in > out) CH12 Running Effect Pattern Effect 12 (2 Dots running on outer circle)
- Page 185 Silent Fan (hold 3 s) Auto Fan (hold 3 s) Normal Fan (hold 3 s) Spare LED PWM frequency 800 Hz (hold 3 s) LED PWM frequency 1200 Hz (hold 3 s) LED PWM frequency 2000 Hz (hold 3 s) LED PWM frequency 3600 Hz (hold 3 s) LED PWM frequency 12 kHz (hold 3 s) LED PWM frequency 25 kHz (hold 3 s)
- Page 186 Pattern 1 - 100 (Pattern folder 1 + 2) 43CH Mode and 33CH Mode...
- Page 188 CAMEOLIGHT.COM Adam Hall GmbH | Adam-Hall-Str. 1 | 61267 Neu-Anspach | Germany Phone: +49 6081 9419-0 | adamhall.com REV: 01...