Table des Matières
Publicité
Les langues disponibles
Les langues disponibles
Liens rapides
VDP
PLW16
LED W
WASH EFFEC
LED W
WASHEFFECT
EFFET
LED WASH
EFECT
O 'WASH' C
LED-W
WASHEFFEK
USER
MANUAL
GEBRU
UIKERSHAND
NOTIC
CE D'EMPLOI
MANU
AL DEL USU
BEDIE
ENUNGSANLE
601
CT - INARA
I - 16 x 1W
T - INARA I
I - 16 x 1W
H - INARA I
- 16 x 1W
CON LEDs -
INARA I -
KT - INARA
I - 16 x 1W
DLEIDING
I
11
UARIO
15
EITUNG
19
W R+G+B+W
W R+G+B+W
R+V+B+W
16 x 1W R
W R+G+B+W
3
7
W
W
W
+G+B+W
W
Publicité
Table des Matières

Manuels Connexes pour HQ Power VDPLW1601


Sommaire des Matières pour HQ Power VDPLW1601
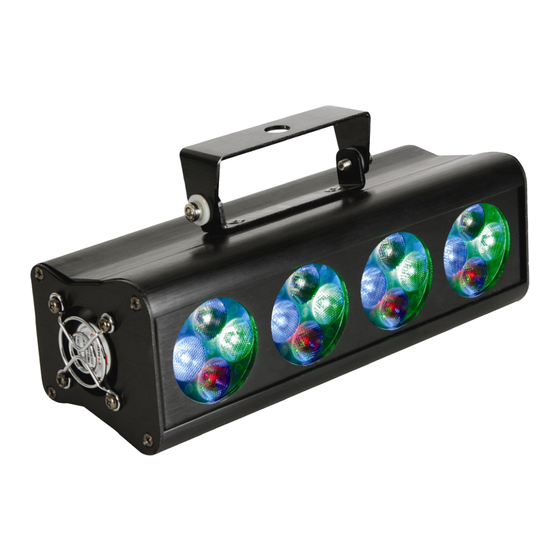
- Page 1 PLW16 LED W WASH EFFEC CT - INARA I - 16 x 1W W R+G+B+W LED W WASHEFFECT T - INARA I I - 16 x 1W W R+G+B+W EFFET LED WASH H - INARA I - 16 x 1W R+V+B+W EFECT O ‘WASH’...
- Page 2 VDPLW160 terminator eindweerstan résistance d terminaison terminación Terminierun 1 brig htness/speed 1 intensiteit/ /snelheid 2 brig htness/speed 2 led intensit teit/snelheid 3 brig htness/speed 3 intensiteit/ /snelheid 4 brig htness/speed 4 led intensit teit/snelheid 5 DIP switch 5 DIP-schake elaars 6 micr rophone 6 microfoon...
- Page 3 VDPLW 1601 User m anual 1. Int troduction To all re esidents of the e European Un Importa ant environme ntal informati on about this product This symbol on n the device or t the package ind dicates that disp posal of the devi ice after its lifec cycle...
-
Page 4: Overhead Mounting
• This device is designed for professional use on stage, in discos, theatres, etc. The VDPLW1601 can be used indoor (<35°C, <75%RH) with an alternating current of max. 240V AC/50Hz. - Page 5 Changing the settings of one channel will only affect the device in question. • In case of the 6-channel VDPLW1601, you will have to set the start address of the first unit to 1 (CH1~6), the second unit to 7 (1 + 6) (CH7~12), the third to 13 (7 + 6) (CH13~18), and so on.
-
Page 6: Cleaning And Maintenance
VDPLW1601 b) Stand alone mode (master) • DIP switches 9 and 10 must be set to OFF, the other switches set the light effect (see table below). effect remarks switch red LEDs on use the UP [1] and DOWN [4] button to set the brightness... - Page 7 VDPLW 1601 GEBRU UIKERSHA ANDLEID DING 1. Inl eiding Aan alle e ingezetenen v van de Europe ese Unie Belangr ijke milieu-inf formatie betre effende dit pro oduct Dit symbool op het toestel of d de verpakking ge eeft aan dat, als s het na zijn lev venscyclus word weggeworpen, d...
-
Page 8: Installatie
• Indien van toepassing, sluit een XLR-kabel aan de vrouwelijke 3-pin XLR-uitgang van een controller (niet meegelev.) en de andere kant van de mannelijke 3-pin XLR-ingang van de VDPLW1601. U kunt verscheidene VDPLW1601’s aan elkaar koppelen met behulp van een seriële koppeling. Gebruik daarvoor een 2-aderige afgeschermde kabel met XLR ingang- en uitgangsaansluitingen. - Page 9 • In het geval van de 6-kanaals VDPLW1601, zult u het startadres van het eerste toestel op 1 (CH1~6) moeten instellen, van het tweede toestel op 7 (1 + 6) (CH7~12), van het derde op 13 (7 + 6) (CH13~18), enz.
-
Page 10: Reiniging En Onderhoud
VDPLW1601 b) Zelfstandige modus (mastersturing) • Plaats DIP-schakelaars 9 en 10 op OFF. Stel het effect in met de overige DIP-schakelaars (zie tabel hieronder). DIP- effect opmerking schak. rode leds aan stel helderheid in met [1] of groene leds aan... - Page 11 VDPLW 1601 OTICE D ’EMPLOI 1. Int troduction Aux rési idents de l'Uni ion européenn Des info ormations envi ironnementale es importantes s concernant c ce produit Ce symbole sur r l'appareil ou l' emballage indiq que que l’élimina ation d’un appa reil en fin de vie peut polluer l'e nvironnement.
-
Page 12: Caractéristiques
• Si nécessaire, connecter un câble à fiche XLR à la sortie XLR femelle à 3 broches de votre contrôleur (non incl.) et l’autre fiche XLR mâle à 3 broches à l’entrée du VDPLW1601. Il est possible de relier plusieurs VDPLW1601 à partir d’une connexion sérielle. Utiliser un câble de connexion blindé à 2 conducteurs avec des connecteurs d’entrée et de sortie XLR. - Page 13 6. Emploi Se référer aux illustrations en page 2 de cette notice. • Le VDPLW1601 peut être utilisé de manière autonome avec une couleur fixe, ou piloté à l’aide d’un contrôleur DMX externe (non inclus). • En mode maître, le VDPLW1601 génère les valeurs DMX sur la sortie DMX. Tous les projecteurs connectés au projecteur maître suivront le programme de ce dernier.
-
Page 14: Nettoyage Et Entretien
VDPLW1601 b) Mode autonome (mode maître) • Placer les interrupteurs DIP 9 et 10 sur OFF ; sélectionner l’effet avec les interrupteurs 1 à 8 (voir tableau ci-dessous). effet remarque LED rouges allumées régler l’intensité avec [1] ou LED vertes allumées LED bleues allumées... - Page 15 VDPLW 1601 NUAL DEL L USUAR 1. Int troducción A los ciu udadanos de la a Unión Europe Importa antes informac ciones sobre e el medio ambie ente concernie ente a este pro oducto Este símbolo en este aparato o el embalaje ind ica que, si tira l las muestras ins...
-
Page 16: Características
• Si fuera necesario, conecte un cable con conector XLR (no incl.) a la salida XLR hembra de 3 polos del controlador y el otro conector XLR macho de 3 polos a la entrada del VDPLW1601. Es posible conectar varios VDPLW1601 en serie. Use un cable blindado de doble hilo conductor con conectores XLR de entrada y de salida VDPLW1601. - Page 17 Por lo tanto, cambiar los ajustes de un solo canal sólo afecta al canal en cuestión. • En el caso del VDPLW1601 de 6 canales, la dirección inicial del primer aparato es 1 (CH1~6), del segundo aparato 7 (1 + 6) (CH7~12), del tercer aparato 13 (7 + 6) (CH13~19), etc.
-
Page 18: Limpieza Y Mantenimiento
VDPLW1601 b) Modo autónomo (modo maestro) • Ponga los interruptores DIP 9 y 10 en la posición OFF ; seleccione el efecto con los interruptores de 1 a 8 (véase la lista a continuación). efecto observación LEDs rojos activados ajuste la intensidad con... - Page 19 VDPLW 1601 BEDIEN NUNGS SANLEIT TUNG 1. Ein nführung An alle E Einwohner der r Europäischen n Union Wichtige e Umweltinfor rmationen übe er dieses Produ Dieses Symbol auf dem Produk kt oder der Verp packung zeigt a an, dass die Ents sorgung dieses Produktes nach h seinem Lebens...
-
Page 20: Dmx512-Anschluss
• Wenn nötig, so verbinden Sie ein XLR-Kabel mit dem 3-Pin XLR-Ausgang der Steuerung (nicht mitgeliefert) und die andere Seite mit dem 3-Pin XLR-Eingang des VDPLW1601. Sie können verschiedene VDPLW1601 in Serie schalten. Verwenden Sie ein zweipoliges abgeschirmtes Kabel mit XLR Ein- und Ausgangsanschlüssen. - Page 21 6. Anwendung Siehe Abbildungen, Seite 2 dieser Bedienungsanleitung. • Verwenden Sie den VDPLW1601 autonom mit einer festen Farbe oder wählen Sie die Farbe mit einem externen DMX-Controller (nicht mitgeliefert) aus. • Der VDPLW1601 generiert im Master-Modus die DMX-Werte der DMX-Ausgang. Jedes verbundene Slave-Gerät folgt dann dem Master-Gerät.
-
Page 22: Reinigung Und Wartung
VDPLW1601 b) Stand-Alone-Modus (Mastersteuerung) • Stellen Sie DIP-Schalter 9 und 10 auf OFF. Stellen Sie den Effekt mit den übrigen DIP-Schaltern ein (siehe nachfolgende Liste). DIP- Effekt Bemerkung Schalter rote LEDs EIN stellen Sie die Helligkeit mit [1] oder [4] ein grüne LEDs EIN... - Page 23 door het toestel, alsook zijn inhoud (bv. verlies van data), vergoeding voor eventuele winstderving. - verbruiksgoederen, onderdelen of hulpstukken die regelmatig dienen te Velleman® Service and Quality Warranty worden vervangen, zoals bv. batterijen, lampen, rubberen onderdelen, Velleman® has over 35 years of experience in the electronics world and aandrijfriemen...
- Page 24 • tuyau : il est conseillé de consulter la notice et de contrôler câbles, problemas a pesar de todas las precauciones, es posible apelar a nuestra piles, etc. avant de retourner l’appareil. Un appareil retourné jugé garantía (véase las condiciones de garantía). défectueux qui s’avère en bon état de marche pourra faire l’objet d’une Condiciones generales referentes a la garantía sobre productos note de frais à...